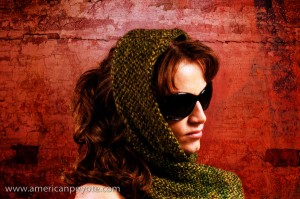
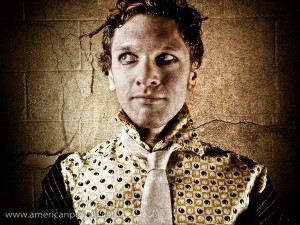
In Photoshop a texture is just something, an overlay, an image layer, a way to add some sort of depth to the image which wasn’t there before. There are many different reasons and motivations for using textures in Photoshop, and I’m here to quickly educate the curious reader on how to use grunge textures in Photoshop.
First off, why grunge?
I don’t know why I like the feeling of grunge textures. Maybe it’s because I’m trying to re-create the feeling I get walking through Berlin or Detroit, maybe it’s because I’m a cliche and am just following the crowd. Joey Lawrence uses grunge texturing techniques, and I bought the Joey L Photoshop DVD Tutorial, so obviously I’m just copying his style. Maybe, but some people say that everything is just a copy of a copy of a copy. I know this because Tyler knows this and because Fight Club is one of my favorite books/movies. What I do know is that sometimes I take a photo and it’s perfectly exposed and has great shadows and yet it just doesn’t have the look, the texture that I want the image to have, so I have to go about adding such elements in Photoshop.
So, what’s a texture?
A texture is a separate image which is overlayed over your original image, and through the use of different blending techniques, defines a part of the image. Textures can be used to change the mood or intended interpretation of the original concept which was in your head when you took the photo. If an image is nothing but a story and the photographer is just the author, then textures are just visual storytelling tools.
Where do textures come from?
Anywhere, any image can be used as a texture and currently I prefer to use concrete and street art textures. I use custom images, which means that I photograph walls and doors and parts of cities which I think have an interesting texture or feeling, specifically to use as textures in Photoshop. I generally like creating images where the original photo, and the texture images are all taken in the same location. So if I do a portrait shoot in Winterthur, Switzerland, I will probably use textures shot in that area as well. I like this idea because it means you’re including environmental elements of the shooting location in the processing of the image, and then the final image is a combination of the subject as well as of the environment where the original image was produced. Once you have a image to use as a texture, how is it used in Photoshop?
 How Do You Add A Texture in Photoshop?
If you’re visually inclined, check out the video tutorial above, which goes through how I created the Textured Sad Clown image. To add a texture to an image in Photoshop (or any other image edition program with layers) you just open the texture image and your main image, and then you copy the texture to the image to the main image. The texture will be imported as a separate layer, and now you just need to blend the texture into the layer below it. There are a number of different blending modes and techniques, which can be used to blend your texture into the final image. The two main ways to blend texture into the original image are via the blending mode, and then via masking of the texture layer. The blending mode defines how the colors, luminosity, tones, and visual parts of the texture blend into the layer below it. So, for example, if you choose “multiply” as a blending mode, then similar tones are multiplied together, producing a darker image. If it’s not the look you want, try another one till the image starts to look good. What is “good?” Good is whatever you think it is. There’s never one blending mode which works for each image and concept. You just go through them all till you find one that you like. Once you settle on a blending mode, you’ll probably still want to modify it to bring out different aspects of the image. This is done by masking. Masking is a technique to mask out or hide parts of a layer. It’s a non-destructive editing technique which is pretty essential in Photoshop. For example, with a portrait, you probably don’t want the texture layer to block out or dramatically change the face of your subject. So after selecting the layer mask on the texture layer, I can paint over Amber’s face, so her features aren’t hidden. The overall opacity of the image can also be reduced to uniformly reduce the impact of the texture layer.
Obtaining Textures
I’m continually adding to my texture library. It currently includes textures from Zurich, New Orleans, Tokyo, Winterthur, anywhere that I find a cool surface to shoot. The more textures you have, the more story telling elements you have at your disposal. I don’t use texturing techniques on every image, sometimes I want a certain look, sometimes I don’t. Sometimes it looks cool, sometimes it’s a cliche. Do what feels right to you when processing in Photoshop. If you limit yourself to a Joey L style or the Scott Kelby 7 Steps, then your images will look like those of a thousand other people. Is that what you want? Maybe every photo I take is just a copy of a copy of a copy. But so far I haven’t found that to be the case.
If you’re interested in trying out some texturing effects in Photoshop but don’t have any images to use, and you live inside a white box without a key, or it’s cold outside and you’re not in the mood to go shooting, or you just want to get started right now this second…
Here is a sample of my Texture library to download and fool around with. It includes custom images produced in the old industrial areas of Winterthur, Switzerland. These textures are free to use for non-commercial work and for educational non-profit uses. When publishing an image, please add a credit for American Peyote, and link back to www.americanpeyote.com and please don’t hotlink to the Winterthur Textures zip file.
I would be interested in seeing how you use these textures, so feel free to email me samples of your creations.
Additional Texture Library Sites:
