The concept is simple, meet people with similar interests (200 participants) and learn about what other people are doing. No paper to write, no registration deadlines for presentations, you sign up on the internet, you go there in the morning, pick your time-slot, you network, do your talk, network – awesome conference experience.
I don’t actually remember how I found out about it, but when I found the BarCamp webpage and checked out the agenda, I signed up to give a talk on Photography and Writing for Blogs. I also won’t try to communicate all of what went on at BlogCamp Switzerland 2007, because bloggers with better talents for reporting facts like PeetTheEngineer and Markus Tressl have already done so.
Why did I give a talk at BlogCamp Switzerland 2007? Because I normally give talks on Active Fiber Composites with graphs and microscopy images and focus on the finer points of delamination in Smart Materials or crack propagation due to stress concentrations at the interface between Interdigitated Electrode fingers and PZT fibers. Not that this is bad, but it seemed like a nice change of pace to talk about off-camera flash techniques and creating a "Mental Anchor" when creating blog content.
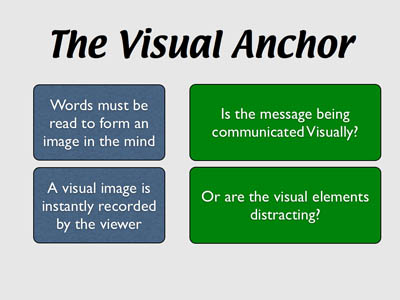
My presentation centered on the idea of creating a Visual Anchor when creating blog content, in particular with writing and photography. Part of this included off-camera flash techniques, and how the advent of cheap radio triggers and flashes makes it easier than ever to create good photos and communicate ideas. In in the process I promoted www.strobist.com, as the best source on the web for learning how to use your flash.

The writing section focused on using descriptive language to communicate a visual image for the reader in addition to transferring information. Naturally I used examples from the blog.
You could write:
"The Laughing Lemon cooking school is located in Zurich."
Or:
"It sounds like the coolest cocktail you’ve ever heard of, but the Laughing Lemon is actually a cooking school in Zurich."
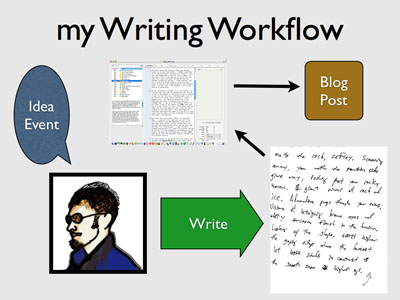
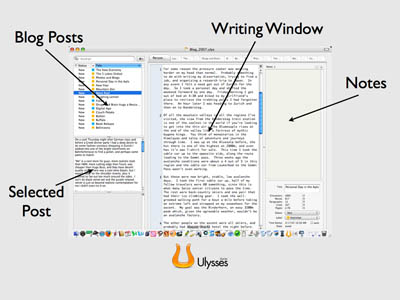
They both communicate information, but the second passage gives a visual anchor (an image in your mind) – and it sounds cooler. I got into workflow a bit and the use of writing programs like Ulysses to organize yourself and write more effectively.
I closed by saying things like,
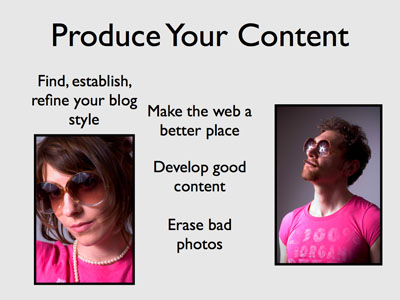
"Focus on developing good content to make the web a better place."
and,
"Delete the embarrassing photos your girlfriend takes of you."
The discussion brought up some cool points, one (from Stefan Bucher I believe) being the idea that German bloggers tend to comment on and discuss events in their blogs, while American bloggers generally maintain a larger focus towards creating content. Essentially it’s the difference between writing a blog about your life versus writing about and creating a dialogue about world events on your blog.
I’m hoping the folks who were at my presentation took away some warm feelings and fun ideas. From reading the bloggers who covered the event, it seems like the talk went better than the technical ones I give. It’s also possible that some thought I was some crack-pot American fool with a pointless blog who spends too much money on cameras – but I’m ok with that, life gets boring if you don’t take risks.
Plus, and this is another reason why I did it, I get to add the following to the Presentation section of my CV:
Light painting and Scribbles – BarCamp Switzerland March 24, 2007, Zurich, Switzerland, International conference on blogging.
5 replies on “BlogCamp Switzerland 2007”
Hi Mark
thanks again for the great session and discussion we had on Saturday.
I promise to come by your blog from time to time since I really like what you are doing!
Cheers, Markus
Mark-
We have never met, but thanks for the kind words about Strobist. Barcamp sounds like it would have been a great place to be. I hope to hear about the next one in time to attend.
I tend to live in my own little world (photojournalism and sleep-deprived writing) so I frequently find myself out of the loop.
Thanks much,
David
You've taken it up a notch I see. Congrats.
I think that sounds kind of cool congrats on getting a place in it.
Event as a venue for a gathering place for bloggers is very interesting especially for those who love the world of blogging would be fun to meet more people but have in common is like the blog world. Events like this should be done every year must be very exciting and fun.