 The Home Photo Studio is one of those elusive mystical quests many photographers embark on once they’ve figured out f-stop from shutter speed and come to the realization that a little bit of controlled light goes a long way in defining a final image. And once you understand that you think,
“if only I had a few studio strobes, softboxes…and naturally a background, I could then start making amazingly-beautiful pictures of…books, cats, the kids, models, and…whatever!”
The point is that before you get fully ripped in the studio lighting equipment “buying stage” you may want to take pause and ask “why?” Do I really need a ProFoto Pro-7 setup to take portraits of my kids? Yes, because in a studio…magic happens. A studio is one of those sacred places in a home or apartment, a place away from the madness of the world where any caffeinated kid with a camera can make some lighting magic happen. But how? And for how much? Everyone wants a loft in New York filled with backgrounds and wet bar for the models, but reality means you’re generally lucky if you can get a free wall to shoot on when no one else is at home.
There are two essential elements one needs to consider for the home studio: space and light. By manipulating these elements you can create whatever magic you like.
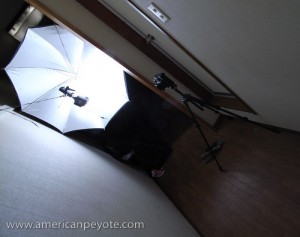 Basic home-studio setup:
1 Lightstand
1 Modifier (softbox/umbrella)
1 Bracket
1 Trigger Receiver Device
1 Camera
1 Manual Flash
1 One Trigger Device
With this basic setup you can expand in whatever direction you like – location oriented, studio oriented, reselling your gear on eBay (when you find a new hobby), it’s all possible from this simple starting point. With a flash on a lightstand, and using a light modifier such as a softbox or umbrella, you can soften and direct the light as you see fit. This of course gives you the option of having hard light (without a modifier) or soft light (with a softbox/umbrella). The initial monetary investment is low (compared to a nasty heroine addiction), the gear can be had for about $250-$400, depending on what you buy. The type of trigger and camera are pretty irrelevant in the early stages. If you’re shooting for the web or to make normal prints, well, you don’t need a Canon 5D-II and the 85mm f/1.2 portrait lens. The money could be spent elsewhere as the lens won’t dramatically improve your images – where as a new reflector or strobe could have a comparatively significant effect. Since 90% of photographers seem to think they “need” the latest DSLR, the used market is saturated with old Nikon, Canon, Minolta, Pentax, Olympus and other random digital camera bodies. Currently I still shoot with a 6-megapixel Minolta 7D. All you “need” is a camera that allows you to set the exposure manually and a flash that allows the same. If you’re shooting in your home, you don’t need a Pocket Wizard setup, you can go with cheap radio triggers from Gadget Infinity or just connect your flashes using PC cords, but if you have the money, “why not?”
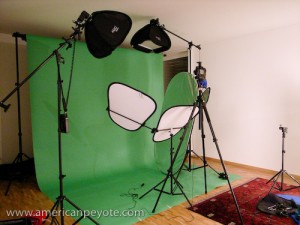 Expanding Your Studio
Once you’ve setup a basic lighting package the inevitable question is, “what to buy next?” My response is “nothing.” Use what you have till you get to the point that it’s limiting, and then thinking of adding another light, but not before considering the following.
Reflectors
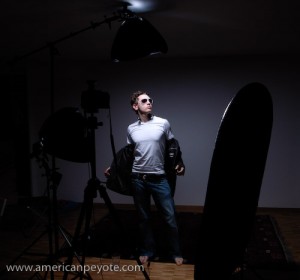
The basic lighting kit is easily expanded on by adding another stand, reflector and boom arm. The reflector allows you to fill in shadows, and thereby start producing a well-balanced image. If you have one flash and are thinking of buying a second, I would recommend getting a reflector instead. They cost less, don’t require batteries and provide a great deal of reflective surface area that a second flash can’t do on its own. I have a long 5-in-one reflector which can be used with silver or gold coverings, and also can be used in shoot-through mode as a giant softbox.
 Boom Arm
The boom arm allows you to position a second flash in various positions around your subject, and can be had for $40-$50. Once you use one, you’ll wonder why you ever went without. Like reflectors, boom-arms are often overlooked by the aspiring light painter as “unsexy” additions to the lighting kit. However, it’s an essential piece of gear which opens up new dimensions to your lighting design. With a boom you can put softboxes in close, directly over-head, to the side, however you like, and thereby really design with precision how your subject will be illuminated. The combination of lighting setups now starts to grow exponentially.
Background
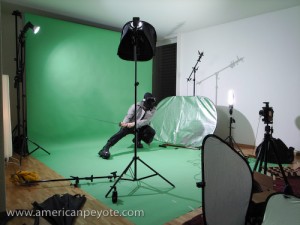
There is a perverse notion that you need to buy a background for a home studio. If you have a free wall to start out with, by all means just use that. When you’re starting out it’s easy to get overwhelmed with choices, background type, color, where it should be placed, etc. Keep things simple at the onset, and grow as you need. In many situations, the background should be the smallest focus in your quest to acquire more gear. Besides, I’ve never liked the idea of hanging a tie-dyed piece of cloth behind people I’m photographing, and hope to never fall into that cliche. Any white wall, brick wall, or variant thereof will do. It doesn’t have to be large or tall or wide or fat, for a head shot, the background can be just a few square feet. In this case you can go for a pop-up background. Sometimes you can use a 5-in-1 reflector with a white or black cover, but there will probably be a lot of wrinkles in the material, I would recommend going with a dedicated pop-up if you go this route. Some of my favorite portraits were done with the equivalent background of just a few cinder blocks in a cramped basement. However, if you have the space, a wide background can be very nice, especially if you plan on filling the air with random volumes of flying coffee. Just maximize the resources you have. I dedicated part of my aparment to a full-lenght paper background setup, and have never regretted it.
 Space
Space
This is generally the biggest problem, as renting studio space is usually not an option, and generally, neither is moving into a larger place. In general you need space to do stuff in – this is clear. Ideally, the more space the better. But there’s something I’ve learned in life: When you know what you need and want to do, it makes sense to get the best you can afford. However, in all other situations, in particular those when you’re just learning, it makes much more sense to buy the cheapest stuff possible with poor performance, because you are then forced to excel in less than ideal conditions. Placing yourself in a challenging situation makes you smarter, stronger, and more capable.
While lights and backgrounds can be bought, borrowed, or rented, during shooting sessions space is generally at a premium, and the occasional photographer will end up using whatever is available. The question is how to use that space effectively? If you have one white wall free to shoot on you already have two background possibilities. One is white: throw light on the background and “blow it out” which is a fun little overdone cliche. Persoanlly I think that the background is as, and sometimes more important than the subject. Something more interesting is to place your subject well in front of the wall, and only provide enough light to illuminate them. If the light hitting your subject is more intense than that hitting the background, you will make the wall turn a nice deep tone of grey. The key to using a small space effectively is controlling light spillage. You want the light from your strobes to hit your subject, and not bounce off the walls and ceilings. I’ve photographed in spaces ranging from a large open parking garage to a cramped dorm room in Tokyo. There’s always a way to get the lighting look you want no matter the resources.
The Gist
Basically, no matter what you’re doing in life, you have to learn how to use minimal resources to your advantage. Want to create a man-floating-in-the-air shot? Throw a mattress on the floor just out of the frame of the lens…and jump. Rearrange bookcases and take pictures off the walls to create space, use white walls and ceilings as giant bounce reflectors. Actually, if you learn how to effectively use a small space, where random light bouncing from exposed walls and the distance from the subject to the background are critical factors, then you’re probably in a better position than if you had started out in a large studio with all the resources at your disposal.
