lighting

Kacey Beauty Reflector – Review

kacey-bd-1.jpgI picked up the Kacey Beauty Reflector for various reasons, first I’ve always wanted to experiment with a beauty dish. Second, the Kacey reflector is designed for small flashes as well as for studio strobe use, offering excellent adaptability in a photo world full of too many mounting systems and of course, it looks cool. The Kacey design comes off very similar to the Mola Demi dish, which is also a very cool beauty dish for the studio. However, like many good ideas, the Kacey dish offers an adaptation from a standard design. It was designed for small flashes and made of plastic to be light and therefore more portable for location shooting, hence fulfilling the desires of people like me, who are self-taught via the internet and highly influence by the Strobist movement. The Mola dishes look interesting, but they’re really outside the budget and needs of anyone but a full-time studio pro shooter. Like many photo startups (think RadioPopper) Kacey Enterprises is fulfilling the purchasing desires of a market, which the established companies have not been innovative enough to design and offer products for. Since I have no desire to acquire a standing as a full-time photographer, the Kacey design is the logical choice for me and my apartment studio, stocked with Metz and Sunpak flashes.
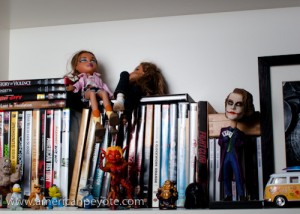
kacey-bd-shots-2.jpgMy first experience with the Kacey dish was photographing my bookcase, complete with Bratz dolls, DVDs and an assortment of toys from California because, well – I’m a geek. What was I expecting and why did I want a beauty dish in the first place? Well, I like umbrellas for throwing a very large amount of light with spill going in all directions, I started using reflective and shoot-through umbrellas, and they have their place. When you’re starting out with lighting design, it’s the best way to go. Umbrellas are cheap, you can get a combined reflector-shoot-through design and it’s very easy to do basic lighting with an umbrella. But, they then become very limiting when one wants to start doing more precise lighting. To explore beyond the umbrella I bought some small softboxes in order to increase the precision of my lighting designs, because they are much more versatile than my 44in umbrellas. The softboxes can be placed on a boom, to the side, behind, where ever I desire around whatever it is I’m photographing. Umbrellas (at least the large ones I have) are not as easy to place, and give too much light spillage for my tastes. Softboxes can be gridded to further decrease light spill and sculpt light as one desires. However, the softbox creates a more diffused light source. What I wanted to achieve with a beauty dish is the ability to place harder light in a desired position. I like the look of photos I’ve seen with beauty dishes, and really I wanted the ability to place a large, even light source on a boom arm around models (ummm, and I’m generally the model). The Kacey dish represents a milestone for me, because it’s the first light modifier I’ve purchased which wasn’t made in China and bought because it was the cheapest option.
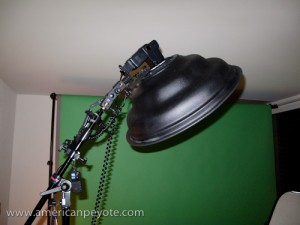
kacey-bd-shots-4.jpgSo, how has the Kacey Beauty Reflector fulfilled my desires so far? First, I’ll note that this review is user, not scientific based, and focuses on my experiences using the reflector in the controlled studio environment of my apartment. The Kacey reflector was designed for location use in mind, but light is light and I was most interested in getting an excellent light modifier. Naturally, any light modifier is useless without light from a quality strobe. The Kacey dish is designed with the Speedlite in mind, like those standard uber expensive flashes from Nikon and Canon, which a person such as myself with a Minolta 7D finds to be over-kill. This is all well and good to design a dish for small flashes, but beauty dishes were originally designed with studio strobes in mind, those with bare bulbs instead of a fresnel lens to focus the light beam, like nearly all small flashes have. Nearly all, but I happen to love the Sunpak 120J bare-bulb cult-classic flash, and it fits perfectly with the Kacey Beauty Dish. Here’s why, most small flashes are designed to focus light directly forward of the flash head. A bare-bulb design throws light forward as well to the side of the head. So when you use a normal Speedlite in a beauty dish, you generally would also use a diffuser on the flash, to throw light to the side of the center reflector of the dish. This spreads out the light and would logically contribute to the nice uniform quality of light that beauty dishes are known for. Since the bare-bulb 120J already is throwing light in all directions, and the bulb is extending into the dish, it forms the perfect lighting combination.

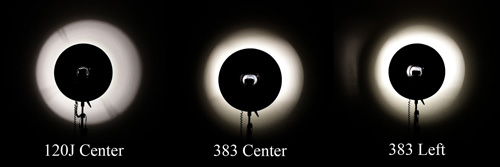
The Kacey reflector was released along with a Speedlite bracket. The bracket costs a cool 150 USD, and some controversy has developed around this price. I picked up the dish for various lighting reasons, and I decided not to get the bracket for economic considerations. I figured I would just drill and modify the bracket from my Alzo softboxes. This required the purchase of a drill, which wasn’t that cheap and I don’t drill much stuff in my apartment, so in the end I don’t see how I saved any money. After modifying the adapter from my Alzo softboxes, I’m of the opinion that the Alzo bracket isn’t stiff enough to support the Kacey dish in the long run, and I’ll most likely buy the Kacey bracket, because it makes little sense in getting an excellent dish like the Kacey product and then using a sub-par bracket when connecting the flash. If the bracket isn’t stiff enough the dish will tilt, thus disrupting the light pattern, depending on how the dish is positioned. Plus, as illustrated below, the bracket and the position of the flash will have a very significant (depending on how much you care) influence on the light patterns coming from the dish.
Kacey_Sunpak.jpg

I did a quick comparison between a Sunpak 120J and a standard Sunpak 383. The 383 sports a normal small flash head, and therefore acts more like a normal Nikon or Canon flash, and is perhaps more representative of what people will be using the the Kacey reflector. As you can see from the above photo, the bare-bulb 120J seems to have a wide light pattern, and when you use a 383 with a head-directed light beam, the light spread becomes a tad tighter, especially around the edges, the light fall-off is significantly (depending on how much you care) influenced. Now, there are mitigating factors, the 120J is no doubt putting out more light than the 383 and the light spread shown above would therefore be dependent on the exact exposure of the flash. But the more interesting thing from my viewpoint, is how centering the flash is rather important to the light coming from the dish. Even if I center the 383, since I opted for a cheap mounting adapter for the flash, it’s off-center and I can’t center the 383 to get perfect light distribution with either the 120J or the 383. This concept is magnified on the last picture on the right, where I turned the head of the 383 to the left, and you can see directly how the light pattern changes. What can a perspective buyer gleam from all this? If you want really good light distribution, don’t skimp on the mounting bracket, by all accounts I’ve read the Kacey bracket is top quality and fully adjustable so you can precisely center the flash and support the weight of the dish. For these reasons, I’m looking for a new bracket solution, either from Kacey, or another source.

Test Shots
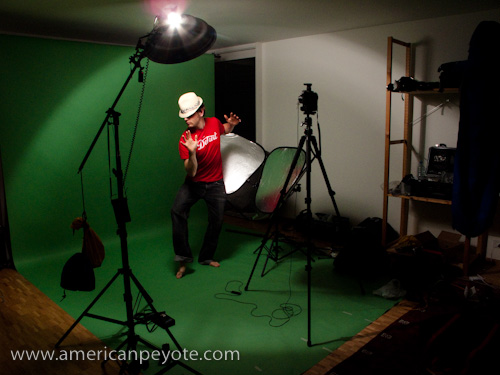
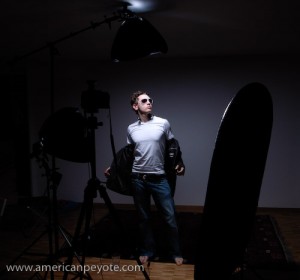
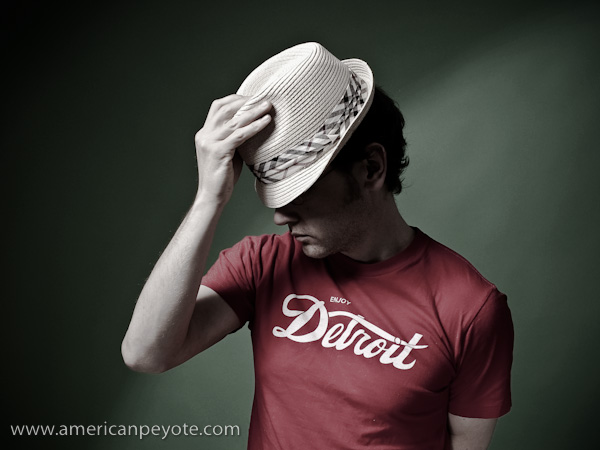
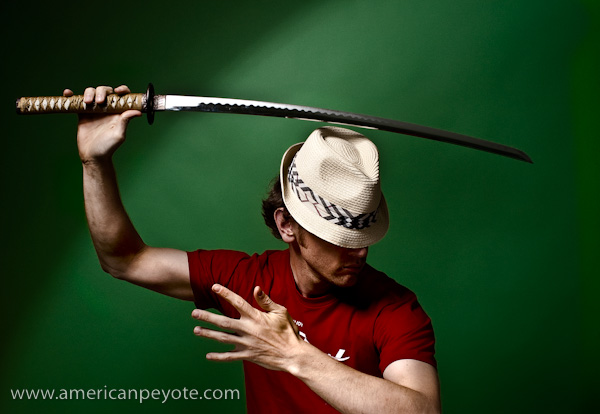
Kacey_BD_Shots-3.jpg I ran a few test shots with myself playing the role of photographer, model, and art director, which feeds all the different parts of my creative brain. I wanted to get a feeling for the light I could expect from the Kacey Beauty Reflector both from a lighting and post-processing perspective. The setup was pretty basic, the dish went on a boom with the 120J above me and I setup my Lastolite Tri-Lite reflectors to get some fill. I did a few shots with my Minolta 7D and 28mm lens, Gadget Infinity radio triggers were used as well. I wore a shirt which says, “Enjoy Detroit,” because red is my color when shooting on a green background and Detroit is my city of eternal inspiration. I wore a hat I bought on the beach in San Diego and for some reason decided that the Katana would add a much needed element to the mix.

I did a few shots and then did some editing on them in Adobe Photoshop and Lightroom. The keen blog reader might protest, “No! You have post images straight out of the camera to give an accurate representation of what the dish can do!” Nothing is straight out of the camera anymore, and even with film it never went so smoothly. The truth is, you can try to imagine yourself as a Joey L or a Dave Hill, but if you don’t get the shadows you need from designing your lighting setup with purpose and determination, no amount of Photoshop alchemy will save your tones. I shoot images in raw, adjust shadows in Lightroom to get a good base, and them export to Photoshop to manipulate the lighting and tones in such as way that my art director brain waves stop and say, “That’s it! That’s the look!”

Kacey_BD-1.jpg

I’ll be blunt, I found the light from the Kacey Beauty Reflector to be nothing short of, exactly what I wanted. The tone and texture of the shadows are simply perfect. The texture of the skin and shirt are unique compared to what I was capturing with my umbrellas and softboxes, simply awesome. Even light distribution across the model, wonderful light fall-off on the edges. The shadows are deep where I want them deep and the transition from proper exposure to background shadow is excellent. This means that I have a very strong base image to work with when I define the final shadows in Photoshop. In the above image, the texture on the shirt has this almost wind-swept-mountain-ice feel to it after adding a Black-and-White layer and blending using Multiply (plus reduced fill on the layer), it’s like ski touring in the Swiss Alps in January and looking at the texture of a wind-swept snow ridge while wearing red-tinted glacier goggles. “Hells yes! I says in my heads.”

In the bottom Katana image, I was interested in getting some nice shadows on the hands and arms. What I love here is that the sword blade doesn’t get all blown out, even though the light is right above it. With my softboxes I would have a defined over-exposure with poor transition to the rest of the body. I’m pretty sure that if I had used an umbrella instead, the sword would have been blown out totally if I had attempted to get a decent exposure on the torso. The hat was another issue, it’s a light yellow tone, but you can see that it still has excellent texture in the weave of the material, the detail hasn’t been lost due to over exposure. And yet, I can still get excellent shadows to work with on the arms. This image didn’t have too much post, mainly just shadow work, some Smart Sharpening, and basic methods of defining shadow tones over the hands and arms.

kacey-bd-1-2.jpg

Am I Happy

So, the inevitable question, is the Kacey Beauty Reflector worth $150? I’m going with a fully confident Yes. In my estimation and experience so far, the Kacey dish rocks, it produces excellent light, and has so far fulfilled my ambitions and desires for a beauty dish. Should you also get the $150 bracket? As I have no direct experience with it, these remarks might be less significant. However, I do wish I had bought the bracket. If you know how to make a decent bracket then be all means do it yourself. I modified a cheap bracket and it shows in the light patterns produced with different flashes. If this means something to you and you have the money, the bracket appears to be one of those high quality pieces of equipment which is sure to out-last your DSLR. I’m looking forward to using the Kacey dish on studio strobes in the future, either from Elinchrom or Alien Bees, depending on which ones I buy. A grid would also be an excellent addition, and I believe one is in the works from Kacey Enterprises.
Creative Spaces – The Home Photo Studio

home_studio-6The Home Photo Studio is one of those elusive mystical quests many photographers embark on once they’ve figured out f-stop from shutter speed and come to the realization that a little bit of controlled light goes a long way in defining a final image. And once you understand that you think,

“if only I had a few studio strobes, softboxes…and naturally a background, I could then start making amazingly-beautiful pictures of…books, cats, the kids, models, and…whatever!”

The point is that before you get fully ripped in the studio lighting equipment “buying stage” you may want to take pause and ask “why?” Do I really need a ProFoto Pro-7 setup to take portraits of my kids? Yes, because in a studio…magic happens. A studio is one of those sacred places in a home or apartment, a place away from the madness of the world where any caffeinated kid with a camera can make some lighting magic happen. But how? And for how much? Everyone wants a loft in New York filled with backgrounds and wet bar for the models, but reality means you’re generally lucky if you can get a free wall to shoot on when no one else is at home.

There are two essential elements one needs to consider for the home studio: space and light. By manipulating these elements you can create whatever magic you like.

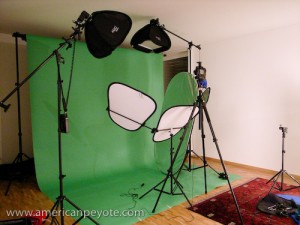
home_studio-7Basic home-studio setup:

1 Lightstand
1 Modifier (softbox/umbrella)
1 Bracket
1 Trigger Receiver Device
1 Camera
1 Manual Flash
1 One Trigger Device

With this basic setup you can expand in whatever direction you like – location oriented, studio oriented, reselling your gear on eBay (when you find a new hobby), it’s all possible from this simple starting point. With a flash on a lightstand, and using a light modifier such as a softbox or umbrella, you can soften and direct the light as you see fit. This of course gives you the option of having hard light (without a modifier) or soft light (with a softbox/umbrella). The initial monetary investment is low (compared to a nasty heroine addiction), the gear can be had for about $250-$400, depending on what you buy. The type of trigger and camera are pretty irrelevant in the early stages. If you’re shooting for the web or to make normal prints, well, you don’t need a Canon 5D-II and the 85mm f/1.2 portrait lens. The money could be spent elsewhere as the lens won’t dramatically improve your images – where as a new reflector or strobe could have a comparatively significant effect. Since 90% of photographers seem to think they “need” the latest DSLR, the used market is saturated with old Nikon, Canon, Minolta, Pentax, Olympus and other random digital camera bodies. Currently I still shoot with a 6-megapixel Minolta 7D. All you “need” is a camera that allows you to set the exposure manually and a flash that allows the same. If you’re shooting in your home, you don’t need a Pocket Wizard setup, you can go with cheap radio triggers from Gadget Infinity or just connect your flashes using PC cords, but if you have the money, “why not?”

home_studio-3Expanding Your Studio

Once you’ve setup a basic lighting package the inevitable question is, “what to buy next?” My response is “nothing.” Use what you have till you get to the point that it’s limiting, and then thinking of adding another light, but not before considering the following.

Reflectors

The basic lighting kit is easily expanded on by adding another stand, reflector and boom arm. The reflector allows you to fill in shadows, and thereby start producing a well-balanced image. If you have one flash and are thinking of buying a second, I would recommend getting a reflector instead. They cost less, don’t require batteries and provide a great deal of reflective surface area that a second flash can’t do on its own. I have a long 5-in-one reflector which can be used with silver or gold coverings, and also can be used in shoot-through mode as a giant softbox.

home_studio-4Boom Arm

The boom arm allows you to position a second flash in various positions around your subject, and can be had for $40-$50. Once you use one, you’ll wonder why you ever went without. Like reflectors, boom-arms are often overlooked by the aspiring light painter as “unsexy” additions to the lighting kit. However, it’s an essential piece of gear which opens up new dimensions to your lighting design. With a boom you can put softboxes in close, directly over-head, to the side, however you like, and thereby really design with precision how your subject will be illuminated. The combination of lighting setups now starts to grow exponentially.

Background

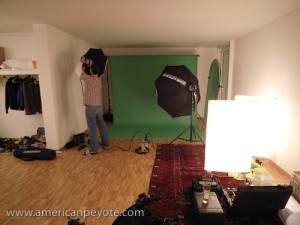
There is a perverse notion that you need to buy a background for a home studio. If you have a free wall to start out with, by all means just use that. When you’re starting out it’s easy to get overwhelmed with choices, background type, color, where it should be placed, etc. Keep things simple at the onset, and grow as you need. In many situations, the background should be the smallest focus in your quest to acquire more gear. Besides, I’ve never liked the idea of hanging a tie-dyed piece of cloth behind people I’m photographing, and hope to never fall into that cliche. Any white wall, brick wall, or variant thereof will do. It doesn’t have to be large or tall or wide or fat, for a head shot, the background can be just a few square feet. In this case you can go for a pop-up background. Sometimes you can use a 5-in-1 reflector with a white or black cover, but there will probably be a lot of wrinkles in the material, I would recommend going with a dedicated pop-up if you go this route. Some of my favorite portraits were done with the equivalent background of just a few cinder blocks in a cramped basement. However, if you have the space, a wide background can be very nice, especially if you plan on filling the air with random volumes of flying coffee. Just maximize the resources you have. I dedicated part of my aparment to a full-lenght paper background setup, and have never regretted it.

home_studio-5Space

This is generally the biggest problem, as renting studio space is usually not an option, and generally, neither is moving into a larger place. In general you need space to do stuff in – this is clear. Ideally, the more space the better. But there’s something I’ve learned in life: When you know what you need and want to do, it makes sense to get the best you can afford. However, in all other situations, in particular those when you’re just learning, it makes much more sense to buy the cheapest stuff possible with poor performance, because you are then forced to excel in less than ideal conditions. Placing yourself in a challenging situation makes you smarter, stronger, and more capable.

While lights and backgrounds can be bought, borrowed, or rented, during shooting sessions space is generally at a premium, and the occasional photographer will end up using whatever is available. The question is how to use that space effectively? If you have one white wall free to shoot on you already have two background possibilities. One is white: throw light on the background and “blow it out” which is a fun little overdone cliche. Persoanlly I think that the background is as, and sometimes more important than the subject. Something more interesting is to place your subject well in front of the wall, and only provide enough light to illuminate them. If the light hitting your subject is more intense than that hitting the background, you will make the wall turn a nice deep tone of grey. The key to using a small space effectively is controlling light spillage. You want the light from your strobes to hit your subject, and not bounce off the walls and ceilings. I’ve photographed in spaces ranging from a large open parking garage to a cramped dorm room in Tokyo. There’s always a way to get the lighting look you want no matter the resources.

The Gist

Basically, no matter what you’re doing in life, you have to learn how to use minimal resources to your advantage. Want to create a man-floating-in-the-air shot? Throw a mattress on the floor just out of the frame of the lens…and jump. Rearrange bookcases and take pictures off the walls to create space, use white walls and ceilings as giant bounce reflectors. Actually, if you learn how to effectively use a small space, where random light bouncing from exposed walls and the distance from the subject to the background are critical factors, then you’re probably in a better position than if you had started out in a large studio with all the resources at your disposal.

home_studio-8


Yeahhhh Baby – Swiss Strobist – CERN Workshop

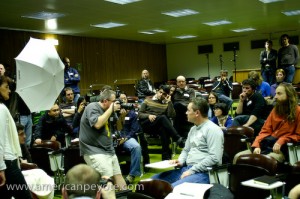
strobist_cern-3Over the weekend I headed down to CERN in Geneva to check out the Strobist seminar on February 21st, 2009. I went down on Friday to shoot Geneva graffiti and ended up doing coverage of a Tamil Tiger demonstration at the United Nations, but those stories wait for another day. I’m the sort of person who doesn’t like spending money on photography education, mainly because there’s nothing really complex or technical about taking pictures which seems to justify the cost of advertised offerings like the Luminous Landscape workshops. A camera is a lightbox, you add light with flashes or manipulate natural lighting, what’s there to learn? You take the vision in your head and make it a reality. But I do occasionally drop money here and there, a Joey L Photoshop DVD, a book on Skin, a book by Michael Grecco, and I figured it was time to join a lighting workshop.
The Strobist workshop was all day on Saturday. We started around 9am, and finished at 5pm with a few breaks in between. In the morning we listened to David explain lighting design and methodology, and in the afternoon we watched David setup and execute four different lighting setups.

strobist_cernThe morning focused on lighting basics, the thought process for designing lighting in different environments. Lighting concept takes a few minutes to describe in every possible detail, but the morning was filled up on designing lighting for different environments, shooting outside in the shade, lighting an interior room by starting with the ambient light and then adding flash where needed. By the end of the morning I had a good handle on the method, which I hadn’t really used before. I finished the morning with one key process in my head:
When shooting a portrait outdoors, find a shaded location, under expose the ambient environment light, add light to paint the final picture using the strobes. Use the same basics for interior portraits.

That’s it, like I said, photography isn’t exactly complex, so there’s no reason to take away confusing tidbits on lighting ratios. If you write up a business plan and ask for $500,000 from an Investment Angel for your startup, they will want to hear your idea described in 2-3 sentences (Swiss StartUp Camp 2009). That’s it, keep it simple. I see no reason why lighting design should be any different.

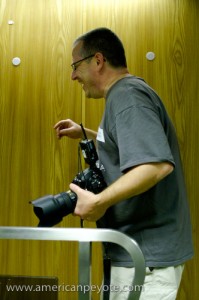
strobist_cern-9Aside from having the basic process of lighting design, the afternoon exposed us to how to “execute.” Using the seminar room, we talked about four different locations to use for portraits. Then David set about the room with umbrellas and his Orbis ringflash, photographing participants. From a certain perspective, David Hobby is like the kid who got all the toys he wanted for Christmas, and spends every day rediscovering their amazingness. This was the impression I had watching him setup the different portraits. It seemed like each light setup was like finding a rocket in the backyard and getting to set it off. This is the corner stone, getting a sense for the energy and problem solving method of the man at work – the message which I took away from the afternoon. This aspect which is more difficult to communicate on a website like Strobist, and a good reason to attend a workshop. The technical aspects are of course – trivial. Flashes are not complex, neither is lighting design, it’s how one executes the shoot which matters.
When photographing, be a kid at play and you’ll have fun and take away cool photos. That’s it, nothing too complex.

strobist_cern-4Yeahhhh, Baby. That’s what we heard every five minutes, David’s way of pulling an emotional response from his subjects. It made me think of Platon asking Bill Clinton to “Show me the Love.” By channeling Austin Powers, David pulled a smile from everyone in the room, every time he said the same line again, and again and again, it got a positive reaction. Apparently he has other lines, but since “Yeahhhhh Baby” worked every time, there wasn’t any need to bring out the reserves.
Basically much of the technical information I took away from the Strobist seminar is covered on Lighting 101 and 102 on the Strobist website. Of course, pretty much all knowledge is available on the internet, you can teach yourself JAVA programming, electrical engineering, and quantum physics if you’re disciplined. The question I always ask in my head, “was this really worth it?” Yes, in the end I left CERN happy that I’d dropped 150 CHF on a Strobist lighting seminar, plus travel between Zurich and Geneva and a sound-proof hotel room on Friday night, just as I’m still happy I dropped some 200 odd dollars on the Joey L Photoshop DVD.

And that’s the key to having a successful StartUp, give people something which they feel they need, and which they find value in, and you’ll be successful.

If you’re in Switzerland an interested in Strobist stuff, check out Swiss-Strobist. There’s a post about the CERN workshop and info on the 1st Swiss-Strobist meetup for 2009.

Lazy Swiss Sunday – Urban Poet Portraits

Urban_Poet.jpgThere are many boring things to do on a lazy Sunday in Switzerland. You can climb up a klettersteig, go paragliding, chill in a coffee shop, enjoy a movie, brunch in die Giesserei in Oerlikon, tour over a glacier, vegetate in front of the TV, but if you did all of that last weekend, then the obvious option is to go shoot urban portraits in Winterthur. As a Strobist-educated photographer, it’s nice to go out and shoot with someone who actually makes money taking photographs, and has an Elinchrom Ranger RX system. So, on a Lazy Swiss Sunday Matt and I headed to the old industrial area of Winterthur, just outside of Zurich to shoot some pictures that we called, the Urban Poet series.

I’m a bit of strange guy, and when I shoot images I naturally try to infuse a bit a strangeness into the process. Dry Tooling in a parking garage, vintage glacier goggles, and hiding my beautiful eyes behind sunglasses are my thing at the moment. This contrasts wonderfully with Matt’s take on portraiture, which is influenced by his background in photo journalism and wedding photography. He captures the beauty of reality, while I try to do anything but.  Fortunately, I was able to add my hint of strangeness during the post-processing.

Our location was at the back of the Lagerplatz near the train tracks in Winterthur. Winterthur is a historic industrial manufacturing base of Zurich, Switzerland. Since the Swiss economy has transitioned away from large-scale industrial manufacturing and become focused on biotech, medical, and technology companies, the hard industrial areas of Winterthur have gone through a large transformation in the past 50 years. Lagerplatz translates from German as something like loading or inventory place, basically it’s where you have warehouses for loading trains, and is right next to the old Sulzer manufacturing area. Since it’s industrial heyday, the whole area has since been transformed into a hip business location for designers, swanky apartments, a climbing gym, and is the go-to place for wedding photographers who want to make urban portraits for high-paying clients.

The Concept

We had two ideas in mind, one as an experimental action image, and would then go do some reality based shots. For the action shot, I had picked up a toy gun at the store the day before. In addition I took along my Pelican hard case and a simple wardrobe, consisting of Levi’s jeans, a form fitted T-shirt, and olive jacket with nice clean lines. As per Matt’s direction, I kept my vintage motorcycle goggles in my pocket and wore instead a pair of traditional black sport glasses.

The Gear

Nikon D300
Nikon 80-200 f/2.8
Nikon 12-24 f/4.0
Elinchrom Ranger RX strobes
Skyport RX radio triggers
Shoot-through and silver umbrellas
Medium Elinchrom octabox

Urban_Poet-2.jpgBullets Are My Prose

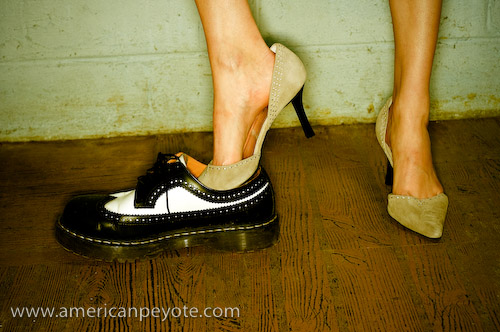
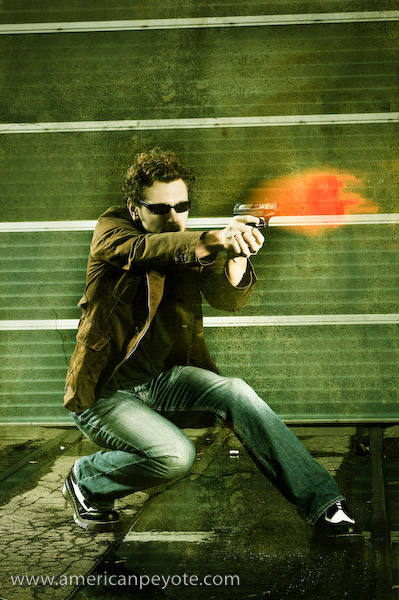
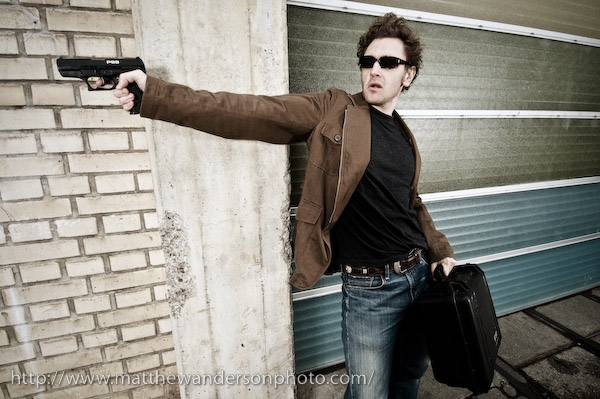
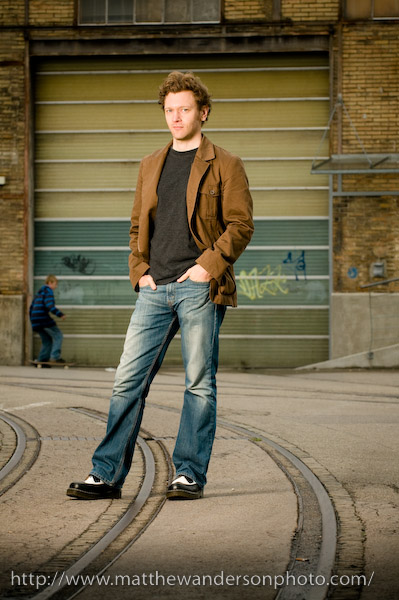
The night before I had been watching Casino Royale, getting ready for the release of Quantum of Solace, so I was pretty geeked to pick up a toy version of the P99 and pretend to be an extra from James Bond, Spy Game or a Jason Bourne movie for 1/100th of a second. The occasional kid would stop to look on his way to the indoor skate park at Block, asking what we were doing, and, “is that a real gun?” For the lighting Matt alternated between hard lighting and flatter diffused looks using the umbrellas. I went with this wardrobe because I like modeling with my olive We sport coat and relaxed Levi’s, the light blue and white of the jeans contrasts well against the green of the coat. Overall it has a sort of hip urban feeling mixed with funtionality of something I actually like to wear. Additionally, both types of clothing give great definition with harder or flatter lighting schemes. The shadows from the creases along the arms give a subtle dramatic texture to the overall image with the right light. I went with my Doc Marten wing tips (model 3989) because their large soles have a very defined edge, forming a nice separation visually between the subject and the ground. Again, the whiteness of the Docs juxtaposes nicely against the coat and sunglasses. It might have been better to have gone with a lighter T-shirt, as the dark grey shirt needs more direct lighting to bring out features of the subject’s torso area. Here it acts more like a visual void in the image, or maybe this is just my science mind making too much of nothing. The gun and Pelican case were added to give some story elements, and because Matt and I wanted to experiment with different visual elements in this series.

Urban_Poet-3.jpgThe Urban Poet

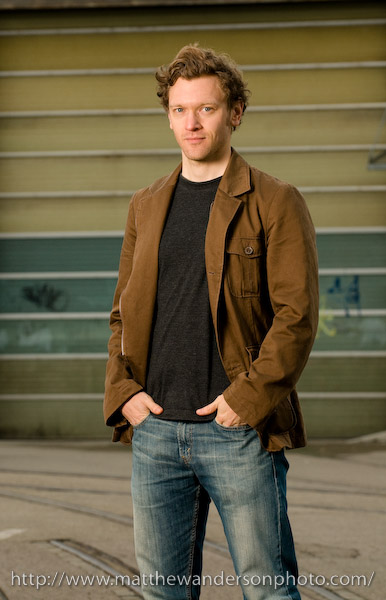
For the main Urban Poet portraits, Matt positioned me well in front of one of the buildings with one of those large garage doors in the background. This renders a nice geometry to the background, without over-powering the colors of the subject. For this shot Matt used the Nikon 80-200 f/2.8 lens, which gives a nice compressed image and control over depth of field to isolate the subject from the background elements of the shooting environment. And, the Nikon 80-200 is of course, very sharp. The lighting was done with one medium Octabox with an Elinchrom head. You can see in the portrait how the light is basically hitting about 1 meter in front of the subject, and then lighting the whole person. For this image, Matt designed a very cool portrait by separating the subject from the background using his choice of lens, and by keeping a shadow on the foreground, he minimizes the tendency of the viewer’s eye to be drawn away from the subject. So, basically it means your eye is drawn directly to the subject and not distracted by either the foreground or background elements. At the same time, having this foreground an background elements in place is what defines the urban environment, and makes the image look cooler and much more interesting than a simple studio shot.

Urban_Poet-4.jpgCould this shot have been done with small flash gear, yes, to a certain extent I’m sure it would have been possible, but if you happen to have an Elinchrom Ranger RX system with a medium-sized octabox, dealing with a small flash Strobist setup is just crazy. The Elinchrom octabox combined with the Ranger strobe heads gives you beautiful diffused light, and using the Skyport RX system meant that Matt was able to control the strobes without moving from his shooting position. If you have an assistant running around changing your lighting settings, then it’s fine to use a Pocket Wizard to trigger your lights, but when working alone the Skyport RX system makes the whole process painless. The use of the octabox is what made this image possible, otherwise it would be more difficult to create this dark shadow seen in the foreground, and hence, the image would have a different character.

Shooting with Matt was a great experience from multiple perspectives.  First, being directed by a photographer and doing what models do gives one valuable experience on how best to ineract with people which I shoot in separate projects. If you’re a photographer who has never gotten in front of the lens, I highly recommend it.  When you act out the part of a model, you become more aware of you body movements, and more aware of the difficulties of taking direction.  So, when you shoot your own projects, you now have a base for better connecting with your models.  You understand what it’s like to be on stage, their insecurities, and it will make you a better photographer.  It’s also important to work with photographers who have a vision and style which differs from your own.  You understand the value of different working methods, different lighting schemes, different portrait techniques, and in the end you are then challenged to reassess your own style  and become a stronger photographer because of it.

More of Matt’s work can be found at his website:

http://www.matthewandersonphoto.com/

Panasonic LX3 and Elinchrom Coffee Madness

For the first two years of it’s genre, the Ricoh GRD, GX100, and Canon G7 were the top compact cameras in the marketplace. This has changed as camera companies have realized that yes, photographers do want high quality image making ability in the palms of their hands. Currently, the high quality compact camera field includes the Ricoh GX200, Ricoh GRD (II), the Canon G10, the Nikon P6000, and the Panasonic LX3 (we’ll ignore the Leica clone model). Ah, and the Sigma DP1. Many reviews are out on these tools, but I have a will to be weird, so when Matt emails me and says we should test out his new LX3 in my new home studio, I says “Hell Yes” in my heads.

Matt picked up the Panasonic LX3 for an upcoming bike tour in Asia, I just got a studio background system, Matt has a set of Elinchrom Ranger Rx flashes, and I have a new coffee pot and set of vintage coffee cups. The keen reader might be able to guess what’s coming next, but I’m about to tell you so it’s irrelevant. There’s a shot I’ve been replaying in my head for a while, a person trying to sip a bit of coffee as it flies through the air, just out of reach of their lips. This is easy to imagine, but slightly more complicated to realize. You need good lighting, a fast shutter speed to capture the coffee in the air (with tack sharpness) and you need a place to do it. With Matt’s email, I knew all the elements were now in place.

Now, we had other tools to do this shot, I have a Minolta 7D, Matt shoots his professional jobs with a Nikon D300, and we both have access to excellent rental shops in Zurich, where you can get whatever you need from Canon to Mamiya, from Leaf to Phase One. But we wanted to explore the LX3 and see how it works in the studio. Does it make sense to use a $2000 lighting kit with a pocket camera? Hell Yes I says in my heads.

Technical Details

The Elinchrom Ranger system was fired using the Skyport radio trigger system, as the LX3 has a hot shoe, this worked flawlessly. The Ranger RX system has a flash duration around 1/2250 sec. depending on the power setting (according to the Elinchrom specs). This is one reason to use a top-of-the-line lighting kit like the Ranger system over my Strobist-inspired Contax and Metz flashes for capturing coffee in the air. With such a short flash duration, you can freeze moving liquids with super precision. Additionally, we used Matt’s Elinchrom Octa box, which provided beautiful wrap-around lighting – and makes my small Alzo softboxes look like, well, small, inadequate light modifiers (for this application).

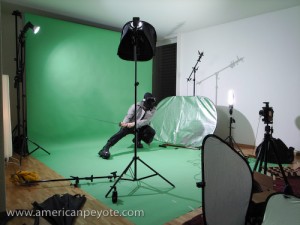
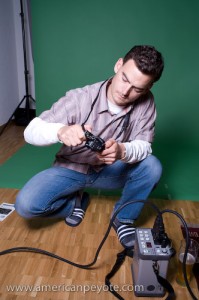
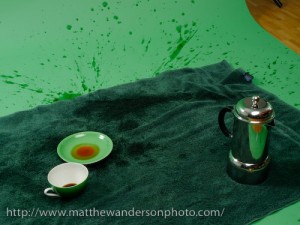
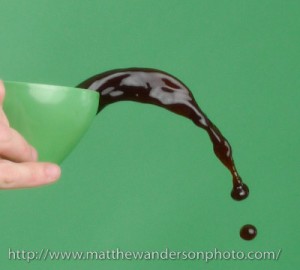
The full setup included an Apple Green background, and me kneeling on the floor with a few towels laid down to protect the paper from the incoming coffee splatter (only partially effective). We had a system, Matt counted one….two….three, and at each number I moved….left…..right…..left, and at the same time propelled the coffee cup in the air and tried to catch the flying liquid with my lips. Then I would wipe up all the coffee splatter that missed the towels and had landed instead on my new wood floor. This took a few shots to get the timing down, but after a few tries and two beers we were getting acceptable results. One main difference between DSLRs and compacts is shutter lag and focusing time. To get around these limitations Matt pre-focused and locked the focus on his LX3. This essentially eliminated the shutter lag problem. He shot with a shutter speed of 1/1000 and an f-stop of f/8. There were no problems syncing the flashes at this speed, the Skyport system worked much better than my Chinese radio triggers in this regard (high speed syncing). This of course highlights one reason to use the LX3 instead of a DSLR or a digital back system, theoretical high-speed syncing on the order of 1/2000. Chase Jarvis did something similar in his Kung Fu water droplet tutorial. But you really don’t need a $40,000 camera system to capture liquid in the air. In fact, you’re a tad limited if you do pick the Hasselblad because if you use a $40,000 Hassy system you’re limited by the sync speed of the camera. To work around the shutter sync limitation one would generally decrease the ambient lighting in the studio, open up the shutter of the camera, and then fire the strobes separately to capture the action, and close the shutter. The exposure is then determined by the flash exposure and aperture setting of the lens. This technique requires a bit of preparation for each shot. With the LX3 and it’s high-speed sync abilities combined with short duration Elinchrom strobes, you just point and shoot, which is the whole point in using a point-and-shoot camera. ?You’ll need to fiddle a bit with the strobe power setting and aperture setting on the camera, but it only takes a few seconds. ?In this setting the shutter speed was around 1/600, but a lower speed could have been used as well, the exposure of the scene being dominated by the strobes.

The Results

The combination of studio lighting and the LX3 really surpassed what I was expecting. The light quality produced with the Octabox combined with the short flash duration of the Rangers made it possible to freeze the flying coffee with a texture and definition I was not expecting. When combined with the resolution of the LX3, and it’s superb Leica lens, you get a tack-sharp image with excellent color and dimension. The combination of a small sensor camera with a small aperture also meant sharpness across the image. As the LX3 RAW format is not widely supported, Matt shot in JPEG, which was fine for this application. We’re not planning on blowing these images up to large sizes and the exposure was perfect, so the difference between a RAW and JPEG image in this shoot was fairly minimal.

There’s one thing I’ve learned since I started shooting with a Ricoh GRD a year ago, and is reinforced here: pocket cameras, like all tools have limitations, but when the right light is used, the resulting images can be as jaw dropping as those taken with DSLRs. Lighting and composition are generally more important than megapixels, and it’s one reason why I’ve added more flashes and modifiers to my toolbox instead of a new DSLR (but the Sony A900 is oh, so, so tempting). Still, if you’re getting a pocket camera, it’s good to know it can be used in a variety of situations. Like the Ricoh GRD, the Panasonic LX3 works great in the studio environment. When Matt emailed me about shooting with the LX3 in the studio I was afraid I would be motivated to pick up an LX3, but the experience was worse, because now my eyes are set on the new BXri 250/500 Elinchrom flashes announced at Photokina.

About the photographers:

Matthew Anderson recently moved to Switzerland and is currently engaged in the art of producing beautiful wedding photography and the precision of imagery for commercial clients.

I technically didn’t do much photography here, and was more of an art director, have little of a life and fill the void with photo gear.

Lazy Sunday – Fun with Flower Photos

After too many days and weeks of rain and snow and late spring sleet the Sun shown bright and strong over Zurich on the second Sunday of April in the year 2008.  I took the opportunity to sun bathe and then set up flashes, picked up my Minolta 7D and Ricoh GRD and set about photographing the excellent garden on the terrace.

Flowers I

One of the coolest things you can do with off-camera lighting is balancing the power of Sunlight with the watt-seconds of your strobe.  Now, with powerful studio flashes from Alien Bees, Elinchrom, Profoto, and many others, this is easy.  But the technique is often overlooked by amateur photographers since normal camera flashes are too weak to balance, or to over-power the exposure from the Sun.

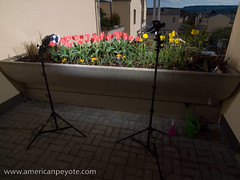
Flowers Setup

I set up two flashes, a Contax TLA280 and Metz MZ40-3i.  Gadget Infinity radio triggers were used to fire them.  I had to use direct flash, with both set to nearly full output, since the high afternoon sun made weaker flash settings and any umbrella diffusers useless.

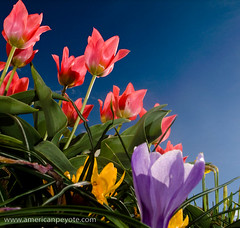
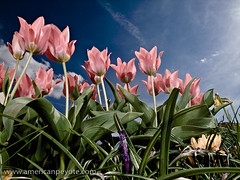
This meant I could light the main parts of the garden and create a nice blue sky in the background.  The flowers take on a sort of unrealistic shine, a certain texture your eyes can’t perceive in reality.  Ah, but the magic of simple off-camera lighting makes the magic appear with little effort.

A number of photos were taken during this session with the Minolta 7D and 20mm lens, but the best were produced using the Ricoh GR Digital with a 28mm lens.  The near infinite depth of field of the Ricoh GRD coupled with the with wide angle of view of the 21mm and 28mm lenses produced nothing short of perfection for capturing the cool colors of the flowers to contrast against the deep blue sky.  The Ricoh GRD rendered excellent saturation and sharpness of the flower petals and sharp green stems.

Flowers V Flowers IV

The setup for this shot took all of 10 minutes and there was no real concept I was trying to communicate.  The motivation was keenly contained within a desire to play around with my cameras and flashes and produce an image I’d never seen before.

Flowers III

There’s little doubt that flash photography and flowers has been around for decades and countless photographers will produce more countless generic flower photos with deep blue skies and saturated petals.  However, these will stick in my memory for a while, mainly because I was just playing around, and that’s when all the really cool things are done, when we don’t mean to do anything beyond killing the time we find on our hands.

Concept to Photo – Urban Dry Tooling

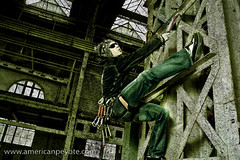
How was that image created?  What was the workflow from the initial idea to the finished product?  Concept to Photo is a growing collection of articles detailing how various images were produced, starting from the initial concept stage through to the final image.  What worked, what didn’t, could the concept be translated to an image, and how successful was the experiment?  This installment includes the development of the Urban Dry Tooling Concept: the perfect mix of climbing coolness and the industrial edge.
The Concept:

I’ve been moving towards combining climbing and urban concepts for a while.  It’s a natural result when you have little time to climb and too much camera equipment combined with a night of self-portrait experimentation.  Everyone knows what the generic city mountaineer looks like: jeans, fuzzy hat, fleece gloves, cool sport sunglasses, Teva or Chaco sandals in the summer and hiking boots in the winter, all topped off with an expensive Gortex jacket fit for Nepal but mainly used to fend off the wind in front of Starbucks.  I’m not an exception, except that I keep the boots at home in favor of Dr. Martens.  Anyways, I wanted to take the Urban Climber/Mountaineer look a bit further than the coffee shop.

Dry Tool Garage Concept

The concept started with a sketch and was simple, take the best parts of Urban and combine with the edginess of mountaineering.  I wanted something sort of dramatic, I wanted movement (or the sense of it), and I wanted it to look cool (at least to my eyes).  For the Urban part this meant that dark industrial backdrop only available from a circa 1940’s sky scape or an old factory.  It also meant fashion and not just taking a mountaineer and putting them onto the side of a building.

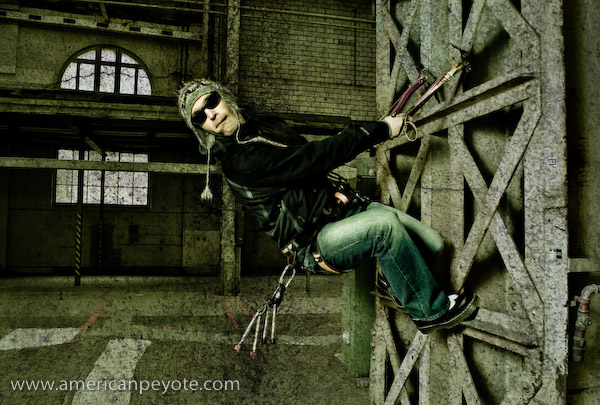
I wanted the coolest elements from mountaineering: ice tools, quickdraws, well-fit jacket, cool hat, and sunglasses – and then combine with a clean hip urban look.  Unless you ice climb you probably know what an ice axe is but don’t have any idea what an “ice tool” is supposed to look like.  Ice tools are short and meant for climbing frozen waterfalls or hanging from rock edges in winter.  They’re curved, wicked and stylish.

The clean hip Urban look was realized by integrating jeans and super-fly Dr. Martens into the mix.  The location was an old industrial area, in conjunction with a zuerichflickrdrinks Flickr group outing.

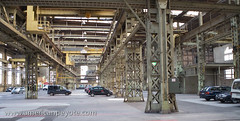
Urban Dry Tooling Location
The Location:

The old industrial Sulzer-Areal complex in Winterthur, just outside of Zurich, Switzerland.  Originally a manufacturing complex, since transformed into an ultra-chic locale with apartments and one fantastic parking garage which is largely unused on the weekends.

The Wardrobe:

Mountain Hardware Jacket
Levis Jeans
Dr. Martins wing tips
Bolivian Hat
Trango Captain Hook Ice Tools
Random Accessories (quickdraws and ice screws)

The Execution

The original idea was to hang on to the columns of the parking garage with the ice tools and be pulled by a rope attached to the harness.  Then the model could have his legs pulled out into space or jump out.  This actually seemed a lot more dangerous in real life with actual steel and concrete to bash his head into – and hence was scraped as an option.  After killing that notion static posing on the steel column in classic climbing fashion became the main focus.  Assisting with the camera was done by ubiquity_zh.

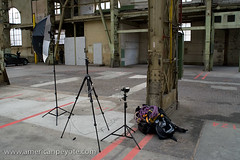
Urban Dry Tooling Setup

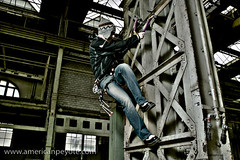
Sometimes the lighting dominates the subject and other times very simple lighting is paired with a subject.  There are a number of things which could have been done better, like lighting the steel column or mixing soft overhead light with some hard lights for contrast, but in the end a simple (somewhat pathetic) one umbrella setup mixed with the natural light filtering through the ceiling was used.  A Contax TLA280 was reflected into an umbrella high camera left and a 20 mm lens was used to get some slight distortion and bring out the Dr. Martens when the feet were properly positioned.

The Processing

Dodging and burning was used on the jeans to bring them out.  Then various curves, high-pass and levels adjustment layers were used to stylize and a deep green color was added with a fill layer.  Layer masking was used where appropriate to bring back facial features lost in the layers.  A grung texture was produced from the concrete in the factory and used as the final step.

The Debrief

The images from the Urban Dry Tooling shoot were ok, more or less what was wanted, but in many ways don’t really pop in the way intended.  On the one hand this is good, it means the photographer is not egotistical to the point where he’s fooled into thinking that crap photography is fabulous because he designed it.  On the other hand it means one can see the road of improvement.

One main problem is the poor separation between the black Mountain Hardware jacket and the background.  A light grey jacket or T-shirt would have absorbed less light, and would’ve rendered better defined shadows.  Furthermore, a diffused light from the right would have illuminated the torso of the model better.  Of course, adding some back-lighting would have helped as well to improve separation, and grid spot to light the ice tools probably would have prevented them being lost in the shadows of the steel framework.  What comes next?  Only the Shadow knows.

Translating a Vision into a Photo Concept

I’m somehow drawn to photography – not to necessarily document an interesting or unique view of the world, but to get the picture that I didn’t know existed.  That concept, that image in my head which sits there till I try and make it for real.  This is generally means combining bokeh, focus, and wide angle lenses with a subject to get that certain “look” which the eyes don’t intuitively capture.  And few things are harder for the eye-brain connection to interpret than motion.  That’s why the use of off-camera strobe flash was developed by Harold Edgerton in the first place: to capture motion in ways never before possible.  Adding motion to a static subject can add a certain “something” it’s unexpected and generally produces an image that sticks in my head.  So, I took the concept in my head and set about translating it into a viewable form.

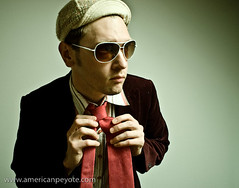
Red Tie and Velvet

Creating a Dramatic Motion Image

When you live in a place that doesn’t include a vast studio space, improvising and designing a shoot becomes important.  It’s the best environment to learn in because you’re challenged to make things look “cool.”  Cool is easy when you’re shooting a Swatch Watch commercial with a full staff and art director, but I don’t do these things – and need to organize things like models and locations and wardrobes on my own.

For the concept, I wanted the images to have movement, some sort of dramatic character, and to look “cool.”  “Cool” is at best a meaningless relative term and I don’t profess to having my finger on the pop-culture pulse of the trend setting world…but I went for the concept in my head anyways.

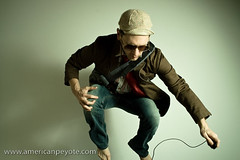
Floating in the Air

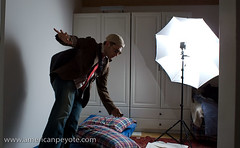
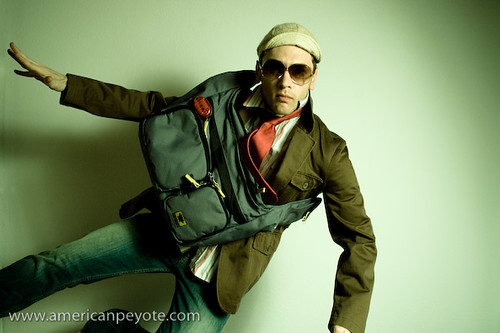
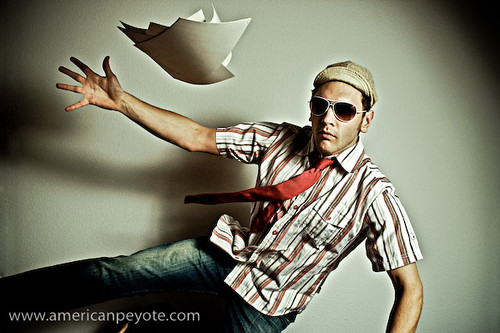
Having no budget or creative vision, I decided to go with my only available model, myself – and capture myself in a dramatic fashion: Flight (jumping through the air).  The apartment has wood floors, so first I set about setting up crash pads (guest beds) to land on and then added wardrobe elements and props which would add motion effects to to the final images.

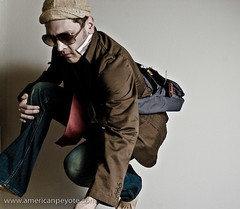
Wardrobe: Shirt (BC Ethic), Tie (H&M), Jeans (Levis), Olive Jacket (We), Messenger Bag (MountainSmith)

Equipment: Crash Pads, 1 Flash w/umbrella, Radio Trigger (Gadget Infinity), Minolta 7D, 20mm lens, Remote Trigger

Crashing in Action

The crash pads were setup in front of a white wall and the camera went on a tripod.  I started out using the 2 sec. shutter delay function on my camera, but coordinating my jump with the delay wasn’t’ working so well.  Instead I opted for using a wired cable release.  My hand was often out of the frame, instinctively trying to break my fall – but the trigger release could eventually be Photoshopped out of the picture.

Jumping with a Trigger

The wardrobe seemed to work, the jacket and tie floated in the air when needed and a stack of paper added another element, a main focus for the eyes to lock onto and juxtapose against the main subject.  The Mountain Smith courier bag was, well, one of those Urban elements, suggesting the subject is “going somewhere” and has “things to do” – people to see.  I love my MountainSmith bags like I love my ice tools, and try to integrate them into shots whenever possible.

MountainSmith in the Air

Post processing of the images was done in Lightroom and Photoshop, sometimes using some processing elements I picked up in the Joey Lawrence Tutorial DVD.

In the end, I fell short of achieving the vision in my head, mainly because I didn’t have a trampoline and the cielings were too low for one anyways. This meant jumping on my own, and since I don’t jump very high I had a very short time to pose while in freefall.  The jump and freefall where rarely timmed correctly to the camera shutter and my head statred hurting from the impacts after a while.  Still, achieving 1/4 of your vision is far more productive than 2 hours of watching TV.

Drama in the Air

Jumping looks easy, and it is twice in a row, but if you’ve spent the previous day ice climbing and every other photo sucks because the timing is off and you’re out of the frame, well…the jumps add up and the photos session quickly turns turns into a workout fast.  I think of Michael Grecco’s book The Dramatic Portrait – he’s shooting Jet Li doing a flying kick at one point, and the translator says, Jet Li doesn’t need a trampoline.

Velvet and Glasses

Techno Claus

IF you know where to shop, the well-bankrolled photographer can buy many beautiful accessories for chic portrait sessions and produce really fantastic photos with high key lighting and limitless imagination. I have wet dreams about Lastolite products. Their stuff is collapsible and fantastic and generally costs enough to blow my bank balance for the whole of next year. And since I don’t know where my funds will be coming from twelve months from now, I figured I’d not drop a thousand bucks on their inflatable white background.

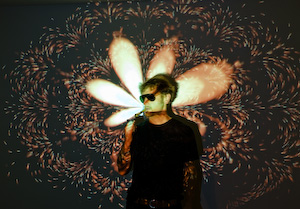
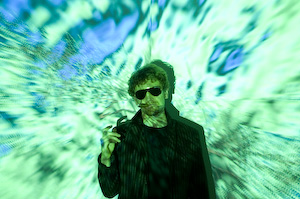
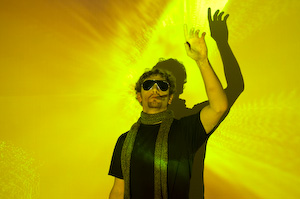
I did, however, co-host a Christmas party with my flat mate. Due to the size and generally cluttered state of my room we rarely have parties in the apartment. But every year I make the effort to make the place acceptable for a gathering. Our Christmas party included the baking of cookies, the drinking of Gluhwein, and then relaxing in front of my white wall, which was soon painted over with the projection of some movie to entertain us for the evening.

After watching Christmas with the Kranks and Along Came Polly I played music via iTunes and turned on the Visualizer.

Those in "the know" are familiar with the visualizer function of iTunes. It syncs seemingly random computer generated colors and patterns to your favorite song selection.

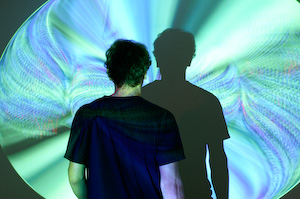
I hardly ever use the thing because on my 12" G4 PowerBook the techno wonder color symphony is actually quiet boring. But when viewed on my apartment wall: higher than I can touch, wider than my arms can reach, well…the techno wonder symphony is so mesmerizing that you just sit there like a cat following a laser pointer – thinking,

"So this is why people take drugs. Now I get it." I am a cat and this is the laser pointer on the wall…and I’m chasing it, meow, meow.

Contemplation

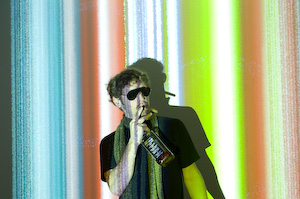
Naturally, I had to photograph myself in front of it. It wasn’t my idea, of course. I’m very unoriginal by nature. I just capitalized on the idea after my girlfriend snapped my picture with her handy Canon – the one that she keeps in the chic red-leather case. Sadly she faded into the night before I pulled out the Minolta 7D and the f/2.8 Tamron lens. I generally find the cable release to be too long, but it was the perfect length to trip with my toe as I posed behind the techno light show.

A Light

Accessories were needed; my will to be weird oozed out and I felt like an extra in that scene from The Doors movie where Jim meets Andy Wahrol.

Wave

A quick search of the place revealed some cigars left over from Cuban night, sunglasses found in the bathroom back in Michigan, the bottle of Jack Daniel’s my dad brought over two years ago (sometimes Jack and Coke is the perfect accent to the night), a Zipppo I never use, and a jacket from We in Zurich.

Off Air

The photos were not clean or perfectly exposed, but unlike a lot of the crap portraits created by people who get paid to do this stuff, I kinda like looking at them.

Sun Flare

Christmas Photography iTunes

Bordom Deflecting

I fully admit it, I want to be a photographer. I’m an engineer, a scientist even, but I figure it’s all the same thing anyways. Writing, mountaineering, smart materials, I don’t see much difference between these different facets of my life. My latest boredom deflecting strategy has been teaching myself portrait lighting. When you don’t live with any beautiful women there’s really only one good way to learn lighting: photographing yourself.

Even if beautiful women did live in my apartment, I still would have to tell them how to pose, how to smile, etc. When it’s just me, I know more or less what I’m looking for, so I just do it without delay or discussion. The beautiful women can factor in later, if necessary.

A cheap 15 year old digital camera (relative cheapness) with IKEA soft boxes can do a lot. You have to keep the shutter speed low for proper exposure, but that just means the poses have to be static. Trip the shutter release with a climbing axe, strike a pose and wait for the 2 second shutter delay to fire. Recompose, repeat, and repeat until something looks good.

Once you perfect the technique on yourself, you have photos to show beautiful women to get them to stand in front of your camera. To be honest, I’d also shoot ugly men as well; it’s the lighting, not the subject that really counts. Lighting can make beautiful women look ugly and mean and it can make grumpy old men look happy and aloof. I don’t subscribe to the notion that lighting is good or bad, it just is. It’s simply the combination of light reflecting off of and being absorbed by different surfaces.

Having a poor subject (like me) is probably better to start out with anyways. This way no one can throw things in my direction if they don’t agree with the results of the photo session.

Hmmmmm