Photography

Swiss Train Passenger Perspective Landscapes

TrainLandscapeSwitzerland-06281
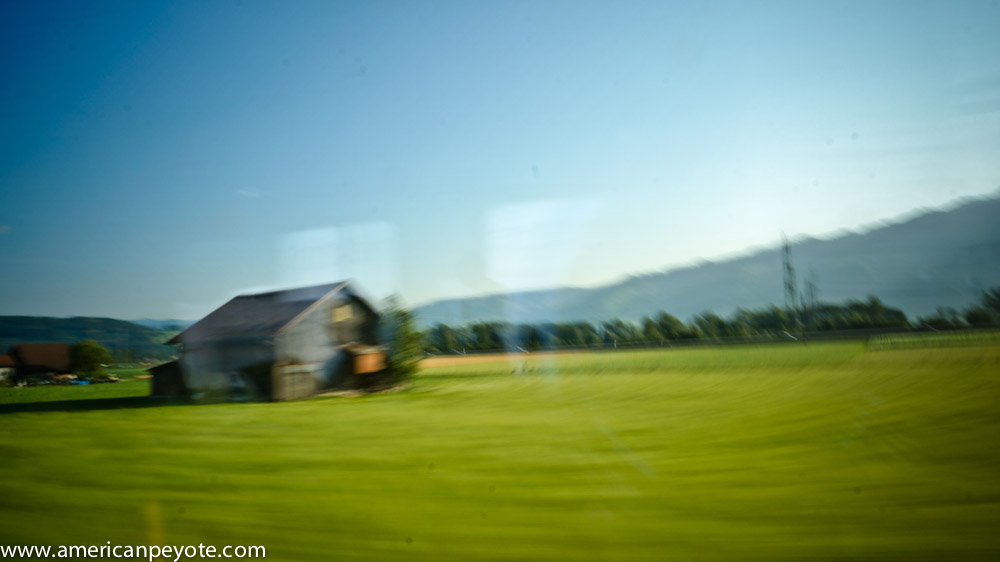
If you live in Switzerland and have no car you ride the trains a lot. It’s one reason why I like living here, because the time in-transit can be used for something. When you’re driving here or there or biking, you have limited attention and ability to do anything beyond watching the road. I stated doing train passenger landscapes on the train last winter. I wanted to create some slightly blurred landscape images to layer into the Toy Warz storyline I’ve been developing with Bratz and Monster High dolls.

Toy WarzToy Warz

Here for example, you can see how the blurred background trees give just a little landscape texture to the background, mixing in will with the foreground but giving some sense of depth and context to the central image. I wanted to give a bit the post-apocalypse feeling and the texture layer of clouds could be blended into the narrative of the image. Expanding beyond that, I was also looking for image to give more texture or shadows in waves, to mix on either side of portraits or or to direct the eye of the viewer from top to bottom.

Relative Motion

These image have been taking mainly from the route from Zurich to Winterthur and from Zurich towards Chur. I started expanding on this theme and realized I just like the landscape images, in particular when I pan while shooting. The effect is that the background landscape is sharp while the foreground elements like trees and houses are blurred. It’s an experiment of image capture and relative motion of the train to the landscape, mixed in with a long shutter speed, it gives a nice surreal feeling to the shots. If you shoot while the train is curving away from the foreground, you get an added wave texture to the image. Some of these I’ll use for the Toy Warz backgrounds, but I also love them as a series on their own.


Dynamic Color Portrait Photoshop Tutorial

Here I present a workflow for creating a dynamic image using layers in Photoshop. Why? Well, because I like to share and because I got some requests on my Google+ album asking how it is done. To illustrate the process, I’ll use a set of images I created for Scaramanga Bags, a cool company in the UK that sells vintage leather bags and other things like journals and vintage suitcases and trunks (see the Scaramanga Concept Images here). On their website Scaramanga already has nice urban portraits with their bags, so I wanted to go in a different direction. I wanted to create portraits that convey a feeling of abstract motion. Something to invoke a feeling of movement and action. I love photography and painting. I began with photography looking for image perfection, and then moved to painting after developing a color palette in Photoshop. I like to light an image in layers, and in Photoshop I layer colors and backgrounds to add a sense of visual movement to an image. I look at a scene, put on a pair of rose-colored glasses, and I have a layered image (because at the base, this is all Photoshop does). When you can do this in your mind you then just need to translate that to something other people can see, and for that we have Photoshop. The aim of this article is to show you how to combine images together to create unique, balanced color combinations, which add a desired character to the original image.

The Basic Recipe

I generally apply this concept to portraits, where I want to add a certain character which complements the person photographed. First, begin by realizing that the person is a person, not simply a subject (A Person is not a Subject) for academic study. I start out with a base portrait image, generally shot in a studio environment with a two or three light setup using softboxes and maybe a beauty dish. Why? Because we need a decent (well exposed) portrait to start with. It should be something that speaks to you and has the look and pose you want. The layers in Photoshop are just there to modify the intention of the original image (otherwise just go ahead and create an image from scratch and render it in 3D).

I always start with a well-exposed base image that defines the main textures, tones, and colors of the person. In the Scaramanga Flight Bag images I used a Sony A900 and Elinchrom lights with a CreativeLight softbox. You don’t need an expensive camera and equipment, but you do need to know that a properly focused image with proper exposure will give you the largest amount of information to work with. If your initial image has high contrast or deep and dark shadows, then you just need to know that you can’t modify those areas of the image very much, and they will not blend so well when we layer a new image on top of it, since the very dark areas contain very little color to modify. So, let’s start from the base image.

The Base Image

In reality we’re mixing static image layers one on top of the other. In my mind I’m painting on layers of color movement to complement a portrait. I began with images produced in my apartment studio, and posed in such a way as to communicate the idea of running or of standing still, with motion in the background. This is my base, a strong pose which will be modified (enhanced) by a new layered color environment. For more info on creating a dramatic pose portrait check out my post on this subject (Urban Ninja – Dramatic Pose Tutorial). In short, I take my inspiration for poses like this from comics and graphic novels such as Conan the Barbarian, 300 and Watchmen.

After importing the images into Lightroom I chose the best and then increased the Fill Light to reduce the contrast in the image, and then exported to Photoshop for layering work. When exporting from Lightroom I don’t want deep and dark shadows, but rather a lot of information to work with and which will respond well to layering. Once in Photoshop I will often start by adding a Black and White and High Pass layers to the base image (although I didn’t need to do that for this image set). I first copy the original layer, add a High Pass filter, and set the blending on that layer to Soft Light. This has the same effect as increasing Clarity in Adobe Lightroom, but in a more controlled way. I reduce the Fill value on this layer so that everything blends well together and the image doesn’t look gaudy or like it was just run through an actions industrial meat grinder. I will often also create a Black and White adjustment layer, and then set the blending to Multiply. You can then adjust the values for reds and greens and blues. This desaturates the color while intensifying the shadows of your base image. It can darken the image a lot, but the goal here is to modify the tones of different parts of the image (such as skin tones). Again, I will often reduce the Fill of this layer so as not to totally kill the base colors.

Choose Layers

I always start from the base portrait and then choose layers on the fly. For the Scaramanga images I wanted a lot of bright colors with movement. So, I opened up Adobe Bridge and looked for long-exposure night scenes with lots of color and light streaks. To achieve this abstract motion goal, I picked a few images that I had shot in New Orleans, Zurich and Berlin. The key here was to have images with long light streaks and pockets of intense color, which would blend in with the form of the person in the Scaramanga portraits. By blending well I mean that the lines of the night scenes would coincide with the lines of the runner (think of drawing lines over his body and comparing it to the flow of the layer images – check out my Dynamic Pose Tutorial for clarification). There’s no formula here, you just need to pick images that work well together. Aside from light streaks, these images also have very interesting pockets of color, and also recognizable object elements such as a tram or street scene, which then defines the background environment of the final image. The night images from Zurich give the feeling of running through a city of lights, while the one of Bourbon St. gives the idea of a person standing still while the environment is exploding in color around him. Now that I have chosen the layer images, I just need to blend everything together.

Blending Layers

After picking the layer images in Adobe Bridge I opened them in Photoshop, and automatically set the blending mode to Overlay. This allowed me to preview how the different light and color elements of the layers would work together, and how the flow of the lines of the layers would mix with the base portrait. At this point, the image just looks like a couple of images stacked on top of one another, and that lazy sort of image production just doesn’t do it for me. To properly blend the images you need to play around with the blending modes, like Overlay, Softlight, etc. and also change the Fill and begin masking individual areas with a paint brush or gradients. To mask a layer by painting simply select the layer and then choose the layer mask icon. When you now paint with black, the layer will be masked (or hidden). You can change the Opacity of the brush to mask the layer gradually with each new brush stroke (the recommended method). When masking in this way I usually use a brush Opacity between 3-20 with a soft brush. This is where I act more like a painter than a photographer, masking and blending the layers uniquely together. I rarely use the entire layer image. Often I use a gradient to mask out half of it, and also paint away most of the layer over the person. I will also add full Color Fill layers (usually set to Overlay blending) to tweak the overall color. Eventually, the final image will then start to come out. To illustrate this process, you find here the secret goldmine of any Photoshop artist, the screenshots of my Layers window on my two favorite images from this set, the Runner and Bourbon St. You can clearly see how the different layers were masked, and what the original layer images looked like before blending.

That’s All

If this sounds complicated don’t be deterred. Essentially all I do here is to mask out the parts of the individual layers which don’t flow well together, and in the end I have an image with all the flow and color vibrancy I desire. The main idea is that the character of the layers complements the base portrait. I save the image and open it up in Lightroom. From Lightroom I play with the colors further, adjust shadow and highlight colors, Vibrance, Clarity, etc. until the final color tones are correct and then I export.

For more info on layers and portraits, check out my Hyper-Realistic Portrait Photoshop Tutorial. This covers the main topics I addressed in this post, but you get to see a screen cast of the whole process.

Analogue Lust: Dark(bath)room Escapades in Photography

I got into photography a few years before the digital revolution exploded and people everywhere began remarking on the death of film as a capture medium for light painting (er, photography). Some say film is dead – I say film is as dead as painting, which is still a vibrant activity for millions throughout the world. Having a darkroom in my apartment has been a quiet dream of mine for a long time, and recently became a reality (till I had to take a shower). This is a summary of my latest analogue escapades with black and white printing. When you develop your own film and enlarger your own prints, there’s this mystic feeling of having a hand in the total process from image capture to final print. A sense of being able to push and pull your development and watch the prints magically grow from the arid white vastness of the unexposed paper to a finely contrasted representation of reality. It’s the embodied feeling of getting it right in the camera. Cartier-Bresson, the decisive moment, Joey L with a Polaroid and capturing the moment. Anyways, I just moved to a new place and hadn’t setup my digital studio yet.

For the past few weeks I’ve been working with a friend of mine to setup a pinhole camera project for a 6th grade class she’s teaching. We began with a Polaroid pinhole camera, but it’s too expensive to have each kid build a camera with a Polaroid back on it, and you also can’t tell the whole story of how an image is developed, as it’s all contained within the Fuji/Polaroid insta-magic photos. So, instead my friend went back to her roots and decided to have the kids build a traditional pinhole camera using black+white paper as the film, and then create the final image via contact printing. It’s a great project for students, especially in this techno-world of today where every gadget can take photos and then upload your electronic images to Facebook, creating and instantly distributing a perfect copy of a copy of a copy that can be shared and retweeted and posted all over the planet. You lose of course, the uniqueness of the printed image. A printed photo is unique – this transience, this fleeting fleck of uniqueness can be seen and felt in each print you develop by your own hand, because no two will be exactly the same (well, at least the way I do it they’re all unique accidents).

Dark(bath)room Setup

We needed a darkroom setup of course to realize the project. I easily found a Rollei enlarger setup on Ricardo.ch (a Swiss auction site) for 250 CHF with two new packs of Iflord Multigrade paper. It was a no-brainer to pick it up. The enlarger was a classic Rollei, coming direct from Lisa, a photographer in the Zurich area. From HobbyLab.ch we ordered the developer and fixer chemicals. Film may be dead (as some say), but it’s super easy to find everything needed for a darkroom. We took ownership of the enlarger and accessories on a sunny Sunday morning, and spent the rest of the day setting up the laboratory and making prints in the bathroom. We put the developer trays and chemicals in the shower to have some running water. Ideally you don’t want to balance the enlarger on a toilet, but you sometimes need to make do with what you have, which is exactly what we did (thankfully it never fell off).

First Prints

My friend started out doing exposures of me sitting outside with her pinhole camera. This was nothing more than a shoebox with a piece of Iflord paper in the back and a pinhole in the front. This piece of paper was developed (creating the negative) and she created the final positive image via contact printing of the negative pressed flat against a second piece of paper under the light of the enlarger. As it was a wonderful sunny Sunday and I had just done some laundry, we hung the prints out to dry along with the whites. This was my first experience seeing pinhole images like this, and I think they rock. The kids in her class are going to have a fabulous time building their own cameras, doing prints, and learning valuable lessons about optics during the process.

I opted to print images I already had, and pulled out the first black and white negatives I could find, which happened to be some ISO 50 Ilford PanF exposures I had made in Bolivia during a trip back in 2003. This is a high contrast film, and it prints very nicely on Ilford Multi-grade paper. I decided included the film carrier holes in my prints, mimicking those retro-film borders you can apply to your iPhone photos using many random retro-cam apps. Fuck the apps, if you desire ultimate interactivity and user experience then consider a darkroom. Oh, do you have a retina display? I have a retina as well – two in fact, they’re called my eyes. Wow, cool, you can view your images on your iPad – know what’s cooler, looking at the smooth fantastic surface of a new print drying in sun along with your laundry. I also pulled out a Fuji Neopan 120 negative from my favorite place in Berlin, and played around printing images of this club front and sticking them to the bathroom mirror. I love how films all have cool names like PanF, Neopan, Provia, Velvia – all with individual character traits and unique personalities, a concept generally lost in the Canikon pissing matches and pointless megapixel branderbating orgies that dominate too many conversations in the photo circles of the world.

Digital Is Not Worthless

I know there are photographers today who have never touched a piece of film, let alone developed or printed their own images. I love creating images with Photoshop and my Sony 24 mega-beast A900, but it’s not the same as creating in the darkroom. I started out with film, moved on to a film scanner to create files for prints, then went on to digital cameras and then expanded to Photoshop. From Photoshop I went a little analogue – started doing paintings, and now my journey has come full circle back to where I thought would be awesome 15 years ago – doing my own prints in a darkroom. No regrets at any point. Use the technology tools you have as you see fit and never stop exploring.

My Favorite Mobile Photo Apps for iOS

The daily smart phone is the camera that’s always on you, and by definition the best, because you can’t put a Sony A900 in your pocket to take around all day. At the moment, I don’t have a smart phone, I have a passingly-intelligent Samsung, that I’m embarrassed to pull out at Web Monday gatherings. I do however have an iPod Touch, and now enjoy using push-button applications to post-process my photos when I’m not by my computer. Here are my experiences with what works, what I find awesome and lame in the world of mobile apps for photo processing. Here’s a run down on what works for photo processing on my iOS device, what doesn’t work so well, and why. The goal here is to have an app that adds to my Photoshop work, is fast and easy to use, and gives easy access to social networking sites for uploading.

First is what I want/expect from a mobile photo app: I expect the app to do something useful and valuable to my photography/art, which can’t be done on my iMac – or, which is more convenient and faster to do with the mobile device. I expect connectivity, so that the processed images can be quickly distributed to social networks and saved to my device/phone. We have three contenders here, Photoshop Express, instagram, and Plastic Bullet.

Photoshop Express

PS Express for your mobile phone is ok, but for my purposes it basically sucks for anything besides viewing images and making a few basic color overlays. I have a Photoshop online account, and had high hopes (now dashed) that I would be able to use the mobile app as a way to process and then distribute images to different online areas and social networks. Alas, the app is basically useful for nothing but a little coloring and an assemblage of near-useless effects that only detract from my work. I’m probably being a tad hard here, and admit to being a post-processing snob, but it’s Photoshop, and should be the pinnacle of processing power. PS Express actually has some useful features: you can rotate, crop, and do some other basic things like overlay a rainbow filter or reduce noise in your images (useful for crappy-exposure camera phone images), but these minor tweaks are no reason to spend the time required to download and open the app. Adobe made a fair effort here, there’s some more advanced functionality like a tilt-shift blur filter, but the transition region from sharp to defocused is abrupt, unnatural, and basically just ugly, making the app near useless for me.

instagram

Instagram is all the rage (so I’ve heard), it’s sort of supposed to be like a Holga for your iPhone, and processes your images in a classic faded Polaroid feeling and light-leaky camera profiles. For some reason we like to push the boundaries of camera technology and then process the images to make them feel old. It’s a fun thing to do and is probably fun to use with a camera phone…however, much like PS Express, I feel that the effects are sort of flat and uninteresting. Uninteresting in the sense that it doesn’t really add to the content (or feeling) of the original images, but generally detracts from it. When you apply one of the filters, the app will basically just overlay a color or processing effect on your image, maybe add a film border for nostalgia (which is an important feeling) but it doesn’t seem to really target or balance between shadows and highlights. The result is a flat image that’s sepia or sort of black and white, but that doesn’t improve upon or add to the quality of the base image (in my elitist opinion). Of course, I’m highly biased to color and form in this respect and make no excuses for mediocrity. I do my own Photoshop work and don’t mind spending an hour or two doing a basic image composition for one portrait, and although I don’t expect the same attention to detail from a free app – still, as a single app instagram is sort of uninspiring for me. But, we don’t have to use just one app, do we? The true value of instagram is the easy integration with all the relevant social networks and microblog sites. Direct from the app I can upload to Facebook, Flickr, Tumblr, etc. and I think this is why some folks use the term Killer when describing instagram, it does everything Flickr should have been doing with from the start with their mobile app. The usability of a social app like instagram is more important than the quality of the product (like the best camera is the one you have on you), and that’s why I still have the app on my iOS device, it’s fun to play with and easy to upload. But there is a better, plastic fantastic choice in the app world.

Plastic Bullet

Plastic Bullet, like many apps, simply doesn’t get the recognition is deserves. Plastic Bullet is developed by Red Giant, a company you’re ever heard of unless you’re into video/film post-production software. Red Giant specializes in software that aids in things like video time code transcoding, color correction and color grading of films, all made available at a price point realistic for indy film makers and startup video hobby directors like myself. Plastic Bullet is a product from the folks who develop one of the best color grading programs on today’s market, packaged as a mobile photo app, and I love it so much I’m using it to produce looks I can’t do in Photoshop (or at least, don’t want to spend time doing). Plastic Bullet is the only photo app I have that really adds to my images. The processing Plastic Bullet applies to your photos isn’t just a color overlay, it really feels like the app is improving the image quality and emotion of my images (when the right effect is applied). Shadows and highlights in the images are processed differently (depending on the filter you choose) and you can’t predict exactly what it will do until you start playing with images. Of course, it’s not a magic bullet. I need to give it a nice image to work with, and I then go through a few finger taps, picking the processing that works best, but in the end it creates a unique image. The cool thing is that you never know exactly how the image will turn out, and that adds to the magic of the whole process. It gives images a much better Holga/Polaroid feeling than instagram, and brings out new colors for different images. From the app you can save your processed image to your device or upload it to Facebook, or Flickr. I would love the ability to upload to Tumblr and to my blog as well, but I can also just save the image and upload it from my library. Plastic Bullet isn’t free, but it’s an app I would pay for (full disclosure, I got it for free during a promotion from Red Giant) now that I know how good it is. But why limit yourself to just one?

Why Choose Just One?

Since I have both instagram and Plastic Bullet, I’ve actually just started using both instead of picking just one. I like the overall feeling of Plastic Bullet, so I use that first, and then save the image and open it in instagram for further processing and uploading to the instagram social network as well as Facebook, Twitter, Tumblr, etc. Since instagram renders a less aggressive treatment than Plastic Bullet, it’s ideal as the final touch to tweak color levels. So with both apps I get the best of both worlds, tight social network integration and excellent color processing. I’ve started using this combination to reprocess old portraits, pictures of my paintings, cow photos, and I simply love it. Sometimes I’ll go so far as to process in Plastic Bullet, then export back to Photoshop/Lightroom on my computer and tweak the colors and shadows, and then send it to the web.

Don’t get caught up in the information overload. All of these things are just tools, and with all the ways to share files an artist shouldn’t feel locked into any one app or processing philosophy. Use the tools that you discover to achieve the vision in your head, don’t be blinded by the marketing hype and pick one over the other. The human imagination is too small for just one photo app.

Scaramanga Large Flight Bag Concept Images

I don’t know how I found out about Scaramanga, but they’re just, basically my favorite vintage bag company in the world. Based in London they ship vintage bags, journals, cases, and other things around the world. They sent me this large version of the vintage Flight bag and I put together an image concept. I wanted to do something dynamic, something that combines the motion of the world with the bag concept. I had all the background images already in my head, I just needed to find and arrange them all together. I shot stills in my studio and then did some compositing in Photoshop to blend everything to my liking. You could say, this is how I imagine I feel like when I’m strolling through the street with the flight bag, naturally, my reality is a bit less dramatic. Enjoy. If you’re looking for a cool vintage leather bag or chest, check out Scaramanga Bags.

A Person is not a Subject

It’s been a fun year of photography so far, and running the Web Portraits Zurich project has given me reason to reflect on the process of making cool portraits of interesting people. I’ve contrasted my findings with the ramblings of professional photographers and teachers of the internet (where I learned a lot abouot photography), and have come to the conclusion that most internet sources don’t really have a handle on the portrait process, or they simply like to focus more on gear and dehumanizing people into subjects with gear talk rather than having a conversation on who is in front of our lenses.

Now, understand, it’s not their fault. It’s not embedded in their DNA. It’s just part of the mystique of this easy-lazy-art-form called photography. Cameras and photo gear became popular because it’s easier to click a shutter on a device than painting a canvas or doing a detailed sketch of what ever it is you’re looking at. When you shoot with a big camera it makes you feel important, but there’s a reason I don’t take myself too seriously. There’s this romanic ideal of photographers being like painters and artists delving with their whole soul into the artistic expression of the portrait. Photographers are expressing the inner soul of humans for all to see in the printed or screen viewed image…however…

A person is not a subject

Simple, and to the point. A lot of folks get into photography because it’s cool – like I did. I drew things in math class because it was interesting, I started with photography and Photoshop because the gear makes it easy. There’s a romantic notion embedded in the collective history of photography of capturing emotions and elements of people, which would otherwise be lost forever as the second-hand ticked over and the present becomes the past and that look is lost forever (unless captured by the photographer). But a person is not a subject. Even models have names and personalities, but photographers sometimes like to ignore those humanizing notions and instead focus on the technical process of focusing light onto an image capture surface (like film or a digital sensor).  Afterall, we’re all engineers and poets, painters and scientists. But I like photography because it opens a door to the non-technical side of life. Models are not Barbie dolls. I know of what I speak, for I shoot pictures of Bratz dolls when I just want to photography plastic people. However, this gets boring quickly, and is a subject best suited to those moments when you’re looking for a way to till time but don’t want to sit in front of a television.

Photographing people is distinctly different than taking snapshots of Bratz dolls because with people you now have the opportunity to interact with the person. If you’re into photographing people, then just think of the process as an extended conversation with some visual elements thrown in. When you start saying things like, “I lit my subject with this and that camera and photographed them with an 85mm f1.2 lens…” Well, you’ve lost the point of the conversation. If you listen to professional photographers they’ll tell you to talk to your subject. Get to get to know them, make them feel comfortable. But here’s the thing, small talk like, “what do you do” “what’s your favorite color” “where are you from” is just filler talk. You’re probably doing it so the person doesn’t feel ignored but not because you really want to know who they are. This type of small talk simply says, “I’m just interested in my camera and making an image and you’re just a body…so smile.” This technique can be effective given the right situation. But is that the more interesting way to shoot? Is it more interesting to shoot a Bratz doll (who can’t speak) or to listen to a person and make a picture of them as well?

A Portrait is just Conversation

A photo session is just an extended conversation in my mind, and if you start out talking with people with an authentic voice, then the photo session will just be an extension of that initial, real, emotional connection. If you starting shooting like a pornographer and only start talking when you notice your subject is looking uncomfortable, then the whole positive momentum of the conversation has already been lost and you need to sort of start over. Tripping the shutter is the  shortest and least important part of a portrait photo session. But it’s the part that defines the final image. The question is, how does one get up to that point? I Think of the photo session in this way:

Conversation – Lighting/Set – Picture

The more time you take in getting to know a person before you light them with a million-gazillion photons, the more natural the resulting image will be. Or more unnatural, it depends on what you’re trying to achieve, and sometimes every photo session is full of suprises. Once you understand something about the person you’re planning to shoot you can design the lighting (some call this subject driven lighting), build a set or pick a proper location, and then being planning a post-processing philosophy, all before taking any pictures. I like to spend the least amount of time possibly on actually shooting and setting up lighting. The reason is simle, the shutter trip is the most insignificant part of the process if the process was done correctly. Now, maybe you’re going for the whole Stanley Kubrik, make-the-actors-feel-uncomfortable-to-illicit-emotion-from-them deal, but that’s a whole other level of person-photographer interaction. An authentic portrait session starts (and ends) with a conversation.

Most of the technical things about photography I’ve learned from the internet. It’s been a fun time and I’ve learned a lot about light control and lenses and cameras and strange terms like gobos and brolley. But my mind became exhaused and bored with this conent, and I’ve started wondering what else is there. However, when I watch things like creativeLive with Zach Arias or attend a Strobist workshop, I’ve started to notice how technology and lights are always at the forefront, and the whole emotional connection thing is thrown in afterwards, even though people generally admit it’s one of the mose important aspects of the whole process. Those conversations are there, but they’re not focused on in blog articles like David’s article On Assignment: Caleb Jones. Technical side of the shoot is all there, but what was the emotional connection between David and Caleb?

That’s a key element that a photographer like Joey L communicates extremely well in his DVD tutorial (Sessions with Joey L). In his tutorial Joey Lawrence pushes the ideas of trust and emotional connection as being primary, and lighting and camera technology as the secondary elements of a photo shoot (or photo career). This isn’t meant to be a negative critique of Zach Arias or of David Hobby (but it could be viewd as an encouragement or suggestion). The latter two (and internet icons like Chase Jarvis) are just responding to what sells. People love the technology of photography, the lenses, bodies, radio triggers, flashes, etc. People drop big bucks on technology and then wonder why their pictures look lifeless and ordinary when they know the person has a soul and interesting story to tell (like we all do). The thing I love about the Vincent Laforet CreativeLive workshop is that he started out talking about the philosophy behind movies, the story telling and emotional elements, and then got into the gear talk. It sets your head in the right mind-set, to tell a story and to make a connection to the viewers or consumers of the media product you’re producing. That’s not to say I miss the gear talk, it just gets boring after a while.

I love photo gear. I have more cameras than Onitsuka tigers and picked my last apartment based on how I could setup a photo studio. One reason I started the Web Portraits Zurich project was to do emotionally-driven portraits of people (I know that sounds a tad pretentious). I wanted to setup a process of including the emotion of the person in their portrait. I wanted to portray people including elements of how they perceive themselves. I shoot the web portraits based first around the person, and then as a secondary condition around lighting and Photoshop. For each portrait set we start out with a concept meeting, the people I’m shooting get to know me and I start to understand how they see themselves. This is the grounding for the whole photo session, and I see the whole process as one long conversation with some camera equipment and photoshop thrown in as an after-thought.

A person is not just a subject

A photo shoot is just an extended conversation


Yes…I Also Shoot Landscapes

Yes, I also photograph boring landscapes. It’s true. In between Web Portraits and Barbie Hunters and Bratz dolls I shoot landscapes and views of cities. My first dance with the photo mistress started with Women’s Rugby at the University of Michigan (my sister was a star player) and continued in Alaska and then Bolivia with views of the land and my travels. Why don’t you see them? Because there’s a perverse notion in the mind of many photographers that light painting is art, and that you should put up every great image on a webpage called a portfolio and allow casual visitors to get lost in random images of flowers and sunsets. But what is the message?

Now, landscapes are good places to start out and a wonderful place to end. I love them, everybody loves a sunset and I’ve shot some fucking amazing shots of flowers. But one night in a cramped Tokyo dormroom I was watching a video from Photoshelter with Chase Jarvis showing his Ninja images, and I think he said something like, “shoot what you love to shoot, and make a concept around that.” Or…that’s the message I took away from it. Well, I’m in agreement with this mentality, and have decided I want to shoot things with a touch of the strange intermixed in the madness. Strange from the perspective of normal people, it’s all very normal for me to put a Bratz doll on a street in LA and start shooting away. And that’s the vision I’ve been developing in the past year, so you don’t see images from Chaco Canyon or the islands of Greece or views from the high camp of Huyana Potosi in Bolivia on my website or online profiles. It’s easy to make a great landscape image, just go to an interesting place and snap the shutter release. I’ve been of the opinion that I should challenge myself and instead try to go to interesting places in my head, and then translate that somehow into a digital image. But the truth is, I was looking back on a few piles of developed Provia, and decided that I should at least see what was there.

It turns out, from reviewing the evidence, that I’ve trekked over a collection of interesting places, and amassed a nice collection of interesting images, and it’s time to post a few for the world to see. I’ve sort of always been into exploring. It started in the basement of the house I grew up in when my mom brought home old toys from rummage sales. Then I started climbing trees in the backyard and now I ski tour in the Swiss Alps. Sometimes I travel in my mind, sometimes in Science, but always the pull of the world, undiscovered from my eyes, has drawn me to various parts of the globe. Along the way I started shooting with a Fuji GA645, because 35mm was too small and the rise of digital make medium formate affordable to the masses of people like myself with more drive than money-sense. The Fuji GA645 and GA645w make amazing images with film like Fuji Provia. However, for the longest time I didn’t have a scanner (like for four years) to actually get the images onto my computer. About a year ago I rented a Nikon LS-9000 and spent a weekend scanning film like a hermit-mad-man-artist-wannabe.

There is something about the landscape, it is exploration. It is also isolation, and the reason I got away from it is because shooting people is just more interesting. You can not interact with a landscape, can not ask it why it is or what it sees itself as. The best you can do is to stay mobile, to experience the landscape by walking into the sunset and not back to the car. That’s why I have a small GA645 and not a big 4×5 large format camera. I like to move through the world and record it as I saw and felt it. I don’t take myself too seriously, it’s the hubris of the photographer to believe that their pictures have any real value. I don’t want to be one of those guys who goes into the fetal position, hurt and sobbing in tears when you ask them if they used a filter for that landscape of the Grand Canyon…

“It’s NOT the camera, it’s ME, the PHOTOGRAPHER!”

We all want to be loved (the only thing really worth feeling in life). The photographer (like any “artist”) wants to be loved for who they are, not what they produce. The beauty should exist forever on a canvas or print. The scientist is humble, and wants to remove emotion from their creation – but technology is developed my mortal humans, not cold computers. So it’s a hard pill for a budding landscape picture snapper to grasp, that their camera is the soul of the medium, and no one person is so special. We grow up with so many stories of being special, that it’s hard to comprehend our ordinariness. You see, probability is on your side, if you shoot one thousands frames, at least a few are going to be “good.” I think everyone is a capable artist, you just need to find your medium and your audience. You’re not talented, you’re not special, you’re just chasing a vision with determination. That is what makes the difference. We are all empowered to create beautiful things in life. It’s like when you head to the Picasso museum in Paris, yes, some of his stuff is interesting, but when you consider that he produced something like 50,000 works of art in his life, it makes statistical sense that some of it will be good. Now go to the Picasso sketches gallery in Luzern – which is full of nothing but crap paper scribbles he did for no reason. The place isn’t worth the admission fee to see – because it’s not any better than I would do if I felt like sketching large forms of voluptuous females all day.

I use landscape images to remember a time. They often tie together with pages from my moleskin journals and the words are one with the colors and shapes of the land and cities. But I’m not hurt when no one else makes that connection, and only sees a sand dune instead of an expanse of my soul warming in the morning Colorado sun. It is the communication of an emotion which we respond to. Make it real and authentic – allow the audience inside, allow them to connect to the vision, and you’ve created something timeless. I don’t create timeless, I take snapshots of places I go and people I meet.

If you keep chasing that vision in your head, good things are bound to happen. I got away from landscape photography and turned to portraits of people because it gave me a way to interact with my fellow human beings in a new and fulfilling way. I don’t have landscape images on my website because I wanted to focus on something else – there’s been a vision in my head and I couldn’t figure out what it was, but it was coming through in the self-portraits and abstract Lazy Art and in the Barbie Hunter and the Web Portraits. There were (and still are) shadows of understanding you see – in the grunge, in the shadows gradations, and I feel a need to chase it.

Don’t take yourself too seriously. You’re no more special than the idiot adolescent standing next to you. Just because you made one nice picture doesn’t mean it will happen again. Everything has already been photographed and every idea has already been thought of in a another place and another time. The details change but the vision stays the same. We want to be respected and loved, and if you see that reflection in the photograph you’re holding, then it’s a good image.

It’s Good to Know Photogaphers with Weapons

It’s good to know other photographers. It’s good to meet, and to discuss things like life and vision and get some perspective from other creative people. It’s good to do collaboration shoots, the two of you decide on an idea/subject to shoot and work to make it a reality. And lastly, it’s good to know photographers with weapons. The conversation went something like…

“Ummmm, do you want to do a creative shoot in your studio?”
“Yeah, sure. Just come over with some stuff and we’ll do a martial arts shoot.”

Ethan from Zurich did just that. In addition to being a photographer he’s also into martial arts, and in addition to a ThinkTank rolling case he walked through my doorway with bag of fun including numbchucks, short swords, and an Onitsuka Tiger jacket. From my side I provided the studio space and lights, along with a Katana. It was the perfect time to add to the Urban Ninja series I had started last year. First we decided on some lighting and then I posed with a pair of my green and white Onitsuka sneakers and the white jacket.

As the night wore on I switched from the Katana to posing with numbchucks and short swords. Posing like a comic book ninja isn’t easy when you’re at it for a few hours, and it equalled a night of climbing in the gym. Plus, when you first start posing with nunchucks you’re careful and timid, then you swing them around a bit, channel the spirit of Bruce Lee, get brave, and start accidentally hitting your head and elbows. When the temple gets hit, that’s when you know it’s time to switch up the model-photographer role in the shoot. After shooting me for a while we switched, Ethan took to posing with deadly blades and I took up my Sony A900 to shoot with.

Authenticity is Key

Posing with weapons is probably the hardest thing I’ve done photographically speaking. It’s easy to think up a cool image (Urban Ninja Concept to Photo), but finding the right model to pose authentically is harder than you might think, and in the end it’s easier to be model and photographer. I mean, as a guy with a childhood American Ninja fantasy, it’s natural for me to bust out a Katana attack pose. I’m always bewildered when the female models I shoot don’t do the same. The thing is, unless the model is really good at taking direction and is athletic, they probably won’t know how to pose with a sword with any authenticity. The worst thing you can do is pose a guy or girl with a sword and expect it to look good just because…

“ummmm, you know, hot women and dudes with and swords are cool!”

Right, just like adding a gun to shoot makes a woman “sexy” and “dangerous.” Think what you like, but I’m of the opinion that an attractive woman who doesn’t know how to hold a sword will just look awkward, and the resulting image will look like crap, unauthentic, and generally be a waste of time to look at (but only if you were going for authenticity in the first place). For example, when I did a shoot with Alexandra, it was obvious that the Katana was too heavy for her, but since we were shooting the Barbie Hunter concept, it fit – because Ninja-Authenticity wasn’t the subject of the shoot. It was awesome doing an authentic martial arts shoot with Ethan. He knows the pose and understands the form of the body and how this all relates to the position of the sword or other weapons. Ethan could probably kill me five different ways with his pinky finger before I realized I was standing in a blue tunnel and as a bonus he has a sweet look.

The Urban Ninja

For the Urban Ninja look I gave Ethan a mask and a pair of welding goggles to wear while he stabbed the air with the short swords. For lighting I used my Creative Light softbox (60cm x 90cm) with a grid from the side and my Elinchrom BxRi 250ws strobe. I had a Sunpak 383 in a Kacey Beauty Reflector high from the opposite side, and there was fill coming from a Lastolite TriLite reflector kit. I post-processed this image with a couple of texture layers, creating a color transition from top to bottom and gave it some grit.

I also shot Ethan with numbchucks wearing the Onitsuka jacket, lighting him only with the gridded Creative Light softbox and added fill from the opposite side with a large silver reflector. With his bald head and muscle-memory knowledge of martial arts, the images of Ethan are just fantastic. This will sound strange, but I love shooting guys with bald heads. You can really focus on the features of the face without getting distracted by the hair. Without the hair your attention is drawn so much more to the eyes and I think this makes for interesting portraits.

More Info

To check out more on my Urban Ninja Concept here are some other posts.

To see more of Ethan’s work check him out on Flickr or his website.

Stroking the Photography Ego: Published by PopPhoto For Free

PopPhoto-02211-EditIf you spend too much time reading about Web 2.0, it’s easy to get confused with the transmission of creative goods and hopeful returns in terms of money in the internet economy. If you read Wikinomics and practice your life in a Web 2.0 way, then nearly anything you produce should be given away for free. If I produce a photo for An American Peyote Scribble article and post it to Flickr, then I’m part of the philosophical web photography industry where information exchange is the medium (as opposed to hard goods). An internet publisher writes an article, posts a photo, and thereby produces a commodity (say a digital image or story) which is consumed by a consumer (random person on the web – you, the person reading this blog article).

Via Flickr I got an email from the editor of the PopPhoto College Edition magazine about using one of my images in an upcomming issue. My first instict was to think about publication rights and compensation. At this point, there are two basic reactions flowing through your brain: one is the joy that someone likes what you did, the second is the question of monetary compensation for a creative work. When you sell or license a creative work, I’m of the impression that you’re selling or licesnsing the actual medium (digital) and as well as the concept contained within that medium. The reason for compensation is generally obvious, a magazine makes money from subscribers and advertisers (really mainly from advertisers) and therefore photographers should be paid for their work when a magazine editor calls and requests usage of a particular photo.

Spontaneous_Freedom.jpg

The image in question is a self-portrait I shot on a weekend afternoon to experiment with my new full-length reflector. I could have demanded money, but that’s not what the image was produced for. It was produced to be displayed on Flickr and my blog, and to not to be used with out consent from myself. Does allowing use of my image without monetary discourse degrade the overall economic potential of the entire photography market simply because it is being published in a freely distributed printed magazine as opposed to say, the Strobist website? Photos from Flickr are used everyday on websites that bring in advertising revenue for the site publisher, and generally no money is set aside for the creator of the image.

If your photo is posted to the Flickr Strobist Group, and used in one of the posts on the Strobist website, you’re also allowing publication to a money-generating entitiy without prior (or future) finanical compensation. The same goes for photos posted to PSDTUTS and a number of other Flickr groups. But this isn’t considered to be a bain on the entire creative industry (and shouldn’t be). You post your photo to a popular Flick-website-integrated entity and get exposure to a wide audience, the site gets content for the readers and the advertisers pay to keep the site going, since they get exposure to potential customers (the readers of that particular site). To close the economic loop, the groups which I post my images to are generally linked to my digital imaging education. I’ve learned a great deal from both the Strobist and PSDTUTS websites, so I feel like it’s a fair trade if they use my images on their site, despite the fact that I’ll receive no monetray compensation from advertisers. In the end, services and digital goods have changed brains, been absorbed, and I receive a free education as they receive rights to display my images on their sites.

For the past year I’ve mainly been shooting myself, this gets boring occasionally, and I’ve since expanded to organizing portrait parties and TFCD model shoots. Why? Because it’s a challenge. Everyone is cool and beautiful in their own way, and it’s far more challenging for a photographer to make themselves look interesting than simply photographing a stylized movie star. Some say that nothing which is free has any real value. And something which is useless can never be truly beautiful. Some practice a free photography based (non?)business model and others push a traditional photography business model. Does giving PopPhoto permission to publish my Flickr photo devalue the cumulative impact of the creative industries? Did I grant the publishing rights for my Flickr photo just so I could write this article? Perhaps, but that’s the beauty of being a Creator, you have the ability to control (to an extent) the use of your digital productions.

Heavy thoughts on any day of the week.

Creative Spaces – The Home Photo Studio

home_studio-6The Home Photo Studio is one of those elusive mystical quests many photographers embark on once they’ve figured out f-stop from shutter speed and come to the realization that a little bit of controlled light goes a long way in defining a final image. And once you understand that you think,

“if only I had a few studio strobes, softboxes…and naturally a background, I could then start making amazingly-beautiful pictures of…books, cats, the kids, models, and…whatever!”

The point is that before you get fully ripped in the studio lighting equipment “buying stage” you may want to take pause and ask “why?” Do I really need a ProFoto Pro-7 setup to take portraits of my kids? Yes, because in a studio…magic happens. A studio is one of those sacred places in a home or apartment, a place away from the madness of the world where any caffeinated kid with a camera can make some lighting magic happen. But how? And for how much? Everyone wants a loft in New York filled with backgrounds and wet bar for the models, but reality means you’re generally lucky if you can get a free wall to shoot on when no one else is at home.

There are two essential elements one needs to consider for the home studio: space and light. By manipulating these elements you can create whatever magic you like.

home_studio-7Basic home-studio setup:

1 Lightstand
1 Modifier (softbox/umbrella)
1 Bracket
1 Trigger Receiver Device
1 Camera
1 Manual Flash
1 One Trigger Device

With this basic setup you can expand in whatever direction you like – location oriented, studio oriented, reselling your gear on eBay (when you find a new hobby), it’s all possible from this simple starting point. With a flash on a lightstand, and using a light modifier such as a softbox or umbrella, you can soften and direct the light as you see fit. This of course gives you the option of having hard light (without a modifier) or soft light (with a softbox/umbrella). The initial monetary investment is low (compared to a nasty heroine addiction), the gear can be had for about $250-$400, depending on what you buy. The type of trigger and camera are pretty irrelevant in the early stages. If you’re shooting for the web or to make normal prints, well, you don’t need a Canon 5D-II and the 85mm f/1.2 portrait lens. The money could be spent elsewhere as the lens won’t dramatically improve your images – where as a new reflector or strobe could have a comparatively significant effect. Since 90% of photographers seem to think they “need” the latest DSLR, the used market is saturated with old Nikon, Canon, Minolta, Pentax, Olympus and other random digital camera bodies. Currently I still shoot with a 6-megapixel Minolta 7D. All you “need” is a camera that allows you to set the exposure manually and a flash that allows the same. If you’re shooting in your home, you don’t need a Pocket Wizard setup, you can go with cheap radio triggers from Gadget Infinity or just connect your flashes using PC cords, but if you have the money, “why not?”

home_studio-3Expanding Your Studio

Once you’ve setup a basic lighting package the inevitable question is, “what to buy next?” My response is “nothing.” Use what you have till you get to the point that it’s limiting, and then thinking of adding another light, but not before considering the following.

Reflectors

The basic lighting kit is easily expanded on by adding another stand, reflector and boom arm. The reflector allows you to fill in shadows, and thereby start producing a well-balanced image. If you have one flash and are thinking of buying a second, I would recommend getting a reflector instead. They cost less, don’t require batteries and provide a great deal of reflective surface area that a second flash can’t do on its own. I have a long 5-in-one reflector which can be used with silver or gold coverings, and also can be used in shoot-through mode as a giant softbox.

home_studio-4Boom Arm

The boom arm allows you to position a second flash in various positions around your subject, and can be had for $40-$50. Once you use one, you’ll wonder why you ever went without. Like reflectors, boom-arms are often overlooked by the aspiring light painter as “unsexy” additions to the lighting kit. However, it’s an essential piece of gear which opens up new dimensions to your lighting design. With a boom you can put softboxes in close, directly over-head, to the side, however you like, and thereby really design with precision how your subject will be illuminated. The combination of lighting setups now starts to grow exponentially.

Background

There is a perverse notion that you need to buy a background for a home studio. If you have a free wall to start out with, by all means just use that. When you’re starting out it’s easy to get overwhelmed with choices, background type, color, where it should be placed, etc. Keep things simple at the onset, and grow as you need. In many situations, the background should be the smallest focus in your quest to acquire more gear. Besides, I’ve never liked the idea of hanging a tie-dyed piece of cloth behind people I’m photographing, and hope to never fall into that cliche. Any white wall, brick wall, or variant thereof will do. It doesn’t have to be large or tall or wide or fat, for a head shot, the background can be just a few square feet. In this case you can go for a pop-up background. Sometimes you can use a 5-in-1 reflector with a white or black cover, but there will probably be a lot of wrinkles in the material, I would recommend going with a dedicated pop-up if you go this route. Some of my favorite portraits were done with the equivalent background of just a few cinder blocks in a cramped basement. However, if you have the space, a wide background can be very nice, especially if you plan on filling the air with random volumes of flying coffee. Just maximize the resources you have. I dedicated part of my aparment to a full-lenght paper background setup, and have never regretted it.

home_studio-5Space

This is generally the biggest problem, as renting studio space is usually not an option, and generally, neither is moving into a larger place. In general you need space to do stuff in – this is clear. Ideally, the more space the better. But there’s something I’ve learned in life: When you know what you need and want to do, it makes sense to get the best you can afford. However, in all other situations, in particular those when you’re just learning, it makes much more sense to buy the cheapest stuff possible with poor performance, because you are then forced to excel in less than ideal conditions. Placing yourself in a challenging situation makes you smarter, stronger, and more capable.

While lights and backgrounds can be bought, borrowed, or rented, during shooting sessions space is generally at a premium, and the occasional photographer will end up using whatever is available. The question is how to use that space effectively? If you have one white wall free to shoot on you already have two background possibilities. One is white: throw light on the background and “blow it out” which is a fun little overdone cliche. Persoanlly I think that the background is as, and sometimes more important than the subject. Something more interesting is to place your subject well in front of the wall, and only provide enough light to illuminate them. If the light hitting your subject is more intense than that hitting the background, you will make the wall turn a nice deep tone of grey. The key to using a small space effectively is controlling light spillage. You want the light from your strobes to hit your subject, and not bounce off the walls and ceilings. I’ve photographed in spaces ranging from a large open parking garage to a cramped dorm room in Tokyo. There’s always a way to get the lighting look you want no matter the resources.

The Gist

Basically, no matter what you’re doing in life, you have to learn how to use minimal resources to your advantage. Want to create a man-floating-in-the-air shot? Throw a mattress on the floor just out of the frame of the lens…and jump. Rearrange bookcases and take pictures off the walls to create space, use white walls and ceilings as giant bounce reflectors. Actually, if you learn how to effectively use a small space, where random light bouncing from exposed walls and the distance from the subject to the background are critical factors, then you’re probably in a better position than if you had started out in a large studio with all the resources at your disposal.

home_studio-8


Tokyo Scribbles – Ginza the Luxury Godzilla

ginza-8Ginza is the Tokyo shopping district which makes Bahnhofstrasse in Zurich look like an outlet mall just off Route 66 in Arizona. Every major clothing marketer is there including the likes of Prada, Eddy Bauer, Levis and Apple. In addition, a number of camera manufacturers including Nikon, Canon and Sony have showrooms here, as well as sword shop selling hand-made Katanas. If you’re in Tokyo, Ginza is a cool place to walk around and gaze in awe. Gaze around in awe of amazing architecture, fantastically expensive clothing and visit all the camera show rooms you could imagine. You can buy any luxury good, and probably find a vodka mixed with glacier water imported from Antarctica if you look hard enough. But the looks are for free and digital pictures cost nothing to take.

ginza-5Despite the concentration of camera shops, Ginza is one of the worst places in Tokyo to buy cameras and photo equipment, unless you’re a collector. The stores there are basically vintage Leica vaults – filled with all manner of limited edition gold plated 35mm Leica paper weights one could want. Rollie twin-reflex cameras and the occasional and Western-rare Fuji 6×8 medium format rangefinder are also floating around, but Ginza is really just focused on filling the needs of Leica and Rollei collectors. For cameras you have to head to Shinjuku (Yodobashi and MapCamera). ?On the weekends the main drag in Ginza closes down to cars and you get to walk wherever you like. This is especially cool when the sun goes down and you can capture excellent views of the buildings from the street vantage point, a location generally difficult to have in any city of the world on any given day.

ginza-4Like many parts of Tokyo, the architecture is new and snazzy and excellent for taking snaps, or even “photographs”. The weekends are also a nice time to do street photography, whatever the exact definition, if you enjoy taking photos of people on the street, a day trip to Ginza on the weekend will provide you with countless subjects. The Japanese population is generally well acclimated to having their picture taken, it’s a street photographer paradise.

ginza-2As with many districts of Tokyo, if you’re street shooting, you’ll have a lot of company. I was walking down the main drag, and a photographer caught my attention. He seemed overly excited, almost like a giddy school boy at a candy convention – and then I saw the object of his obsession. A woman was chilling by the street light and this guy was having the time of his life shooting her, she didn’t seem to mind too much – as if she were used to the attention, and just stood their posing and smiling. Even when a second guy showed up and started clicking away she just kept the pose. I took the photojournalist angle and photographed the guy shooting the woman chilling by the street post – being photographed by another guy. Naturally, and in unique Japanese photography fashion, I was sporting a Ricoh GR Digital with the optional 21mm add-on lens. The skies were deep blue and set the stage for fantastic portraits of the city.

ginza-6Most parts of Tokyo look awesome at night, but Ginza is special. The main street is extremely wide, and on the weekend when the cars are forbidden to drive there, you have fantastic views of the buildings. Grab a tripod and setup directly on the double yellow lines of the street, turn around in awe of the magical light spectacle around you, the view still haunts me to this day. Whatever you do in Ginza, don’t miss this sunset magic hour, the time when the sun is going down – and in that magic 20 minutes when the sky is blue, the city lights are up, and you have time to kill, this is the best time to do cityscapes and capture those sights you can only experience once during the short 24 hours squeezed into a normal day.

ginza-7

Pelican 1510 Photo Gear Case

Pelican 1510 Lighting God
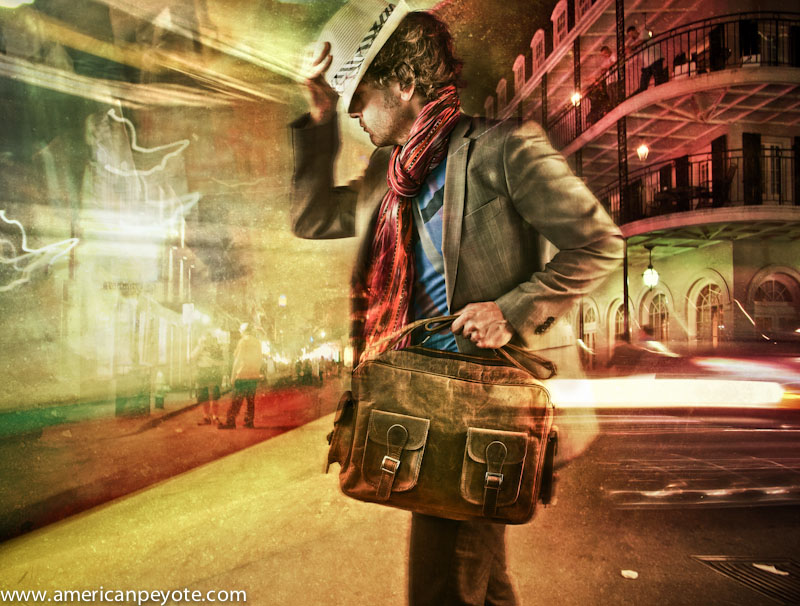
When one gets deep into photography the inevitable question becomes, what can I store my gear in to keep it organized, accessible, mobile, bombproof and cool when jet-setting across the globe? The default answer is a Pelican case. Although now a cliche – Pelican cases are still the gold standard in photo gear protection. I bought a Pelican 1510 for various reasons, but the primary being that I needed a mobile case to house my gear for locations and for taking whatever wherever I desire without worrying about stuff breaking in-transit. I’ve used my 1510 for over half a year now, on planes, in my apartment, anywhere I decided I needed it to be (mostly my apartment).

I buy my gear used and don’t upgrade my DSLR every two years. I just haven’t seen the logic in stopping my acquisition of camera gear, and once you have a fine collection of cameras and lenses, the natural desire is to push it as far as possible on a given budget, and what better way to do that than buying a nice case to keep and transport everything in?

Additionally, I was tired of looking around for ways to pack gear, put some stuff here and other stuff there, and wanted to consolidate everything in one reliable, robust, portable container. The Pelican 1510 is perfect in this respect for a small production photographer (or random Flickr poster). It’s uber portable and aside from being checked by security nearly every time I go through an airport, it’s been a joy to use on the airlines. So far it’s been between Zurich, Boston, Detroit, and Zurich. In nearly each place I get checked at the security line. It must have something to do with the case, because on previous trips with more or less the same gear distributed in my carry-on luggage I was never pulled aside. Of course, it makes a bit of sense, with three or four flashes all lined up side by side, the case does no doubt look like some sort of munitions case on the X-ray machine.

Then come the inevitable question, “are you a photographer?” Ahhh, no dude, I just carry a box full of cameras and flashes because it makes me feel cool (ok, this “is” close to the truth). In Boston the TSA guy asked where I was going and recommended the lobsters in Baltimore…or maybe the chowder, I can’t remember. He also mentioned something about this looking like a lot of equipment for a hobby. My natural response to him was, of course, “well, you gotta have a hobby.”

pelican_1510-2My hobby sometimes includes hanging off of parking garage supports or skipping around abandoned factories in my Doc Martens, and photographing the concept images using off-camera small strobe techniques. This was the main reason I got the 1510, to roll around as needed in any given urban location. At any given time my Pelican 1510 contains 4-5 flashes with Gadget Infinity radio triggers, a DSLR (Minolta 7D), 2 lenses (20mm and 50mm), my Hyperdrive, maybe a Zoom H4 cable release, extra AA batteries, memory cards, plus a vertical grip, and Ricoh GR Digital or Fuji GA645w. In general, almost all of the above fits nicely in the 1510. I can grab what I need and shoot instead of worrying about gear organization. I just choose the light modifiers and stands I want to use and I’m off. Now I never need to look aimlessly around wondering where I put that extra hotshoe adapter or if I have some extra AA batteries somewhere. It’s all there when I need it and I can take wherever I want to go. The stock 1510 comes with pluck foam, but I opted for a version from B&H which came with dividers, and I added the optional photography organizer for the lid. This was an extra $40 or so, but I highly recommend it if you plan on using the 1510 as a traveling toolkit. It’s worth the extra few bucks without a second thought.

The 1510 with its rolling wheels is also handy around the house. People living in an apartment which doesn’t have a dedicated studio room often need to setup their studio and break it down before their husband/wife/boyfriend/girlfriend starts complaining about having the living room back, and it’s a breeze to roll the Pelican from one room to the next. This has changed somewhat since I moved into a big place with space for a small studio, but it’s nice to know the functionality is there.

There are cheaper options of course. You could, for example just get a clear plastic case and drop your assorted flashes and gear in there. It would cost less and still be nearly as functional. However, I like gear that can be abused if needed. Plus, you can stand on it in a lighting storm to insulate your body from extreme electro-shock therapy of Mother Nature during thunderstorms.

pelican_1510-3I like the security of Pelican cases and knowing that I never have to worry about the stuff I put inside them. The only time I ever opened a Pelican case to find the contents broken was when the TSA decided they needed to break open every fucking chocolate Easter bunny which I had packed in my 1450 (as checked luggage) as a present for my niece and nephew. Because, obviously if I wanted to smuggle drugs into the country I would do it in chocolate Easter bunnies which were still in the sealed packaging they came in from the store I bought them at in Switzerland. Which brings up another point, the 1450 is the perfect travel companion to the 1510. I can use my 1510 primarily for my lighting kit and then pack my Minolta 7D and assorted prime and zoom lenses into the 1450 (which is paired with a Pelican camera bag). The 1510 counts as the normal carry-on bag, the 1450 can counted as a camera bag. Since the 1510 is bomb-proof, it’s not light, and some people could run into the problem that it’s too heavy to take in the cabin. However, for myself it hasn’t been a problem.

So, if you’re in the market for a mid-sized bomb-proof rolling case for your photo-related mayhem consider a Pelican 1510 ?- I highly recommend it. If you’re weight consious I’d look to a rolling Kata bag or a backpack.