Concept to Photo

Alexandra – Anatomy of a TFCD Model Shoot

Barbie HunterA little while ago I started networking on with models on websites like Model Mayhem and Stylished to organize some shoots. One day I was reading my email and saw a contact from Alexandra (MM# 809690) on Model Mayhem, she liked some of my shots of Amber and we organized a TFCD shoot. What follows is an article on my approach to organizing ideas and lighting scenarios for the shoot with Alexandra. I took a project management based approach in this case. This included a pre-shoot meeting, concept development, and laying out all the ideas, resources, and equipment in a mind map project file. Organization overkill for a basic TFCD shoot? Some will say yes, some will say no, and some will have no clue of the appropriate response.

Alexandra-4Pre-Shoot Networking

A Time For CD (TFCD) shoot is the digital incarnation of the Time For Prints (TFP) concept developed in the film area. In the purist form this means that a photographer and model work together, both contributing their time and talents free of charge, and in the end both use the resulting photos for their respective portfolios. In this particular case Alexandra (the model) contacted me (the photographer) via Model Mayhem. We discussed a few details and expectations via email, and then met in Zurich one fine Saturday afternoon to discuss concepts and logistics in person. During this meeting we decided to shoot three photo set concepts with different outfits in my studio. Those concepts were…

  • Basic spring dress
  • Business suit
  • Hippy Ninja – Barbie Hunter

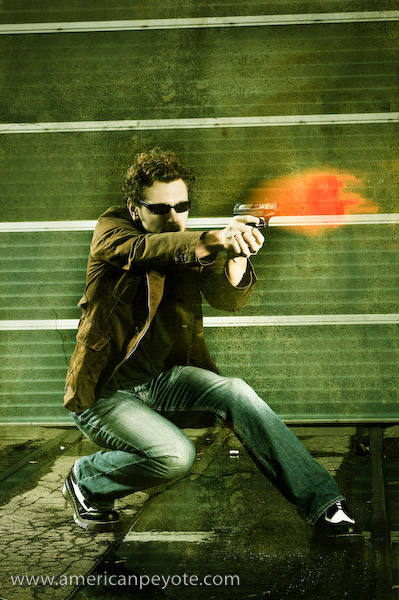
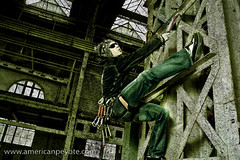
The spring dress and business suit ideas were basic, safe concepts, sure to result in some usable images. The Hippy Ninja was a riskier notion I wanted to work with – an adaptation of my Urban Ninja photo set.

Photo Shoot Project PlanningAlex-08.06.09_Concepts.jpg

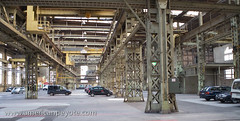
There are two extremes to the approach of organizing a photo shoot. On the…let’s call it Conservative end you have a photographer planning each and every detail of the shoot from start to finish. On the…let’s call it Liberal end, you have a photographer showing up with a camera and lights and doing everything “in the moment.” The former sounds calculated and boring, the latter a romantic vision of what a creative photographer “should” be like. I’m a mix of the two, and I happen to know that the best example of Gonzo journalism ever written: Fear and Loathing in Las Vegas, was not written in the Gonzo sense of a reporter furiously filling up a notebook and sending off directly to Rolling Stone for publication. Fear and Loathing was a great short story which took a lot of work to translate into a novel. It’s easy to be creative and spontaneous in “the moment”, but translating a vision into a solid tangible photo concept is another story. So I just did what I do best. I took my project management skills honed in the academic research world at ETH Zurich and EMPA and built up a project plan detailing all the shooting concepts and resources required to complete them using a little Computer Aided Creativity.

The photo concept stage started with our first meeting between myself and Alexandra. We came with our ideas of what we wanted and came to a middle ground. I took the notes from my meeting with Alexandra and started creating a mind map on my PowerBook. I used MyMind to list and then organize all the elements of the shoot, listing the photo ideas, what would be needed for each concept, the lighting style I wanted, and my available resources (cameras, lights, etc), and finally what I would rent or need to buy for the shoot. The mind map isn’t necessarily a rigid plan for the shoot, rather it’s used here to collect and organize all the ideas. Since I’m acting as financier, creative director, photographer, and post-processing artist, I can change the game plan as needed. The organization of ideas is useful so that way I remember to buy a couple of Barbie dolls to remove their heads for the hunter necklace, in addition to buying fresh flowers for the Ninja head dress. Although I love my Minolta 7D I rented a Sony A900 and the Zeiss 24-70 lens from GraphicArt in Zurich. Why? Well, mainly because I’d been using a Minolta 7D for many years and now wanted something with better resolution, auto-focus accuracy and dynamic range.

Camera:BarbieHunterSetup-00828.jpg
Sony A900
Zeiss 24-70mm

Lighting Kit:
2x Elinchrom BxRi 250ws strobes
2x Portalite softboxes
1x Elinchrom beauty dish
2x Sunpak 383 flashes
1x Kacey Beauty Reflector
1x Orbis Ring Flash Adapter
1x Lastolite TriLite Reflector kit
Skyport and Gadget Infinity radio triggers


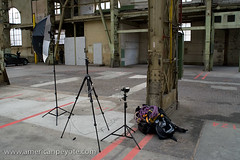
Photo Concept: Color and Lighting Design

The three different looks would require different background colors and lighting designs. My backgrounds included dark green, deep red, and storm grey.

Summer Dress

Yellow summer dress with different scarfs (picked up at H&M and from my closet). for the spring type feeling I went with my green background and main lighting via the BxRi flashes using a softbox and beauty dish. We also added a deep red scarf and a few hats. The lighting scheme was to use the BxRi flashes, a large softbox light with the beauty dish for some directionality, giving some deeper shadows and better definition on the skin. The dish also provided nice sort of hard shadows over the brim of the hat to form a vile over here eyes. Lastolite TriLite reflectors were used to add fill from beneath.

Alexandra-3.jpg

SuitSetup-00677.jpgBusiness Suit

Here I shot with a deep red background, contrasting with the black suit Alexandra wore and giving a moody feeling. I pulled the cushion from my couch for Alexandra to lounge on and we also did standing shots. For these shots I used a beauty dish, softbox, and added fill with a Sunpak 383 in an Orbis ring flash. I setup the softbox on a boom up high with one BxRi. The second BxRi was in a beauty dish on a boom and used as a shaping and fill light to create some moody shadows and balance out the light from the softbox. The 383-Orbis light was used to fill in more of the dress, as it was a dark fabric it needed more light to define the texture.

Hippie Ninja – Barbie Hunter

At some point in the concept stage I remember thinking something like, “It would be sweet if she were a Ninja hunting Barbie and Bratz dolls and then made a necklace from their severed heads.” Here I wanted a harder look, and deviated from the softbox-beauty-dish combination. Two softboxes were placed directly perpendicular to Alexandra, creating definition on her arms and side (think Joel Grimes). The TriLite reflectors added fill to her front, and a Sunpak 383 on the lowest setting in a Kacey Beauty Reflector was used high in the front.BarbieHunterSetup-00828.jpg

Post Processing

Alexandra originally contacted me because she liked the processing work I do with layered texture techniques. While I made it a point to stay true to these desires, it was obvious that all these images didn’t necessarily “want” to be textured with concrete and graffiti layers. Yes, you read right, I listen to the image while post-processing, the colors and shadows speak to me and we build the final image together. No, I don’t do drugs, I just listen to the rhythm of the world. In the end I worked on the images Alexandra chose for her portfolio and applied the urban style I like to play with. However, for many images I left them mostly true to the in-camera look. Naturally I modified the shadows and color feeling, but for the Barbie Hunter images, I wanted Alexandra to stand out – contrasted with the Barbie Head necklace.

Barbie Hunter

Wrap-Up

Shooting with Alexandra was pretty cool. We did a few safe image concepts and then moved into the experimental territory with the Barbie Hunter. I loved doing the pre-shoot planning and concept design. The more time you put into pre-shoot planning, the less you have to worry about during the actual event and everything will just go smoother. The Elinchrom BxRi flashes are awesome and the Sony A900 + Zeiss 2470 is a sweet combination. Many people will tell you to buy the more powerful 500 ws strobes, but the 250 ws strobes have a fast recycle time and provide more than enough light for my current studio setup. I got Elinchrom strobes from Profot in Switzerland.

Alexandra-2.jpg

What comes next? A photo shoot with Margarita…

Margarita_I-2.jpg

Urban Ninja – Photo to Concept Video Tutorial

Urban_Ninja_IV

Fooling around with video presentations is a fun way to waste a few nights. This one focuses on lighting, posing, and post-processing of my Urban Ninja photo concept. Aside from the concept and posing, which I discussed previously, this video includes a screencast of the post-processing.

The post-processing for the Urban Ninja images was done in Adobe Lightroom and Photoshop CS3. The processing was designed to define and enhance shadow areas of the arms and hands, while the pose of the image is the main element. The face falls off into blackness and shadows, so that the form of the Ninja is focused on by the viewer. Grunge layering techniques were used to add the dark-gritiness I seem to like. Two concrete layers were used here, one I shot in Wintethur, Switzerland, and the second came with the Joey L Photoshop Tutorial DVD. I blended the concrete layers using overlay or softlight, and a few curves and levels adjustment layers were included to better define the shadows. A final color layer was used to give the final color-cast and define the overall image feel. Anyways, to see the full process just check out the video below.

I used black+white adjustment layers to control the shadow depth. With his technique you create a B+W layer, then blend it using Luminosity or, as I prefer Multiply. This darkens the shadows and since it’s a black and white layer, you can go in and adjust the amount of red, green, blue, etc. which is being defined in that layer. This technique can be used in many images so long as you don’t abuse it. In addition to portraits I like to use it for landscape images with a deep blue sky and a collection of clouds. This image below from the Swiss National Park was shot on film with my Fuji GA645, scanned with a Nikon LS-9000 scanner, then worked on in Photoshop, with a B+W layer used to control shadow texture.

Lazy Swiss Sunday – Urban Poet Portraits

Urban_Poet.jpgThere are many boring things to do on a lazy Sunday in Switzerland. You can climb up a klettersteig, go paragliding, chill in a coffee shop, enjoy a movie, brunch in die Giesserei in Oerlikon, tour over a glacier, vegetate in front of the TV, but if you did all of that last weekend, then the obvious option is to go shoot urban portraits in Winterthur. As a Strobist-educated photographer, it’s nice to go out and shoot with someone who actually makes money taking photographs, and has an Elinchrom Ranger RX system. So, on a Lazy Swiss Sunday Matt and I headed to the old industrial area of Winterthur, just outside of Zurich to shoot some pictures that we called, the Urban Poet series.

I’m a bit of strange guy, and when I shoot images I naturally try to infuse a bit a strangeness into the process. Dry Tooling in a parking garage, vintage glacier goggles, and hiding my beautiful eyes behind sunglasses are my thing at the moment. This contrasts wonderfully with Matt’s take on portraiture, which is influenced by his background in photo journalism and wedding photography. He captures the beauty of reality, while I try to do anything but.  Fortunately, I was able to add my hint of strangeness during the post-processing.

Our location was at the back of the Lagerplatz near the train tracks in Winterthur. Winterthur is a historic industrial manufacturing base of Zurich, Switzerland. Since the Swiss economy has transitioned away from large-scale industrial manufacturing and become focused on biotech, medical, and technology companies, the hard industrial areas of Winterthur have gone through a large transformation in the past 50 years. Lagerplatz translates from German as something like loading or inventory place, basically it’s where you have warehouses for loading trains, and is right next to the old Sulzer manufacturing area. Since it’s industrial heyday, the whole area has since been transformed into a hip business location for designers, swanky apartments, a climbing gym, and is the go-to place for wedding photographers who want to make urban portraits for high-paying clients.

The Concept

We had two ideas in mind, one as an experimental action image, and would then go do some reality based shots. For the action shot, I had picked up a toy gun at the store the day before. In addition I took along my Pelican hard case and a simple wardrobe, consisting of Levi’s jeans, a form fitted T-shirt, and olive jacket with nice clean lines. As per Matt’s direction, I kept my vintage motorcycle goggles in my pocket and wore instead a pair of traditional black sport glasses.

The Gear

Nikon D300
Nikon 80-200 f/2.8
Nikon 12-24 f/4.0
Elinchrom Ranger RX strobes
Skyport RX radio triggers
Shoot-through and silver umbrellas
Medium Elinchrom octabox

Urban_Poet-2.jpgBullets Are My Prose

The night before I had been watching Casino Royale, getting ready for the release of Quantum of Solace, so I was pretty geeked to pick up a toy version of the P99 and pretend to be an extra from James Bond, Spy Game or a Jason Bourne movie for 1/100th of a second. The occasional kid would stop to look on his way to the indoor skate park at Block, asking what we were doing, and, “is that a real gun?” For the lighting Matt alternated between hard lighting and flatter diffused looks using the umbrellas. I went with this wardrobe because I like modeling with my olive We sport coat and relaxed Levi’s, the light blue and white of the jeans contrasts well against the green of the coat. Overall it has a sort of hip urban feeling mixed with funtionality of something I actually like to wear. Additionally, both types of clothing give great definition with harder or flatter lighting schemes. The shadows from the creases along the arms give a subtle dramatic texture to the overall image with the right light. I went with my Doc Marten wing tips (model 3989) because their large soles have a very defined edge, forming a nice separation visually between the subject and the ground. Again, the whiteness of the Docs juxtaposes nicely against the coat and sunglasses. It might have been better to have gone with a lighter T-shirt, as the dark grey shirt needs more direct lighting to bring out features of the subject’s torso area. Here it acts more like a visual void in the image, or maybe this is just my science mind making too much of nothing. The gun and Pelican case were added to give some story elements, and because Matt and I wanted to experiment with different visual elements in this series.

Urban_Poet-3.jpgThe Urban Poet

For the main Urban Poet portraits, Matt positioned me well in front of one of the buildings with one of those large garage doors in the background. This renders a nice geometry to the background, without over-powering the colors of the subject. For this shot Matt used the Nikon 80-200 f/2.8 lens, which gives a nice compressed image and control over depth of field to isolate the subject from the background elements of the shooting environment. And, the Nikon 80-200 is of course, very sharp. The lighting was done with one medium Octabox with an Elinchrom head. You can see in the portrait how the light is basically hitting about 1 meter in front of the subject, and then lighting the whole person. For this image, Matt designed a very cool portrait by separating the subject from the background using his choice of lens, and by keeping a shadow on the foreground, he minimizes the tendency of the viewer’s eye to be drawn away from the subject. So, basically it means your eye is drawn directly to the subject and not distracted by either the foreground or background elements. At the same time, having this foreground an background elements in place is what defines the urban environment, and makes the image look cooler and much more interesting than a simple studio shot.

Urban_Poet-4.jpgCould this shot have been done with small flash gear, yes, to a certain extent I’m sure it would have been possible, but if you happen to have an Elinchrom Ranger RX system with a medium-sized octabox, dealing with a small flash Strobist setup is just crazy. The Elinchrom octabox combined with the Ranger strobe heads gives you beautiful diffused light, and using the Skyport RX system meant that Matt was able to control the strobes without moving from his shooting position. If you have an assistant running around changing your lighting settings, then it’s fine to use a Pocket Wizard to trigger your lights, but when working alone the Skyport RX system makes the whole process painless. The use of the octabox is what made this image possible, otherwise it would be more difficult to create this dark shadow seen in the foreground, and hence, the image would have a different character.

Shooting with Matt was a great experience from multiple perspectives.  First, being directed by a photographer and doing what models do gives one valuable experience on how best to ineract with people which I shoot in separate projects. If you’re a photographer who has never gotten in front of the lens, I highly recommend it.  When you act out the part of a model, you become more aware of you body movements, and more aware of the difficulties of taking direction.  So, when you shoot your own projects, you now have a base for better connecting with your models.  You understand what it’s like to be on stage, their insecurities, and it will make you a better photographer.  It’s also important to work with photographers who have a vision and style which differs from your own.  You understand the value of different working methods, different lighting schemes, different portrait techniques, and in the end you are then challenged to reassess your own style  and become a stronger photographer because of it.

More of Matt’s work can be found at his website:

http://www.matthewandersonphoto.com/

Concept to Photo – Urban Dry Tooling Video Tutorial

Concept to Photo Urban Dry ToolingPhotography and text-based web publishing are fantastic tools for communicating ideas across the world. However, they have their limitations. I think in a 3D moving picture mindset, and therefore, it made sense to start communicating using moving pictures and spoken words. Concept to Photo – Urban Dry Tooling is a video tutorial about starting with a concept, and then translating that inspiration into a final photo.

This isn’t a new idea, there are many photography related video tutorials on the web. However, I rarely find one I want to watch for more than 30 seconds, because they’re either boring, or filled with the least relevant information possible. Another problem is that in many ways the photography tutorial video genre has become a dumping ground for marketing videos from photographers trying to emulate Chase Jarvis – the famous commercial photographer from Seattle who is often credited with starting the photo-video marketing movement. However, he’s a unique gem in the chaotic video landscape of the internet, and his videos have yet to be matched for style or content. I’m not a photographer posting a video to show off my equipment and pretend like I have a cutting edge production studio. I’m a guy in an apartment with an old G4 Macintosh and an old Minolta 7D DSLR who likes to think up concepts and express them.

The concept behind this video is simple, compress my creative and photo production process into the upper attention span limit of an average internet video viewer.

This video tutorial was created to fulfill three functions: first, as an exercise for me in producing a video I would want to watch (but I’m weird so this probably doesn’t apply to the average internet viewer). Second to help me understand my creative workflow by packaging it in a video form (teaching to others is the best way to learn). And Third to give other photographers, creatives, and anyone else interested in a new (or old) perspective on the creative process as applied to photography.

Audio was recorded using my Zoom H4, screen capture video was obtained using Snapz Pro X, music was obtained from Kevin Mcleod’s music collection, and the rest is just still images and titles. Some say that soon cameras and camcorders will be one and the same, and they’re right. But in transitioning to the video world I wanted to start simple, and that meant using primarily still images.

Concept to Photo – Workflow Tutorial

For some reason the job details between photographers and scientific researchers are dramatically different, but from my perspective the motivation and work-flows are almost indistinguishable. Maybe it’s just my will to be weird, but when I sketch out a photo concept or think up a new research project, the exact same centers of my brain are working at peak capacity. This was the inspiration in developing this article on the creative workflow from concept to realization as applied to photography.

IKEA Dry Tooling

IKEA Dry Tooling

The generic view of artists is that they’re filled with an abundance of talent and drive and create through pure inspiration – bubbling from a magical fountain in their soul.  The generic view of a scientist/engineer is one of a logically cold calculating individual slaving for days and nights and eventually years with a sort of mad-scientist personality detached from reality – characterizing the world in theories and mathematics that normal folks just don’t understand.

The more I started actually doing photography I began to realize some things would go faster and come out better if I actually thought about them – laid them out beforehand you see. It’s not like I need to define the process in a textbook. After all, photography is Art, the result of intuitive inspiration and amazing talent…blah, blah, blah. But the fact is, as an engineer I acutely appreciate the poetry in a well executed project. An elegant well-thought out project map is as beautiful as a fleeting mountain vista or abstract impression. The link between art and science/engineering/design is indistinguishable, so why not integrate them all? Take the analytical themes of science and fuse them with the free out-of-the-box thinking of art and photography.

I like to take the analysis aspects of science, combine with the project management aspects of engineering, mix with the artistic element of design and cap it off with the fool-proof ease of digital photography and computer imaging. We end up with a total process for the concept develop though image execution and output.

I’m not defining the creative process because I feel a need to before producing an image. Yes I can pick up a camera, set up lights, or not use any lights and produce great images. Sure art is supposed to be free-wheeling and off the cuff and pure inspiration and guess what – so is engineering. Even if you don’t think there’s a process going on inside the nicely packaged computer inside your skull, doesn’t mean it’s not happening. So why not exploit it? Why not explore the creative production process and learn how to improve it?

So, for clarity let’s quickly define the photo production process as:


Concept – Production – Shooting – Processing – Deliverables


Concept

Dry Tooling Concept Sketch

This stage probably doesn’t need to include a camera or computer or anything more complicated than a pen and paper and your thoughts. You just think up what you want to do and start putting it down so it doesn’t get erased in your short-term memory banks. Sure this can be done inside your head, visualize a subject with lights and angles and photoshop layers and then try to produce it directly with a camera. Alternatively setting things down on paper usually brings up more questions. Like, what color should the pants of the model be, will I need a grid to highlight the face or will two soft boxes suffice. Of course, all of this can be worked out on the fly as you’re shooting, but if you can visualize everything before you start, you will naturally get more accomplished and probably get closer to realizing of your vision faster than doing it all on the fly. Essentially the concept stage is there for brainstorming: subject, location, colors, lighting, message, mood, etc. These are realized as sketches, mock-ups, whatever you need. Figuring these things out early means not having to screw around with them later.


Production/Logistics

Once everything is set up in your head, you just need to go through the actual process of producing the work. How will lights be set up, what equipment and wardrobe is needed? Do we need to buy a purple velvet jacket? How about some clear makeup to reduce glare on the nose? Where will the shoot will take place, and how do we get equipment and the models together in production. You could even include a subsection purely for logistics. Screwing things up here means you forgot to bring batteries and your cool new flash doesn’t work or that awesome Octabox is useless because you didn’t pack the speedring. And that means not having the elements necessary to get the image you wanted. Developing equipment lists, maintaining an organized lighting kit which can be taken when needed, and knowing how to set everything up and execute the shooting session efficiently means it could take 10 minutes instead of 60 to get the images you originally wanted.


Shooting

With the concept in your head, and all the logistics worked out and the various elements of the production set up, all you have to do now is press the shutter and head to the next step (in theory). We could also call this the execution stage, but that sounds a tad morbid. Probably it won’t go so smoothly as simply depressing the shutter button, but the point is that if you work out the concept and logistics before you actually start shooting, you won’t have to run around looking for random flashes or light modifiers or – trying to come up with a totally new concept on the fly and not have the resources to see it realized. Many people will say they’re in their “element” when running around fiddling with flash position and making models wait because they didn’t prepare beforehand. I’d rather take the least amount of time as needed to do the actual shooting and move on to Processing the images moving on to the Deliverables. The idea is, get the shot and make great exposures that can be successfully processed into the final image you want.


Processing

In the golden ages of darkrooms and chemicals the main essence of your image was produced in-camera, unless you were a real wiz who lived in the darkroom. I now more or less consider the image from a camera to be a nice starting point – or a possible end point. Processing can be as easy as tweaking the levels or a bit more complicated, leading to various layers, filters, and electronic brush strokes in Photoshop. Processing can mean compositing multiple images together or working exclusively on one from the camera. Processing can make an angry man look approachable or a little girl look like a devil. The colors, shadows, image sharpness, it can all be defined and/or modified at this point to realize the final interpretation of your original concept/vision. How you do it is up to you. My processing work-flow starts by loading images in Adobe Lightroom, editing those images to focus on the images I want, the ones which best communicate the original concept I had. Those are further edited down and the finalists are exported to Photoshop for editing and compositing (if needed), whatever is needed before finishing and moving on to Deliverables. The final images are generally exported from Lightroom (even if heavily modified in Photoshop), primarily because last minute exposure tweaks, cropping, and adding watermarks is far easier in Lightroom than in Photoshop. Depending on your output destination color management is either irrelevant (like to the web) or essential (like for printing).


Deliverables

Website, Flickr, print, Flash movie, printed tattoo, however the image gets from your computer to your audience/client is the Deliverable. Here, beyond sizes, formats, and possibly printer and color profiles there’s not much to enhance or to dilute the vision conceived in the Concept stage. If the Concept-Production-Shooting-Processing stages were done well then the output will look great in any media. If you got lost somewhere between Concept and Processing and forgot to pack an extra flash, then the Deliverable might be lacking, it’s the culmination of everything which came before.


The End?

Here it was and now it’s not, a guide to conceptualizing and producing the fantastic images you want out of your digital life. You can be an engineer, naturally untalented Artist or a librarian, or anything else you can imagine to classify yourself, but if you recognize and follow a process or develop your own and stay true to the vision in your head (and pay attention to the details) the images will come out fantastic. Getting down to Brass Tacs, any project, whether scientific or artist can be thought of as the effective management of resources. You have models, locations, lighting equipment, etc. The job is simply to communicate a message/concept based off of those resources in the least painful way.

Concept to Photo – Urban Dry Tooling

How was that image created?  What was the workflow from the initial idea to the finished product?  Concept to Photo is a growing collection of articles detailing how various images were produced, starting from the initial concept stage through to the final image.  What worked, what didn’t, could the concept be translated to an image, and how successful was the experiment?  This installment includes the development of the Urban Dry Tooling Concept: the perfect mix of climbing coolness and the industrial edge.
The Concept:

I’ve been moving towards combining climbing and urban concepts for a while.  It’s a natural result when you have little time to climb and too much camera equipment combined with a night of self-portrait experimentation.  Everyone knows what the generic city mountaineer looks like: jeans, fuzzy hat, fleece gloves, cool sport sunglasses, Teva or Chaco sandals in the summer and hiking boots in the winter, all topped off with an expensive Gortex jacket fit for Nepal but mainly used to fend off the wind in front of Starbucks.  I’m not an exception, except that I keep the boots at home in favor of Dr. Martens.  Anyways, I wanted to take the Urban Climber/Mountaineer look a bit further than the coffee shop.

Dry Tool Garage Concept

The concept started with a sketch and was simple, take the best parts of Urban and combine with the edginess of mountaineering.  I wanted something sort of dramatic, I wanted movement (or the sense of it), and I wanted it to look cool (at least to my eyes).  For the Urban part this meant that dark industrial backdrop only available from a circa 1940’s sky scape or an old factory.  It also meant fashion and not just taking a mountaineer and putting them onto the side of a building.

I wanted the coolest elements from mountaineering: ice tools, quickdraws, well-fit jacket, cool hat, and sunglasses – and then combine with a clean hip urban look.  Unless you ice climb you probably know what an ice axe is but don’t have any idea what an “ice tool” is supposed to look like.  Ice tools are short and meant for climbing frozen waterfalls or hanging from rock edges in winter.  They’re curved, wicked and stylish.

The clean hip Urban look was realized by integrating jeans and super-fly Dr. Martens into the mix.  The location was an old industrial area, in conjunction with a zuerichflickrdrinks Flickr group outing.

Urban Dry Tooling Location
The Location:

The old industrial Sulzer-Areal complex in Winterthur, just outside of Zurich, Switzerland.  Originally a manufacturing complex, since transformed into an ultra-chic locale with apartments and one fantastic parking garage which is largely unused on the weekends.

The Wardrobe:

Mountain Hardware Jacket
Levis Jeans
Dr. Martins wing tips
Bolivian Hat
Trango Captain Hook Ice Tools
Random Accessories (quickdraws and ice screws)

The Execution

The original idea was to hang on to the columns of the parking garage with the ice tools and be pulled by a rope attached to the harness.  Then the model could have his legs pulled out into space or jump out.  This actually seemed a lot more dangerous in real life with actual steel and concrete to bash his head into – and hence was scraped as an option.  After killing that notion static posing on the steel column in classic climbing fashion became the main focus.  Assisting with the camera was done by ubiquity_zh.

Urban Dry Tooling Setup

Sometimes the lighting dominates the subject and other times very simple lighting is paired with a subject.  There are a number of things which could have been done better, like lighting the steel column or mixing soft overhead light with some hard lights for contrast, but in the end a simple (somewhat pathetic) one umbrella setup mixed with the natural light filtering through the ceiling was used.  A Contax TLA280 was reflected into an umbrella high camera left and a 20 mm lens was used to get some slight distortion and bring out the Dr. Martens when the feet were properly positioned.

The Processing

Dodging and burning was used on the jeans to bring them out.  Then various curves, high-pass and levels adjustment layers were used to stylize and a deep green color was added with a fill layer.  Layer masking was used where appropriate to bring back facial features lost in the layers.  A grung texture was produced from the concrete in the factory and used as the final step.

The Debrief

The images from the Urban Dry Tooling shoot were ok, more or less what was wanted, but in many ways don’t really pop in the way intended.  On the one hand this is good, it means the photographer is not egotistical to the point where he’s fooled into thinking that crap photography is fabulous because he designed it.  On the other hand it means one can see the road of improvement.

One main problem is the poor separation between the black Mountain Hardware jacket and the background.  A light grey jacket or T-shirt would have absorbed less light, and would’ve rendered better defined shadows.  Furthermore, a diffused light from the right would have illuminated the torso of the model better.  Of course, adding some back-lighting would have helped as well to improve separation, and grid spot to light the ice tools probably would have prevented them being lost in the shadows of the steel framework.  What comes next?  Only the Shadow knows.