TFCD

Margarita – Urban Location Photoshoot

Margarita_I-2.jpgMargarita contacted me via Stylished.com (she’s also on ModelMayhem: #1243386) and we setup a quick photo shoot in the urban area of Winterthur, just outside of Zurich, Switzerland. What follows is a break-down of the shooting process.

I conduct my photo shoots similar to the way one might assemble a portfolio of research projects. See, some research topics like Smart Materials can be rather revolutionary with a large potential pay-off, but risky. If you design a mechano-bioreactor using Electro-Active Polymers, you can (theoretically) grow and at the same time mechanically stimulate layers of skin or bone cells to engineer artificial tissue. But if you put all your energies and financing into such a risky topic, you run the risk of spending five years developing something which might not – in the end, be completely successful. So instead, you might also include less ambitions projects like active-mechanically conformable sensors for remote surgical robots and control gloves.

What’s the connection from biomedical research to photography? In short, when planning a photo shoot you balance out the shot concepts. Start with ones you know will be cool and work out as intended, and then experiment and spend some time with new poses or lighting scenarios.

The Shoot Setup

I met Margarita in the industrial area of Winterthur to do some Urban Location shooting. I’ve shot here before when I was playing around with Urban Dry Tooling concepts.  I picked the location and worked up a few location ideas in my head, but I knew this shoot would be more spontaneous than, for example my previous studio shoot with Alexandra. Margarita came in a car with herself, a small wardrobe, and her cousin on a cool motorcycle. Since the shoot would be more flexible and off-the-cuff, I planned for a small location lighting setup. The weather was beautiful with strong afternoon sunshine, and I just needed lighting to be mobile and produce the desired effects.
Margarita_I.jpg

Camera:
Sony A900
Minolta 7D
Sigma 70-200 HSM

Lighting:
Sunpak 120J
Sunpak 383
TR-II battery pack
Kacey Beauty Reflector
Orbis Ring Flash adapter
Gadget Infinity 16 channel radio triggers

Margarita brought three or four different clothing combinations. So, essentially she defined the initial visual concept via the wardrobe and I placed her in the right urban location to full define the shot. We ended up with four strong looks including: Jeans and T-Shirt, Elegant Dress, Form Fitted and a Fox Head, Urban Chair, and Urban Cowgirl (woman).
Margarita-3.jpg

Jeans and T-Shirt

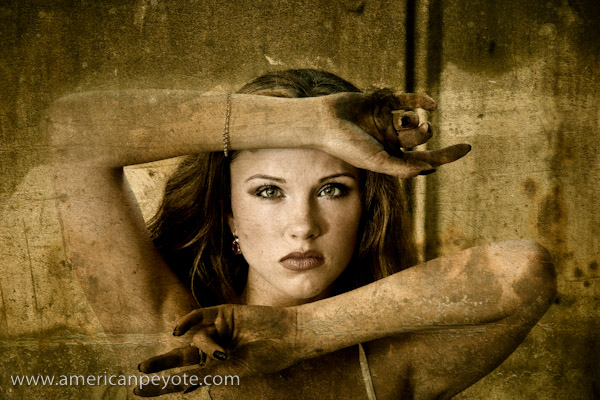
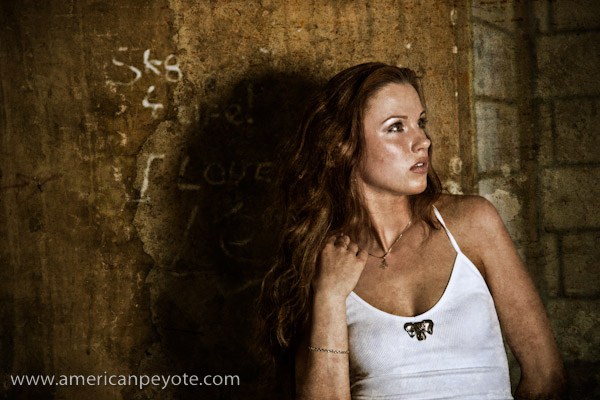
We started with a jeans and T-shirt look in an old factory-turned-parking-garage. The simple wardrobe would work well with the processing I had in mind and let Margarita be the focus, not her clothes. This would give me an idea of how she posed and carried herself, and make subsequent shots come out better as I would know more how to direct her, already having a feeling for how well she could direct herself. For lighting I setup a 120J in the Kacey reflector on a stand, this produced a nice directed, slightly hard light source, placed 3-5 meters away from Margarita. First we shot against the cinderblock walls, some of which had cool scribbles. Then we did a few shots backlit by the sun from the large windows. I shot with the Sony A900 and Minolta 7D. The 7D with the lower pixel count (6 megapixels) produces files with a different shadow texture, and can work better than the 24 megapixel A900 for certain looks. These shots leant themselves well to grunge texturing in the post-processing stage.

Margarita_I-2.jpg

Long Elegant Dress

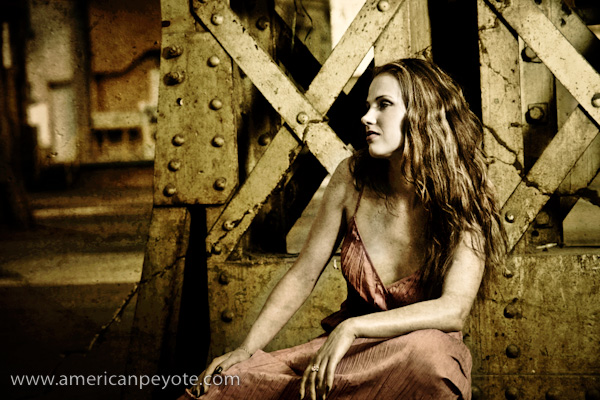
After the first set Margarita chose a long, elegant dress. This was perfect to contrast against the large steel columns which support the roof of the old factory. We did a few distant headshot captures, then I posed Margarita against one of the steel columns. The 120J-Kacey combination was used in both instances, first to add just a tad of fill on the head shots, and then to illuminate the scene from the side. This allowed me to capture the texture of the steel and also give excellent light on Margarita’s face and upper torso. As I was using a lot of natural light, so I could open up my aperture and diffuse the background behind the steel column. This added a nice dimension to the final images.
Margarita_Location-00324.jpgForm-fitted and a Fox Head

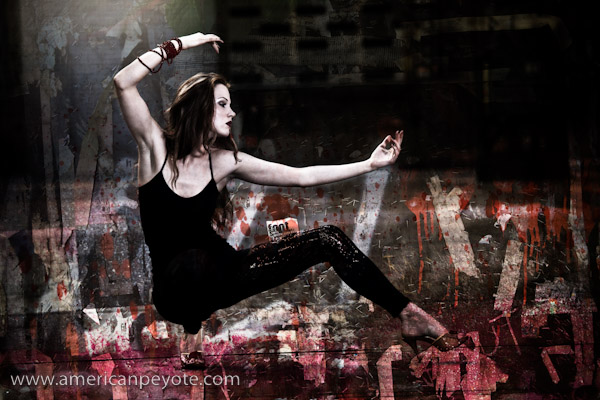
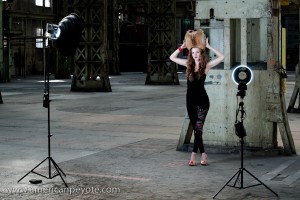
For this shot, we were really experimenting. Margarita came out dressed in a form-fitted top and leggings. Additionally, there was a fox handwarmer. This had a certain strange appeal, so naturally I approved and we used it. For lighting, I setup the 120J-Kacey dish, as well as a Sunpak 383 in the Orbis ring flash. I wanted a hard sort of steel look. Generally convention dictates that the photographer should know what they want and direct the model in a specific way to produce great results. But to be honest, the foxhead was unexpected and we set about experimenting with different looks. Fox head on her head, to the side, is it the main focus of the image, is it a concept, does it “mean” something? I don’t know if anyone can answer these questions, and probably they require no clarification.

Margarita-4.jpgSitting on the Chained Chair

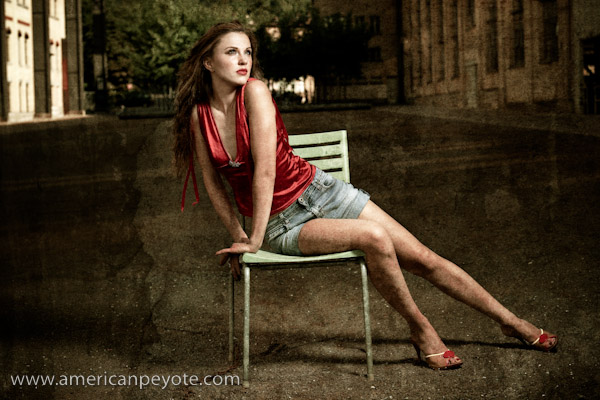
Winterthur is like a giant kick-ass photo studio. Next to the old factory-turned-parking-garage there are some very posh apartments, which have chained chairs sitting on the rocky courtyard. This location gives a nice feeling with the desolate gravel ground and random chairs, it makes me think of a Pink Floyd video. We did two more sets in the setting sun and shade of the buildings, which stretched across the courtyard. In the first set Margarita sat in a chair and I bumped the 120J up to full power and placed it just out of frame in the Kacey dish. Naturally I wanted to balance out the exposure of the dying sunlight in the background. Again, I can’t say enough about the awesomeness of the Kacey dish, it’s a tad large to take around but well worth the inconvenience. It’s awesome on location, and when you use it with a Sunpak 120J and TR-II battery pack it’s a flexible, very powerful and fantastic lighting tool. But we were not finished, Margarita had a final look she wanted and ran off to change.
Margarita-5.jpgClassic Urban Cowgirl

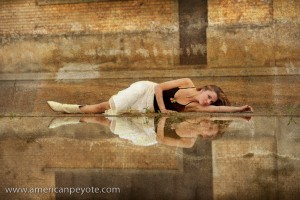
Margarita came back dressed in white with fun cowgirl boots and the same fantastic smile from the past two hours, undaunted by the time we’d spent posing. For this set I left the flashes standing at a distance and used natural sunlight, which was being reflected off of the floor-to-ceiling windows of the posh apartment buildings where I wish I had a place. In the gravel courtyard were a few shallow pools, and I used the full capabilities of my Sigma 70-200, shooting images of Margarita posing across the water. Here I got down low to the ground and pick up Margarita’s reflection in the pool.

Margarita-2.jpg

Post-Processing

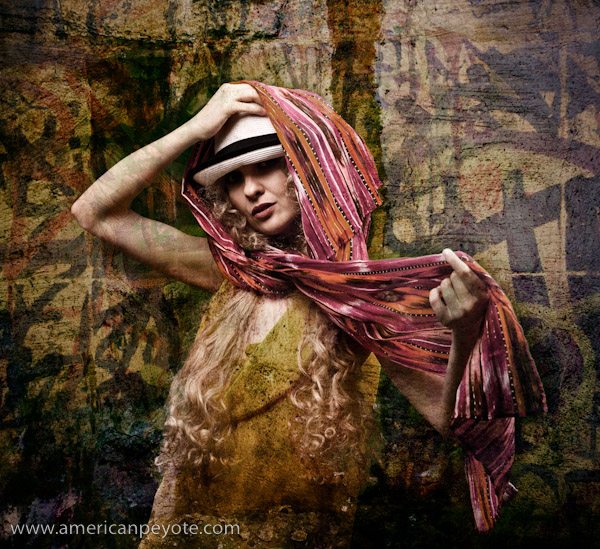
The combination of Margarita and the industrial background worked nicely with my imagination and visual tendencies to blur the divide the line between visual reality, painting, and graffiti. When processing photos from a location shoot I generally use textures from that specific location. I’ve spent a few days shooting around the old industrial walls and cracked concrete in Winterthur and have a nice library of low-rez 6 and high-rez 24 megapixel texture files to work with. The post-processing philosophy included blending concrete layers with Margarita and manipulating the shadows of the images.

Margarita.jpg

Wrap Up

Margarita is a pretty awesome model to work with. She has a dynamic personality and has a good sense of form and posing. Margarita’s cousin came along for the shot. Some photographers shy away from the idea of a model bringing along a friend, but I think it’s great. Margarita and her cousin discussed poses and she could watch from the back and throw out suggestions in Lithuanian while I was shooting, it was awesome.

My Sony A900 User Review
My Kacey Beauty Reflector Review
Kacey Beauty Reflector – Kacey Enterprises
Kacey Dish on Location  – Swiss Strobist
Alexandra – Anatomy of a TFCD Model Shoot

Barbie HunterA little while ago I started networking on with models on websites like Model Mayhem and Stylished to organize some shoots. One day I was reading my email and saw a contact from Alexandra (MM# 809690) on Model Mayhem, she liked some of my shots of Amber and we organized a TFCD shoot. What follows is an article on my approach to organizing ideas and lighting scenarios for the shoot with Alexandra. I took a project management based approach in this case. This included a pre-shoot meeting, concept development, and laying out all the ideas, resources, and equipment in a mind map project file. Organization overkill for a basic TFCD shoot? Some will say yes, some will say no, and some will have no clue of the appropriate response.

Alexandra-4Pre-Shoot Networking

A Time For CD (TFCD) shoot is the digital incarnation of the Time For Prints (TFP) concept developed in the film area. In the purist form this means that a photographer and model work together, both contributing their time and talents free of charge, and in the end both use the resulting photos for their respective portfolios. In this particular case Alexandra (the model) contacted me (the photographer) via Model Mayhem. We discussed a few details and expectations via email, and then met in Zurich one fine Saturday afternoon to discuss concepts and logistics in person. During this meeting we decided to shoot three photo set concepts with different outfits in my studio. Those concepts were…

  • Basic spring dress
  • Business suit
  • Hippy Ninja – Barbie Hunter

The spring dress and business suit ideas were basic, safe concepts, sure to result in some usable images. The Hippy Ninja was a riskier notion I wanted to work with – an adaptation of my Urban Ninja photo set.

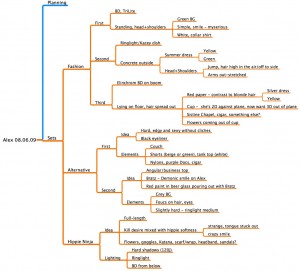
Photo Shoot Project PlanningAlex-08.06.09_Concepts.jpg

There are two extremes to the approach of organizing a photo shoot. On the…let’s call it Conservative end you have a photographer planning each and every detail of the shoot from start to finish. On the…let’s call it Liberal end, you have a photographer showing up with a camera and lights and doing everything “in the moment.” The former sounds calculated and boring, the latter a romantic vision of what a creative photographer “should” be like. I’m a mix of the two, and I happen to know that the best example of Gonzo journalism ever written: Fear and Loathing in Las Vegas, was not written in the Gonzo sense of a reporter furiously filling up a notebook and sending off directly to Rolling Stone for publication. Fear and Loathing was a great short story which took a lot of work to translate into a novel. It’s easy to be creative and spontaneous in “the moment”, but translating a vision into a solid tangible photo concept is another story. So I just did what I do best. I took my project management skills honed in the academic research world at ETH Zurich and EMPA and built up a project plan detailing all the shooting concepts and resources required to complete them using a little Computer Aided Creativity.

The photo concept stage started with our first meeting between myself and Alexandra. We came with our ideas of what we wanted and came to a middle ground. I took the notes from my meeting with Alexandra and started creating a mind map on my PowerBook. I used MyMind to list and then organize all the elements of the shoot, listing the photo ideas, what would be needed for each concept, the lighting style I wanted, and my available resources (cameras, lights, etc), and finally what I would rent or need to buy for the shoot. The mind map isn’t necessarily a rigid plan for the shoot, rather it’s used here to collect and organize all the ideas. Since I’m acting as financier, creative director, photographer, and post-processing artist, I can change the game plan as needed. The organization of ideas is useful so that way I remember to buy a couple of Barbie dolls to remove their heads for the hunter necklace, in addition to buying fresh flowers for the Ninja head dress. Although I love my Minolta 7D I rented a Sony A900 and the Zeiss 24-70 lens from GraphicArt in Zurich. Why? Well, mainly because I’d been using a Minolta 7D for many years and now wanted something with better resolution, auto-focus accuracy and dynamic range.

Camera:BarbieHunterSetup-00828.jpg
Sony A900
Zeiss 24-70mm

Lighting Kit:
2x Elinchrom BxRi 250ws strobes
2x Portalite softboxes
1x Elinchrom beauty dish
2x Sunpak 383 flashes
1x Kacey Beauty Reflector
1x Orbis Ring Flash Adapter
1x Lastolite TriLite Reflector kit
Skyport and Gadget Infinity radio triggers


Photo Concept: Color and Lighting Design

The three different looks would require different background colors and lighting designs. My backgrounds included dark green, deep red, and storm grey.

Summer Dress

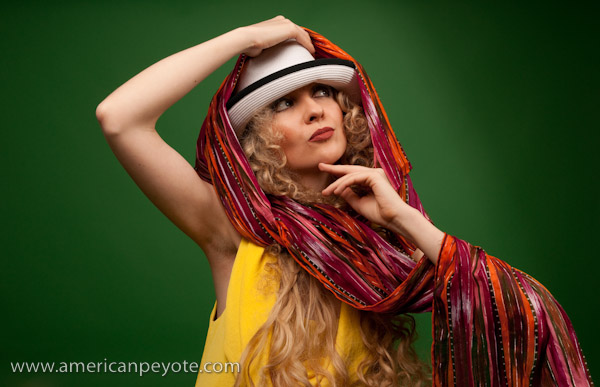
Yellow summer dress with different scarfs (picked up at H&M and from my closet). for the spring type feeling I went with my green background and main lighting via the BxRi flashes using a softbox and beauty dish. We also added a deep red scarf and a few hats. The lighting scheme was to use the BxRi flashes, a large softbox light with the beauty dish for some directionality, giving some deeper shadows and better definition on the skin. The dish also provided nice sort of hard shadows over the brim of the hat to form a vile over here eyes. Lastolite TriLite reflectors were used to add fill from beneath.

Alexandra-3.jpg

SuitSetup-00677.jpgBusiness Suit

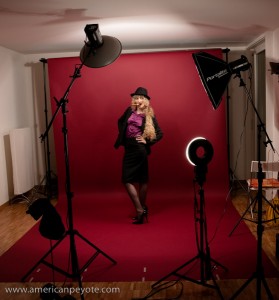
Here I shot with a deep red background, contrasting with the black suit Alexandra wore and giving a moody feeling. I pulled the cushion from my couch for Alexandra to lounge on and we also did standing shots. For these shots I used a beauty dish, softbox, and added fill with a Sunpak 383 in an Orbis ring flash. I setup the softbox on a boom up high with one BxRi. The second BxRi was in a beauty dish on a boom and used as a shaping and fill light to create some moody shadows and balance out the light from the softbox. The 383-Orbis light was used to fill in more of the dress, as it was a dark fabric it needed more light to define the texture.

Hippie Ninja – Barbie Hunter

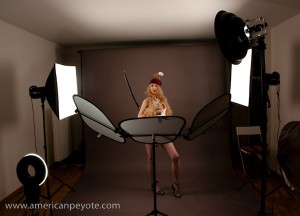
At some point in the concept stage I remember thinking something like, “It would be sweet if she were a Ninja hunting Barbie and Bratz dolls and then made a necklace from their severed heads.” Here I wanted a harder look, and deviated from the softbox-beauty-dish combination. Two softboxes were placed directly perpendicular to Alexandra, creating definition on her arms and side (think Joel Grimes). The TriLite reflectors added fill to her front, and a Sunpak 383 on the lowest setting in a Kacey Beauty Reflector was used high in the front.BarbieHunterSetup-00828.jpg

Post Processing

Alexandra originally contacted me because she liked the processing work I do with layered texture techniques. While I made it a point to stay true to these desires, it was obvious that all these images didn’t necessarily “want” to be textured with concrete and graffiti layers. Yes, you read right, I listen to the image while post-processing, the colors and shadows speak to me and we build the final image together. No, I don’t do drugs, I just listen to the rhythm of the world. In the end I worked on the images Alexandra chose for her portfolio and applied the urban style I like to play with. However, for many images I left them mostly true to the in-camera look. Naturally I modified the shadows and color feeling, but for the Barbie Hunter images, I wanted Alexandra to stand out – contrasted with the Barbie Head necklace.

Barbie Hunter

Wrap-Up

Shooting with Alexandra was pretty cool. We did a few safe image concepts and then moved into the experimental territory with the Barbie Hunter. I loved doing the pre-shoot planning and concept design. The more time you put into pre-shoot planning, the less you have to worry about during the actual event and everything will just go smoother. The Elinchrom BxRi flashes are awesome and the Sony A900 + Zeiss 2470 is a sweet combination. Many people will tell you to buy the more powerful 500 ws strobes, but the 250 ws strobes have a fast recycle time and provide more than enough light for my current studio setup. I got Elinchrom strobes from Profot in Switzerland.

Alexandra-2.jpg

What comes next? A photo shoot with Margarita…

Margarita_I-2.jpg