 This is a story (or a tutorial) about creating a Polaroid pinhole camera. The initial motivation was to make a pinhole camera for use with a 6 grade class to teach them all about optics, but the camera is also super fun for me. This is my first experiment with a Camera Obscura imaging device, or commonly called: pinhole photography, one of the most accessible high-technologies of this and the last century. It’s a way to create interesting images without an expensive camera, and is an excellent way to demystify photography.
Kids are easy to impress, you give them a smart phone and they’re all like, oohhhhh, awesome, and you can make pictures with these fantastically plastic devices. But with a smart phone you have no understanding at all about what’s going on. Even most folks with a digital SLR probably don’t have a great concept about light capture and the reality that the physics behind your super amazing 24 megapixel Sony A900 can still be boiled down to nothing more than a very advanced light box. That uber-awesome Carl-Zeiss lens is built to high standards, but all it does is focus a little light on a light-sensitive surface – and with a pinhole camera, we don’t even need glass to focus the light.
 The Idea
Originally this pinhole idea was for a school project, and I wanted to have something as cheap and easy to build and use as possible. While researching Polaroid pinhole I found a tutorial on Flickr where you put a piece of Polaroid film into the back of an aluminum container to build the camera. This is the cheapest way to do it and works well enough, but you need to change the film in total darkness. You also need a way to press the film correctly to apply the developer to the image, requiring the rollers from an old Polaroid back. Sure, we could do that with a light-tight tent and a rolling pin, but I wanted something more…instant. Also something with fewer things to go wrong to demonstrate the concept to the kids before they built their own. So, I looked at what I had in the house, and I ended up taking apart a Polaroid film back from my Mamiya 645 camera and then taping the aluminum container to it. I painted the inside black with spray paint, and then pressed a pin through the front before taping the film back in place. Hence the name, Polaroid pinhole camera. Now, you can also do things like measuring the pinhole (possible using a projector) and do some calculations to know your exact exposure for your film, but I didn’t feel like doing math and just took the camera out to shoot around Zurich with. More anticipation for the result, less thinking, more fun.
 Polaroid Pinhole Recipe

- Aluminum tin (or box, or whatever)
- A Polaroid back (any one that accepts film will do)
- Black paint (choose another color for interesting effects)
- A pin
- Polaroid/Fuji Instant film
The aluminum tin or box you buy from a supermarket or find in your house/apartment along with the black paint and the pin. The Polaroid back you can find on eBay (probably the cheapest) or the used departments at places like Keh or Adorama. You can probably also buy an old Polaroid camera and rip it apart for the film back, but that sounds a tad aggressive. Once you have a Polaroid back, you need to remove the front of it. Why? Because these backs are designed to show film areas for 6×4.5 or 6×6 (depends on the back you have), which are smaller than the Polaroid film area, and you want to use the whole piece of film. On my Mamiya Polaroid back I just removed the rubber backing, removed a few screws, and could then pull the face off of the back with out creating any permanent damage. The loading area for the film was perfectly intact, and ready for the pinhole camera body. If you want a wide angle camera, the distance from the film plane to the pinhole should be 2-3 inches, and will correspond to about a 20-35mm lens from a 35mm film camera. If you want more of a telephoto just use a box with a larger distance.
 The film isn’t too hard to get, even in Switzerland. You can get Fujifilm or Polaroid. Now, there are two types of instant film from Fuji, one for legacy Polaroid systems, and one for their new Instamatic line. These are not interchangeable, and you want to buy the legacy Polaroid type, otherwise it won’t fit in your Polaroid back. There is also the Impossible Project, a company which makes Polaroid film in various flavors like black and white. The Impossible Project products are direct copies of the now discontinued Polaroid films and will work well with this system. The Fuji however, will be the cheapest and easiest to find, and I would recommend going with the Fuji to start out with to perfect your technique.
What comes next?
I’m having a blast with the Polaroid pinhole, but I see room for biggering. First, I want to start shooting portraits with strobes. It’ll be easy, just take some flashes along, set them up as desired, and trigger them by hand for the shoot. Second, is biggering to a Fuji 4×5 Polaroid back. This is a back for 4×5 large format cameras, and can be found on eBay or in Japan via the Japan Exposures webshop. This will allow me to easily use a larger film size, which can be easily bought in color or black and white from FujiFilm. Excessive? No doubt, but should make for an interesting project.
Analogue to Digital
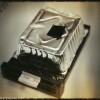
Once you have your fabulous pinhole images, you might still want to share them with those kids with the smart phones. And on smart phones, you might want to make them look like classic faded Polaroid images, as has become oh, so, so popular with Hipstamatic/instagram mobile apps. I like to scan my image on a flatbed scanner (I have an Epson 4990) and then transfer it to my iPod Touch. From there I run can run the image through Red Giant Plastic Bullet, and then instagram, where I can easily upload to Twitter and Tumblr. For more info, check out article: My Favorite Mobile Photo Apps for iOS Excessive? No doubt, but I don’t like to use just one imaging technology. I mix, I match, and I love the ability to apply the classic Polaroid look to Fuji-instant film on an image captured in a aluminum box and processed on my iOS device. In closing, here are some images showing the disassembled Polaroid back, painted aluminum camera body, assembled camera, and example images.


