Graffiti and street art have been a small fascination of mine since I started touring cities in Europe. I generally prefer to seek out graffiti on the streets rather than jumping between restaurants and museums. In parallel, I began experimenting between portrait photography and painting (Gonzo Art), where I tried to combine the layering methods I use in Photoshop with the speedy and interactive way street art is created. On my last trip to Berlin I joined an Alternative Berlin Street Art Workshop to learn a bit more about creation techniques with my first stencil.
The day started with a little street tour near Alexander Platz, Ben (our excellent tour guide) walked us through a history of street art, the difference to that and graffiti, and the culture of groups like the 1up graffiti crew. Eventually we ended up on the far east side of Berlin, where one can still get affordable space in which to host a street art workshop, far away from the MUJI design store or Dunkin’ Donuts. The workshop was exactly what I needed, a basic intro to spraying and stencils, enough to make me dangerous. The process was straight-forward, much like many things are in life, once you understand the thinking behind it.
 Stencil
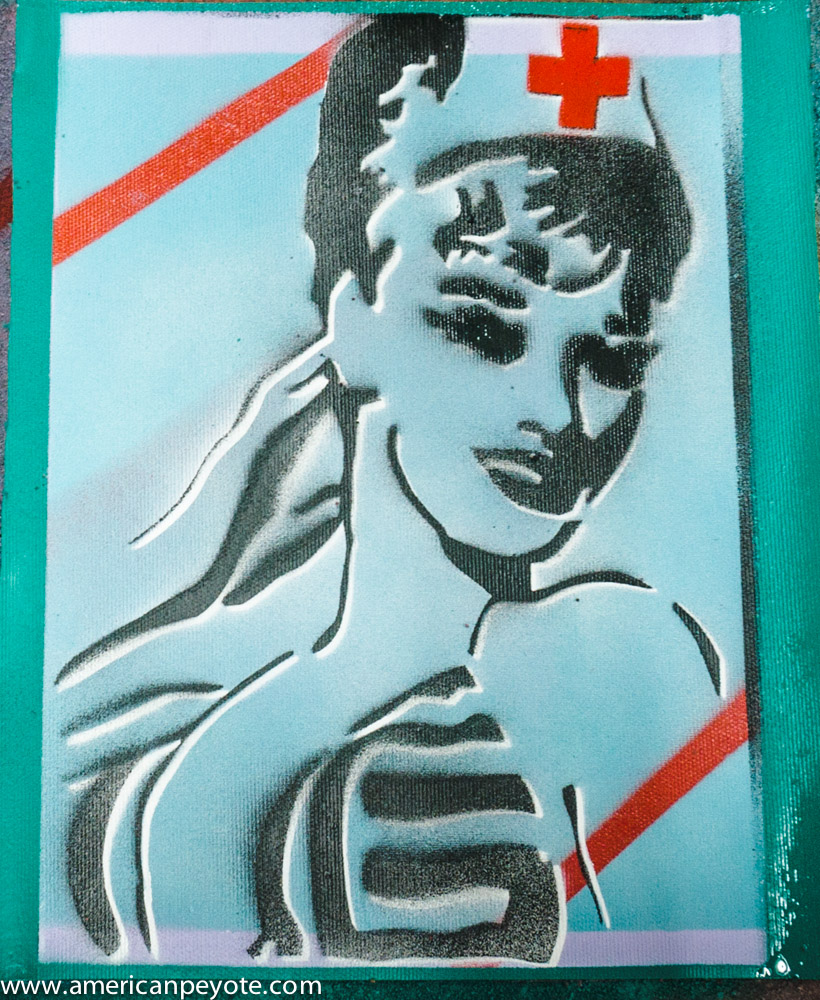
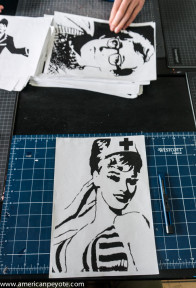
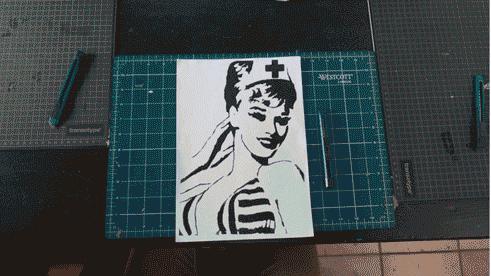
First, you need to cut out the stencil. We chose from a variety of images, from Pulp Fiction to Scarface and Woody Allen, and I settled on…a sexy nurse. The nurse was ideal, as she was near the top of the stack of possible choices and had nice basic lines, which were straight forward to cut out with the Exacto knife. If you choose an image with intricate lines (for example) you’ll spend hours trying to get the thing cut out. And as I found out, it’s much better to have larger features which using a paper stencil, because it will mask the spray paint much, much better than a stencil with very fine features.
 Paint
Paint
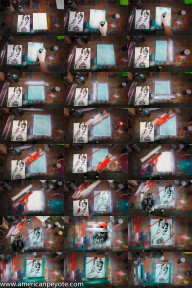
With my stencil cut out I moved on to the painting area. Our awesome workshop leader Ben showed us all the basics, and then we were free to experiment. We were supplied with a pre-cut canvas, about A4 in size to spray on. I like this medium a lot, similar to what I use when painting larger canvases using latex paints. I chose a bluish sort of colour pallet, and high-lighted the nurse’s cross in red. In the back of my mind there was some consistency with the geometric mask shapes I include in my Gonzo Art stuff. I documented the process in between each step, so you can see the evolution from basic canvas to finished piece. The stencil process is quite natural if you’re familiar with layers in Photoshop and basic masking techniques. If you don’t understand Photoshop, then I can recommend starting with a street art workshop to understand masking, and then the process with feel natural when you start using a Wacom tablet to mask and blend digital layers together.
My desire for the future is to use the stencil technique to transform some of my portrait photography into a type of street art print. This would entail starting with the digital image, then using Photoshop to separate different shadow, light, and colour regions, which would then be printed and cut out of a thicker plastic material for the stencil. Then I would use a large canvas, about one meter wide (or tall) and either the spray paint or the quick drying latex I like to work with to create the final art piece. This would give some rarity to the medium, something I was philosophising on with my Ignite Zurich talk, thinking how art exists in our digital internet age where everything is a copy of a copy of a copy.
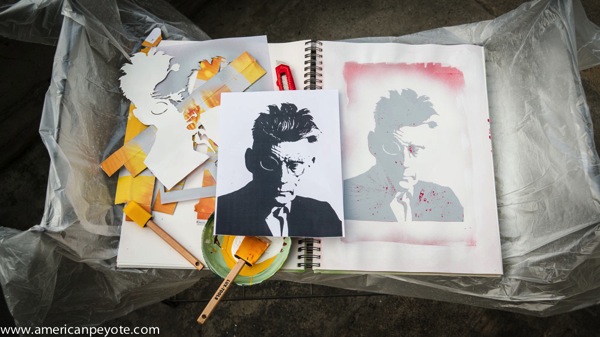
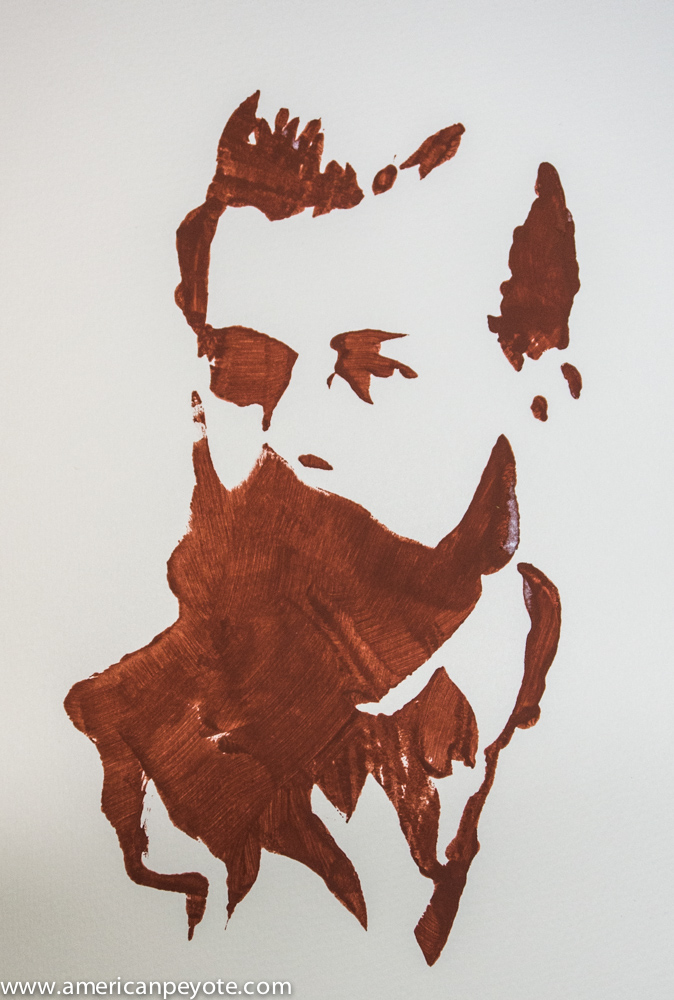
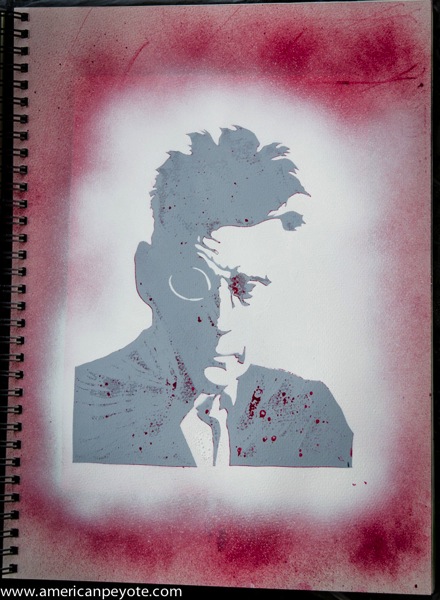 Building on my exploration of stencil art, I played around with a portrait of Samuel Beckett. I searched a bit on Google for images and found a number of reasonable ones that could be converted to stencils. Beckett has an excellent face, with defined lines, rim glasses, and wicked hair, making his portraits ideal for creating strong stencils.