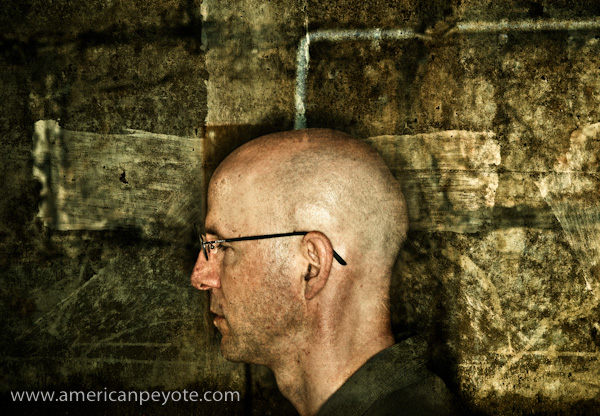
 My photography-digital-imaging-hobby-obsession has started peaking in the past few months. After putting up some profiles on Model Mayhem and Stylished I started getting requests for Time For CD (TFCD) shoots. So I figured: Hell, why not try out a Sony A900? Why the Sony A900? Well, I have a Minolta 7D, and all my lenses will work with the Sony DSLR line. Plus GraphicArt in Zurich rents the A900 as well as the A700 and all the Zeiss and G lenses. I started out renting the A900 and 24-70mm Zeiss zoom, and since picked up a body, a flash, and a Sigma 70-200 HSM zoom. What follows is a first impressions user review of the Sony A900, used in my apartment studio and around Winterthur and Zurich for location shooting.
Why the Sony A900?
Here’s my DSLR history. I started with a Canon D2000 from eBay, decided I like the DSLR concept, moved on to a Minolta 7D (I own the Minolta 7 film camera) and basically did nothing but shoot with the 7D and expand my lighting kit. Why? Because for basic shooting a 6 megapixel camera is all you need. If you have one then keep shooting with it, only camera freaks feel a constant need to upgrade. I saw little need to buy a new DSLR, in particular I saw no point unless the new camera was significantly better than my current one. I’ve been unimpressed with the results of the Nikon D300 files as compared with those from my 7D, so why consider the A700 (which sports a similar sensor). But after shooting with the Sony A900 for a weekend and seeing how much resolution and shadow texture (dynamic range) I could get with the thing, it was a natural reaction to look at my bank account and pick up a body of my own. So to get it straight, I bought the A900 because I love the colors and shadow detail.
 The A900 in the Studio
My first experience with the A900 was shooting Alexandra in my studio. She found me through Model Mayhem and we worked out a few concepts. Here I used the A900, the 24-70mm F/2.8 ZA SSM (SAL2470Z), two Elinchrom BxRi studio strobes as well as a Kacey Beauty Reflector with a Sunpak 383 flash and sometimes the Lastolite Trilite reflector kit. The Zeiss-A900 combination really leaves little to be desired. The resolution and color produced with this combination are simply fantastic, and almost exceeded my expectations (on can never be satisfied with camera gear). One major problem with the Minolta 7D is focusing. I have a number of image with a model against a wall where the camera focused on the wall instead of the model. The resulting image would of course be slightly out of focus. This doesn’t matter much for web stuff, but affects the image quality and provides less image information for post-processing work. Compared to the 7D the Sony A900 has very accurate focusing, in particular when used with a SSM (Sony Super Sonic) lens. The focus point can be controlled using a joystick on the camera, and is very useful when composing. There’s no need to “focus and recompose” as you can just move the focus point where you want. The Sony A900 is the only camera to sport a function called Intelligent Preview. Basically with Intelligent Preview you take a preview image, you can view it on the camera LCD for a few seconds, and make any adjustments necessary. On other cameras you just take an image, so at first I thought “who cares?” The face is, for light checking and shooting with the popular Strobist techniques, Intelligent Preview is a very useful feature. It allows you to fire the strobes and check exposure very quickly without filling up your memory card with test images. And when the full RAW images are 35 Megabytes in size, the Intelligent Preview feature actually saves you a lot of time and storage space.
No camera can produce an image without light. For the lighting, the Elinchrom BxRi flashes were triggered via the Skyport radio system and worked flawlessly. I hooked the Skyport camera trigger up to the A900 using a hotshoe adapter from Gadget Infinity, which enables connection of a standard 1-pin flash to the Sony/Minolta flash mount. The power of the BxRi flashes can then be adjusted directly from the camera. This is ideal when you don’t have an assistant and have a number of lights set up. There’s nothing more annoying than standing around while the photographer fiddles around with lighting equipment.
And what is the result? Perfection mon ami, perfection. The tones and colors from the A900 are fantastic. I shot Alexandra in a few different sets against green, red, and grey backgrounds. This included everything from a yellow dress to posing with a Katana and a severed Barbie head necklace. During the pre-shoot brainstorming stage I remember I was thinking something like, “Wouldn’t it be great if she was hunting Barbie dolls in the jungle and then cut off their heads and made a necklace?”
 The A900 on Location
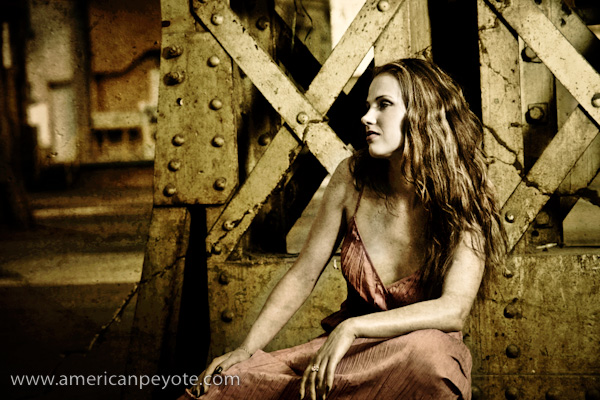
I was contacted by Margarita via Stylished (she’s also on Model Mayhem). I wanted to do some photography in an urban environment, so we headed to the old industrial area of Winterthur and moved around the old Sulzer industrial-area-turned-hip-living-area. For this shoot I used the Sigma 70-200 HSM and a Sunpak 120J with a Kacey Beauty Reflector. I always use the TR-II battery pack with the 120J, as I can shoot almost all I like without worrying about battery life. I also had a Sunpak 383 with my Orbis ringflash adapter for added fill when needed. Margarita and I did a few different sets in the Sulzer parking garage and then outside. The A900 and Sigma combination was very nice. The Sigma includes an in-body ultra sonic motor, giving fast and accurate focusing. The 120J and Kacey dish is my favorite location lighting kit. Margarita posed against concrete walls, walked around the old industrial space, and contrasted quite well with the steel framework of the place.
Many people say you don’t need the 24 megapixels of the Sony A900, and this is probably true for me as well. However, more important then sensor count is the full-frame 35mm sized sensor. This means you’re able to use the bokeh qualities of your lenses the way they were designed to be used. In the Sulzer garage you have sunlight filtering through the roof and wall windows, I balanced this with my strobe and opened up the aperture of the Sigma lens to get fantastic background blur – an ideal portrait setup. I grabbed the super bokeh frames and then posed Margarita against the steel columns. I placed the Kacey dish just out of the frame to light Margarita’s upper torso and the steel column. Light fall-off from the Kacey dish was as fantastic as ever. Every time I use it I’m happy I bought it.
The Amazing A900 Files
I’ll be honest, I gag every time someone says something like, “I take real photos, I get it right IN-CAMERA and never use Photoshop.” The images I see in my head can rarely be captured in-camera. Many times they are, but like my paintings, the final image only starts with what I capture in-camera. The ability to manipulate your images in the post-processing stage depends heavily on how much information you’ve captured in-camera. So if you have a 24 megapixel image which isn’t focused properly, the shadows of the image will have poor definition and you’re limited in how well you’ll be able to manipulate those shadows, limiting your vision with Photoshop. The RAW .ARW image from the A900 are beautiful. You can shoot in normal or cRaw, the compressed .ARW format. The uncompressed RAW files are like 35 Mb, and the cRAW are like 24 Mb. Good money says you won’t see much difference between the two formats, and I’m shooting everything in cRAW at the moment. Now, I bought the A900 to get significantly better shadows texture and dynamic range than I was achieving with the 7D. Am I happy? Yes – fuck yes, I am ecstatically over-joyed with the shadow texture and post-processing ability of the A900 RAW files.
But beautiful files eat up a lot of CF card space when you’re like me and only have 1 and 2 gigabyte cards. But given how cheap these things are, I plan to be shooting with 4 or 8 gig cards with the A900. During shooting I copy the A900 files to my HyperDrive Space, then hook that up to my Mac Quicksilver 2002 G4 and copy the files using Adobe Lightroom. Basic adjustments are done in Lightroom, then choice images are exported to Adobe Photoshop to achieve the vision then fine-tuned again in Lightroom before final export to Flickr or for printing. I’ve been told you can just shoot JPEG with the A900, but I can’t figure out why. If you’re shooting JPEG with the A900 you probably don’t need the camera and should sell it to me at a good price so I can have a backup body.
So…
Is the Sony A900 a sweet camera? Yes. Should you buy one? Yes, if you want a fine camera which produces fantastic files, has a speedy focus, handles really well. I kept my Minolta 7D for a long time, and I plan to keep on shooting with it, but I also plan on shooting with the A900. The 24 megapixels are over-kill for many applications, but when you want the fine shadow textures and ability to mainuplate the light of an image, the Sony ARW files are heaven to work with in Photoshop and Lightroom.

I see something of a brownish tint to all of your pictures. Is it my display or is that a new trend 😕
The first, third and fifth images all have some brownish hues in them, but the rest should be pretty much devoid of it.
Beautiful demonstration of the a900’s potential. Thank you for posting this. I’m on the verge of buying the a850 and it is great to hear such positive mention of the features that drew me to this model — dynamic range and color handling. One of my intended uses of the a850 is photographing fine art paintings. From your experience with the a900 is there a specific lens that you might recommend for this?
Hi Tom,
For shooting fine art paintings with the A900 I would go with a mid-telephoto lens, ideally in the range of 85mm to 100mm. It depends on how much space you have to shoot in. You could probably also do it with a 50mm macro, but when I shoot my 1mx1m paintings I like to use my 85mm f/1.4 Minolta. The distance from the painting to the camera isn’t too far and the lens is very sharp with nice color rendition. If you go too wide you will have problems with curvature in the image and straight lines on the painting or frame. I think a 100mm macro would also be a nice choice.
-mark
Thanks Mark,
In regards to lighting a painting shoot, I had planned to use continuous (solux bulbs), thinking that this would give me the truest colors. But perhaps there is a strobe setup that might work s well or better? Any thought you have on this would be appreciated.
Tom
Hi Tom,
As long as you have even lighting over the painting it shouldn’t matter if you’re using the Solux or strobes. People often put two lights at 45 degrees to the paintings (one on either side) to get even lighting. You can also use a polarizer filter on your lens to reduce reflections (it’s also possible to put polarizers on the light sources).
If you’re going for ultimate color reproduction you would also want to shoot with a color checker card (like a Macbeth ColorChecker). In this case you would do a shot with the color checker in the image (so it has the same lighting conditions as the painting), and then use this image of the checker to create a custom color profile for the raw development software you use. This is the best way to ensure that the colors of the painting are being reproduced correctly.
Check out this link for info on the color checker:
http://www.digital-photography.org/macbethcolor_checker/Macbeth_ColorChecker_Gray.html
-mark