Tutorial

Dynamic Color Portrait Photoshop Tutorial

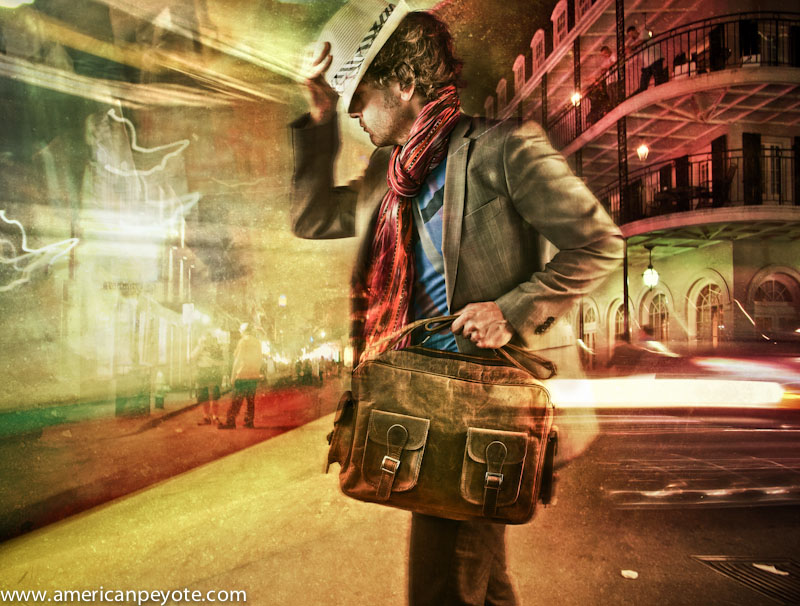
Here I present a workflow for creating a dynamic image using layers in Photoshop. Why? Well, because I like to share and because I got some requests on my Google+ album asking how it is done. To illustrate the process, I’ll use a set of images I created for Scaramanga Bags, a cool company in the UK that sells vintage leather bags and other things like journals and vintage suitcases and trunks (see the Scaramanga Concept Images here). On their website Scaramanga already has nice urban portraits with their bags, so I wanted to go in a different direction. I wanted to create portraits that convey a feeling of abstract motion. Something to invoke a feeling of movement and action. I love photography and painting. I began with photography looking for image perfection, and then moved to painting after developing a color palette in Photoshop. I like to light an image in layers, and in Photoshop I layer colors and backgrounds to add a sense of visual movement to an image. I look at a scene, put on a pair of rose-colored glasses, and I have a layered image (because at the base, this is all Photoshop does). When you can do this in your mind you then just need to translate that to something other people can see, and for that we have Photoshop. The aim of this article is to show you how to combine images together to create unique, balanced color combinations, which add a desired character to the original image.

The Basic Recipe

I generally apply this concept to portraits, where I want to add a certain character which complements the person photographed. First, begin by realizing that the person is a person, not simply a subject (A Person is not a Subject) for academic study. I start out with a base portrait image, generally shot in a studio environment with a two or three light setup using softboxes and maybe a beauty dish. Why? Because we need a decent (well exposed) portrait to start with. It should be something that speaks to you and has the look and pose you want. The layers in Photoshop are just there to modify the intention of the original image (otherwise just go ahead and create an image from scratch and render it in 3D).

I always start with a well-exposed base image that defines the main textures, tones, and colors of the person. In the Scaramanga Flight Bag images I used a Sony A900 and Elinchrom lights with a CreativeLight softbox. You don’t need an expensive camera and equipment, but you do need to know that a properly focused image with proper exposure will give you the largest amount of information to work with. If your initial image has high contrast or deep and dark shadows, then you just need to know that you can’t modify those areas of the image very much, and they will not blend so well when we layer a new image on top of it, since the very dark areas contain very little color to modify. So, let’s start from the base image.
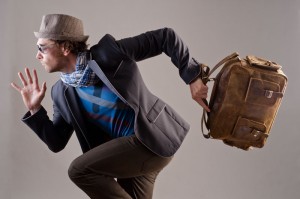
The Base Image

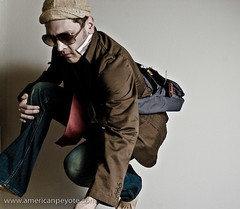
In reality we’re mixing static image layers one on top of the other. In my mind I’m painting on layers of color movement to complement a portrait. I began with images produced in my apartment studio, and posed in such a way as to communicate the idea of running or of standing still, with motion in the background. This is my base, a strong pose which will be modified (enhanced) by a new layered color environment. For more info on creating a dramatic pose portrait check out my post on this subject (Urban Ninja – Dramatic Pose Tutorial). In short, I take my inspiration for poses like this from comics and graphic novels such as Conan the Barbarian, 300 and Watchmen.

After importing the images into Lightroom I chose the best and then increased the Fill Light to reduce the contrast in the image, and then exported to Photoshop for layering work. When exporting from Lightroom I don’t want deep and dark shadows, but rather a lot of information to work with and which will respond well to layering. Once in Photoshop I will often start by adding a Black and White and High Pass layers to the base image (although I didn’t need to do that for this image set). I first copy the original layer, add a High Pass filter, and set the blending on that layer to Soft Light. This has the same effect as increasing Clarity in Adobe Lightroom, but in a more controlled way. I reduce the Fill value on this layer so that everything blends well together and the image doesn’t look gaudy or like it was just run through an actions industrial meat grinder. I will often also create a Black and White adjustment layer, and then set the blending to Multiply. You can then adjust the values for reds and greens and blues. This desaturates the color while intensifying the shadows of your base image. It can darken the image a lot, but the goal here is to modify the tones of different parts of the image (such as skin tones). Again, I will often reduce the Fill of this layer so as not to totally kill the base colors.
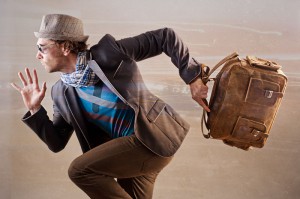
Choose Layers

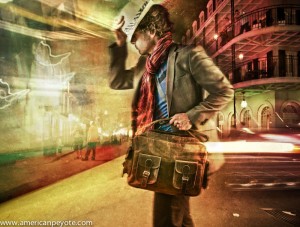
I always start from the base portrait and then choose layers on the fly. For the Scaramanga images I wanted a lot of bright colors with movement. So, I opened up Adobe Bridge and looked for long-exposure night scenes with lots of color and light streaks. To achieve this abstract motion goal, I picked a few images that I had shot in New Orleans, Zurich and Berlin. The key here was to have images with long light streaks and pockets of intense color, which would blend in with the form of the person in the Scaramanga portraits. By blending well I mean that the lines of the night scenes would coincide with the lines of the runner (think of drawing lines over his body and comparing it to the flow of the layer images – check out my Dynamic Pose Tutorial for clarification). There’s no formula here, you just need to pick images that work well together. Aside from light streaks, these images also have very interesting pockets of color, and also recognizable object elements such as a tram or street scene, which then defines the background environment of the final image. The night images from Zurich give the feeling of running through a city of lights, while the one of Bourbon St. gives the idea of a person standing still while the environment is exploding in color around him. Now that I have chosen the layer images, I just need to blend everything together.
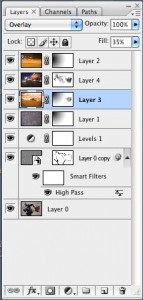
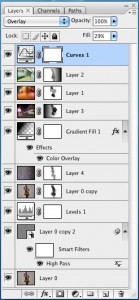
Blending Layers

After picking the layer images in Adobe Bridge I opened them in Photoshop, and automatically set the blending mode to Overlay. This allowed me to preview how the different light and color elements of the layers would work together, and how the flow of the lines of the layers would mix with the base portrait. At this point, the image just looks like a couple of images stacked on top of one another, and that lazy sort of image production just doesn’t do it for me. To properly blend the images you need to play around with the blending modes, like Overlay, Softlight, etc. and also change the Fill and begin masking individual areas with a paint brush or gradients. To mask a layer by painting simply select the layer and then choose the layer mask icon. When you now paint with black, the layer will be masked (or hidden). You can change the Opacity of the brush to mask the layer gradually with each new brush stroke (the recommended method). When masking in this way I usually use a brush Opacity between 3-20 with a soft brush. This is where I act more like a painter than a photographer, masking and blending the layers uniquely together. I rarely use the entire layer image. Often I use a gradient to mask out half of it, and also paint away most of the layer over the person. I will also add full Color Fill layers (usually set to Overlay blending) to tweak the overall color. Eventually, the final image will then start to come out. To illustrate this process, you find here the secret goldmine of any Photoshop artist, the screenshots of my Layers window on my two favorite images from this set, the Runner and Bourbon St. You can clearly see how the different layers were masked, and what the original layer images looked like before blending.

That’s All

If this sounds complicated don’t be deterred. Essentially all I do here is to mask out the parts of the individual layers which don’t flow well together, and in the end I have an image with all the flow and color vibrancy I desire. The main idea is that the character of the layers complements the base portrait. I save the image and open it up in Lightroom. From Lightroom I play with the colors further, adjust shadow and highlight colors, Vibrance, Clarity, etc. until the final color tones are correct and then I export.

For more info on layers and portraits, check out my Hyper-Realistic Portrait Photoshop Tutorial. This covers the main topics I addressed in this post, but you get to see a screen cast of the whole process.

Sessions with Joey L – DVD Tutorial Review

This is a review of the Sessions with Joey L DVD Tutorial, including a break-down of the DVD content and how I feel it applies to my photographic directions and how it might be useful to other people.

Back in the fall of 2007 I was spending my days in a Tokyo dorm room playing around with Photoshop, and decided it was time to pick up some sort of tutorial DVD.  Yes, you can learn and be inspired without needing to buy these things, but I break my brain trying to figure out stuff like applying Altair Optistruct optimization strategies to fatigued composite structures with barley a manual to work with.  So with Photoshop I was looking for a way to relax and get a grounding in photo processing, so I bought the JoeyL Photoshop Tutorial DVD by photographer Joey Lawrence.  It was well received by some, ridiculed by others, and I found it to be a good buy.  However, I’m able to pull a great deal of knowledge from anything, due to my training in figuring out ball-busting simulation programs like Nastran.  However, for my purposes, what was lacking from the Photoshop Tutorial DVD was the connection between lighting and shot setup and Photoshop processing.  So when Mr. Lawrence released his Sessions with JoeyL DVD, I watched the trailer, and then decided to drop 200 USD on the DVD.

First some background on me

Here’s my situation.  I’ve mainly focused on learning photography and lighting during the last two years.  This was mainly in my spare time while finishing my Doctor of Science degree at ETH Zurich  I read Strobist in between experiments, and sometimes sketched out lighting diagrams at the SPIE Smart Materials conferences.  Since starting a normal job I’ve had time to develop a lighting and processing look that I like, which fits with what I see in my head.  To this end I finished with taking only self-portraits and started organizing model shoots.  The last piece is nearly in place and that is making a strong link between vision and reality.  Taking the image in my head and easily making it a tangible medium people can hold in their hands or see for themselves.  I sketch out shoot ideas, design lighting concepts, network, and do my own Photoshop.  Foe me it’s all part of the process of Arience, the integration of Art and Science in my life.  In my view, everyone is a poet and an engineer.  I attended a Strobist seminar and picked up the Sessions DVD to get a better perspective on how other photographers work, see the process of concept to photo in other people.

The Sessions content is broken down as follows

Lighting Theory

    The Vision
    Lighting Theory – The Basics
    Lighting Theory – Advanced Technique
    The Necessary Tools
    Modifiers

Photoshoots

    Forbes Assignment
    Monty Are I CD Artwork
    Thrillogy Advertisement Shoot
    Model Test Shoot
    Strange Familiar

Business

    Business Lecture
    Trust
    Misc Q&A

Travel

    Travel Lecture
    Ethiopia: Behind the Scenes

Photoshop

    Compositing
    Using Color Curves
    Strange Familiar – Swapping Skies
    Experimenting with Blending Modes
    Black and White Conversion
    Tonal Colorizing
    Fixing Blown Highlights

There’s something that always floats around in my head, namely that photography isn’t difficult, and it gets easier every year.  Images which took a full production studio to create 20 years ago can now be done in a bedroom quicker and with fewer resources.  The thing that interests me is the process and approach a person takes to the whole idea of photography from concept to lighting to final image, and I think this has been well communicated in the Sessions DVD.

Lighting Theory: Joey explains his philosophy and how he sets up lighting.  Then he moves on to modifiers and how the ones he uses to define the character of his images.  If you know nothing of lights and modifiers this is a great video, if you know everything already you probably won’t buy this DVD anyways.  I fall in the middle, and found this to be a very interesting section.  It didn’t totally revolutionize my ideas on lighting, but did make me think a bit more outside of the Strobist softbox.

Photoshoots: Joey presents a walk-through, behind-the-scenes videos of different shoots including bands, a plastic surgeon, and a model test shoot.  Throughout Joey gives explanations of lighting and concept, and you can draw a direct link between how he works and his previously described Lighting Vision.  Also interesting here is seeing the photographer-model interaction.  This is an important, I think the most important part of a shoot.  I try to make an emotional connection with models and explain what I’m trying to create in a shoot, and it’s interesting to see the way Joey works in these different situations, working with a TFP model versus a highly successful surgeon versus a band releasing a new CD.  All in all, very cool to see.

Business: Joey describes how he grew and developed as a photographer, the value of a portfolio, how he gets jobs, basically a discussion on how he works as a businessman.  Again, this is great to see, and would be interesting for anyone contemplating a business (even outside photography), because he focuses on the personal drive and interaction which are needed, as opposed to just having a slick portfolio online somewhere.  He also has a video on Trust and how important it is for business as well as directing shoots, again, very cool stuff to hear about.

Travel: Focus is on Ethiopia, and a lot about how he understands the culture of his subjects before blasting them with a Profoto strobe.  You don’t need to be planning a trip to Africa to get a lot out of these videos, they focus on the human connection between photographer and subject, a topic often missed and usually never even brought up in internet forum discussions (well, the ones I read at least).  The Travel section is great for looking at the human side of photography, and focusing less on the technical side.  It’s also a great motivational video if you’re the type who always thinks of traveling but hasn’t jumped on the plane yet.

Photoshop: Here are presented a few popular techniques, many things people are always asking about on the internet.  Yes, you can also find internet videos on the basic techniques, but it’s the application of those techniques in the larger puzzle which is of value here.  If you want to buy the DVD just for Photoshop, you’re better off looking at something else (I recommend Skin Photoshop the book).  The Photoshop section fits in very well with the rest of the DVD, bringing the vision full circle to the post processing stage.  This was something I found lacking in his Photoshop DVD Tutorial, because there a strong connection wasn’t made between lighting and post-processing.  Here however, you can see how the images from the Strange Familiar shoot are processed, including a new sky, and in this way you get a feeling for the whole process from start to finish.

Why I Liked It

What I like is seeing concept development in other people, and seeing how they think and work.  I like understanding their philosophy of creation and ideas or their approach to concept development and how it’s realized in a final form – be it a picture or an elegant toaster.  In this way, I think the Sessions DVD is fantastic, and I recommend it instead of taking a workshop (if you have to choose).  Sessions gives you a feeling for the whole process from lighting philosophy, through shoot execution, the business approach to final Photoshop editing, and throughout out you get a feeling for the human connection as a main driver of the process.

Is it worth the Money?

Is $200, $250, $300 too much for a photography DVD?  Maybe yes, possibly no.  I paid $200 for my copy, and I’m ok with that. The Zach Arias DVD is $250, the Strobist $135, and new ones come out all the time from places like Lighting-Essentials, Scott Kelby (how many remixed Photoshop books can we release this year?) and David Honl (to name a very few).  But not all are coming from a working commercial photographer who shoots stuff I find interesting. This isn’t the same as a working educator who also takes nice photos.  There is a significant difference here.  It’s easy to say, “you need to do this, this and this” to make cool pictures, it’s another thing to be a working photographer at this level and showing the whole process.

I consider it the difference between learning Physics from a tenured professor who hasn’t written a new publication in 2 years versus a Richard Feynman (even after he was at the top of his field, you can find some of his lectures on the net).  Maybe this sounds harsh, but my main critique of 90% of the photography/Photoshop learning material I see for free from internet sources as well as some professional educators is the lack of vision, and for me that makes all the difference.  The Sessions DVD is a tutorial with Vision and Heart.  But maybe that’s just me?  I got so bored with McNally’s Hot Shoe Diaries I didn’t get half-way through it, but I love re-reading Michael Grecco’s Dramatic Portrait.  It’s just what gets me off.

I’ve also reviewed and still like the JoeyL Behind the Scenes Photoshop DVD, the reason being that the focus isn’t placed on minute details of levels and curve operations, but because it focuses on process and development.  This is the same philosophy I use in engineering research, so maybe that’s why I like it.  The details can always be ironed out, but if you don’t have that overall big picture (that thing you’re reaching for) in your head, then you won’t have a clue about which details need to be fine-tuned.  This is one thing I wasn’t getting from reading Strobist or attending a seminar – but I just learn differently than other people, and so do you.  I don’t need someone to make me creative, I do that on my own, sometimes vie induced boredom.  It’s just cool to see how other people are creative in the scope of their vision.

Brass Tacs

The Sessions DVD isn’t some blue pill to take with a whiskey chaser, promising you everlasting creative abilities as well as the drive to bring your vision into the world.  It’s just another piece in the puzzle. Seek your knowledge in the way you know will be most effective for your own personal learning style.  I get Photoshop technique inspiration by actually painting, I get lighting inspiration when I’m listening to a Web Monday talk or a smart materials presentation.  No two people learn the same way, so find out what works for you and exploit it to make your own visions a reality.


Alexandra – Anatomy of a TFCD Model Shoot

Barbie HunterA little while ago I started networking on with models on websites like Model Mayhem and Stylished to organize some shoots. One day I was reading my email and saw a contact from Alexandra (MM# 809690) on Model Mayhem, she liked some of my shots of Amber and we organized a TFCD shoot. What follows is an article on my approach to organizing ideas and lighting scenarios for the shoot with Alexandra. I took a project management based approach in this case. This included a pre-shoot meeting, concept development, and laying out all the ideas, resources, and equipment in a mind map project file. Organization overkill for a basic TFCD shoot? Some will say yes, some will say no, and some will have no clue of the appropriate response.

Alexandra-4Pre-Shoot Networking

A Time For CD (TFCD) shoot is the digital incarnation of the Time For Prints (TFP) concept developed in the film area. In the purist form this means that a photographer and model work together, both contributing their time and talents free of charge, and in the end both use the resulting photos for their respective portfolios. In this particular case Alexandra (the model) contacted me (the photographer) via Model Mayhem. We discussed a few details and expectations via email, and then met in Zurich one fine Saturday afternoon to discuss concepts and logistics in person. During this meeting we decided to shoot three photo set concepts with different outfits in my studio. Those concepts were…

  • Basic spring dress
  • Business suit
  • Hippy Ninja – Barbie Hunter

The spring dress and business suit ideas were basic, safe concepts, sure to result in some usable images. The Hippy Ninja was a riskier notion I wanted to work with – an adaptation of my Urban Ninja photo set.

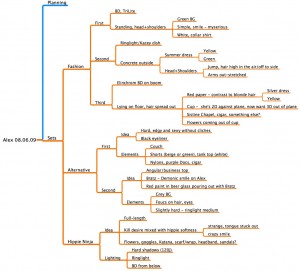
Photo Shoot Project PlanningAlex-08.06.09_Concepts.jpg

There are two extremes to the approach of organizing a photo shoot. On the…let’s call it Conservative end you have a photographer planning each and every detail of the shoot from start to finish. On the…let’s call it Liberal end, you have a photographer showing up with a camera and lights and doing everything “in the moment.” The former sounds calculated and boring, the latter a romantic vision of what a creative photographer “should” be like. I’m a mix of the two, and I happen to know that the best example of Gonzo journalism ever written: Fear and Loathing in Las Vegas, was not written in the Gonzo sense of a reporter furiously filling up a notebook and sending off directly to Rolling Stone for publication. Fear and Loathing was a great short story which took a lot of work to translate into a novel. It’s easy to be creative and spontaneous in “the moment”, but translating a vision into a solid tangible photo concept is another story. So I just did what I do best. I took my project management skills honed in the academic research world at ETH Zurich and EMPA and built up a project plan detailing all the shooting concepts and resources required to complete them using a little Computer Aided Creativity.

The photo concept stage started with our first meeting between myself and Alexandra. We came with our ideas of what we wanted and came to a middle ground. I took the notes from my meeting with Alexandra and started creating a mind map on my PowerBook. I used MyMind to list and then organize all the elements of the shoot, listing the photo ideas, what would be needed for each concept, the lighting style I wanted, and my available resources (cameras, lights, etc), and finally what I would rent or need to buy for the shoot. The mind map isn’t necessarily a rigid plan for the shoot, rather it’s used here to collect and organize all the ideas. Since I’m acting as financier, creative director, photographer, and post-processing artist, I can change the game plan as needed. The organization of ideas is useful so that way I remember to buy a couple of Barbie dolls to remove their heads for the hunter necklace, in addition to buying fresh flowers for the Ninja head dress. Although I love my Minolta 7D I rented a Sony A900 and the Zeiss 24-70 lens from GraphicArt in Zurich. Why? Well, mainly because I’d been using a Minolta 7D for many years and now wanted something with better resolution, auto-focus accuracy and dynamic range.

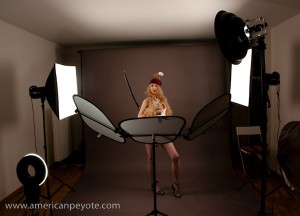
Camera:BarbieHunterSetup-00828.jpg
Sony A900
Zeiss 24-70mm

Lighting Kit:
2x Elinchrom BxRi 250ws strobes
2x Portalite softboxes
1x Elinchrom beauty dish
2x Sunpak 383 flashes
1x Kacey Beauty Reflector
1x Orbis Ring Flash Adapter
1x Lastolite TriLite Reflector kit
Skyport and Gadget Infinity radio triggers


Photo Concept: Color and Lighting Design

The three different looks would require different background colors and lighting designs. My backgrounds included dark green, deep red, and storm grey.

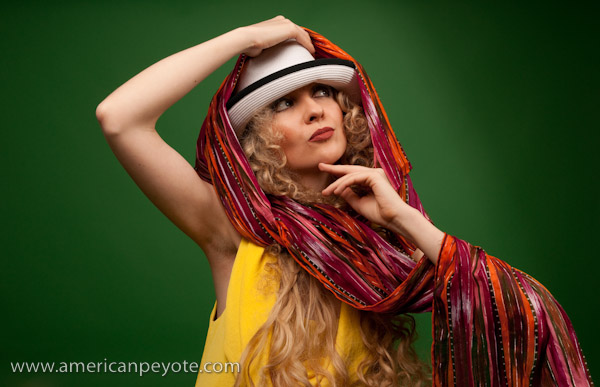
Summer Dress

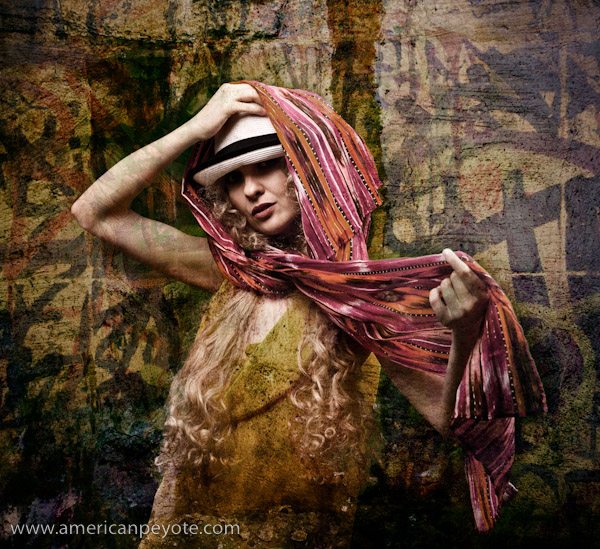
Yellow summer dress with different scarfs (picked up at H&M and from my closet). for the spring type feeling I went with my green background and main lighting via the BxRi flashes using a softbox and beauty dish. We also added a deep red scarf and a few hats. The lighting scheme was to use the BxRi flashes, a large softbox light with the beauty dish for some directionality, giving some deeper shadows and better definition on the skin. The dish also provided nice sort of hard shadows over the brim of the hat to form a vile over here eyes. Lastolite TriLite reflectors were used to add fill from beneath.

Alexandra-3.jpg

SuitSetup-00677.jpgBusiness Suit

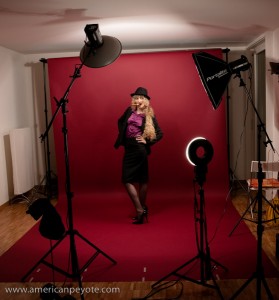
Here I shot with a deep red background, contrasting with the black suit Alexandra wore and giving a moody feeling. I pulled the cushion from my couch for Alexandra to lounge on and we also did standing shots. For these shots I used a beauty dish, softbox, and added fill with a Sunpak 383 in an Orbis ring flash. I setup the softbox on a boom up high with one BxRi. The second BxRi was in a beauty dish on a boom and used as a shaping and fill light to create some moody shadows and balance out the light from the softbox. The 383-Orbis light was used to fill in more of the dress, as it was a dark fabric it needed more light to define the texture.

Hippie Ninja – Barbie Hunter

At some point in the concept stage I remember thinking something like, “It would be sweet if she were a Ninja hunting Barbie and Bratz dolls and then made a necklace from their severed heads.” Here I wanted a harder look, and deviated from the softbox-beauty-dish combination. Two softboxes were placed directly perpendicular to Alexandra, creating definition on her arms and side (think Joel Grimes). The TriLite reflectors added fill to her front, and a Sunpak 383 on the lowest setting in a Kacey Beauty Reflector was used high in the front.BarbieHunterSetup-00828.jpg

Post Processing

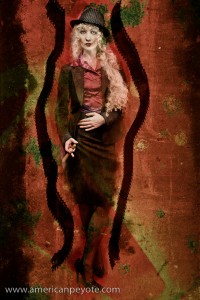
Alexandra originally contacted me because she liked the processing work I do with layered texture techniques. While I made it a point to stay true to these desires, it was obvious that all these images didn’t necessarily “want” to be textured with concrete and graffiti layers. Yes, you read right, I listen to the image while post-processing, the colors and shadows speak to me and we build the final image together. No, I don’t do drugs, I just listen to the rhythm of the world. In the end I worked on the images Alexandra chose for her portfolio and applied the urban style I like to play with. However, for many images I left them mostly true to the in-camera look. Naturally I modified the shadows and color feeling, but for the Barbie Hunter images, I wanted Alexandra to stand out – contrasted with the Barbie Head necklace.

Barbie Hunter

Wrap-Up

Shooting with Alexandra was pretty cool. We did a few safe image concepts and then moved into the experimental territory with the Barbie Hunter. I loved doing the pre-shoot planning and concept design. The more time you put into pre-shoot planning, the less you have to worry about during the actual event and everything will just go smoother. The Elinchrom BxRi flashes are awesome and the Sony A900 + Zeiss 2470 is a sweet combination. Many people will tell you to buy the more powerful 500 ws strobes, but the 250 ws strobes have a fast recycle time and provide more than enough light for my current studio setup. I got Elinchrom strobes from Profot in Switzerland.

Alexandra-2.jpg

What comes next? A photo shoot with Margarita…

Margarita_I-2.jpg

Urban Ninja – Photo to Concept Video Tutorial

Urban_Ninja_IV

Fooling around with video presentations is a fun way to waste a few nights. This one focuses on lighting, posing, and post-processing of my Urban Ninja photo concept. Aside from the concept and posing, which I discussed previously, this video includes a screencast of the post-processing.

The post-processing for the Urban Ninja images was done in Adobe Lightroom and Photoshop CS3. The processing was designed to define and enhance shadow areas of the arms and hands, while the pose of the image is the main element. The face falls off into blackness and shadows, so that the form of the Ninja is focused on by the viewer. Grunge layering techniques were used to add the dark-gritiness I seem to like. Two concrete layers were used here, one I shot in Wintethur, Switzerland, and the second came with the Joey L Photoshop Tutorial DVD. I blended the concrete layers using overlay or softlight, and a few curves and levels adjustment layers were included to better define the shadows. A final color layer was used to give the final color-cast and define the overall image feel. Anyways, to see the full process just check out the video below.

I used black+white adjustment layers to control the shadow depth. With his technique you create a B+W layer, then blend it using Luminosity or, as I prefer Multiply. This darkens the shadows and since it’s a black and white layer, you can go in and adjust the amount of red, green, blue, etc. which is being defined in that layer. This technique can be used in many images so long as you don’t abuse it. In addition to portraits I like to use it for landscape images with a deep blue sky and a collection of clouds. This image below from the Swiss National Park was shot on film with my Fuji GA645, scanned with a Nikon LS-9000 scanner, then worked on in Photoshop, with a B+W layer used to control shadow texture.

Urban Ninja – Dramatic Pose Tutorial

Urban_Ninja-1.jpgThere are many things that are easy to buy in life. Cameras, lights, guns (in America), pants, Katana swords. And it’s easy to say, “Yes, I have a Katana, and therefore I’ll hold it and logically the resulting picture will be cool.” Why? “Because, I’ll have a sword, and Samurai swords are cool…like guns. So, I’ll just hold it and it’ll be a cool shot.” No my son, you’ve seen too many Tarantino movies. The simple fact that you decided to use a gun or a sword in a photo shoot is not a magic-bullet-express to coolness. Yes, yes, I know, you want to believe that your model can become Uma Thurman from Kill Bill or Bruce Willis from Pulp Fiction – just because they’re holding a highly evolved Japanese decapitation device. I may be daft, but I think that even Angelina Jolie looks awkward and fake with a firearm in her hand. Not quite as foolish as Pamela Anderson in Barb Wire, but not far off either. Good photos come from the imagery of the subject and the message contained within their static forms. It only has to look believable for 1/120 of a second if you’re taking a photo, but it’s easy to come up short. So what goes into creating a cool dramatic image using things like swords and guns as props in photos?

The Emotional Connection

Images and pictures are interesting because the viewer feels a sensation, a reaction to the medium. This is paramount over everything else, and 99.99% of the time your camera doesn’t matter too much. You don’t need a Hassy and a production team to do some cool ninja shots, you just need to get a handle on the visual imagery. Visual imagery? Ok, so where does that come from?

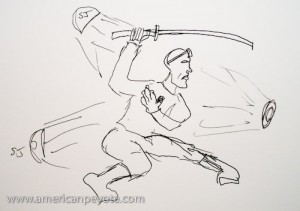
urban_ninja-2One day I was thinking up image concepts and settled on the Urban Ninja concept. This involved a bit a sketching, lighting design, wardrobe, post-processing, but the most important part was the visual pose of the model. Why is the pose so important when creating a dramatic action image? Because photography is just a fake representation of reality, and the more realistic and powerful the emotional message, the more unique your image will be. The whole point of weapons (swords or guns) is to inflict irreversible bodily harm onto another human being or animal. The purpose is to kill. You can read all the Sun Tzu you want, recite all the Samurai poetry you can remember, imagine valiant soldiers as warrior poets transplanted from killing fields in Scotland and Thermopylae, but weapons are simple extensions of the body, meant to draw blood. The actions from the warrior are pure intentions to kill before being killed. We’ve dressed this up in popular media and comic books, but the point is that the body should communicate a sense of power and desire to inflict bodily harm, to kill someone else. Otherwise, there’s no reason for the sword/gun/weapon to be in the image. And therein exists the heart of the dramatic action image.
dramatic-pose-1-3.jpgThe Dramatic Pose

The dramatic pose has evolved and reached a pinnacle of artistic expression in comic books and graphic novels. In these static mediums you have to communicate the dramatic action in just a few static frames, but give the reader a sense of danger and adrenaline. So what can a photographer learn from comics books? Many things my children; color palette, posing, attention to detail. Recently a number of graphic novels have found their way to the silver screen, among these latest attempts, Watchmen and 300 have been the best adaptations, which really capture the drama of a graphic novel in the fluid movement of a feature film. The basic premise when designing the pose of your subject is to ensure that there’s a connection between the weapon and the model. If you hand some random person a sword and say action there’s a very good chance you’ll just get an awkward image of a person with a sword. The Katana is a beautifully curved piece of steel, which needs to flow with, and be a part of (because it is simply an extension of) the body of your model. Portray it in any other way and you end up with something which doesn’t look genuine. It’ll look forced, fake, and a viewer will pick up on that. Something will click in their mind and they’ll think, “no, that’s not right.” If your viewer doesn’t intuitively feel themselves drawn into the image, and don’t believe that they are Uma Thurman wielding a Samurai sword, then the photograph has failed. So what are the specific mechanics of the dramatic pose?

urban_ninja-4Pose Dynamics

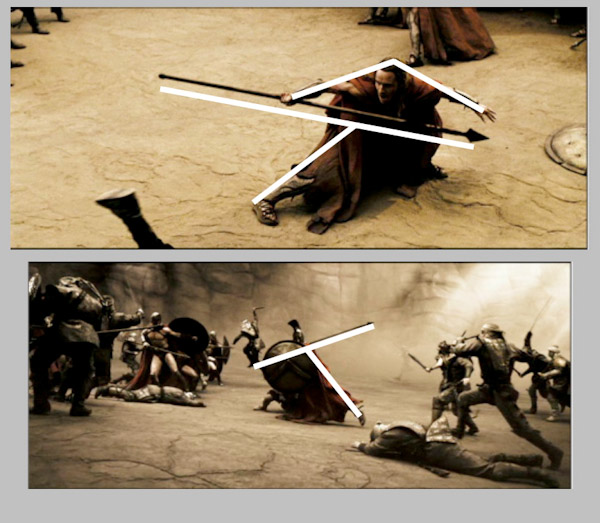
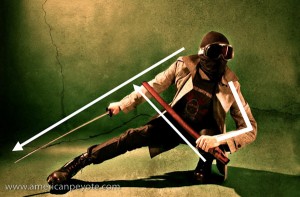
Naturally these mechanics of posing will change for whatever crazy weapon you ask your model to hold, but here are the basics from the comics and my own experiences. Think about a body, think about a body holding a sword and about to decapitate someone. The body moves from the center of gravity, from the Chi center of the warrior. If you don’t respect this notion then your model will look unbalanced, your ninja will look like a drunk Halloween party-goer, and the result will be sub-par. Momentum moves from the center of the body, which is generally taken to be at the center of gravity, near the abdomen. Force is translated to the legs and reaction forces move through the arms, but as any dancer knows (and I a-love-a the techno dance nights) it starts from the center of the body. With a ninja concept, the Katana follows the curve of the body as it moves in space. Therefore, the relationship between the legs, arms, body center, and sword is very important. It seems most dramatic to capture this relationship at the two extremes: when a person is recoiled, ready to explode, or at the end of the action, after the head has been decapitated and is flying through the air. That’s the way they do it at Marvel and D.C. Comics. Let’s look at a few screen shots of 300 and Watchmen to illustrate the concept.

dramatic-pose-1.jpg

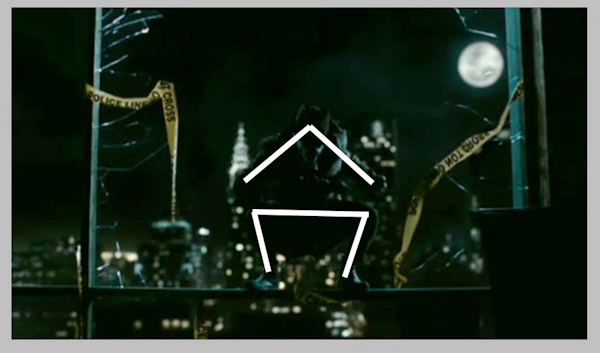
So what do we see? We see King Leonidas of Sparta at the pinnacle of recoil, (bottom image) about to bring down a wicked spear-death on some poor Persian bastard who got send to the front-lines. Look at the lines of the body and the weapon. The line of the legs from the ground to the connection to the spear is very angular, nearly 90 degrees. Look at Stelios (top image), recoiled in a defensive position just after killing the representative of Xerxes. The line of the legs to the spear are very hard (although more difficult to see here) and prominent. Look at the geometric position of Rorschach (shown below) when he’s crouched on what’s left of the Comedian’s window. Actually, the lines are very similar to the Kanji for the Shibuya train station in Tokyo. Coincidence? Yes, of course. There is no magic formula to the Universe. There is no hard rule, but some loose patterns do seem to possibly exist.

dramatic-pose-1-2.jpg

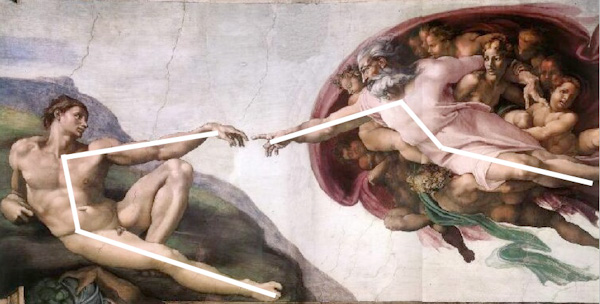
I interpret it this way, harder angles generally tend to  communicate a sense of strength and power. If you look at a the lines of two people having sex, the lines of the bodies are all interconnected and chaotic, because that is the point of extreme vulnerability. Think of the lines of a nude image, one meant to express sensuality. The lines of the body in a traditional nude will be very subtle. What do we see from Art history? Lets consider the connection between humanity and God (or whatever the interpretation is) from Michaelangelo. God stretches out in a subtle way towards Man (feel free to interpret as Wo(man) as well). The lines are relaxed and not very hard. You get more a sense of calm (of course the lighting has an effect as well), which is far different from 300 and Watchmen. Even if a Katana were thrown into the mix between Adam and the Creator, it wouldn’t come across as a dramatic expression of rage. I’m not an Art historian or an illustrator, I’m a Doctor of Science, and these are just the patterns my mind has picked up on.

dramatic-pose-1-4.jpg

So, if you’re interested in creating a hard-dramatic image, consider the pose first. It will help define the overall tone and drama of the image. From the pose flows the intention of the subject, to love or kill, and if you form a good basis here, the resulting image will better communicate the drama and emotions you originally intended. Or, you could just put a gun in a picture and the result will likely be a generic, uninteresting image of a gun and some person.

Urban Ninja – Concept to Photo

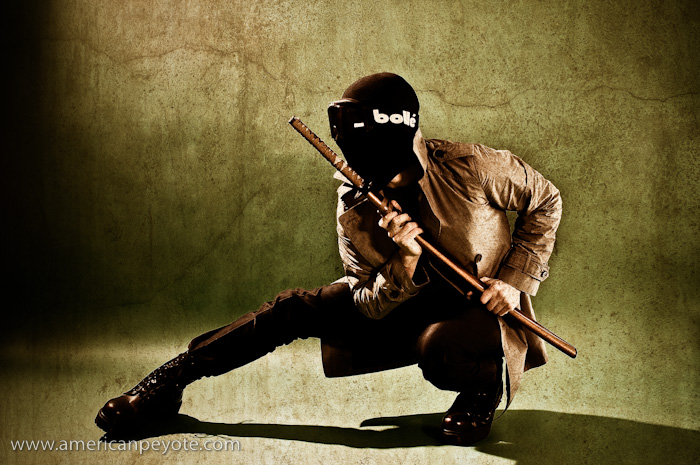
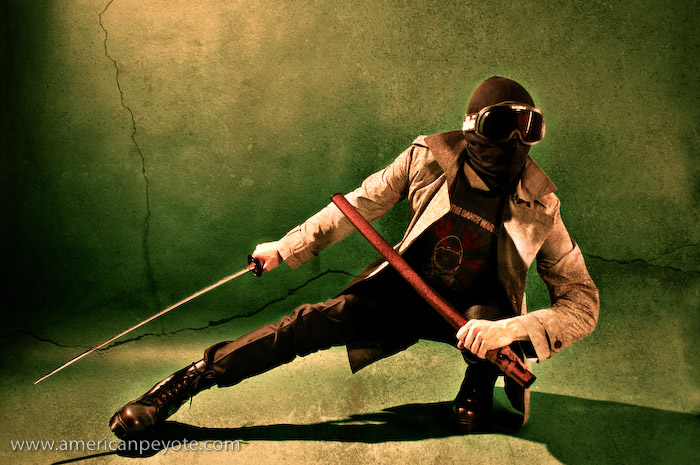
urban_ninja-2I was on a train heading back from Zurich and I had an image in my head, so I sketched it out and the next night setup some lights to create a few concept images of the Urban Ninja. This set of images is probably one of my more thought-out to date. The image is meant to be dark, with the main action elements distinct, this includes the pose, lighting, and post-processing. I can’t really say why I designed an Urban Ninja image concept. Partially it’s because I’m enthralled with the new Watchmen movie, partially it’s because I watched Akira Kurosawa’s movie Ran, and finally because I happen to have a Katana sitting on a shelf in my apartment. So how was the Urban Ninja image designed and executed? Well, lets look at the various elements, Pose, Wardrobe, Lighting Design, Processing.

urban_ninja

Pose

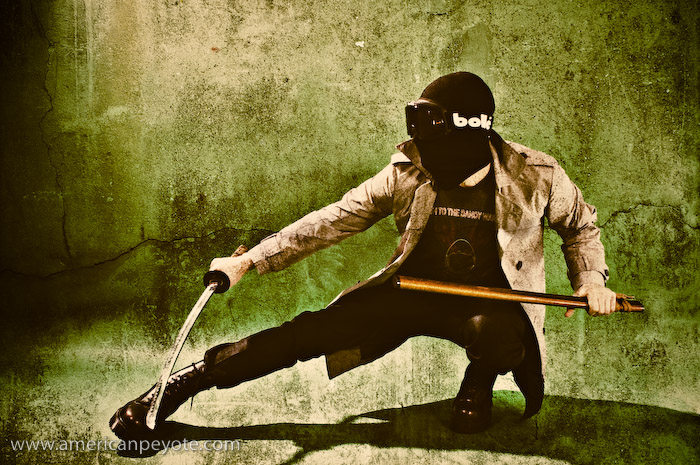
The pose was the primary reason for this image, and the driving force being it’s creation. I have a book somewhere in Michigan that I used to learn about drawing comics from. It was called something like, “The Marvel Way” it basically describes how characters are portrayed in the Marvel Universe. The main idea is that you draw characters at the height of anticipation or the climax of action. So you draw Spiderman in a crouched position before his energy explodes and he leaps off of the roof of a building, or you draw Batman with his fist connecting to the jawbone of some villain, but never portray the in between action, where people are just standing around looking normal. So, here our Urban Ninja is in full crouch, poised for action. The leg and sword extend and there’s a sense that there’s something just out of the frame. This is accomplished due to the lines of the body, leading the eye of the viewer. The line of the body leads you into it. The Katana is drawn and ready for blood. The scabbard is in a defensive position to extend the line of the right arm. All these elements are key to the visual impact of the image.

Further reading: Urban Ninja – Dramatic Pose Tutorial

Samurai Sword

The Katana is meant to be an extension of the warrior’s body, the curvature of the blade mimics the swoop and fluid moments of the body when it’s in motion, and this a key element in the pose. Symmetry between the leg and sword contrasts with the defensive crouch of the Ninja, using the scabbard in a defensive position forms a perpendicular line to the sword arm. These all lead the eye of the viewer.

Face Design

The face of the Ninja is totally covered in a mask I got the last time I drove go-carts at Block in Winterthur. The idea is to hide the face, while retaining the features of the face. The goggles are over-sized and remind me of Snake Eyes from G.I.Joe. The mask and goggles are essential to remove the sense of identity and humanity from the Ninja and focus on the pose. The hands were left bare to represent the philosophy that while we can hide our faces and identities in life, we conduct our lives with our own two hands, and there is nothing to hide behind when we have to answer for our deeds.

Wardrobe

Lighting is easy, but to have a cool image you need detail that people will find interesting. In this case, I just wanted to find it interesting for myself, thinking that others might as well. The trench coat and pants are from We, chosen for their close fit and reflective (but not gaudy) texture, which I knew would mix well with the hard lighting design I had in my mind. The Purple Doc Marten combat boots were chosen as the base of the image, the elements which connect the Ninja to the environment. Their size and hard lines complete the line of the legs and also work well with hard lighting. The T-shirt is from a Dandy Warhols concert in Zurich. I used it because the design is just sort of astronaut-cool and cuts down on the seriousness of the image. You just can’t take yourself too seriously when you’re posing for a self-portrait with a Katana in one hand and wearing black ski goggles.

urban_ninja-3

Lighting Design

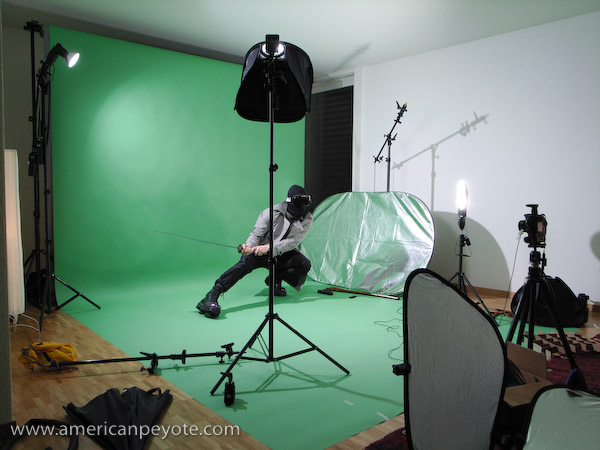
The main driving force in the lighting design was to create some hard shadows and give definition to the Ninja which would hold up well during the post-processing in Adobe Lightroom and Photoshop. Hard light and a bit of soft fill was used to define the hardness of the trench coat and portray the face as melting into the night. Three lights were used and one reflector. The overall desire was to have hard light illuminating the Ninja, forming shadows of the night. The main light is a Sunpak 120J placed above and slightly behind the Ninja. I went with a 120J with a parabolic reflector because it dumps a lot of hard light, which is exactly what I wanted. An Orbis ringflash adapter with a Sunpak 383 was positioned in front of the Ninja, filling in shadows on the front and adding definition to the features of the Ninja. A second Sunpak 383 in an Alzo softbox filled in the front without softening the hard light from the 120J. The ultra cheap Gadget Infinity 16 channel radio triggers were used to fire the strobes. A Minolta 7D with 28mm lens was used, capturing the whole subject and adding a bit of wide-angle distortion which I like.

urban_ninja-4

Color and Post-Processing

A green background was used, to contrast with the black and grey color scheme of the wardrobe. The 120J illuminated the background from the upper left, giving a sense of a moon or street light cascading down over the ninja and rendering a hard shadow on the ground below. An orange layer was added in Photoshop to balance out the darks and work with the grunge concrete layer I used for the processing. The post-processing design was sort of hyper-real, translating into a few layers of Levels, Highpass, Curves and Smart Sharpening. This allowed the Ninja to have some deep shadows, and sharp definition of the body. I use a light de-saturation layer as well to tone down the color and match the “feeling” of the color scheme with that of the concrete grunge layer. This is better described in my Photoshop Grunge Tutorial.

Random Photoshop Tutorial – Grunge Textures

A Textured Sad Clown

In Photoshop a texture is just something, an overlay, an image layer, a way to add some sort of depth to the image which wasn’t there before. There are many different reasons and motivations for using textures in Photoshop, and I’m here to quickly educate the curious reader on how to use grunge textures in Photoshop.

First off, why grunge?

I don’t know why I like the feeling of grunge textures. Maybe it’s because I’m trying to re-create the feeling I get walking through Berlin or Detroit, maybe it’s because I’m a cliche and am just following the crowd. Joey Lawrence uses grunge texturing techniques, and I bought the Joey L Photoshop DVD Tutorial, so obviously I’m just copying his style. Maybe, but some people say that everything is just a copy of a copy of a copy. I know this because Tyler knows this and because Fight Club is one of my favorite books/movies. What I do know is that sometimes I take a photo and it’s perfectly exposed and has great shadows and yet it just doesn’t have the look, the texture that I want the image to have, so I have to go about adding such elements in Photoshop.

So, what’s a texture?

A texture is a separate image which is overlayed over your original image, and through the use of different blending techniques, defines a part of the image. Textures can be used to change the mood or intended interpretation of the original concept which was in your head when you took the photo. If an image is nothing but a story and the photographer is just the author, then textures are just visual storytelling tools.
Where do textures come from?

Anywhere, any image can be used as a texture and currently I prefer to use concrete and street art textures. I use custom images, which means that I photograph walls and doors and parts of cities which I think have an interesting texture or feeling, specifically to use as textures in Photoshop. I generally like creating images where the original photo, and the texture images are all taken in the same location. So if I do a portrait shoot in Winterthur, Switzerland, I will probably use textures shot in that area as well. I like this idea because it means you’re including environmental elements of the shooting location in the processing of the image, and then the final image is a combination of the subject as well as of the environment where the original image was produced. Once you have a image to use as a texture, how is it used in Photoshop?

How Do You Add A Texture in Photoshop?

If you’re visually inclined, check out the video tutorial above, which goes through how I created the Textured Sad Clown image. To add a texture to an image in Photoshop (or any other image edition program with layers) you just open the texture image and your main image, and then you copy the texture to the image to the main image. The texture will be imported as a separate layer, and now you just need to blend the texture into the layer below it. There are a number of different blending modes and techniques, which can be used to blend your texture into the final image. The two main ways to blend texture into the original image are via the blending mode, and then via masking of the texture layer. The blending mode defines how the colors, luminosity, tones, and visual parts of the texture blend into the layer below it. So, for example, if you choose “multiply” as a blending mode, then similar tones are multiplied together, producing a darker image. If it’s not the look you want, try another one till the image starts to look good. What is “good?” Good is whatever you think it is. There’s never one blending mode which works for each image and concept. You just go through them all till you find one that you like. Once you settle on a blending mode, you’ll probably still want to modify it to bring out different aspects of the image. This is done by masking. Masking is a technique to mask out or hide parts of a layer. It’s a non-destructive editing technique which is pretty essential in Photoshop. For example, with a portrait, you probably don’t want the texture layer to block out or dramatically change the face of your subject. So after selecting the layer mask on the texture layer, I can paint over Amber’s face, so her features aren’t hidden. The overall opacity of the image can also be reduced to uniformly reduce the impact of the texture layer.

Obtaining Textures

I’m continually adding to my texture library. It currently includes textures from Zurich, New Orleans, Tokyo, Winterthur, anywhere that I find a cool surface to shoot. The more textures you have, the more story telling elements you have at your disposal. I don’t use texturing techniques on every image, sometimes I want a certain look, sometimes I don’t. Sometimes it looks cool, sometimes it’s a cliche. Do what feels right to you when processing in Photoshop. If you limit yourself to a Joey L style or the Scott Kelby 7 Steps, then your images will look like those of a thousand other people. Is that what you want? Maybe every photo I take is just a copy of a copy of a copy. But so far I haven’t found that to be the case.

If you’re interested in trying out some texturing effects in Photoshop but don’t have any images to use, and you live inside a white box without a key, or it’s cold outside and you’re not in the mood to go shooting, or you just want to get started right now this second…

Here is a sample of my Texture library to download and fool around with. It includes custom images produced in the old industrial areas of Winterthur, Switzerland. These textures are free to use for non-commercial work and for educational non-profit uses.  When publishing an image, please add a credit for American Peyote, and link back to www.americanpeyote.com and please don’t hotlink to the Winterthur Textures zip file.

Winterthur Textures Library

I would be interested in seeing how you use these textures, so feel free to email me samples of your creations.

Additional Texture Library Sites:

Textura

Texture Warehouse

Concept to Photo – Urban Dry Tooling Video Tutorial

Concept to Photo Urban Dry ToolingPhotography and text-based web publishing are fantastic tools for communicating ideas across the world. However, they have their limitations. I think in a 3D moving picture mindset, and therefore, it made sense to start communicating using moving pictures and spoken words. Concept to Photo – Urban Dry Tooling is a video tutorial about starting with a concept, and then translating that inspiration into a final photo.

This isn’t a new idea, there are many photography related video tutorials on the web. However, I rarely find one I want to watch for more than 30 seconds, because they’re either boring, or filled with the least relevant information possible. Another problem is that in many ways the photography tutorial video genre has become a dumping ground for marketing videos from photographers trying to emulate Chase Jarvis – the famous commercial photographer from Seattle who is often credited with starting the photo-video marketing movement. However, he’s a unique gem in the chaotic video landscape of the internet, and his videos have yet to be matched for style or content. I’m not a photographer posting a video to show off my equipment and pretend like I have a cutting edge production studio. I’m a guy in an apartment with an old G4 Macintosh and an old Minolta 7D DSLR who likes to think up concepts and express them.

The concept behind this video is simple, compress my creative and photo production process into the upper attention span limit of an average internet video viewer.

This video tutorial was created to fulfill three functions: first, as an exercise for me in producing a video I would want to watch (but I’m weird so this probably doesn’t apply to the average internet viewer). Second to help me understand my creative workflow by packaging it in a video form (teaching to others is the best way to learn). And Third to give other photographers, creatives, and anyone else interested in a new (or old) perspective on the creative process as applied to photography.

Audio was recorded using my Zoom H4, screen capture video was obtained using Snapz Pro X, music was obtained from Kevin Mcleod’s music collection, and the rest is just still images and titles. Some say that soon cameras and camcorders will be one and the same, and they’re right. But in transitioning to the video world I wanted to start simple, and that meant using primarily still images.

Concept to Photo – Workflow Tutorial

For some reason the job details between photographers and scientific researchers are dramatically different, but from my perspective the motivation and work-flows are almost indistinguishable. Maybe it’s just my will to be weird, but when I sketch out a photo concept or think up a new research project, the exact same centers of my brain are working at peak capacity. This was the inspiration in developing this article on the creative workflow from concept to realization as applied to photography.

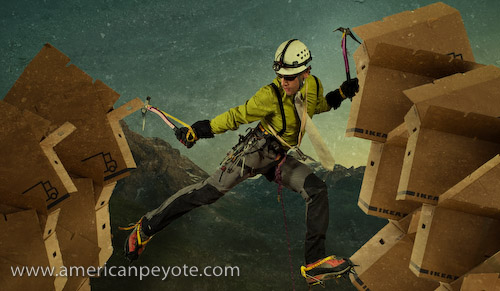
IKEA Dry Tooling

IKEA Dry Tooling

The generic view of artists is that they’re filled with an abundance of talent and drive and create through pure inspiration – bubbling from a magical fountain in their soul.  The generic view of a scientist/engineer is one of a logically cold calculating individual slaving for days and nights and eventually years with a sort of mad-scientist personality detached from reality – characterizing the world in theories and mathematics that normal folks just don’t understand.

The more I started actually doing photography I began to realize some things would go faster and come out better if I actually thought about them – laid them out beforehand you see. It’s not like I need to define the process in a textbook. After all, photography is Art, the result of intuitive inspiration and amazing talent…blah, blah, blah. But the fact is, as an engineer I acutely appreciate the poetry in a well executed project. An elegant well-thought out project map is as beautiful as a fleeting mountain vista or abstract impression. The link between art and science/engineering/design is indistinguishable, so why not integrate them all? Take the analytical themes of science and fuse them with the free out-of-the-box thinking of art and photography.

I like to take the analysis aspects of science, combine with the project management aspects of engineering, mix with the artistic element of design and cap it off with the fool-proof ease of digital photography and computer imaging. We end up with a total process for the concept develop though image execution and output.

I’m not defining the creative process because I feel a need to before producing an image. Yes I can pick up a camera, set up lights, or not use any lights and produce great images. Sure art is supposed to be free-wheeling and off the cuff and pure inspiration and guess what – so is engineering. Even if you don’t think there’s a process going on inside the nicely packaged computer inside your skull, doesn’t mean it’s not happening. So why not exploit it? Why not explore the creative production process and learn how to improve it?

So, for clarity let’s quickly define the photo production process as:


Concept – Production – Shooting – Processing – Deliverables


Concept

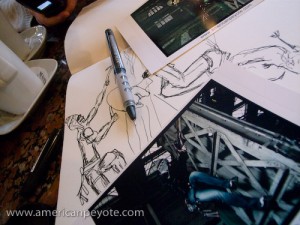
Dry Tooling Concept Sketch

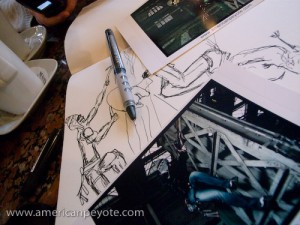
This stage probably doesn’t need to include a camera or computer or anything more complicated than a pen and paper and your thoughts. You just think up what you want to do and start putting it down so it doesn’t get erased in your short-term memory banks. Sure this can be done inside your head, visualize a subject with lights and angles and photoshop layers and then try to produce it directly with a camera. Alternatively setting things down on paper usually brings up more questions. Like, what color should the pants of the model be, will I need a grid to highlight the face or will two soft boxes suffice. Of course, all of this can be worked out on the fly as you’re shooting, but if you can visualize everything before you start, you will naturally get more accomplished and probably get closer to realizing of your vision faster than doing it all on the fly. Essentially the concept stage is there for brainstorming: subject, location, colors, lighting, message, mood, etc. These are realized as sketches, mock-ups, whatever you need. Figuring these things out early means not having to screw around with them later.


Production/Logistics

Once everything is set up in your head, you just need to go through the actual process of producing the work. How will lights be set up, what equipment and wardrobe is needed? Do we need to buy a purple velvet jacket? How about some clear makeup to reduce glare on the nose? Where will the shoot will take place, and how do we get equipment and the models together in production. You could even include a subsection purely for logistics. Screwing things up here means you forgot to bring batteries and your cool new flash doesn’t work or that awesome Octabox is useless because you didn’t pack the speedring. And that means not having the elements necessary to get the image you wanted. Developing equipment lists, maintaining an organized lighting kit which can be taken when needed, and knowing how to set everything up and execute the shooting session efficiently means it could take 10 minutes instead of 60 to get the images you originally wanted.


Shooting

With the concept in your head, and all the logistics worked out and the various elements of the production set up, all you have to do now is press the shutter and head to the next step (in theory). We could also call this the execution stage, but that sounds a tad morbid. Probably it won’t go so smoothly as simply depressing the shutter button, but the point is that if you work out the concept and logistics before you actually start shooting, you won’t have to run around looking for random flashes or light modifiers or – trying to come up with a totally new concept on the fly and not have the resources to see it realized. Many people will say they’re in their “element” when running around fiddling with flash position and making models wait because they didn’t prepare beforehand. I’d rather take the least amount of time as needed to do the actual shooting and move on to Processing the images moving on to the Deliverables. The idea is, get the shot and make great exposures that can be successfully processed into the final image you want.


Processing

In the golden ages of darkrooms and chemicals the main essence of your image was produced in-camera, unless you were a real wiz who lived in the darkroom. I now more or less consider the image from a camera to be a nice starting point – or a possible end point. Processing can be as easy as tweaking the levels or a bit more complicated, leading to various layers, filters, and electronic brush strokes in Photoshop. Processing can mean compositing multiple images together or working exclusively on one from the camera. Processing can make an angry man look approachable or a little girl look like a devil. The colors, shadows, image sharpness, it can all be defined and/or modified at this point to realize the final interpretation of your original concept/vision. How you do it is up to you. My processing work-flow starts by loading images in Adobe Lightroom, editing those images to focus on the images I want, the ones which best communicate the original concept I had. Those are further edited down and the finalists are exported to Photoshop for editing and compositing (if needed), whatever is needed before finishing and moving on to Deliverables. The final images are generally exported from Lightroom (even if heavily modified in Photoshop), primarily because last minute exposure tweaks, cropping, and adding watermarks is far easier in Lightroom than in Photoshop. Depending on your output destination color management is either irrelevant (like to the web) or essential (like for printing).


Deliverables

Website, Flickr, print, Flash movie, printed tattoo, however the image gets from your computer to your audience/client is the Deliverable. Here, beyond sizes, formats, and possibly printer and color profiles there’s not much to enhance or to dilute the vision conceived in the Concept stage. If the Concept-Production-Shooting-Processing stages were done well then the output will look great in any media. If you got lost somewhere between Concept and Processing and forgot to pack an extra flash, then the Deliverable might be lacking, it’s the culmination of everything which came before.


The End?

Here it was and now it’s not, a guide to conceptualizing and producing the fantastic images you want out of your digital life. You can be an engineer, naturally untalented Artist or a librarian, or anything else you can imagine to classify yourself, but if you recognize and follow a process or develop your own and stay true to the vision in your head (and pay attention to the details) the images will come out fantastic. Getting down to Brass Tacs, any project, whether scientific or artist can be thought of as the effective management of resources. You have models, locations, lighting equipment, etc. The job is simply to communicate a message/concept based off of those resources in the least painful way.

Joey L Photoshop Tutorial – After the Honeymoon

The worth of any product does not lie in the first impression, but is rather exposed after having used the thing for an extended time period.  Given the turnover in digital camera technology, 4 months is probably a decent time frame to assess the worth of the Joey L Behind the Scenes Photoshop DVD Tutorial.  I purchased the Joey L DVD Photoshop Tutorial just after it was released in October of 2007 and it is now March of 2008.  After having viewed and used the tutorial for an extended period, did it have a lasting, positive impact on my image making abilities?  Am I now a Photoshop Buddha?  Is it time for me to organize my own DVD and start teaching workshops?  Was the Tutorial a wise investment in my education or an overpriced, rash, ill-thought out toss of my money out the digital window?

Relax Hand Hard Shadow

The Back Story

There are few things which I view with a need-it-now mentality, in particular when it comes to education.  It might suck to learn long division as a disgruntled youth, but it pays dividends later in life when you can calculate things fifty times faster than someone who needs a calculator.

Similarly, I didn’t buy the Joey L DVD thinking it would change my Photoshop skills overnight, but rather, over time it would either have a positive, or absent affect.  The purpose of this extended After-the-Honeymoon review is to look at how the material from the Joey L DVD affected my photoshop and photography capabilities – after the initial joy of buying another digital imaging product had worn off.

First: Why Buy a DVD Tutorial?

The main criticism of the Joey L DVD Tutorial in various internet circles is that it’s overpriced, and doesn’t show anything that can’t be learned on the internet, either for free, or via modest monetary costs.  So why buy it?

It’s true, there are countless opportunities to learn Photoshop and Photography on the web.  Sites like Scott Kelby, Layers Magazine, Photoshop User TV, Dr. Brown, and a number of random totally free videos and written tutorials (often with sample files) are sitting there in virtual space, begging to be viewed.  There’s also libraries of books on-hand dealing with every aspect of Photoshop.

I also know from experience that a number of the tutorials are little more than simple near-pointless tips on using curves, the healing brush, and converting to Black and White.  Not all of course, the paid ones have more real value and there are many gems at Layers Magazine.  However, my main experience is that many almost universally use bland uninspiring images for their examples, and often times it feels like I’m watching a copy of a copy of a copy.  I was looking for something more original to supplement my Photoshop education.

One main draw of the Joey L DVD tutorial is that Joey Lawrence is an actual working photographer.  A dynamic beacon of creativity in an industry of imitators.  The draw of learning from an active Pro is unique for me, as I often have the feeling that too many tutorials are done by people who realized it was more profitable to teach Photoshop instead of being a photographer.  This is probably a pessimistic view, and there’s really nothing wrong with that business model, I encourage folks to make money in any legal fashion they wish, and teaching is one of the noblest professions.  Still, I get my science education from world class-researchers.  Why skimp on my Photoshop education?

A tutorial like the Joey L DVD instantly makes me think of photography workshops.  Workshops are popular from a few perspectives; when you get to the point as a photographer that you want to expand your creative consciousness or skills in a certain areas, or you travel to some distant hard-to-organize location.  Workshops are generally considered to be money-well-spent, and in general I would never spend money on a workshop because many just seem like an excuse for people with too much money to pay someone to tell them to use their camera equipment.  There are exceptions, if David Hobby or Don Giannati flew into Zurich for a Strobist or Lighting Essentials workshop, I’d probably be there to welcome them at the airport.  Basically, I wanted a Photoshop tutorial, and the Joey L DVD seemed like a good fit.

Hanging Hand

Playing and Criticism

Another main criticism is that Joey doesn’t teach good Photoshop technique.  From a technical stand-point I’d say this is true – but if I was technically a Photoshop whiz, I wouldn’t have bought the Tutorial in the first place.  The Joey L tutorial is primarily about using destructive editing techniques and just doing what "seems" right for the image – you know, to make it look good.  I don’t really think this is a bad thing.  This is what artistic expression is all about, if you stick to rigid guidelines in books and always listen to your teachers, you’ll always be one step behind your peers and more or less copying from the old Master’s.

If you copy what Joey does point-for-point, you’re not learning anything that a monkey couldn’t learn (yes, it could take a generation or two of breeding and genetic engineering).  Anytime you’re confronted with a large, intimidating construct like biomechanics, quantum physics or Photoshop, playing around isn’t such a bad thing – and should be encouraged.  "Playing around" has brought more ground breaking discoveries than I care to list, including penicillin and bubble wrap.  Playing in Photoshop is an important lesson I’ve taken away from the tutorial, which is also how Dave Hill developed his legendary style that so many geeks try to achieve.  This doesn’t mean I use the techniques Mr. Lawrence has described in his tutorial.  I do Photoshop with my own workflow and so should you.  But it’s not bad to learn from someone who isn’t using Adobe standard practices.

Ah, But the Cost

The Joey L DVD is not cheap, but education is what the student makes of it more so than what the teacher teaches.  This is contrary to many philosophies of modern pedagogy, but after going through three engineering degrees and a few semesters as a teaching assistant, I feel comfortable saying that a motivated student will learn no matter how dimwitted the professor may be.  Ahhh, but inspiration from a teacher, is sometimes priceless.  The Joey L DVD was inspiring for me, and that is hard to put a dollar sign on.  But it might not be for other pupils.

Draw Like the Maple Tree Young Grasshopper

I feel like the DVD has helped open up the horizons of Photoshop.  This doesn’t mean that now I think that every photo needs to emulate Dave Hill and Joey Lawrence, it just means that my mind is more open to what I can do with the raw image – and the DVD Tutorial had a part in that.

I love to draw and do images on paper, but I’ve generally felt constrained in Photoshop, "Hmmmm, I should make layers with correct names and make sure I can go back and change everything."  So, again one of the important lessons from the Joey L DVD is that a desire to play in Photoshop is essential, the program is a tool, not a defined process.  My Photoshop skills are getting more fluid and playful, which opens up more creative directions in photo manipulation – and hence visual expression.

Was the Joey L Tutorial a good buy?

After 4 months, I’m still comfortable with the amount of money I threw down for the Joey L DVD.  I come back to it and replay a lesson here and there when I need to, thinking back to the techniques, imagining how to use and create them differently, and often also disregarding them and doing something different.

I like being able to replay different lessons quickly, and then go back to other projects – something you can’t do with a workshop (unless they include a DVD).  I’ll probably never buy another DVD like this again (ok, maybe one), the exception being the forthcoming Strobist DVDs or the offerings from Lighting Essentials.

Why not go crazy buying more DVDs?  Because I’ve hit the point where all the other fine points of Photoshop can be easily found or discovered, maybe I didn’t need to buy the Joey L DVD to get to this point, but that’s the way I’ve arrived here, and I don’t regret the path I’ve taken.

Brass Tacks

Here’s the thing, with Photoshop I was looking for a spark, something to open the flood gates and broaden my horizons on this subject of digital post-processing.  The Joey L Tutorial DVD did that – exactly that – I see images in layers and masks and color shifts and shadowed hues now.  When I look at setting up a shot, I think about the post-processing, the way the lighting will define how the image can be manipulated later.  This isn’t a certain style, it’s an addition to my digital visualization abilities – the same as visualizing a wide angle effect before taking a picture.  The horizons for communicating a certain message have now been expanded.

Could the Joey L Tutorial DVD have been done better?  The crazy thing about the Joey L Tutorial DVD is that it could have been one of the most fantastic photography-centered Photoshop learning tools ever created – if it had been created with an eye towards integrating the lighting and photoshop techniques.  However, it doesn’t take long to see for yourself which type of images "work" and which ones "don’t" based on their lighting.  No Photoshop action can "fix" images which don’t have the right lighting to start with.  That’s the shortcoming of the Joey L DVD, the lighting-processing connection is mostly missing.  However, playing around with different images and the Joey L actions will quickly reveal how lighting affects the post-processing.

Here’s an example, both of the images shown below were processed using the Joey L Signature Action, and should be slightly representative of how this technique works.  It’s pretty obvious how the first image doesn’t really look all that great.  It’s flat and desaturated, and more or less boring.  This is because the face and torso are turned away from the light source, and all we have is definition of the jacket. However, the second image is better-lit, and renders the deep-grudge shadows much better than the first one.  Once you see which type of images and lighting combinations work it’s easy to draw up in your mind how to design shots specifically for this type of deep-shadow processing.

Floating in the Air Drama in the Air
Poor lighting, only shadow and definition in the jacket Better lighting, good shadow definition of the arms, torso, and face.

Monkey See Monkey Do?

There is a pervading attitude from many dark corners of the web that if you buy his DVD to learn from someone like Joey Lawrence, you’re trying to adopt or steal his look/style instead of developing your own.  If such an attitude existed in the scientific research world, we’d still be riding horses and the telegraph would probably be 200 years from being invented.  In general everything has been done before.  There are very few truly new things.  There was Dragan, people copied him by creating Photoshop actions, Joey Lawrence no doubt learned from these influences, and developed his own style.  He made a DVD, I bought it, and here we are.  That’s how progress and the evolution of style sometimes works in the digital imaging world.

As you move through life you learn things – and the knowledge you retain becomes tools which you can use to do other things: build bridges, take pictures, climb mountains, relax on a beach.  The real mistake is not learning as much as you can and using those tools as desired.  I didn’t set out to imitate Joey Lawrence, or to create iconic art that will stand the test of time.  But if that iconic art thing happens, well – cool.

The Joey L Tutorial DVD is just an addition to my photography digital image making toolset, what comes next no one knows.  Should you buy the Joey L DVD Tutorial, or that Canon 85 mm lens or that Nikon D300?  Will a set of Profoto strobes make you a better photographer?  Figure out what you "need" to accomplish what you’re seeking to accomplish – acquire those tools, and then go write your book, develop your look, live your life, whatever.

No one single piece of knowledge or equipment will improve your skills in life unless you’re motivated to push yourself to the next level, but once you know how things work…well, maybe I’m working on my own tutorial DVD…