Mark

Mark is a guy from Michigan who lives in Switzerland. He's a photographer, occasional writer and trained research engineer. His free time is sometimes monopolized by mountain touring or travels. On occasion he attends and presents at BarCamps and blogging events.

Sigma DP1 – Revelations from the Camera Shrine

When an 800 pound Gorilla walks into a room, everyone notices.? When a world class lens company releases a new camera, few will barely have the inclination to even suggest turning their eyes to acknowledge noticing. ?Sony owned the PMA 2008 news like no other, and the other companies seemed to know it.? That’s what it means to be an 800 pound Gorilla, your competitors have to sit back and watch the beast do what it wants because there’s no way to realistically deny your presence. ?Aside from the Sony DSLR releases there was one lone camera release by Sigma, the lens company which also makes a DSLR which has one of the smallest user bases of any current camera maker.? It could probably be argued that the Sigma DSLR user bases is actually smaller than those of some defunct camera lines like Contax. ?Sigma produces lenses for nearly every camera type, from Canon to Pentax, and even for their own DSLR camera, the SD14 – a camera which has been discounted as much as any camera in history, except for those which were officially discontinued – because despite their best intentions to market a “competitor” few take Sigma seriously when it comes to making digitally enhanced light-tight boxes.? At least, until their development of a pocket camera with a large APS-sized imaging sensor.

At Photokina 2006 Sigma announced they were developing a camera from heavens, and showed a prototype at PMA 2007 of the small and powerful DP1 – which was enough to create a butterfly marketing breeze strong enough to light up every photo website on the net and generate universal interest from nearly every user group, from Canon to Minolta.

Then came the delays and speculation.? The DP1 didn’t materialize at PMA 2007 and the word “Vaporware” started to spread.? There are many examples of awesome camera products like the Pentax Medium Format Digital, which had nice mock-ups at the PMA and Photokina shows but never materialized in the marketplace.? So it was with great mega-pixel glee that camera geeks across the globe read the news of the DP1 launch at PMA 2008.

Like every camera maker, Sigma has a user base of die-hards committed to loving their products till life slips from their fingers – no matter the actual performance and usability of the camera system. ?However, Sigma is a little different than Canikon, because although their core user base will jump on any product they produce (like the SD14), it doesn’t mean that their customer base will grow by any measurable amount. ?Enter: The Sigma DP1, a camera that a lot of photographers would be willing to drop dollars on if it would only be released – and according to Amazon.com, the DP1 will be available on March 25, 2008 with a price tag of $799.

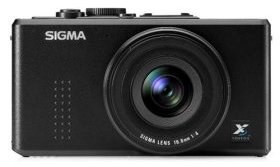
The Sigma DP1 with 14 megapixel FOVEON X3 is set to go on sale in late March.? It will have a fixed f/4 16.6mm (28mm equiv.) lens, with manual focusing capabilities, a hot shoe, optional external viewfinder, and 2.5″ LCD screen.? This means a compact camera with a high resolution sensor and a pixel size of 7.8 microns – promising to render smooth images with dynamic range beyond that of every other hand sized camera on the market today.

Now the digital camera market has come of age with a compact point-and-shoot camera with a APS-sized sensor, all the image quality capabilities of a DSLR in the palm of your hand.? In short, the God-send camera users have been calling for.? It is true deliverance from the camera Gods, a high resolution, high quality compact camera with an affordable price, something not seen since the film days when a compact Contax G1/G2 could match the image quality of any top-shelf SLR.

Of course, many people have already counted the DP1 as being a flop.? The rationale being that with a 28mm equivalent lens and a “slow” aperture of only f/4, and a maximum ISO of only 800, a number of folks don’t even want to consider it as a digital imaging tool.? Which is sort of the reception the Ricoh GRD first received, but it since risen to become a cult camera favorite.

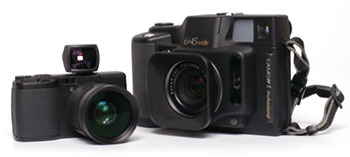
And I would discount the DP1 too if I listened to the gadget-junky-fools on the net.? The thing is, I like to “use” the cameras that I buy, and getting down to Brass Tacs, my Fuji GA645 and GA645w film cameras (both with a slow f/4 lens) produce incredibly sharp, amazing results in a relatively small package.? The Fuji auto-focus 6×4.5 rangefinders did well in their day, but with the advent of digital the cameras didn’t make the impact they deserved and are now only found on the used market.

But the Sigma DP1 is different, it will find a profitable niche, because once people start using it, they’ll no doubt find that having a high performance tool in the palm of your hand is much better than a $2,000 DSLR-lens combo which sits around on your desk half the time because it isn’t convenient to take everywhere. ?I know for a fact deep down in my heart that at the very least the DP1 will be a killer landscape tool for the mountaineers and travelers of the world, and if a wide angle and telephoto converter were offered, (as are available for the Ricoh GRD line) it would be the perfect travel package to tool around the globe with.

Essential Links:

Sigma DP1
Sample Pics on Dpreview
Press Release on Dpreview

PMA 2008 – Sony Digital Junky Live View Nuclear Madness

Now we have come of Age
Descended from the Hills and Caves

This humble year of our Lord called 2008 is set to explode in the mind of this camera-politico-junky dream.  Forces are in motion and old battle scores are set to be replayed on the global stage.  We in the pro-amature photo industry news business take these things very seriously – more intently and at a higher adrenalin level than any fool CNN political commentator War junky journalist on the Net today.

The Photo Marketing Association held it’s yearly show, and among camera announcments from Canon, Nikon, Sigma, Pentax and others, Sony is set to transform the digital camera market.

The stakes are higher than those wars overseas and every online junky comes out of the digital net to blast competitor companies and raise their favorite brand to Buddha like reverence with the crafty spirit of a Sun Tzu trained assassin.

First, let’s set the stage:

For those in the know, the competition between digital single lense reflex (DSLR) camera manufacturers is nothing less than a precision guerrilla war on the global chess board.  In any competition there are those on the top and there are underdogs.  The Goliath of the camera industry is Canon.  Dominant in the pro sports market their lenses and bodies penetrate the consiousness of anyone who has seen a main stream camera in the past 20 years.  Canon was really the first camera maker to develop its own imaging sensors and use full frame (35mm film sized) sensors.  Their pro cameras are always at the top of the performance charts and have dominantly defined the direction of digital camera technology since Kodak dropped the ball in developing DSLR technology.

Canon is the Golaith to knock off, and Nikon started the real assault late in 2007 with the release of the D3, a full frame high ISO DSLR beast which is creating a movement of dollars back to the Nikon brand.  Aside from Nikon, the small companies like Pentax, Olympus, and the now defunct Konica-Minolta released cool technologies like in camera images stabilization, anti-dust, and Live View innovations, which were either capatilized upon, improved, or ignored by Canikon.

Unlike War, the photography battles occur at prearranged places, generally the yearly PMA and biannual Photokina.  This year they’re both going down and the bloody push for market share is fierce.

The stage is set to explode because one last vestiage of the samurai inspired Nihon-Camera tradition has begun to growl and show its silver back.

An 800 lbs Gorilla is in the room – Sony started is mobilizing in the DSLR business about 2 years ago with all the vigor and quiet calm of a Tsunami – after aquiring the camera technology from Minolta.  Now the hurgry beast has declared a desire to capture 10% of the DSLR market in 2008.  At this time in 2007 Sony had one DSLR and a hand full of lenses on sale.  Now the line boasts the A100, A200, A300, A350, and A700.  Partnered with Carl Zeiss, the mystic German lens house to design and oversee high-end lens production – the pieces are coming into place for Sony to make some serious market penetration.  And then, just a few days before PMA opened and other manufacturers finished their announcements, a quiet press release was made:

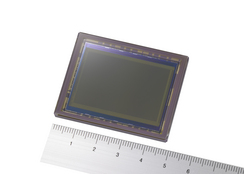
Sony announces the development of 24.81 Megapixel Full Frame Sensor

The general camera geek consumer has been waiting for a hammer to drop… that full frame DSLRs would be produced is such numbers that they would actually become affordable and Canon would be knocked on its head – and this is one large step closer to reality.

Sony is more or less leap-frogging over Olympus and Pentax, which Minolta was incapatble of doing.  With in-house sensor manufacturing abilities and global marketing reach, Sony has the power to do what Nikon has had trouble with – entering a head-to-head Ram style war for the high resolution Pro-oriented DSLR market.

Let’s Focus…

The combination of Minolta camera technology, Zeiss lenses and a 24.81 megapixel CMOS imaging sensor is the camera industry equivalent of a country aquiring full-blown nuclear capabilities with ICBM cluster delivery systems overnight.  No matter your moral affiliations it means something, and the world will never seem the same again.  Of course, we’re dealing with cameras here, not atomic demons, but the analogy will stick for now.

The hammer is coming children…and it’s set to slam against the ground with the full force of an 800 lbs Japanese Gorilla behind it – and all the camera junkies are laying money down on Sony in announcing their Alpha 9/A900 full frame DSLR at Photokina in September 2008.

Engineering for the People – Radio Triggers

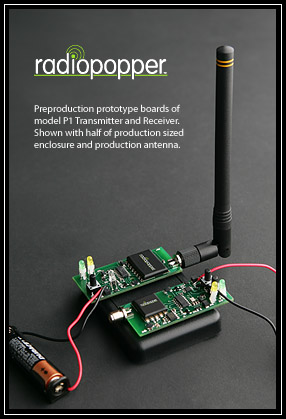
One of the great possibilities the current digital age is the revolution in photography and off-camera flash, an often over-looked aspect is the development of radio triggers to activate off-camera flashes. There are currently two known projects from non-corporate entities developing radio triggers for off-camera flashes, RadioPopper, and the open source Strobit Trigger project.

The RadioPopper P1 and P8 are devices that goes on standard Canon and Nikon flashes and turns their IR light-based triggered TTL functions into radio-based ones.  By "goes on" we mean as in "stick on" no permanent modifications to the flashes are needed.  In some Geek circles this is the equivalent of combining Voodoo and Witchcraft into one compact religion to dominate the position and intensity of the Sun.

If the RadioPopper works, it means that the high technology tied into crazy expensive flashes like the Nikon SB-800 and Canon 540 can be combined with the awesome convenience and reliability of the most popular flash trigger available, the Pocket Wizard.  The RadioPopper is supposed to be an add-on for Canon and Nikon flashes, but it’s impossible to discuss any radio triggering device without bringing up the industry standard Pocket Wizard.

As a photographer who generally uses only manually enabled flashes like the Fuji GA, Contax TLA-280 and Metz 40, I’m more excited about the third trigger device from Radio Popper, a basic radio trigger – higher quality, greater range, and more reliable than those fantastic Chinese models from Gadget Infinity, but at an only slightly higher price.  Of course, part of the reason I use manual flashes is that I use a Minolta camera, which has only recently been saved by Sony.  Rumor on the RadioPopper blog is that Pentax, Olympus and Sony flashes will be included in the P1 and P8 compatibility list.

Getting down to brass tacs, the Radiopopper is a slick example of engineering being taken into the hands of the people – filling the void that big business has failed to capitalize on.  A fantastic idea coupled with innovative drive and the motivation to serve a niche market with a product that’s in demand and staying in tune with your potential future customers from design to product realization.  Early on the RadioPopper developers were seeking feedback from Strobist readers on Flickr.  It’s a pretty kick-ass example of how to go from concept to product without the benefit of a research and development department.  This is basically how Apple started, and in these days of Wars and hard economic times, it’s fantastic to see this dream of Radio TTL coming to the market from a start-up company.

However, even more over looked than the Radio Popper is the Strobit Open Source Trigger project.  The open source trigger was bound to happen eventually – the natural curiosity of photographers coupled with the Do-it-Yourself mentality fueled by David Hobby’s Strobist movement was bound to eventually give birth to a DIY radio trigger project.

The advantage of the open source Strobit project isn’t just the idea of manufacturing a low cost alternative for the off-camera lighting enthusiast, the Strobit platform would be open for add-on mods to the firmware, and by using an expansion bus incorporated into the circuit the Strobit now harbors some fantastic development potential, like firing strobes in different sequences and other custom functions like sound triggering.

The Strobit project is a banner example of the power of open-source.  The camera product world is littered with proprietary cables, lens mounts, and flash accessories where the large camera makers like to control the profits for add-ons to the DSLR market.  The Strobit project is ultimate Engineering for the People, because it means that normal non-electrical engineering folks will be able to build and modify their off-camera strobe triggers to fit their needs, not their needs as projected by the profitability of electronics manufacturers.

Let’s end this madness by noting that 2008 is going to be a banner year for digital photography Geeks of every skill level.  PMA is coming up in a few weeks, and the safe money is on Canon to drop a new body like an upgraded 5D – look for the K20D from Pentax – and the hope of an A900 announcement from Sony.

Essential Links:

RadioPopper

Strobit Project

Digital Style – The Joey L – Jill G – Dave Hill Look

Editor’s Note:

The following is a collection of thoughts on Digital Style, an elusive element of Digital Imaging, an extension of Photography.? The author has already admitted during our last project meeting that he “has” no style, nor any particular story to tell – which made him the logical choice for this article.? This is a Style piece, and logic therefore need not apply.

The Writer's Hand

Photoshop is a great big beautiful doorway to the realization of any creative genius that the Devil can conjure up.? For a generation of digital-born image makers it’s the go-to in creating a digital style – that illusive look that sets one image apart from another and defines the distinctive qualities of an Artist.

Millions of poor fools are locked in the cult-mindset that their crap photos can be saved by the Photoshop high Priest-magic of our time – the Photoshop Action.? Load a photo, run the action, Photoshop does all the changes to your image – and there is your masterpiece.? The object of their obsession is getting “the so-and-so look” the high dynamic range of Dragan, the cartoon-like softness of Dave Hill, the gritty power of Joey Lawrence, or even the emotionally engaging elements of Jill Greenberg.

Photoshop, like any unchecked religious fascination quickly becomes a short-cut to thinking if the “program” is placed before the “story.”? Some would say it’s all down to plot and the story line.? Most everything worth reading, watching or looking at has it.? You check out a photograph and there’s a message, something there, a story that pops into your mind and pulls you in.? If there’s no story in your photos, no amount of demon-inspired-bastard Photoshopping will save your blunder.

Relax Hand Hard Shadow

You can spend hours searching for a top-notch Dave Hill action script, or you can spend about 30 minutes on Strobist, StudioLighting.net, FlashFlavor, and any number of free-learning websites where a sheep can shave the wool from their vision and learn to use light to paint a story on a digital imaging sensor.? Photoshop can enhance and manipulate, but it’s not a creativity creation machine – and it doesn’t need to be.? Creativity is just the Artistic neighbor of Quantum Physics, terms used to things which are not fully understood by the people who use them.

The simple truth is that there’s no secret to Jill’s emotionally charged images or Joey’s gritty grung work.? Lighting and subject, with Dave and Jill and Joey, they are awesome.? Awesome subjects and lighting.? Sure you can imitate Jill’s style, just call up Gwen Stefani or your local bear handler and set up a shoot.? Get the lighting right and you can copy her look. No Photoshop action needed.

“No, no, I got it, Jill and Dave use RING LIGHTS.”

It’s true, many photographers such as Jill G and Dave Hill make sensible use of right light flash heads, but dropping $400 on an Alien Bees head won’t make your images “good” if you have no story to tell.

The limited edition White Stripes Meg Diana with ring light accessory is a different story.? If you drop $180 on this cool camera you’ll space-jump to Hollywood lighting pimp in the span of 5 seconds.

4…3…2…1…take off

Climber I

Seriously, if you’re looking for digital style – quit Photoshop.? There’s no point in wasting time with the program if you haven’t a clue what look you want or what the story should be.? Take a walk, pick up a Japanese ink pen, build a house of cards, and come back when you have something to say.

The story doesn’t have to be anything special, profound or engaging, but if you simply manipulate your photos in Photoshop trying for that special look and post photos to Flickr messages boards looking for accolades from the web community, your sheep mind will never rise above the level of a second-rate snap shooter.? But is doesn’t have to be, it’s cool just using new tools to be Creative.? However, with new tools comes confusion, consider leaving the digital sanctuary, turn your back on the Photoshop cult and tell your story as it exists in your mind.

Of course, if you have no desire to – keep doing what you were doing.

Looking to the East

Trust me, I’m a scientist.

Excellent Photographers:

Jill Greenberg
Joey Lawrence
Dave Hill
Michael Grecco
Andrzej Dragan

Further reading:

A drawn-out Flickr discussion – the Dave Hill Look
A useful Flickr discussion – the Joey Lawrence Look

Flickr Photos without a Style or a Look

Ricoh GRD – Frozen Motion Street Photography

Street photography gets debated a lot in online photo forum elitist groups.  Favorite arguments will revolve around "What is Street Photography" and unknown photographers lavishing praise on figures like Cartier-Bresson – who in certain circles enjoys more mindless devotion than the Gods.

I like the idea of photography being a documentary tool, but documentary according to what?  We all perceive ideas and images in various ways, so it’s pretty hard to set down a specific definition of Street Photography.  Tokyo is probably one of the best places in the World to make street images.  The number and styles of people spread throughout the city is endless and sets an excellent stage for your humble photographer narrator.

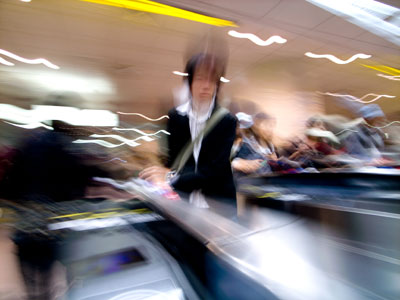
My day to day routine in Tokyo involves taking the train from Komaba and changing in Shibuya, one of the busiest stations in Tokyo.  This affords daily opportunities to exercise one of my favorite photography styles – capturing Frozen Motion of folks heading hither and thither.

Cameras are by default used to capture static moments in time.  This often entails sharp, defined images where you can clearly see what the photographer saw.  Or was it only what was recorded by the machine?  My mind doesn’t always percieve street photography as a static scene.  I want to see the unseen image, the one I didn’t know was there – the Motion.  I want to take an image with my camera to see what it will look like.  Capturing motion is pretty easy, you just reduce the shutter speed such that the resulting images capture enough definition so everything isn’t a total blur.

The Ricoh GRD is pretty much the perfect camera for street shooting, save for the long RAW write time – in which case the Ricoh GX100 or the new Ricoh GRD2 is probably the best camera available for these types of boredom deflecting activities.  With the wide angle 21 mm lens attachment you can pull in a very wide scene, with colors and motion from everywhere in front of the lens.

Motion capture can be very cool, but it’s also very easy to make mediocre images this way.  To my eye, if there’s just enough blur to make the image appear unfocused, but not enough for any colors to mix with one another, it’s just a waste of memory card space.

Many Japanese wear conservative suits to the offices, and when mixed together this renders a sea of grey.  The element I look for is something with a bright color, a hand bag, a light colored box, something that will stand out in the sea.

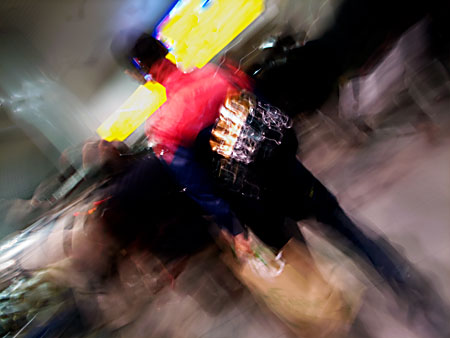
The second element I hunt for is mixed motion.  If you just stand there and shoot, all the motion is in one direction, one or two of these shots are cool if you’ve never used this technique before – but gets old crazy fast.  I like capturing motion from different directions.

In Shibuya, I usually head up the stairs and position myself on the edge of the up and down directions, then I can focus on someone with a non-standard element (color, geometry) and pan on them while I’m walking past.  This means that the image is a combination of them getting closer to me while my camera is rotating, if I’m lucky I can catch one element of their person in reasonable focus – like a hand or bag.  If executed with exacting imprecision this results in an element popping out from the chaos.

The Frozen Motion technique works for me because it’s the scene which I want to capture for Street Photography.  The important element isn’t capturing and documenting the scene exactly as it occurred, I want to paint with the motion, get the random colors mixing – chaos going and freeze it in-camera.

You can try stretching the image and using motion blur filters in Photoshop, but for my taste it’s like using a Lens Baby instead of a Holga, there’s no randomness to the image – it’s all been over-engineered, and hence – boring to my eyes.

Rioch GRD II – Deliverence from the Gods

In our digital age the Gods are real and our prayers answered with ever increasing frequency.  Two years ago the Japanese God Ricoh Ltd. gave to this Earth the digital incarnation of his most special creation – the Ricoh GRD, a digital version of the fabled razor sharp Ricoh GR and GR21.  Now the prayers of GR pilgrims has again been answered, in the form of an updated GRD-II.

The Ricoh GRD-II was announced this November and is due out in stores just before December.  The GRD2 looks pretty much exactly like the GRD and sports every new feature a GR fanatic could want.  The Raw write time has been reduced to a few seconds, higher ISO images will sport less noise and a 40 mm add-on lens will be available as well as a new smaller external viewfinder. 

The coolest thing about the GRD2 is that most of this new technology will be available to and compatible with the existing GRD model.  The 21 mm lens from the GRD works on  the GRD2, and the new 40 mm lens works with the GRD.  Ricoh isn’t just releasing a marketing hyped camera to replace your year old-one like most camera makers generally do.  Once again Ricoh is actually adding value to an existing product through a new firmware upgrade and accessories.  This pretty much cements my economic commitment to Ricoh for compact cameras, with the new 40 mm lens there’s far less reason to look at a Canon G9 for a compact portrait camera.

The only missing feature in the GRD2 is shake reduction.  An anti-shake function is built into the Ricoh GX100 and R-Series cameras, so many were GR disciples were expecting it to be in the GRD2 as well.  To be honest this isn’t a huge thing for me.  I shoot with a Minolta 7D, the first anti-shake DSLR, but with my GRD I often shoot at low speeds approaching 1/10 of a second with minimal blur.  The fact is that with a short focal length lens, anti-shake isn’t such a big deal.  Does it help?  Yes, but so does a camera strap wrapped around your shoulder, and that doesn’t increase manufacturing costs of the final product.

I see the minor upgrades of the GRD2 as an affirmation of Ricoh’s place as one of the best digital camera makers.  Aside from more resolution, anti-shake, better raw write time, and a mild-telephoto lens, there was nothing to improve upon with the GRD2.  Much like the Canon G9 is pretty much the same as the G7, but with the Raw format and a better LCD screen.

Yes dear digital imaging children it’s true, in certain circles the digital camera technology revolution is starting to plateau, technology is maturing, and one doesn’t have to worry about their camera being obsolete in a year.

Ricoh GRD Review
Tokyo Strobist Ricoh GRD
Ricoh GRD on Mt. Fuji

More info at:

Ricoh GRD II Page
GRD Blog

Photography and Photoshop – Getting Digital Style

I’m sort of on a Style quest.  This isn’t meant to mean that I’m trying to define a certain photographic style because I read online that I need to do so.  Getting a certain style, or look in my digital images in just an extension of the process that started many years ago.  I started out in photography with mountain photography, documenting trips in Colorado or New Mexico, which eventually shifted to locales like Bolivia, the Swiss Alps, and now to parts of Japan.

Photography is a natural part of travel, and in Europe I took the time four yeas ago to head out with a universal train pass shooting about two rolls of mixed 35 mm and 6×4.5 for a month in places like Austria, Poland, Czech Republic, Hungary, and Germany.  The point was that I wanted to see what I liked shooting and didn’t care much for – to figure things out.  Eventually I moved to off-camera lighting with a Strobist education, and now I’m expanding further into the freedom provided by Photoshop – initially inspired by the work of Joey Lawrence.

Photoshop is one of those crazy amazing programs where anything is possible, but if you just randomly click things without any feeling for the result you’ll never really use the program for anything beyond an amusing supplement for television.

It’s important to remember that Photoshop is just a visual translator, an avenue for the user to express a visual representation of an idea.  Like most computer programs, the actual user-computer interaction sucks.  Many of the elements of Photoshop like the paintbrush tool are traditionally controlled by a computer mouse – one of the least bio-mechancially compatible gadgets ever invented.  It doesn’t matter the shape, number of buttons or color, the mouse was not designed for a person to easily interact with the computer.  It was developed because in the age of post-DOS early Windows programs, it was the most basic component that could be produced to allow user-computer interaction beyond the keyboard.

I’m still waiting for the day when mechanical design and analysis programs like Pro/E and ANSYS are sold with VR-goggles and three-dimensional motion gloves to enable real user-program interaction.  If you really want to start interacting with Photoshop and making it an extension of your imagination and body – drop the standard mouse and pick up a graphic tablet.  Mine is a basic small Wacom from like 8 years ago – superior to any of the latest button-crazy-curved-but-non-ergonomic mouse designs found today.  Plus, it’s small enough to pack along to all corners of the Earth with my dented G4 PowerBook.  I’ve been drawing in class since kindergarten – sketching with a pen or pencil is my natural visual expressive process – so using a mouse with Photoshop is just imposing a handicap.

Once you get a feeling for what Photoshop can do by starting out with some basic online tutorials, buy yourself a sketch book and drawing implements.  My current favorites are a Moleskine sketch book, standard pen, and Japanese ink pen.  The Moleskin has heavyweight pages that soak up excess ink are great for shading.

The Japanese ink pen is essentially like having a paint brush in your pocket.  You can buy different brush lengths, and are generally available in art stores.  As I’m in Tokyo at the moment, I plan on bringing a small bag full back to Zurich.  When you feel like it, draw something, anything, fill in lines, create shadows, contrast, change the feeling from happy bunny to evil man-eating alien with a few pen strokes.  That’s really all Photoshop does, just on a much larger scale.  Get used to doing it with simple sketch books, and you can start opening up the creative flood gates in Photoshop.

Photoshop is great for doing contrast and brightness adjustment, but if that’s all you’re using the program for save yourself the hassle of having all the other features and go with a simpler program like Gimp, Lightroom, Aperture, Light Zone, etc.

The reason I’m exciting about using and abusing Photoshop in the coming year is the amazing possibilities with selective lighting and local image adjustments.  Using a graphic tablet and painter techniques one can really start using the program as an extension of the mind-body and use it as a creative tool to create – as opposed to modifying images.  I always knew these things were possible, I just never took the time to explore them before.

I don’t know where I’m going with Photoshop, but I love the possibilities, I love using the program as an extension of my mind and starting to visualize the creation and evolution of images from the initial image capture to the thing my mind originally envisioned when I tripped the shutter.

JoeyL Tutorial Review – Behind the Scenes

Editor’s Note:
What follows is a Review of JoeyL Behind the Scenes: The Complete Tutorial.  This is an impression of the DVD tutorial provided by the reviewer and nothing else.  There are no financial ties between this review and the photographer Joey Lawrence.

JoeyL: Behind the Scenes Review

I’ve been shooting various cameras and engaged in various amounts of Photoshop for five or six years now.  I think of cameras and computers and hammers in the same way – tools with which to do something, nothing more or less.  In the past year I’ve expanded from mountaineering and landscape and travel photography to using studio lighting techniques, mainly gleamed from www.Strobist.com, where I read an interview by David Hobby with Joey Lawrence and learned about his new DVD tutorial.  He seems to have a cool style and creative philosophy, so I bought his tutorial for $249 (promotion till Oct. 21st, – $299 thereafter).

This is the first Photoshop tutorial I’ve ever bought, and it was purchased for the following reason:  I’ve become comfortable with the basics of Photoshop, using the clone tool for basic corrections, levels and saturation control for various tonal adjustments.  Basically using those tools to enhance the feeling I wanted to communicate with the images taken using my cameras.  I’ve been looking for a learning package to help me take things to the next level and to expand beyond the basics of enhancing an image and start using Photoshop as a tool to create a specific visual impact with my digital images – beyond what can be accomplished with cameras and basic lighting.

Did the JoeyL DVD contribute in the aim of fulfilling my creative desires?  Who is the DVD for?  Will you, as a reader benefit from buying your own copy?  Hopefully you’ll find some answers here.

DVD Contents

The JoeyL DVD is broken up into two sections: Lessons and Videos, a preview is available on the tutorial website.

The Lessons section includes videos showing Joey editing digital images in Photoshop, explaining along the way how and why specific adjustments are made to enhance the photo and his vision for the final image.  The specific lessons are:

Specialized RAW Conversion Techniques (manual HDR)
Levels and Curves
Multiply techniques (“Joey L signature look”)
Dodge/Burn
Soft Light Techniques
Grunge (apply textures, scratches to images)
Rescue (rescue a ‘bad take’ photo)
Tilt/Shift (simulate lens blur effect)
Quick Masks (influence light/dark values)
Cooking Your Own Textures (texture production)

The Videos section includes four production videos, which show Joey working with different bands and models.  The creative process is explained including some lighting diagrams to illustrate how lighting was setup for the shoots.

A set up Photoshop actions and high resolution textures are also included on the DVD.  A set of actions like these would probably set you back a certain amount of money if bought separately.  If you add up the projected cost of the 10 actions and 51 custom textures (by my hand counting), the total price of the DVD becomes more digestible.

So, after going through the DVD various times and working with the techniques and evaluating what I’ve learning and what it means for my future image making process, here are my impressions:

The Impressions

During the lessons Mr. Lawrence talks through his thinking process in adding various layers and how to do different adjustments.  Adding layers and blending and the use of manipulating shadows and adding light to images is well explained.  This is exactly what I was looking for, since it shows you how to enhance lighting effects in Photoshop which were absent or difficult to produce in reality.  A problem though is that the Photoshop techniques are presented as separate from the production process.

Some videos are included which document different shoots and the photos of which are used in the lessons.  This is pretty cool, since you can see how the images were created and then you can go through the editing process in Photoshop to see the evolution of concept to digital final.  However, a link between lighting for the sets and how that lighting was used in the editing process isn’t really presented.  Of course, a specific link may exist, but adding the connection would greatly enhance the learning experience.

There are five videos in the Video section, but really only two videos on the DVD include lighting diagrams and a talk-through about the production process.  I was hoping for a broader amount of material here, including a workflow starting out with planning for the shot, figuring out what lights would be needed and more interaction about what was working and why.  The lighting of course, is key here, many of the Photoshop editing techniques work because the lighting produced the right shadow which would later be enhanced in Photoshop.  Without more background on the lighting, it just feels like something is missing.

I like that videos are included that show the production shoots.  The images from those shoots are later used to illustrate the editing techniques.  So you get a feeling for how one goes from doing the photography to producing the final image.  However, in this sense I feel like the material doesn’t flow as well as it could.  The editing and production videos are separate, and must be viewed separately.  I think it would have been beneficial to integrate the two together.  Of course, this would make it more difficult to organize the lessons in an easily accessible format.  Still, it would be cool it the Photoshop editing could have been added to the production footage to better illustrate the path from initial idea – image capture – digital editing ending with the final image.  Of course, this is my bias and reflects how I would have liked it to have been setup.  It wouldn’t be too hard to import the movie files into Final Cut or iMovie and re-edit the JoeyL Tutorial to a form which better fits with my leaning preferences.

Is It Worth the Price?

The creative process was a main draw when I finally sent my credit card info for the DVD, knowing full well that $249 was just dropped electronically.  In my opinion a description of the creative process is probably the weak point of the tutorials.  The Photoshop techniques are very clearly explained and you can start doing cool things to your own images in the time it takes to open your file in Photoshop.  Now, a critic will say that it’s easy to find all the info one wants on Photoshop on the web – hence, why buy the tutorial?

Numerous web tutorials and people like Russell Brown show you how to do many things in Photoshop.  Of course, this information is generally spread out everywhere across the web, and all without the benefit of a professional photographer explaining their creative process.  Time is valuable, and time wasted scouring the web for into on Photoshop and then taking the time to figure out what enhances what is time not used shooting photos or climbing mountains.

My reason for buying the JoeyL DVD was to see how Photoshop can be used to create an image as a part of the creative production process and to enhance my own creativity.  In this capacity I’m very happy with my decision to drop $249 on the JoeyL DVD tutorial and would do so again.

Beyond Photoshop

Learning about the creative process isn’t just important for photography and Photoshop.  I look at the purchase of the JoeyL DVD as enhancing other areas of my life, both the artistic and in the scientific research realm.  To a certain extent, I expect to see a benefit from using the JoeyL tutorial in my research career.  This could be in any area from designing actuator systems for smart material applications to a new scaffold strategy for bone regeneration implants.

“What!!!  Did he just use his job as a scientist to justify a $249 Photoshop tutorial purchase???”

You’re damn right I did.  When you get to a certain level in engineering you see that the line between art and science is pretty much just a myth perpetrated by those who like categorizing things.

My knowledge of Photoshop and photo printers and the creative process from an artistic viewpoint has only enhanced by ability as a research scientist.  When you engage in a free-creative pastime like photography and enhance your image making abilities with Photoshop you’re training your mind to be more open and flexible than is generally taught in engineering, chemistry and science classes.

In both art and science you characterize the world around you using various tools to translate your vision into something which can be communicated to other people.  The tools can be cameras, physics, Photoshop, ANSYS, mathematical equations, wide angle lenses, whatever tools you need to tell the story you’re interested in.  The story could be the emotions evoked by a portrait or the aerodynamics of a rocket.  Exploring the creative process of other scientists or artists can only enhance you’re own.

Should You Buy It?

Now, that I’ve explained what I liked and what I felt could be improved in the JoeyL DVD – the question then becomes if you, the potential customer should drop the change to buy your own copy.  Here’s what I think…

  • If you’re a Photoshop whiz and already do your own lighting, know what you want to create, have a handle on your creative process and so fourth, you might not find a lot of value in this tutorial.
  • If you have no idea about Photoshop and want to create cool images with a nice gritty Grunge feel to them (the JoeyL look).  Yes, you will get a ton out of this DVD and it could act as a great starting point for jump starting your own vision.  Even if you’re starting from a very low Photoshop level, it wouldn’t be too hard to get to the point where you’ll understand and be able to exploit the techniques in this tutorial.
  • If you’re like me, someone who understands lighting at the mid-intermediate level, knows Photoshop but isn’t a Pro and is interested in the creative process and not just editing details, yes, you’ll probably enjoy the tutorial and find a lot of value in it.
  • If you’re a scientist and wish to enhance your creativity in the technical research world, I would recommend the tutorial only after reading Sparks of Genius.
  • If you’re more interested in camera specs than pictures and enjoy debating the finer points of copying the Dave Hill look than finding your own style and feel a deep resentment towards the fact that a 17 year old guy from Canada is an established photographer while you’re spending your time pouring over photo forums and tutorial reviews…well, I recommend you find a new outlet in your life.


Brass-Tacks

Reviews like this shouldn’t just be about feelings and impressions but also a prelude to action.  I worked with a self-portrait which I like and tried out some of the techniques from the JoeyL DVD and played with the JoeyL Photoshop action.  This entailed the addition of various overlays and a cool texture to give the image a nice gritty feel.  I’ve never used these techniques before and I love the result that 10 minutes of my day coupled with knowledge from the tutorial was able to produce.
JoeyL Tutorial Before JoeyL Tutorial After
If you’d like another opinion check out the Review on Strobist.com
There’s also a discussion at the Flickr Strobist Forum

Infinite Memory Card – Hyperdrive Space Review

In the age of digital cameras, new gimmicks and trinkets are released every week.  Mega-autofocus-crazy-byte products from Canon, Nikon, Sony, Ricoh, Olympus, Leica, Panasocnic, and a multitude in between like Fuji give one the option of any camera one’s heart desires.  Memory card capacities double every couple years or so and the cost of storage is insanely cheap compared to just a few years back.  Still…the management and backup of memory cards is generally a problem, especially when traveling.  You can’t see which pictures are on which card, and backing up to a laptop means physically sitting down, having a computer with you, and the time to download your images.  There are portable hard drives and image viewers like those from Canon, Jobo, etc., but many times these are a tad more expensive and more flash than utilitarian.  Many times the ideal design solution is one thought up on the outside of the large corporations.  In the case of infinite storage, the Hyperdrive line of memory card backup devices really excels at doing what it was designed for. 

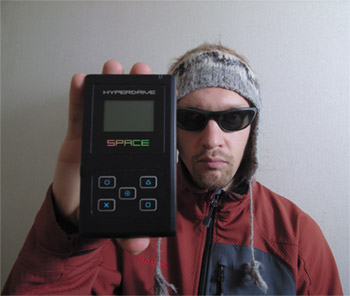
Problems arise when traveling and shooting digitally, especially with with multiple cameras.  Adding a laptop to your travel accessories just to backup images is a big waste of space and weight.  Memory cards can fill up incredibly fast, and nothing sucks more than not having free space to get that cool shot that’s happening right this second.  Backup in the field is a primary concern of any digital image maker.  One of the really useful digital gadgets that one can use to store images from SD, MMC, Compact Flash, and pretty much any digital card you can imagine is the Hyperdrive Space – not to be confused with the mythical hyperdrive engine which allows space travel at speeds greater than light.  The Hyperdrive is a bare-bones storage device for backing up images from memory cards.  The Hyperdrive is basically a notebook hard-drive enclosure with a battery, card slots, and LCD screen.

I bought my Hyperdrive just a week before flying to Tokyo for three months.  The Hyperdrive with a 120 GB drive was the perfect solution for backing up images from my Ricoh GRD while traveling.  I have a laptop and am continually trying to free up harddrive space.  With the Hyperdrive I can backup 1 Gigabyte memory cards in a minute or so and not have the added worry of taking my laptop everywhere.  When I need images, they’re right there on the Hyperdrive.

The LCD screen displays basic information.  It allows access to which folders are on the drive, you can assign the name of new folders, check how much harddrive space is available.  So, no, you can’t view stored images on the Hyperdrive Space.  The Space is specifically for backing up images, not viewing them.  I download everything from the card to the Hyperdrive, choosing an appropriate file name for the folder, which helps with Digital Asset Management (DAM).  I now have a portable catalogue of all my images.  Assessing the images is awesome and easy.  For posting to my blog or other things, I just hook up the Hyperdrive to my laptop, open up Photoshop, and work on the photos I want to use.  I save a copy to my laptop and post to the web.  This allows me to back everything up on the drive, copy any originals that I need, and not fill up my laptop harddrive.  When I get back to Zurich I’ll do a full backup on a normal drive, but for travel the Hyperdrive is a super efficient bare-none one of the best accessories for digital photography I have.

The Hyperdrive Space is powered by an internal user-replaceable Lithium Ion battery.  For normal use, if you charge it once and then leave it hooked up to your computer for a while here and there, you won’t have to worry about the batter running out.  A full charge is supposed to last for 100 Gb of data transfer and can be recharged via a normal outlet or by plugging the USB into a computer.

The only thing I would modify in the Hyperdrive design is the addition of doors to the card slots, which are open to the external environment.  For normal day to day things this isn’t an issue.  You get a nice neoprene cover with the Hyperdrive, which protects it during normal travel.  Still, it would be cool to have doors to protect the card slots, or even better, the option of an external armor, like the kind available for iPods.

The Hyperdrive line has been extended since the first models and now includes the Hyperdrive ColorSpace, which was just released.  The Hyperdrive Color sports a high resolution color screen with full playback of stored images.  You can view histogram and exif info on the screen and even access RAW format images from various DSLRs.  Exactly which DSLRs I’m not sure of, the info isn’t specifically posted on the Hyperdrive website.  Since the firmware of the Hyperdrive is updatable, presumably the most popular RAW formats will be supported initially, and new camera models would be supported with new firmware updates.

Even if all my cameras aren’t supported, the addition of a color screen makes the Hyperdrive Colorspace pretty much the perfect backup device for digital photographers.  The Colorspace version without a harddrive is about $200, if I have spare funds later I might pick this up, but really, but I have enough gadgets at the moment.

So, to sum it all up – a review of my impressions: The Hyperdrives are small, download photos really fast, read any memory card and the harddrive is easily replaced.  You get the most value for your money of any of the other portable image drives out there.  The Hyperdrive is an awesome example of the benefits of the digital age for the entrepreneur.  Someone sees a need in the market and has the ability to fill that void at a cost less than the major companies like Canon or Epson or Jobo, who all have their own back up devices which are flashy and expensive.

I’ll use the Hyperdrive when I’m back in Zurich for backing up pictures and not worrying about knowing which photos are on which harddrive.  I’m looking at picking up the Colorspace version, but it’s not an absolute necessity for me at this time.  Now, if the color version had been out three months ago, I probably would have bought it.

Marketing in Science and the Research World

Marketing – the act of shaping the ideas or desires of a population to the desire of the marketer.

Science – the collective process and knowledge of describing how the world works and how to harness it for the advancement of society.

Some say marketing amounts to brain-washing, manipulating the buying habits of consumers to fulfill the goal of making profit for a company.  Many consider Science to be a linear, established collection of facts created and assembled by scientists, who have the freedom to explore and bring new discoveries to light.  In all my academic experiences, through the Bachelor’s, the Master’s the PhD, in scientific conferences on biomedical and smart material topics, I have heard el-zipppo concerning one of the most important topics of modern science – how to market it all.

The warm, cozy idealization of science is that scientists have total freedom (within ethical boundaries) to make scientific discoveries, share that knowledge with the world, and contribute to making society a better place by understanding the natural laws that govern our world.

But how is this done?

First off, science requires money.  You need resources to do science: laboratory, workers, computers, raw materials, etc.  Where does the money come from?  The money to do science comes from public and private sources.  Public means the government gives money to scientists.  In the US organizations like the NIH and NSF distribute millions every year to scientists in research institutions (like universities) to do science, make discoveries, advance society.

But who gets what?

The funding request is where the marketing starts to become important.  If your idea isn’t well marketed and clearly described, no one will give you money.  Ideal marketing buzz words change throughout the years, currently some of the best include various combinations of biomedical and nano-technology.

The committees distribute money based on their assumptions and idealization of what is good science.  Those projects get funded.  Others are ignored.  If you want money, you need to ask for it.  Generally this entails writing up a funding request, an application, explaining what the money is for and why your project is so important as to get funded.  A committee reviews that request and gives you the money.  Well, if you’re a university researcher, the university gets that money, then they will no doubt take something like half of it because the university – of course, is first and foremost, a commercial entity (secondary a learning institution).  I wouldn’t say this is such a bad thing, but in general it’s not really understood.  In some ways it’s disingenuous to write up grant proposal and submitting it without full disclosure of how much money will actually be used for research purposes and how much will be taken by the university.

If you’re a research who is dependent on public or private funding, and this description covers, well, probably almost every researcher in the world, it’s important to educate yourself on proper marketing practices.  If you’re not marketing yourself and your research well, then the exposure you receive in the academic and research communities may be very small.  Good marketing could be as simple as setting up a website with clear descriptions of your research work and contact information.  Communicate your ideas and work to a large body of people and increase your ability to work with others in your field and remain open to new avenues and research directions.

Lazy Tokyo Weekend – Mt. Fuji

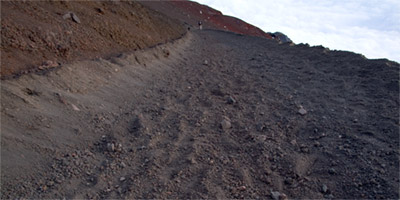
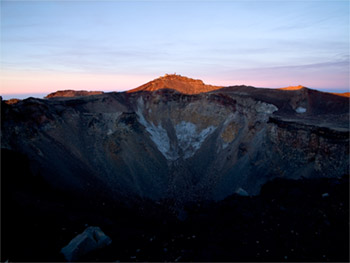
Mt. Fuji, Fuji-san is possibly the easiest and most awestruck climbs I’ve ever done.  The term "climb" is a stretch when describing Fuji-san.  A winter ascent up the iced face might warrant crampons and axes, but a summer/fall experience falls into the hiking category.  The pathway is wide and primarily maintained with heavy machinery, and during the official climbing season, you can buy food and drinks along the way.  I climbed Fuji-san the third weekend of September, just after the close of the official climbing window of July 1 to August 27.  I’d been in Tokyo for about two weeks and my body and soul were screaming from some escape from the manic metros and crowded Shibuya streets.

Mountaineering has historically had a certain man vs. nature connotation.  Climbing magazines like Rock and Ice or Climbing sometimes use the terms assault to describe a person ascending to a mountain summit.  Popular culture uses terms such as conquer when to romanticize the act when a climbing team attains the summit of Everest.  But to say that one has attacked or conquered a large body of earth such as Fuji-san by the simple act of standing on the summit is like saying that the mosquito which buzzes near your sweaty head has made you it’s bitch.  Even the Swiss Alps with their cable ways and hotels and huts have not been conquered by mankind.

Despite the explicit traces of humankind and the rampant tourism and gimmicks associated with an ascent of Fuji-san, all the reverence and sacredness of the highest mountain on Japan, forged in the ring of fire, and risen from the sea like a God of old…none of these things are diminished by the fact that you can buy Fuji-Inspired custard snacks.  The gimmicks don’t make the mountain anything less than it is, one of the beautiful places on Earth.

I left Tokyo early in the morning.  Normally one can catch a bus from Shinjuku, but I waited too long to reserve a seat and had to find my way there by train.  I pick up a rice ball and yummy looking lemon drink.  It had a funky taste, something in between sour and fire.  After downing half the can I looked and noticed that the funky lemon can of liquid was 7% alcohol.

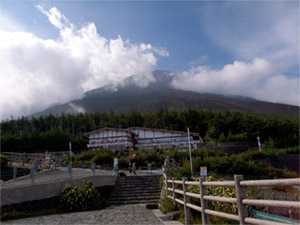
You can start the hike near sea-level, but I, like nearly everyone else started from Kawaguchiko-guchi Go-gome (Kawaguchiko Fifth Station).  It’s a bus stop and tourist trap, and signifies the start of the trailhead up to the summit.  The 5th is like any other tourist pit between the Mystery Spot in Northern Michigan or the Edelweiss-inspired shops in Grindelwald selling Swiss chocolate and cheese and kitsch.  You can get a can of fresh Fuji-san air at the 5th station, just like you can buy a sealed can of cosmic mystery in Sedona Arizona.

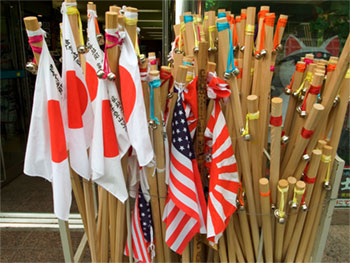
The most popular product is the walking stick.  During the summer you take the stick with you and get it stamped at each station.  I opted not to pick one up, partially because it would be hard taking back to Zurich, also because I was tired of spending Yen, but primarily because I would have entered into a Samurai fighting fantasy and ended up hitting someone by accident.

The real draw of Fuji-San is that everyone who can reasonably walk can make it to the top.  If you’re not in prime altitude condition, you can bring along an oxygen canister (available at the 5th station).  I highly recommend visiting Fuji in the early fall, there are fewer transportation possibilities, but there are far fewer people and the shops along the trail to the peak are closed.

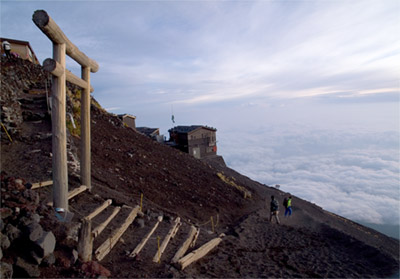
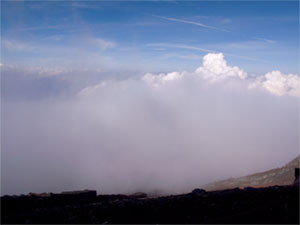
The hike up Fuji-san is uneventful at first.  You begin to rise from the forested slopes and move over some rock, passing huts here and there.  You wonder why you’re ascending and wasting time on this man-conjured joke until the moment you pass through the cloud curtain and see the world falling away below you.  At this point the Zen begins to set in, and you are propelled upwards with a deep sense of wonder, each step a prayer to the deity whom you are set to meet on the summit.

There are a number of station up to the summit, I have no idea when I passed which ones, I really didn’t care.  All I needed to mark my ascent was the continued view of my vantage point getting ever closer to the sky.

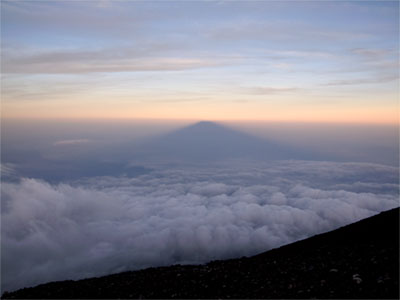
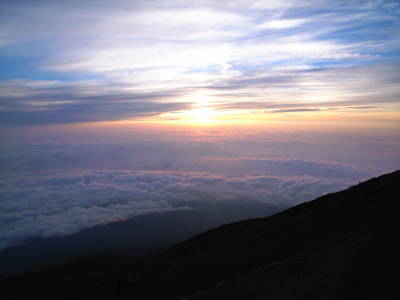
In the Ying of the Yang, there is no sunrise without a sunset.  The many visitors will do a night hike and arrive at the summit for the sunrise, and the mountain is a bustling highway at 5:50am.  But at 5:50pm there are only a few souls, those who haven’t found a hut for the night or already descended.  I can’t recommend the sunset enough.  The popular gimmick is the sunrise, but in my experience it in no way matches the calm magic of the sun falling behind the summits.  The clouds gather in full at the slopes and form the perfect curtain for the shadow of the mighty one to be projected upon.

I thought about descending after the sunset and finding one of the huts to stay at for the night.  The cost for one of these runs around 60-80,000 Yen, and for some reason I just didn’t feel like putting myself back into the confines of walls and windows.

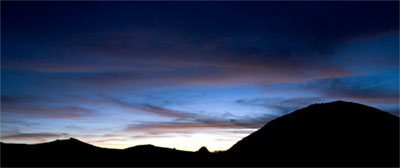
The cold was creeping over the ridges and rocks like it always does in an alpine environment after the sun leaves.  We get used to the comforts and confines and forget how vulnerable we are in the world.  I alternated between sitting and trying to sleep for a few minutes near rocks and walking around the volcano craters to move and stay warm.  This also allowed me to see the sky as I never had before.  The moon rose and set and the sky was filled with stars and at other times guarded by clouds.  It was quiet and cold and I’ll never forget the wonderful sleep depravation on the summit ridges and volcano rims of Fuji-san.

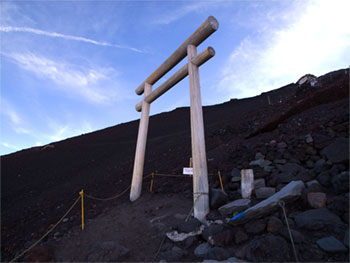
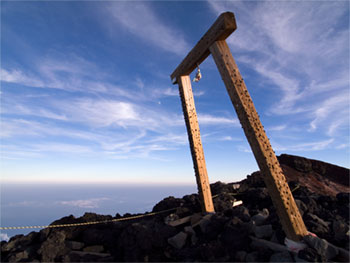
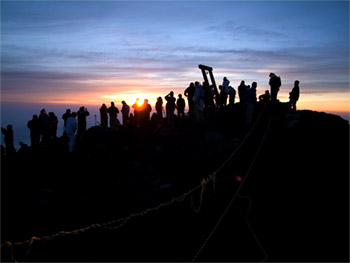
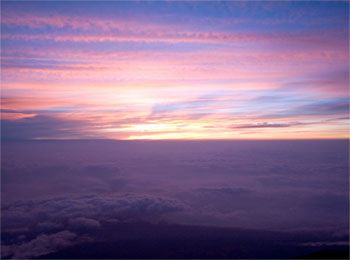
I was shivering at 4am when the first night hikers crested the over the last gate and began looking for the best place from which to see the rising sun.  You can see the sunrise from everywhere, but I opted for the more popular location, along with most everyone else.  The view is filled with cigarette smoke and the light of cell phones screens burns into the eyes as you wait for the sun.  The sunrise starts very slowly.  The sky lightens, and slivers of red start burning themselves into the atmosphere.  Eventually the red eye looks out across Japan and rises up above the clouds which have come to gather around the lower slopes.

The trip up and down Fuji-san was a wonderful experience.  It was a trip in the most spiritual sense, the way from Tokyo, finding the train, getting to the 5th station, watching the sun set and the stars revealed, the moon set and the sun rise and the eventual return to Shinjuku.

For the inexperience mountaineer Fuji-san is a colossal trek, an adventure of one’s lifetime.  For the lazy sometimes seasoned mountaineer such as your humble narrator, Fuji can be done as a day trip if desired.  One just needs to make sure of the transpiration issues.  Camping is officially prohibited, but like in the Swiss Alps, if you do and no one else is around, there’s no one to tell you to stop.  A number of travelers set up tents on the summit during the night, although I think this is only in the off-climbing season.  Either way, I highly recommend it for those in Tokyo seeking an escape from the manic rhythms of the city.  It is a majestic climb, no matter your skill level or previous mountain experiences.

Specifics on the climbing routes up Fuji-san can be found at the SummitPost page.  Photos and images from this trip were produced with the awesome Ricoh GRD digital camera.

Ricoh GRD Review
Ricoh GRD and Strobe Lighting

Ricoh GRD – Tokyo Strobist and Shoestring Lighting

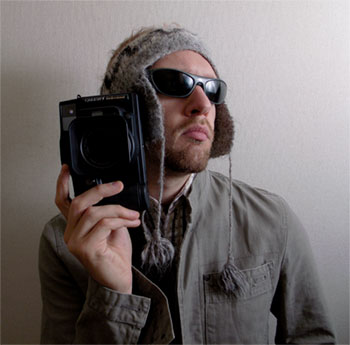
There are many thing to do in Tokyo, but on a Monday night after riding the metro one needs to relax. One of my favorite relaxing activities is the impromptu self-portrait session with a digital camera. This session focused on using off-camera flash with the Ricoh GRD. But here’s the problem, while checking in for my flight to Tokyo I was made aware of the fact that I was 15 kilos over weight, I’d either have to dump half my baggage or pay great fool-damned weight penalty.?While tossing things out of my luggage at Zurich I tried to cut it down to the essentials. The crampons and ice axe had to go, but perhaps a bit more regretful was leaving behind my light stand. Yes, I’ve made a habit of taking various cameras and at least one flash everywhere I fly to. As a compromise I kept the umbrella and flash bracket, thinking I’d find a solution in Tokyo.

Shooting in a cramped dorm room in Tokyo can be a bit limiting. With a desk, bed, and bookshelf there’s pretty much no room to do anything. I wanted a clear background and that meant setting up in the hallway. The cramped hallway presented an interesting shooting situation.? At only four feet wide, there was really no room for a normal camera to focus and capture the subject (me). Ah, but I had in my possession the fabled and non-standard wide angle Ricoh GRD digital camera. I setup a tripod and decided to go with the GRD and the 21mm add-on lens. This gave me a wide angle setup perfect for the cramped hallway.

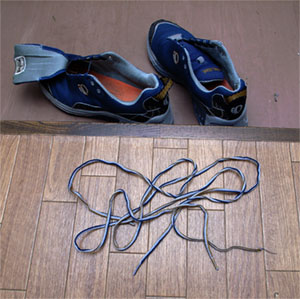
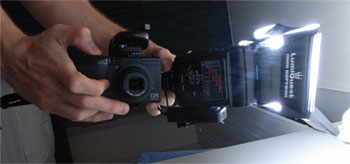
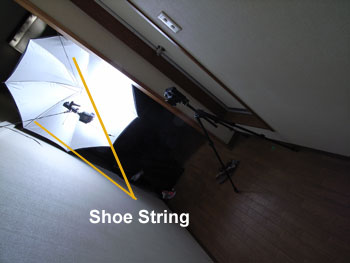
For the lighting, I had a set of Gadget Infinity radio triggers to trip my old Contax TLA280 flash. The Contax flash was fired on manual mode into a 40 inch umbrella, in the narrow hallway this provided a rather large body of light, perfect for the random portrait session. However, without a stand, it’s pretty hard to set up an umbrella anywhere. To solve this problem I borrowed from my climbing mind and decided the best course of action would be to suspend the umbrella and flash (with bracket) using two shoelaces from my running shoes.

In my experience, the Ricoh GRD has been awesome for mountaineering and city shooting, but I’d never used it with off-camera strobes before. One difficulty with self-portraits is triggering the camera. The GRD has a nice interval timer, I set it for a 5 second delay and started shooting after a few test shots to get a nice exposure setting. Doing off-camera flash with the GRD was totally painless. Using the interval setting the GRD refocuses for each shot and will keep shooting till the battery runs out or the SD card is full. Five seconds is perfect for changing poses and waiting for the camera to focus.

Compact digital cameras are generally ignored with it comes to flash work, and usually have horrible small flashes that create unnaturally ugly images. The Gadget Infinity radio trigger is very small, and fits extremely well on the GRD hotshoe. It means you have the freedom to take a small flash wherever you’re going and bounce it or diffuse it for awesome lighting on the fly and create excellent flash photos, even with a point and shoot digital like the GRD, Canon G9, or any digital with a hotshoe.

The extreme wide angle of the GRD was very cool to work with. The GRD has an awesome lens, and worked extremely well in the tight confines of mine small dorm room. I took to shooting myself in various combinations of the clothes I brought to Tokyo. It’s not rocket science, the images aren’t fantastic art or crazy creative, but I like them and plan to expand on the wide angle portrait technique.

Traditional portrait guidelines call for a camera with a focal length around 85mm (in 35mm format). Wide angle lenses are generally not used since distortions in the face can be considered unflattering. I found the 21mm GRD lens just awesome for portraits. The advantage is, with a few movements forward or backward and left or right, you can control which parts of your body are slightly distorted, made larger or small due to the distortions inherent in the lens. This means you can easily modify the subject of your portraits by making parts of the body larger or smaller, distorted or normal. Positioning various parts of your subject in the distorted range of the lens can dramatically increase how the subject is communicated to the viewer of the images.

I had an awesome time shooting with the Ricoh GRD and off-camera flash for the exposure. The wide angle 21mm lens gives the brave photographer a number of creative opportunities to portray your subject in ways not possible with traditional mid-telephoto lenses. The compact size of the GRD means you can set up anywhere, and break the myth that flash and small compact cameras doesn’t work.

If you found this information helpful and would like to experiment for yourself, check out Strobist for lighting info with off-camera flashes.