Photoshop

Dynamic Color Portrait Photoshop Tutorial

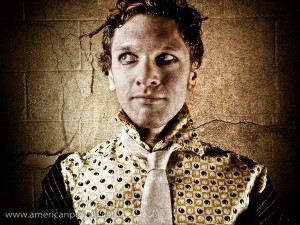
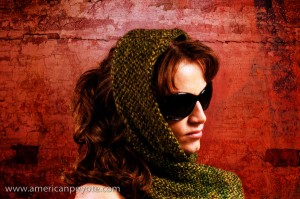
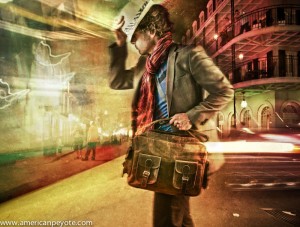
Here I present a workflow for creating a dynamic image using layers in Photoshop. Why? Well, because I like to share and because I got some requests on my Google+ album asking how it is done. To illustrate the process, I’ll use a set of images I created for Scaramanga Bags, a cool company in the UK that sells vintage leather bags and other things like journals and vintage suitcases and trunks (see the Scaramanga Concept Images here). On their website Scaramanga already has nice urban portraits with their bags, so I wanted to go in a different direction. I wanted to create portraits that convey a feeling of abstract motion. Something to invoke a feeling of movement and action. I love photography and painting. I began with photography looking for image perfection, and then moved to painting after developing a color palette in Photoshop. I like to light an image in layers, and in Photoshop I layer colors and backgrounds to add a sense of visual movement to an image. I look at a scene, put on a pair of rose-colored glasses, and I have a layered image (because at the base, this is all Photoshop does). When you can do this in your mind you then just need to translate that to something other people can see, and for that we have Photoshop. The aim of this article is to show you how to combine images together to create unique, balanced color combinations, which add a desired character to the original image.

The Basic Recipe

I generally apply this concept to portraits, where I want to add a certain character which complements the person photographed. First, begin by realizing that the person is a person, not simply a subject (A Person is not a Subject) for academic study. I start out with a base portrait image, generally shot in a studio environment with a two or three light setup using softboxes and maybe a beauty dish. Why? Because we need a decent (well exposed) portrait to start with. It should be something that speaks to you and has the look and pose you want. The layers in Photoshop are just there to modify the intention of the original image (otherwise just go ahead and create an image from scratch and render it in 3D).

I always start with a well-exposed base image that defines the main textures, tones, and colors of the person. In the Scaramanga Flight Bag images I used a Sony A900 and Elinchrom lights with a CreativeLight softbox. You don’t need an expensive camera and equipment, but you do need to know that a properly focused image with proper exposure will give you the largest amount of information to work with. If your initial image has high contrast or deep and dark shadows, then you just need to know that you can’t modify those areas of the image very much, and they will not blend so well when we layer a new image on top of it, since the very dark areas contain very little color to modify. So, let’s start from the base image.
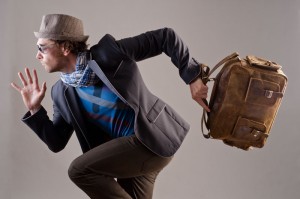
The Base Image

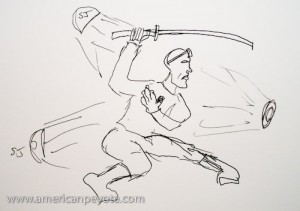
In reality we’re mixing static image layers one on top of the other. In my mind I’m painting on layers of color movement to complement a portrait. I began with images produced in my apartment studio, and posed in such a way as to communicate the idea of running or of standing still, with motion in the background. This is my base, a strong pose which will be modified (enhanced) by a new layered color environment. For more info on creating a dramatic pose portrait check out my post on this subject (Urban Ninja – Dramatic Pose Tutorial). In short, I take my inspiration for poses like this from comics and graphic novels such as Conan the Barbarian, 300 and Watchmen.

After importing the images into Lightroom I chose the best and then increased the Fill Light to reduce the contrast in the image, and then exported to Photoshop for layering work. When exporting from Lightroom I don’t want deep and dark shadows, but rather a lot of information to work with and which will respond well to layering. Once in Photoshop I will often start by adding a Black and White and High Pass layers to the base image (although I didn’t need to do that for this image set). I first copy the original layer, add a High Pass filter, and set the blending on that layer to Soft Light. This has the same effect as increasing Clarity in Adobe Lightroom, but in a more controlled way. I reduce the Fill value on this layer so that everything blends well together and the image doesn’t look gaudy or like it was just run through an actions industrial meat grinder. I will often also create a Black and White adjustment layer, and then set the blending to Multiply. You can then adjust the values for reds and greens and blues. This desaturates the color while intensifying the shadows of your base image. It can darken the image a lot, but the goal here is to modify the tones of different parts of the image (such as skin tones). Again, I will often reduce the Fill of this layer so as not to totally kill the base colors.
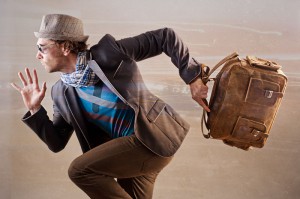
Choose Layers

I always start from the base portrait and then choose layers on the fly. For the Scaramanga images I wanted a lot of bright colors with movement. So, I opened up Adobe Bridge and looked for long-exposure night scenes with lots of color and light streaks. To achieve this abstract motion goal, I picked a few images that I had shot in New Orleans, Zurich and Berlin. The key here was to have images with long light streaks and pockets of intense color, which would blend in with the form of the person in the Scaramanga portraits. By blending well I mean that the lines of the night scenes would coincide with the lines of the runner (think of drawing lines over his body and comparing it to the flow of the layer images – check out my Dynamic Pose Tutorial for clarification). There’s no formula here, you just need to pick images that work well together. Aside from light streaks, these images also have very interesting pockets of color, and also recognizable object elements such as a tram or street scene, which then defines the background environment of the final image. The night images from Zurich give the feeling of running through a city of lights, while the one of Bourbon St. gives the idea of a person standing still while the environment is exploding in color around him. Now that I have chosen the layer images, I just need to blend everything together.
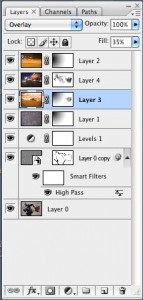
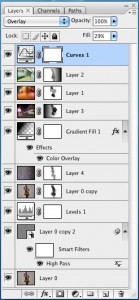
Blending Layers

After picking the layer images in Adobe Bridge I opened them in Photoshop, and automatically set the blending mode to Overlay. This allowed me to preview how the different light and color elements of the layers would work together, and how the flow of the lines of the layers would mix with the base portrait. At this point, the image just looks like a couple of images stacked on top of one another, and that lazy sort of image production just doesn’t do it for me. To properly blend the images you need to play around with the blending modes, like Overlay, Softlight, etc. and also change the Fill and begin masking individual areas with a paint brush or gradients. To mask a layer by painting simply select the layer and then choose the layer mask icon. When you now paint with black, the layer will be masked (or hidden). You can change the Opacity of the brush to mask the layer gradually with each new brush stroke (the recommended method). When masking in this way I usually use a brush Opacity between 3-20 with a soft brush. This is where I act more like a painter than a photographer, masking and blending the layers uniquely together. I rarely use the entire layer image. Often I use a gradient to mask out half of it, and also paint away most of the layer over the person. I will also add full Color Fill layers (usually set to Overlay blending) to tweak the overall color. Eventually, the final image will then start to come out. To illustrate this process, you find here the secret goldmine of any Photoshop artist, the screenshots of my Layers window on my two favorite images from this set, the Runner and Bourbon St. You can clearly see how the different layers were masked, and what the original layer images looked like before blending.

That’s All

If this sounds complicated don’t be deterred. Essentially all I do here is to mask out the parts of the individual layers which don’t flow well together, and in the end I have an image with all the flow and color vibrancy I desire. The main idea is that the character of the layers complements the base portrait. I save the image and open it up in Lightroom. From Lightroom I play with the colors further, adjust shadow and highlight colors, Vibrance, Clarity, etc. until the final color tones are correct and then I export.

For more info on layers and portraits, check out my Hyper-Realistic Portrait Photoshop Tutorial. This covers the main topics I addressed in this post, but you get to see a screen cast of the whole process.

Urban Ninja – Photo to Concept Video Tutorial

Urban_Ninja_IV

Fooling around with video presentations is a fun way to waste a few nights. This one focuses on lighting, posing, and post-processing of my Urban Ninja photo concept. Aside from the concept and posing, which I discussed previously, this video includes a screencast of the post-processing.

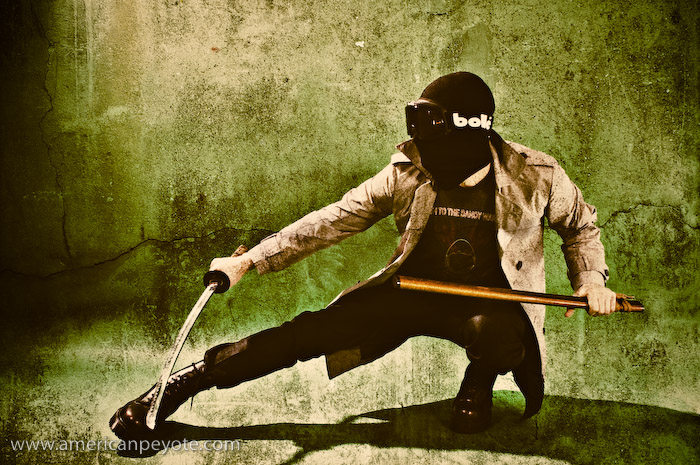
The post-processing for the Urban Ninja images was done in Adobe Lightroom and Photoshop CS3. The processing was designed to define and enhance shadow areas of the arms and hands, while the pose of the image is the main element. The face falls off into blackness and shadows, so that the form of the Ninja is focused on by the viewer. Grunge layering techniques were used to add the dark-gritiness I seem to like. Two concrete layers were used here, one I shot in Wintethur, Switzerland, and the second came with the Joey L Photoshop Tutorial DVD. I blended the concrete layers using overlay or softlight, and a few curves and levels adjustment layers were included to better define the shadows. A final color layer was used to give the final color-cast and define the overall image feel. Anyways, to see the full process just check out the video below.

I used black+white adjustment layers to control the shadow depth. With his technique you create a B+W layer, then blend it using Luminosity or, as I prefer Multiply. This darkens the shadows and since it’s a black and white layer, you can go in and adjust the amount of red, green, blue, etc. which is being defined in that layer. This technique can be used in many images so long as you don’t abuse it. In addition to portraits I like to use it for landscape images with a deep blue sky and a collection of clouds. This image below from the Swiss National Park was shot on film with my Fuji GA645, scanned with a Nikon LS-9000 scanner, then worked on in Photoshop, with a B+W layer used to control shadow texture.

Urban Ninja – Concept to Photo

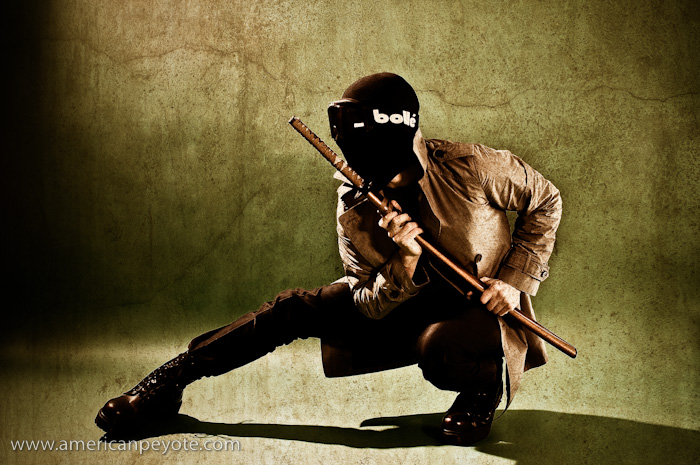
urban_ninja-2I was on a train heading back from Zurich and I had an image in my head, so I sketched it out and the next night setup some lights to create a few concept images of the Urban Ninja. This set of images is probably one of my more thought-out to date. The image is meant to be dark, with the main action elements distinct, this includes the pose, lighting, and post-processing. I can’t really say why I designed an Urban Ninja image concept. Partially it’s because I’m enthralled with the new Watchmen movie, partially it’s because I watched Akira Kurosawa’s movie Ran, and finally because I happen to have a Katana sitting on a shelf in my apartment. So how was the Urban Ninja image designed and executed? Well, lets look at the various elements, Pose, Wardrobe, Lighting Design, Processing.
urban_ninja

Pose

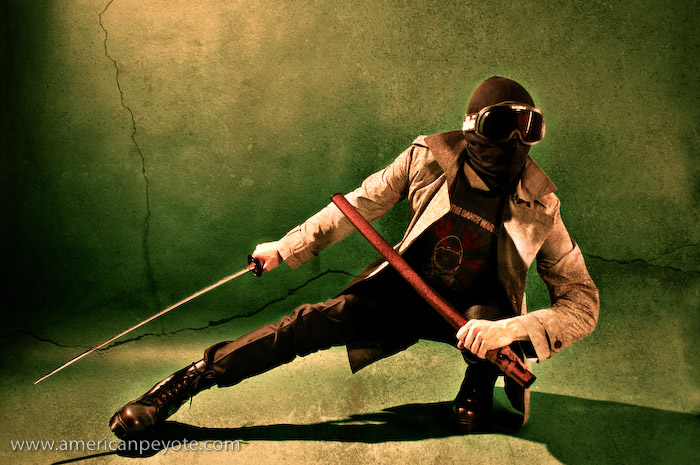
The pose was the primary reason for this image, and the driving force being it’s creation. I have a book somewhere in Michigan that I used to learn about drawing comics from. It was called something like, “The Marvel Way” it basically describes how characters are portrayed in the Marvel Universe. The main idea is that you draw characters at the height of anticipation or the climax of action. So you draw Spiderman in a crouched position before his energy explodes and he leaps off of the roof of a building, or you draw Batman with his fist connecting to the jawbone of some villain, but never portray the in between action, where people are just standing around looking normal. So, here our Urban Ninja is in full crouch, poised for action. The leg and sword extend and there’s a sense that there’s something just out of the frame. This is accomplished due to the lines of the body, leading the eye of the viewer. The line of the body leads you into it. The Katana is drawn and ready for blood. The scabbard is in a defensive position to extend the line of the right arm. All these elements are key to the visual impact of the image.

Further reading: Urban Ninja – Dramatic Pose Tutorial

Samurai Sword

The Katana is meant to be an extension of the warrior’s body, the curvature of the blade mimics the swoop and fluid moments of the body when it’s in motion, and this a key element in the pose. Symmetry between the leg and sword contrasts with the defensive crouch of the Ninja, using the scabbard in a defensive position forms a perpendicular line to the sword arm. These all lead the eye of the viewer.

Face Design

The face of the Ninja is totally covered in a mask I got the last time I drove go-carts at Block in Winterthur. The idea is to hide the face, while retaining the features of the face. The goggles are over-sized and remind me of Snake Eyes from G.I.Joe. The mask and goggles are essential to remove the sense of identity and humanity from the Ninja and focus on the pose. The hands were left bare to represent the philosophy that while we can hide our faces and identities in life, we conduct our lives with our own two hands, and there is nothing to hide behind when we have to answer for our deeds.

Wardrobe

Lighting is easy, but to have a cool image you need detail that people will find interesting. In this case, I just wanted to find it interesting for myself, thinking that others might as well. The trench coat and pants are from We, chosen for their close fit and reflective (but not gaudy) texture, which I knew would mix well with the hard lighting design I had in my mind. The Purple Doc Marten combat boots were chosen as the base of the image, the elements which connect the Ninja to the environment. Their size and hard lines complete the line of the legs and also work well with hard lighting. The T-shirt is from a Dandy Warhols concert in Zurich. I used it because the design is just sort of astronaut-cool and cuts down on the seriousness of the image. You just can’t take yourself too seriously when you’re posing for a self-portrait with a Katana in one hand and wearing black ski goggles.

urban_ninja-3

Lighting Design

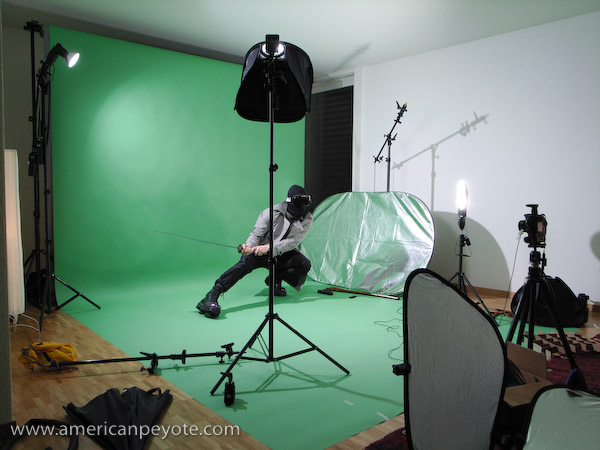
The main driving force in the lighting design was to create some hard shadows and give definition to the Ninja which would hold up well during the post-processing in Adobe Lightroom and Photoshop. Hard light and a bit of soft fill was used to define the hardness of the trench coat and portray the face as melting into the night. Three lights were used and one reflector. The overall desire was to have hard light illuminating the Ninja, forming shadows of the night. The main light is a Sunpak 120J placed above and slightly behind the Ninja. I went with a 120J with a parabolic reflector because it dumps a lot of hard light, which is exactly what I wanted. An Orbis ringflash adapter with a Sunpak 383 was positioned in front of the Ninja, filling in shadows on the front and adding definition to the features of the Ninja. A second Sunpak 383 in an Alzo softbox filled in the front without softening the hard light from the 120J. The ultra cheap Gadget Infinity 16 channel radio triggers were used to fire the strobes. A Minolta 7D with 28mm lens was used, capturing the whole subject and adding a bit of wide-angle distortion which I like.

urban_ninja-4

Color and Post-Processing

A green background was used, to contrast with the black and grey color scheme of the wardrobe. The 120J illuminated the background from the upper left, giving a sense of a moon or street light cascading down over the ninja and rendering a hard shadow on the ground below. An orange layer was added in Photoshop to balance out the darks and work with the grunge concrete layer I used for the processing. The post-processing design was sort of hyper-real, translating into a few layers of Levels, Highpass, Curves and Smart Sharpening. This allowed the Ninja to have some deep shadows, and sharp definition of the body. I use a light de-saturation layer as well to tone down the color and match the “feeling” of the color scheme with that of the concrete grunge layer. This is better described in my Photoshop Grunge Tutorial.

Random Photoshop Tutorial – Grunge Textures

A Textured Sad Clown

In Photoshop a texture is just something, an overlay, an image layer, a way to add some sort of depth to the image which wasn’t there before. There are many different reasons and motivations for using textures in Photoshop, and I’m here to quickly educate the curious reader on how to use grunge textures in Photoshop.

First off, why grunge?

I don’t know why I like the feeling of grunge textures. Maybe it’s because I’m trying to re-create the feeling I get walking through Berlin or Detroit, maybe it’s because I’m a cliche and am just following the crowd. Joey Lawrence uses grunge texturing techniques, and I bought the Joey L Photoshop DVD Tutorial, so obviously I’m just copying his style. Maybe, but some people say that everything is just a copy of a copy of a copy. I know this because Tyler knows this and because Fight Club is one of my favorite books/movies. What I do know is that sometimes I take a photo and it’s perfectly exposed and has great shadows and yet it just doesn’t have the look, the texture that I want the image to have, so I have to go about adding such elements in Photoshop.

So, what’s a texture?

A texture is a separate image which is overlayed over your original image, and through the use of different blending techniques, defines a part of the image. Textures can be used to change the mood or intended interpretation of the original concept which was in your head when you took the photo. If an image is nothing but a story and the photographer is just the author, then textures are just visual storytelling tools.
Where do textures come from?

Anywhere, any image can be used as a texture and currently I prefer to use concrete and street art textures. I use custom images, which means that I photograph walls and doors and parts of cities which I think have an interesting texture or feeling, specifically to use as textures in Photoshop. I generally like creating images where the original photo, and the texture images are all taken in the same location. So if I do a portrait shoot in Winterthur, Switzerland, I will probably use textures shot in that area as well. I like this idea because it means you’re including environmental elements of the shooting location in the processing of the image, and then the final image is a combination of the subject as well as of the environment where the original image was produced. Once you have a image to use as a texture, how is it used in Photoshop?

How Do You Add A Texture in Photoshop?

If you’re visually inclined, check out the video tutorial above, which goes through how I created the Textured Sad Clown image. To add a texture to an image in Photoshop (or any other image edition program with layers) you just open the texture image and your main image, and then you copy the texture to the image to the main image. The texture will be imported as a separate layer, and now you just need to blend the texture into the layer below it. There are a number of different blending modes and techniques, which can be used to blend your texture into the final image. The two main ways to blend texture into the original image are via the blending mode, and then via masking of the texture layer. The blending mode defines how the colors, luminosity, tones, and visual parts of the texture blend into the layer below it. So, for example, if you choose “multiply” as a blending mode, then similar tones are multiplied together, producing a darker image. If it’s not the look you want, try another one till the image starts to look good. What is “good?” Good is whatever you think it is. There’s never one blending mode which works for each image and concept. You just go through them all till you find one that you like. Once you settle on a blending mode, you’ll probably still want to modify it to bring out different aspects of the image. This is done by masking. Masking is a technique to mask out or hide parts of a layer. It’s a non-destructive editing technique which is pretty essential in Photoshop. For example, with a portrait, you probably don’t want the texture layer to block out or dramatically change the face of your subject. So after selecting the layer mask on the texture layer, I can paint over Amber’s face, so her features aren’t hidden. The overall opacity of the image can also be reduced to uniformly reduce the impact of the texture layer.

Obtaining Textures

I’m continually adding to my texture library. It currently includes textures from Zurich, New Orleans, Tokyo, Winterthur, anywhere that I find a cool surface to shoot. The more textures you have, the more story telling elements you have at your disposal. I don’t use texturing techniques on every image, sometimes I want a certain look, sometimes I don’t. Sometimes it looks cool, sometimes it’s a cliche. Do what feels right to you when processing in Photoshop. If you limit yourself to a Joey L style or the Scott Kelby 7 Steps, then your images will look like those of a thousand other people. Is that what you want? Maybe every photo I take is just a copy of a copy of a copy. But so far I haven’t found that to be the case.

If you’re interested in trying out some texturing effects in Photoshop but don’t have any images to use, and you live inside a white box without a key, or it’s cold outside and you’re not in the mood to go shooting, or you just want to get started right now this second…

Here is a sample of my Texture library to download and fool around with. It includes custom images produced in the old industrial areas of Winterthur, Switzerland. These textures are free to use for non-commercial work and for educational non-profit uses.  When publishing an image, please add a credit for American Peyote, and link back to www.americanpeyote.com and please don’t hotlink to the Winterthur Textures zip file.

Winterthur Textures Library

I would be interested in seeing how you use these textures, so feel free to email me samples of your creations.

Additional Texture Library Sites:

Textura

Texture Warehouse

Concept to Photo – Urban Dry Tooling Video Tutorial

Concept to Photo Urban Dry ToolingPhotography and text-based web publishing are fantastic tools for communicating ideas across the world. However, they have their limitations. I think in a 3D moving picture mindset, and therefore, it made sense to start communicating using moving pictures and spoken words. Concept to Photo – Urban Dry Tooling is a video tutorial about starting with a concept, and then translating that inspiration into a final photo.

This isn’t a new idea, there are many photography related video tutorials on the web. However, I rarely find one I want to watch for more than 30 seconds, because they’re either boring, or filled with the least relevant information possible. Another problem is that in many ways the photography tutorial video genre has become a dumping ground for marketing videos from photographers trying to emulate Chase Jarvis – the famous commercial photographer from Seattle who is often credited with starting the photo-video marketing movement. However, he’s a unique gem in the chaotic video landscape of the internet, and his videos have yet to be matched for style or content. I’m not a photographer posting a video to show off my equipment and pretend like I have a cutting edge production studio. I’m a guy in an apartment with an old G4 Macintosh and an old Minolta 7D DSLR who likes to think up concepts and express them.

The concept behind this video is simple, compress my creative and photo production process into the upper attention span limit of an average internet video viewer.

This video tutorial was created to fulfill three functions: first, as an exercise for me in producing a video I would want to watch (but I’m weird so this probably doesn’t apply to the average internet viewer). Second to help me understand my creative workflow by packaging it in a video form (teaching to others is the best way to learn). And Third to give other photographers, creatives, and anyone else interested in a new (or old) perspective on the creative process as applied to photography.

Audio was recorded using my Zoom H4, screen capture video was obtained using Snapz Pro X, music was obtained from Kevin Mcleod’s music collection, and the rest is just still images and titles. Some say that soon cameras and camcorders will be one and the same, and they’re right. But in transitioning to the video world I wanted to start simple, and that meant using primarily still images.

Concept to Photo – Urban Dry Tooling

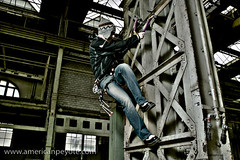
How was that image created?  What was the workflow from the initial idea to the finished product?  Concept to Photo is a growing collection of articles detailing how various images were produced, starting from the initial concept stage through to the final image.  What worked, what didn’t, could the concept be translated to an image, and how successful was the experiment?  This installment includes the development of the Urban Dry Tooling Concept: the perfect mix of climbing coolness and the industrial edge.
The Concept:

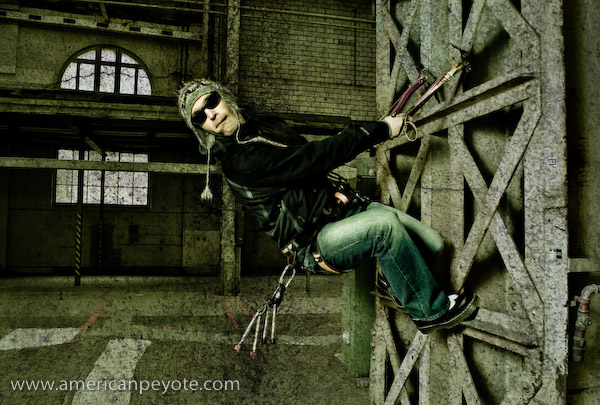
I’ve been moving towards combining climbing and urban concepts for a while.  It’s a natural result when you have little time to climb and too much camera equipment combined with a night of self-portrait experimentation.  Everyone knows what the generic city mountaineer looks like: jeans, fuzzy hat, fleece gloves, cool sport sunglasses, Teva or Chaco sandals in the summer and hiking boots in the winter, all topped off with an expensive Gortex jacket fit for Nepal but mainly used to fend off the wind in front of Starbucks.  I’m not an exception, except that I keep the boots at home in favor of Dr. Martens.  Anyways, I wanted to take the Urban Climber/Mountaineer look a bit further than the coffee shop.

Dry Tool Garage Concept

The concept started with a sketch and was simple, take the best parts of Urban and combine with the edginess of mountaineering.  I wanted something sort of dramatic, I wanted movement (or the sense of it), and I wanted it to look cool (at least to my eyes).  For the Urban part this meant that dark industrial backdrop only available from a circa 1940’s sky scape or an old factory.  It also meant fashion and not just taking a mountaineer and putting them onto the side of a building.

I wanted the coolest elements from mountaineering: ice tools, quickdraws, well-fit jacket, cool hat, and sunglasses – and then combine with a clean hip urban look.  Unless you ice climb you probably know what an ice axe is but don’t have any idea what an “ice tool” is supposed to look like.  Ice tools are short and meant for climbing frozen waterfalls or hanging from rock edges in winter.  They’re curved, wicked and stylish.

The clean hip Urban look was realized by integrating jeans and super-fly Dr. Martens into the mix.  The location was an old industrial area, in conjunction with a zuerichflickrdrinks Flickr group outing.

Urban Dry Tooling Location
The Location:

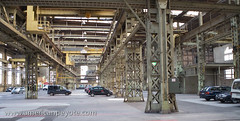
The old industrial Sulzer-Areal complex in Winterthur, just outside of Zurich, Switzerland.  Originally a manufacturing complex, since transformed into an ultra-chic locale with apartments and one fantastic parking garage which is largely unused on the weekends.

The Wardrobe:

Mountain Hardware Jacket
Levis Jeans
Dr. Martins wing tips
Bolivian Hat
Trango Captain Hook Ice Tools
Random Accessories (quickdraws and ice screws)

The Execution

The original idea was to hang on to the columns of the parking garage with the ice tools and be pulled by a rope attached to the harness.  Then the model could have his legs pulled out into space or jump out.  This actually seemed a lot more dangerous in real life with actual steel and concrete to bash his head into – and hence was scraped as an option.  After killing that notion static posing on the steel column in classic climbing fashion became the main focus.  Assisting with the camera was done by ubiquity_zh.

Urban Dry Tooling Setup

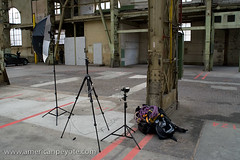
Sometimes the lighting dominates the subject and other times very simple lighting is paired with a subject.  There are a number of things which could have been done better, like lighting the steel column or mixing soft overhead light with some hard lights for contrast, but in the end a simple (somewhat pathetic) one umbrella setup mixed with the natural light filtering through the ceiling was used.  A Contax TLA280 was reflected into an umbrella high camera left and a 20 mm lens was used to get some slight distortion and bring out the Dr. Martens when the feet were properly positioned.

The Processing

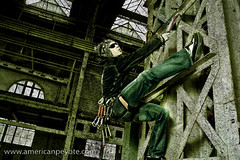
Dodging and burning was used on the jeans to bring them out.  Then various curves, high-pass and levels adjustment layers were used to stylize and a deep green color was added with a fill layer.  Layer masking was used where appropriate to bring back facial features lost in the layers.  A grung texture was produced from the concrete in the factory and used as the final step.

The Debrief

The images from the Urban Dry Tooling shoot were ok, more or less what was wanted, but in many ways don’t really pop in the way intended.  On the one hand this is good, it means the photographer is not egotistical to the point where he’s fooled into thinking that crap photography is fabulous because he designed it.  On the other hand it means one can see the road of improvement.

One main problem is the poor separation between the black Mountain Hardware jacket and the background.  A light grey jacket or T-shirt would have absorbed less light, and would’ve rendered better defined shadows.  Furthermore, a diffused light from the right would have illuminated the torso of the model better.  Of course, adding some back-lighting would have helped as well to improve separation, and grid spot to light the ice tools probably would have prevented them being lost in the shadows of the steel framework.  What comes next?  Only the Shadow knows.

Photoshop Express – Divine Deliverance

In the dark ages there came to pass the revelation in imaging technology, which has since come to define and dominate the photo world.  Photoshop, has and will continue to be the premier photo editing go-to program for millions of minions – but it what form will the program take?  The introduction of Adobe Photoshop Lightroom brings the easy of photo organization and keywording to a new level.  Work-flows are faster, letting one access and edit images with gleeful ease.

But when one has images and feels a need to share them Photoshop and Lightroom falter, for they offer no output directly to the web.  And if your image are not on the web, then they don’t exist.  Images, like cartoons die without the attention of viewers.

This is why we love Flickr.  The easy of image uploading and keyword tagging means you can post and distribute your images across the web in femtoseconds.

What if some freak accident fused the awesomeness of Photoshop with the web-coolness of Flickr?
Bow down Earthly photo-crazed mortals, for the Divine ones from the digital sanctuary have again blessed us with new gifts.

Photoshop Express

The cosmic programmers at Adobe seem to have taken the best of Photoshop and Lightroom and fused those excellent image editing and browsing tools with the goodness of Flickr.

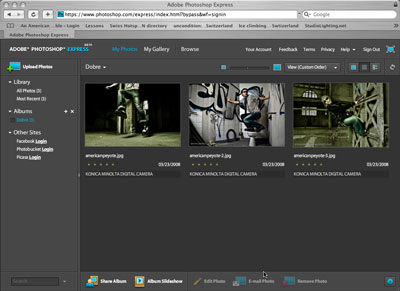
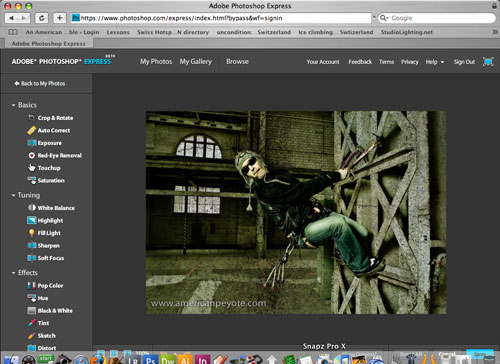
With a free Photoshop Express account one gets 2 GB of storage and a browsing and image editing interface similar to Adobe Lightroom.  You can upload images, edit them, their colors, tones, crop, fix exposure, red eye, white balance,sharpen, and do black and white conversions, but that’s not all.

Images can be distributed similar to Flickr, which means embedding images in websites and blogs and having them linked to you Photoshop Express account.  Naturally you can set up a gallery and show your images directly from Express.  The really cool thing is the images are not public until you make them so.  In Flickr everything is just up on your photostream.  Express also offers integration with Facebook, Photobucket and Picasa.

The Future with Photoshop Express?

Sweet Jesus, just imagine the future with me for a second…
You take a picture with your WiFi enabled camera, it uploads directly to Photoshop Express, with your WiFi laptop you do the editing and then distribute you digital media to blogs and website, all online, no computer program to load on a computer, it’s all online, in the air, across the radio waves.  The need for redundant backup harddrives at home is less needed and you can access and edit your photos anywhere with an internet connection.

…or whatever, brass tacks Photoshop Express is a pretty kickass – a cool photo editing and sharing platform, and it’s what we’ve been expecting for a while.  Program distribution over the net, and all you need is a license agreement with the provider.  Many are surprised Microsoft hasn’t already done this with Windows.

Here’s the future: No software, just onlineware, nolineware, and for now it’s freeware, but for how long?

You can sign up here:

Photoshop Express

And quick tutorials are here:

Photoshop Express Techniques

Joey L Photoshop Tutorial – After the Honeymoon

The worth of any product does not lie in the first impression, but is rather exposed after having used the thing for an extended time period.  Given the turnover in digital camera technology, 4 months is probably a decent time frame to assess the worth of the Joey L Behind the Scenes Photoshop DVD Tutorial.  I purchased the Joey L DVD Photoshop Tutorial just after it was released in October of 2007 and it is now March of 2008.  After having viewed and used the tutorial for an extended period, did it have a lasting, positive impact on my image making abilities?  Am I now a Photoshop Buddha?  Is it time for me to organize my own DVD and start teaching workshops?  Was the Tutorial a wise investment in my education or an overpriced, rash, ill-thought out toss of my money out the digital window?

Relax Hand Hard Shadow

The Back Story

There are few things which I view with a need-it-now mentality, in particular when it comes to education.  It might suck to learn long division as a disgruntled youth, but it pays dividends later in life when you can calculate things fifty times faster than someone who needs a calculator.

Similarly, I didn’t buy the Joey L DVD thinking it would change my Photoshop skills overnight, but rather, over time it would either have a positive, or absent affect.  The purpose of this extended After-the-Honeymoon review is to look at how the material from the Joey L DVD affected my photoshop and photography capabilities – after the initial joy of buying another digital imaging product had worn off.

First: Why Buy a DVD Tutorial?

The main criticism of the Joey L DVD Tutorial in various internet circles is that it’s overpriced, and doesn’t show anything that can’t be learned on the internet, either for free, or via modest monetary costs.  So why buy it?

It’s true, there are countless opportunities to learn Photoshop and Photography on the web.  Sites like Scott Kelby, Layers Magazine, Photoshop User TV, Dr. Brown, and a number of random totally free videos and written tutorials (often with sample files) are sitting there in virtual space, begging to be viewed.  There’s also libraries of books on-hand dealing with every aspect of Photoshop.

I also know from experience that a number of the tutorials are little more than simple near-pointless tips on using curves, the healing brush, and converting to Black and White.  Not all of course, the paid ones have more real value and there are many gems at Layers Magazine.  However, my main experience is that many almost universally use bland uninspiring images for their examples, and often times it feels like I’m watching a copy of a copy of a copy.  I was looking for something more original to supplement my Photoshop education.

One main draw of the Joey L DVD tutorial is that Joey Lawrence is an actual working photographer.  A dynamic beacon of creativity in an industry of imitators.  The draw of learning from an active Pro is unique for me, as I often have the feeling that too many tutorials are done by people who realized it was more profitable to teach Photoshop instead of being a photographer.  This is probably a pessimistic view, and there’s really nothing wrong with that business model, I encourage folks to make money in any legal fashion they wish, and teaching is one of the noblest professions.  Still, I get my science education from world class-researchers.  Why skimp on my Photoshop education?

A tutorial like the Joey L DVD instantly makes me think of photography workshops.  Workshops are popular from a few perspectives; when you get to the point as a photographer that you want to expand your creative consciousness or skills in a certain areas, or you travel to some distant hard-to-organize location.  Workshops are generally considered to be money-well-spent, and in general I would never spend money on a workshop because many just seem like an excuse for people with too much money to pay someone to tell them to use their camera equipment.  There are exceptions, if David Hobby or Don Giannati flew into Zurich for a Strobist or Lighting Essentials workshop, I’d probably be there to welcome them at the airport.  Basically, I wanted a Photoshop tutorial, and the Joey L DVD seemed like a good fit.

Hanging Hand

Playing and Criticism

Another main criticism is that Joey doesn’t teach good Photoshop technique.  From a technical stand-point I’d say this is true – but if I was technically a Photoshop whiz, I wouldn’t have bought the Tutorial in the first place.  The Joey L tutorial is primarily about using destructive editing techniques and just doing what "seems" right for the image – you know, to make it look good.  I don’t really think this is a bad thing.  This is what artistic expression is all about, if you stick to rigid guidelines in books and always listen to your teachers, you’ll always be one step behind your peers and more or less copying from the old Master’s.

If you copy what Joey does point-for-point, you’re not learning anything that a monkey couldn’t learn (yes, it could take a generation or two of breeding and genetic engineering).  Anytime you’re confronted with a large, intimidating construct like biomechanics, quantum physics or Photoshop, playing around isn’t such a bad thing – and should be encouraged.  "Playing around" has brought more ground breaking discoveries than I care to list, including penicillin and bubble wrap.  Playing in Photoshop is an important lesson I’ve taken away from the tutorial, which is also how Dave Hill developed his legendary style that so many geeks try to achieve.  This doesn’t mean I use the techniques Mr. Lawrence has described in his tutorial.  I do Photoshop with my own workflow and so should you.  But it’s not bad to learn from someone who isn’t using Adobe standard practices.

Ah, But the Cost

The Joey L DVD is not cheap, but education is what the student makes of it more so than what the teacher teaches.  This is contrary to many philosophies of modern pedagogy, but after going through three engineering degrees and a few semesters as a teaching assistant, I feel comfortable saying that a motivated student will learn no matter how dimwitted the professor may be.  Ahhh, but inspiration from a teacher, is sometimes priceless.  The Joey L DVD was inspiring for me, and that is hard to put a dollar sign on.  But it might not be for other pupils.

Draw Like the Maple Tree Young Grasshopper

I feel like the DVD has helped open up the horizons of Photoshop.  This doesn’t mean that now I think that every photo needs to emulate Dave Hill and Joey Lawrence, it just means that my mind is more open to what I can do with the raw image – and the DVD Tutorial had a part in that.

I love to draw and do images on paper, but I’ve generally felt constrained in Photoshop, "Hmmmm, I should make layers with correct names and make sure I can go back and change everything."  So, again one of the important lessons from the Joey L DVD is that a desire to play in Photoshop is essential, the program is a tool, not a defined process.  My Photoshop skills are getting more fluid and playful, which opens up more creative directions in photo manipulation – and hence visual expression.

Was the Joey L Tutorial a good buy?

After 4 months, I’m still comfortable with the amount of money I threw down for the Joey L DVD.  I come back to it and replay a lesson here and there when I need to, thinking back to the techniques, imagining how to use and create them differently, and often also disregarding them and doing something different.

I like being able to replay different lessons quickly, and then go back to other projects – something you can’t do with a workshop (unless they include a DVD).  I’ll probably never buy another DVD like this again (ok, maybe one), the exception being the forthcoming Strobist DVDs or the offerings from Lighting Essentials.

Why not go crazy buying more DVDs?  Because I’ve hit the point where all the other fine points of Photoshop can be easily found or discovered, maybe I didn’t need to buy the Joey L DVD to get to this point, but that’s the way I’ve arrived here, and I don’t regret the path I’ve taken.

Brass Tacks

Here’s the thing, with Photoshop I was looking for a spark, something to open the flood gates and broaden my horizons on this subject of digital post-processing.  The Joey L Tutorial DVD did that – exactly that – I see images in layers and masks and color shifts and shadowed hues now.  When I look at setting up a shot, I think about the post-processing, the way the lighting will define how the image can be manipulated later.  This isn’t a certain style, it’s an addition to my digital visualization abilities – the same as visualizing a wide angle effect before taking a picture.  The horizons for communicating a certain message have now been expanded.

Could the Joey L Tutorial DVD have been done better?  The crazy thing about the Joey L Tutorial DVD is that it could have been one of the most fantastic photography-centered Photoshop learning tools ever created – if it had been created with an eye towards integrating the lighting and photoshop techniques.  However, it doesn’t take long to see for yourself which type of images "work" and which ones "don’t" based on their lighting.  No Photoshop action can "fix" images which don’t have the right lighting to start with.  That’s the shortcoming of the Joey L DVD, the lighting-processing connection is mostly missing.  However, playing around with different images and the Joey L actions will quickly reveal how lighting affects the post-processing.

Here’s an example, both of the images shown below were processed using the Joey L Signature Action, and should be slightly representative of how this technique works.  It’s pretty obvious how the first image doesn’t really look all that great.  It’s flat and desaturated, and more or less boring.  This is because the face and torso are turned away from the light source, and all we have is definition of the jacket. However, the second image is better-lit, and renders the deep-grudge shadows much better than the first one.  Once you see which type of images and lighting combinations work it’s easy to draw up in your mind how to design shots specifically for this type of deep-shadow processing.

Floating in the Air Drama in the Air
Poor lighting, only shadow and definition in the jacket Better lighting, good shadow definition of the arms, torso, and face.

Monkey See Monkey Do?

There is a pervading attitude from many dark corners of the web that if you buy his DVD to learn from someone like Joey Lawrence, you’re trying to adopt or steal his look/style instead of developing your own.  If such an attitude existed in the scientific research world, we’d still be riding horses and the telegraph would probably be 200 years from being invented.  In general everything has been done before.  There are very few truly new things.  There was Dragan, people copied him by creating Photoshop actions, Joey Lawrence no doubt learned from these influences, and developed his own style.  He made a DVD, I bought it, and here we are.  That’s how progress and the evolution of style sometimes works in the digital imaging world.

As you move through life you learn things – and the knowledge you retain becomes tools which you can use to do other things: build bridges, take pictures, climb mountains, relax on a beach.  The real mistake is not learning as much as you can and using those tools as desired.  I didn’t set out to imitate Joey Lawrence, or to create iconic art that will stand the test of time.  But if that iconic art thing happens, well – cool.

The Joey L Tutorial DVD is just an addition to my photography digital image making toolset, what comes next no one knows.  Should you buy the Joey L DVD Tutorial, or that Canon 85 mm lens or that Nikon D300?  Will a set of Profoto strobes make you a better photographer?  Figure out what you "need" to accomplish what you’re seeking to accomplish – acquire those tools, and then go write your book, develop your look, live your life, whatever.

No one single piece of knowledge or equipment will improve your skills in life unless you’re motivated to push yourself to the next level, but once you know how things work…well, maybe I’m working on my own tutorial DVD…

Digital Style – The Joey L – Jill G – Dave Hill Look

Editor’s Note:

The following is a collection of thoughts on Digital Style, an elusive element of Digital Imaging, an extension of Photography.? The author has already admitted during our last project meeting that he “has” no style, nor any particular story to tell – which made him the logical choice for this article.? This is a Style piece, and logic therefore need not apply.

The Writer's Hand

Photoshop is a great big beautiful doorway to the realization of any creative genius that the Devil can conjure up.? For a generation of digital-born image makers it’s the go-to in creating a digital style – that illusive look that sets one image apart from another and defines the distinctive qualities of an Artist.

Millions of poor fools are locked in the cult-mindset that their crap photos can be saved by the Photoshop high Priest-magic of our time – the Photoshop Action.? Load a photo, run the action, Photoshop does all the changes to your image – and there is your masterpiece.? The object of their obsession is getting “the so-and-so look” the high dynamic range of Dragan, the cartoon-like softness of Dave Hill, the gritty power of Joey Lawrence, or even the emotionally engaging elements of Jill Greenberg.

Photoshop, like any unchecked religious fascination quickly becomes a short-cut to thinking if the “program” is placed before the “story.”? Some would say it’s all down to plot and the story line.? Most everything worth reading, watching or looking at has it.? You check out a photograph and there’s a message, something there, a story that pops into your mind and pulls you in.? If there’s no story in your photos, no amount of demon-inspired-bastard Photoshopping will save your blunder.

Relax Hand Hard Shadow

You can spend hours searching for a top-notch Dave Hill action script, or you can spend about 30 minutes on Strobist, StudioLighting.net, FlashFlavor, and any number of free-learning websites where a sheep can shave the wool from their vision and learn to use light to paint a story on a digital imaging sensor.? Photoshop can enhance and manipulate, but it’s not a creativity creation machine – and it doesn’t need to be.? Creativity is just the Artistic neighbor of Quantum Physics, terms used to things which are not fully understood by the people who use them.

The simple truth is that there’s no secret to Jill’s emotionally charged images or Joey’s gritty grung work.? Lighting and subject, with Dave and Jill and Joey, they are awesome.? Awesome subjects and lighting.? Sure you can imitate Jill’s style, just call up Gwen Stefani or your local bear handler and set up a shoot.? Get the lighting right and you can copy her look. No Photoshop action needed.

“No, no, I got it, Jill and Dave use RING LIGHTS.”

It’s true, many photographers such as Jill G and Dave Hill make sensible use of right light flash heads, but dropping $400 on an Alien Bees head won’t make your images “good” if you have no story to tell.

The limited edition White Stripes Meg Diana with ring light accessory is a different story.? If you drop $180 on this cool camera you’ll space-jump to Hollywood lighting pimp in the span of 5 seconds.

4…3…2…1…take off

Climber I

Seriously, if you’re looking for digital style – quit Photoshop.? There’s no point in wasting time with the program if you haven’t a clue what look you want or what the story should be.? Take a walk, pick up a Japanese ink pen, build a house of cards, and come back when you have something to say.

The story doesn’t have to be anything special, profound or engaging, but if you simply manipulate your photos in Photoshop trying for that special look and post photos to Flickr messages boards looking for accolades from the web community, your sheep mind will never rise above the level of a second-rate snap shooter.? But is doesn’t have to be, it’s cool just using new tools to be Creative.? However, with new tools comes confusion, consider leaving the digital sanctuary, turn your back on the Photoshop cult and tell your story as it exists in your mind.

Of course, if you have no desire to – keep doing what you were doing.

Looking to the East

Trust me, I’m a scientist.

Excellent Photographers:

Jill Greenberg
Joey Lawrence
Dave Hill
Michael Grecco
Andrzej Dragan

Further reading:

A drawn-out Flickr discussion – the Dave Hill Look
A useful Flickr discussion – the Joey Lawrence Look

Flickr Photos without a Style or a Look

Photography and Photoshop – Getting Digital Style

I’m sort of on a Style quest.  This isn’t meant to mean that I’m trying to define a certain photographic style because I read online that I need to do so.  Getting a certain style, or look in my digital images in just an extension of the process that started many years ago.  I started out in photography with mountain photography, documenting trips in Colorado or New Mexico, which eventually shifted to locales like Bolivia, the Swiss Alps, and now to parts of Japan.

Photography is a natural part of travel, and in Europe I took the time four yeas ago to head out with a universal train pass shooting about two rolls of mixed 35 mm and 6×4.5 for a month in places like Austria, Poland, Czech Republic, Hungary, and Germany.  The point was that I wanted to see what I liked shooting and didn’t care much for – to figure things out.  Eventually I moved to off-camera lighting with a Strobist education, and now I’m expanding further into the freedom provided by Photoshop – initially inspired by the work of Joey Lawrence.

Photoshop is one of those crazy amazing programs where anything is possible, but if you just randomly click things without any feeling for the result you’ll never really use the program for anything beyond an amusing supplement for television.

It’s important to remember that Photoshop is just a visual translator, an avenue for the user to express a visual representation of an idea.  Like most computer programs, the actual user-computer interaction sucks.  Many of the elements of Photoshop like the paintbrush tool are traditionally controlled by a computer mouse – one of the least bio-mechancially compatible gadgets ever invented.  It doesn’t matter the shape, number of buttons or color, the mouse was not designed for a person to easily interact with the computer.  It was developed because in the age of post-DOS early Windows programs, it was the most basic component that could be produced to allow user-computer interaction beyond the keyboard.

I’m still waiting for the day when mechanical design and analysis programs like Pro/E and ANSYS are sold with VR-goggles and three-dimensional motion gloves to enable real user-program interaction.  If you really want to start interacting with Photoshop and making it an extension of your imagination and body – drop the standard mouse and pick up a graphic tablet.  Mine is a basic small Wacom from like 8 years ago – superior to any of the latest button-crazy-curved-but-non-ergonomic mouse designs found today.  Plus, it’s small enough to pack along to all corners of the Earth with my dented G4 PowerBook.  I’ve been drawing in class since kindergarten – sketching with a pen or pencil is my natural visual expressive process – so using a mouse with Photoshop is just imposing a handicap.

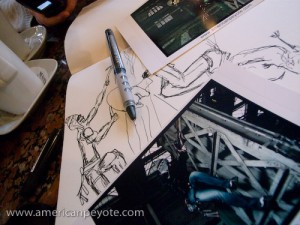
Once you get a feeling for what Photoshop can do by starting out with some basic online tutorials, buy yourself a sketch book and drawing implements.  My current favorites are a Moleskine sketch book, standard pen, and Japanese ink pen.  The Moleskin has heavyweight pages that soak up excess ink are great for shading.

The Japanese ink pen is essentially like having a paint brush in your pocket.  You can buy different brush lengths, and are generally available in art stores.  As I’m in Tokyo at the moment, I plan on bringing a small bag full back to Zurich.  When you feel like it, draw something, anything, fill in lines, create shadows, contrast, change the feeling from happy bunny to evil man-eating alien with a few pen strokes.  That’s really all Photoshop does, just on a much larger scale.  Get used to doing it with simple sketch books, and you can start opening up the creative flood gates in Photoshop.

Photoshop is great for doing contrast and brightness adjustment, but if that’s all you’re using the program for save yourself the hassle of having all the other features and go with a simpler program like Gimp, Lightroom, Aperture, Light Zone, etc.

The reason I’m exciting about using and abusing Photoshop in the coming year is the amazing possibilities with selective lighting and local image adjustments.  Using a graphic tablet and painter techniques one can really start using the program as an extension of the mind-body and use it as a creative tool to create – as opposed to modifying images.  I always knew these things were possible, I just never took the time to explore them before.

I don’t know where I’m going with Photoshop, but I love the possibilities, I love using the program as an extension of my mind and starting to visualize the creation and evolution of images from the initial image capture to the thing my mind originally envisioned when I tripped the shutter.

JoeyL Tutorial Review – Behind the Scenes

Editor’s Note:
What follows is a Review of JoeyL Behind the Scenes: The Complete Tutorial.  This is an impression of the DVD tutorial provided by the reviewer and nothing else.  There are no financial ties between this review and the photographer Joey Lawrence.

JoeyL: Behind the Scenes Review

I’ve been shooting various cameras and engaged in various amounts of Photoshop for five or six years now.  I think of cameras and computers and hammers in the same way – tools with which to do something, nothing more or less.  In the past year I’ve expanded from mountaineering and landscape and travel photography to using studio lighting techniques, mainly gleamed from www.Strobist.com, where I read an interview by David Hobby with Joey Lawrence and learned about his new DVD tutorial.  He seems to have a cool style and creative philosophy, so I bought his tutorial for $249 (promotion till Oct. 21st, – $299 thereafter).

This is the first Photoshop tutorial I’ve ever bought, and it was purchased for the following reason:  I’ve become comfortable with the basics of Photoshop, using the clone tool for basic corrections, levels and saturation control for various tonal adjustments.  Basically using those tools to enhance the feeling I wanted to communicate with the images taken using my cameras.  I’ve been looking for a learning package to help me take things to the next level and to expand beyond the basics of enhancing an image and start using Photoshop as a tool to create a specific visual impact with my digital images – beyond what can be accomplished with cameras and basic lighting.

Did the JoeyL DVD contribute in the aim of fulfilling my creative desires?  Who is the DVD for?  Will you, as a reader benefit from buying your own copy?  Hopefully you’ll find some answers here.

DVD Contents

The JoeyL DVD is broken up into two sections: Lessons and Videos, a preview is available on the tutorial website.

The Lessons section includes videos showing Joey editing digital images in Photoshop, explaining along the way how and why specific adjustments are made to enhance the photo and his vision for the final image.  The specific lessons are:

Specialized RAW Conversion Techniques (manual HDR)
Levels and Curves
Multiply techniques (“Joey L signature look”)
Dodge/Burn
Soft Light Techniques
Grunge (apply textures, scratches to images)
Rescue (rescue a ‘bad take’ photo)
Tilt/Shift (simulate lens blur effect)
Quick Masks (influence light/dark values)
Cooking Your Own Textures (texture production)

The Videos section includes four production videos, which show Joey working with different bands and models.  The creative process is explained including some lighting diagrams to illustrate how lighting was setup for the shoots.

A set up Photoshop actions and high resolution textures are also included on the DVD.  A set of actions like these would probably set you back a certain amount of money if bought separately.  If you add up the projected cost of the 10 actions and 51 custom textures (by my hand counting), the total price of the DVD becomes more digestible.

So, after going through the DVD various times and working with the techniques and evaluating what I’ve learning and what it means for my future image making process, here are my impressions:

The Impressions

During the lessons Mr. Lawrence talks through his thinking process in adding various layers and how to do different adjustments.  Adding layers and blending and the use of manipulating shadows and adding light to images is well explained.  This is exactly what I was looking for, since it shows you how to enhance lighting effects in Photoshop which were absent or difficult to produce in reality.  A problem though is that the Photoshop techniques are presented as separate from the production process.

Some videos are included which document different shoots and the photos of which are used in the lessons.  This is pretty cool, since you can see how the images were created and then you can go through the editing process in Photoshop to see the evolution of concept to digital final.  However, a link between lighting for the sets and how that lighting was used in the editing process isn’t really presented.  Of course, a specific link may exist, but adding the connection would greatly enhance the learning experience.

There are five videos in the Video section, but really only two videos on the DVD include lighting diagrams and a talk-through about the production process.  I was hoping for a broader amount of material here, including a workflow starting out with planning for the shot, figuring out what lights would be needed and more interaction about what was working and why.  The lighting of course, is key here, many of the Photoshop editing techniques work because the lighting produced the right shadow which would later be enhanced in Photoshop.  Without more background on the lighting, it just feels like something is missing.

I like that videos are included that show the production shoots.  The images from those shoots are later used to illustrate the editing techniques.  So you get a feeling for how one goes from doing the photography to producing the final image.  However, in this sense I feel like the material doesn’t flow as well as it could.  The editing and production videos are separate, and must be viewed separately.  I think it would have been beneficial to integrate the two together.  Of course, this would make it more difficult to organize the lessons in an easily accessible format.  Still, it would be cool it the Photoshop editing could have been added to the production footage to better illustrate the path from initial idea – image capture – digital editing ending with the final image.  Of course, this is my bias and reflects how I would have liked it to have been setup.  It wouldn’t be too hard to import the movie files into Final Cut or iMovie and re-edit the JoeyL Tutorial to a form which better fits with my leaning preferences.

Is It Worth the Price?

The creative process was a main draw when I finally sent my credit card info for the DVD, knowing full well that $249 was just dropped electronically.  In my opinion a description of the creative process is probably the weak point of the tutorials.  The Photoshop techniques are very clearly explained and you can start doing cool things to your own images in the time it takes to open your file in Photoshop.  Now, a critic will say that it’s easy to find all the info one wants on Photoshop on the web – hence, why buy the tutorial?

Numerous web tutorials and people like Russell Brown show you how to do many things in Photoshop.  Of course, this information is generally spread out everywhere across the web, and all without the benefit of a professional photographer explaining their creative process.  Time is valuable, and time wasted scouring the web for into on Photoshop and then taking the time to figure out what enhances what is time not used shooting photos or climbing mountains.

My reason for buying the JoeyL DVD was to see how Photoshop can be used to create an image as a part of the creative production process and to enhance my own creativity.  In this capacity I’m very happy with my decision to drop $249 on the JoeyL DVD tutorial and would do so again.

Beyond Photoshop

Learning about the creative process isn’t just important for photography and Photoshop.  I look at the purchase of the JoeyL DVD as enhancing other areas of my life, both the artistic and in the scientific research realm.  To a certain extent, I expect to see a benefit from using the JoeyL tutorial in my research career.  This could be in any area from designing actuator systems for smart material applications to a new scaffold strategy for bone regeneration implants.

“What!!!  Did he just use his job as a scientist to justify a $249 Photoshop tutorial purchase???”

You’re damn right I did.  When you get to a certain level in engineering you see that the line between art and science is pretty much just a myth perpetrated by those who like categorizing things.

My knowledge of Photoshop and photo printers and the creative process from an artistic viewpoint has only enhanced by ability as a research scientist.  When you engage in a free-creative pastime like photography and enhance your image making abilities with Photoshop you’re training your mind to be more open and flexible than is generally taught in engineering, chemistry and science classes.

In both art and science you characterize the world around you using various tools to translate your vision into something which can be communicated to other people.  The tools can be cameras, physics, Photoshop, ANSYS, mathematical equations, wide angle lenses, whatever tools you need to tell the story you’re interested in.  The story could be the emotions evoked by a portrait or the aerodynamics of a rocket.  Exploring the creative process of other scientists or artists can only enhance you’re own.

Should You Buy It?

Now, that I’ve explained what I liked and what I felt could be improved in the JoeyL DVD – the question then becomes if you, the potential customer should drop the change to buy your own copy.  Here’s what I think…

  • If you’re a Photoshop whiz and already do your own lighting, know what you want to create, have a handle on your creative process and so fourth, you might not find a lot of value in this tutorial.
  • If you have no idea about Photoshop and want to create cool images with a nice gritty Grunge feel to them (the JoeyL look).  Yes, you will get a ton out of this DVD and it could act as a great starting point for jump starting your own vision.  Even if you’re starting from a very low Photoshop level, it wouldn’t be too hard to get to the point where you’ll understand and be able to exploit the techniques in this tutorial.
  • If you’re like me, someone who understands lighting at the mid-intermediate level, knows Photoshop but isn’t a Pro and is interested in the creative process and not just editing details, yes, you’ll probably enjoy the tutorial and find a lot of value in it.
  • If you’re a scientist and wish to enhance your creativity in the technical research world, I would recommend the tutorial only after reading Sparks of Genius.
  • If you’re more interested in camera specs than pictures and enjoy debating the finer points of copying the Dave Hill look than finding your own style and feel a deep resentment towards the fact that a 17 year old guy from Canada is an established photographer while you’re spending your time pouring over photo forums and tutorial reviews…well, I recommend you find a new outlet in your life.


Brass-Tacks

Reviews like this shouldn’t just be about feelings and impressions but also a prelude to action.  I worked with a self-portrait which I like and tried out some of the techniques from the JoeyL DVD and played with the JoeyL Photoshop action.  This entailed the addition of various overlays and a cool texture to give the image a nice gritty feel.  I’ve never used these techniques before and I love the result that 10 minutes of my day coupled with knowledge from the tutorial was able to produce.

JoeyL Tutorial Before JoeyL Tutorial After
If you’d like another opinion check out the Review on Strobist.com
There’s also a discussion at the Flickr Strobist Forum