Photography

Analogue Lust: Dark(bath)room Escapades in Photography

I got into photography a few years before the digital revolution exploded and people everywhere began remarking on the death of film as a capture medium for light painting (er, photography). Some say film is dead – I say film is as dead as painting, which is still a vibrant activity for millions throughout the world. Having a darkroom in my apartment has been a quiet dream of mine for a long time, and recently became a reality (till I had to take a shower). This is a summary of my latest analogue escapades with black and white printing. When you develop your own film and enlarger your own prints, there’s this mystic feeling of having a hand in the total process from image capture to final print. A sense of being able to push and pull your development and watch the prints magically grow from the arid white vastness of the unexposed paper to a finely contrasted representation of reality. It’s the embodied feeling of getting it right in the camera. Cartier-Bresson, the decisive moment, Joey L with a Polaroid and capturing the moment. Anyways, I just moved to a new place and hadn’t setup my digital studio yet.

For the past few weeks I’ve been working with a friend of mine to setup a pinhole camera project for a 6th grade class she’s teaching. We began with a Polaroid pinhole camera, but it’s too expensive to have each kid build a camera with a Polaroid back on it, and you also can’t tell the whole story of how an image is developed, as it’s all contained within the Fuji/Polaroid insta-magic photos. So, instead my friend went back to her roots and decided to have the kids build a traditional pinhole camera using black+white paper as the film, and then create the final image via contact printing. It’s a great project for students, especially in this techno-world of today where every gadget can take photos and then upload your electronic images to Facebook, creating and instantly distributing a perfect copy of a copy of a copy that can be shared and retweeted and posted all over the planet. You lose of course, the uniqueness of the printed image. A printed photo is unique – this transience, this fleeting fleck of uniqueness can be seen and felt in each print you develop by your own hand, because no two will be exactly the same (well, at least the way I do it they’re all unique accidents).
Dark(bath)room Setup

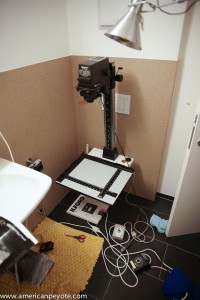
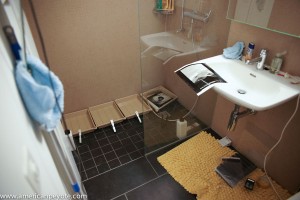
We needed a darkroom setup of course to realize the project. I easily found a Rollei enlarger setup on Ricardo.ch (a Swiss auction site) for 250 CHF with two new packs of Iflord Multigrade paper. It was a no-brainer to pick it up. The enlarger was a classic Rollei, coming direct from Lisa, a photographer in the Zurich area. From HobbyLab.ch we ordered the developer and fixer chemicals. Film may be dead (as some say), but it’s super easy to find everything needed for a darkroom. We took ownership of the enlarger and accessories on a sunny Sunday morning, and spent the rest of the day setting up the laboratory and making prints in the bathroom. We put the developer trays and chemicals in the shower to have some running water. Ideally you don’t want to balance the enlarger on a toilet, but you sometimes need to make do with what you have, which is exactly what we did (thankfully it never fell off).
First Prints

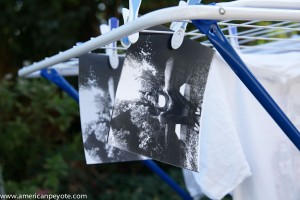
My friend started out doing exposures of me sitting outside with her pinhole camera. This was nothing more than a shoebox with a piece of Iflord paper in the back and a pinhole in the front. This piece of paper was developed (creating the negative) and she created the final positive image via contact printing of the negative pressed flat against a second piece of paper under the light of the enlarger. As it was a wonderful sunny Sunday and I had just done some laundry, we hung the prints out to dry along with the whites. This was my first experience seeing pinhole images like this, and I think they rock. The kids in her class are going to have a fabulous time building their own cameras, doing prints, and learning valuable lessons about optics during the process.
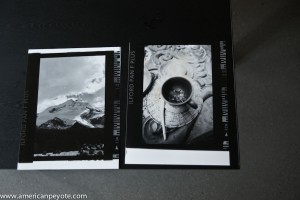
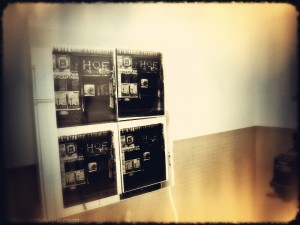
I opted to print images I already had, and pulled out the first black and white negatives I could find, which happened to be some ISO 50 Ilford PanF exposures I had made in Bolivia during a trip back in 2003. This is a high contrast film, and it prints very nicely on Ilford Multi-grade paper. I decided included the film carrier holes in my prints, mimicking those retro-film borders you can apply to your iPhone photos using many random retro-cam apps. Fuck the apps, if you desire ultimate interactivity and user experience then consider a darkroom. Oh, do you have a retina display? I have a retina as well – two in fact, they’re called my eyes. Wow, cool, you can view your images on your iPad – know what’s cooler, looking at the smooth fantastic surface of a new print drying in sun along with your laundry. I also pulled out a Fuji Neopan 120 negative from my favorite place in Berlin, and played around printing images of this club front and sticking them to the bathroom mirror. I love how films all have cool names like PanF, Neopan, Provia, Velvia – all with individual character traits and unique personalities, a concept generally lost in the Canikon pissing matches and pointless megapixel branderbating orgies that dominate too many conversations in the photo circles of the world.
Digital Is Not Worthless

I know there are photographers today who have never touched a piece of film, let alone developed or printed their own images. I love creating images with Photoshop and my Sony 24 mega-beast A900, but it’s not the same as creating in the darkroom. I started out with film, moved on to a film scanner to create files for prints, then went on to digital cameras and then expanded to Photoshop. From Photoshop I went a little analogue – started doing paintings, and now my journey has come full circle back to where I thought would be awesome 15 years ago – doing my own prints in a darkroom. No regrets at any point. Use the technology tools you have as you see fit and never stop exploring.
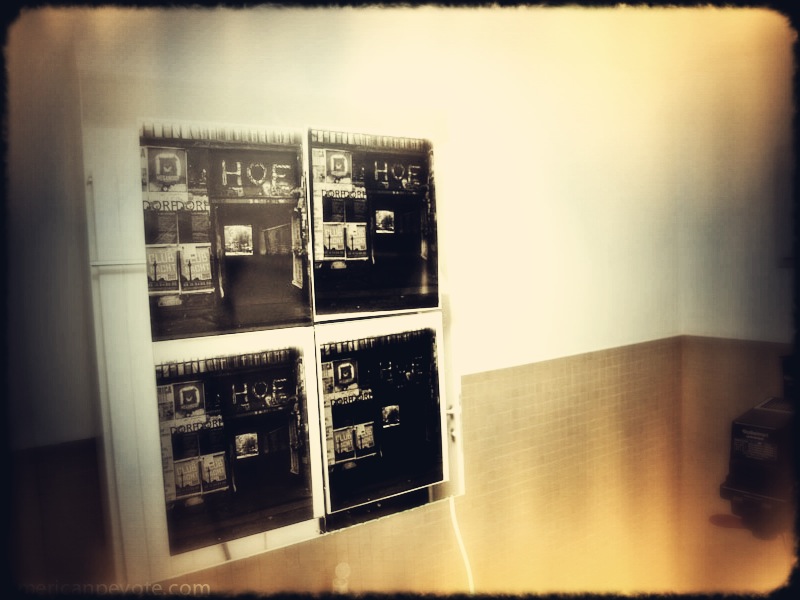
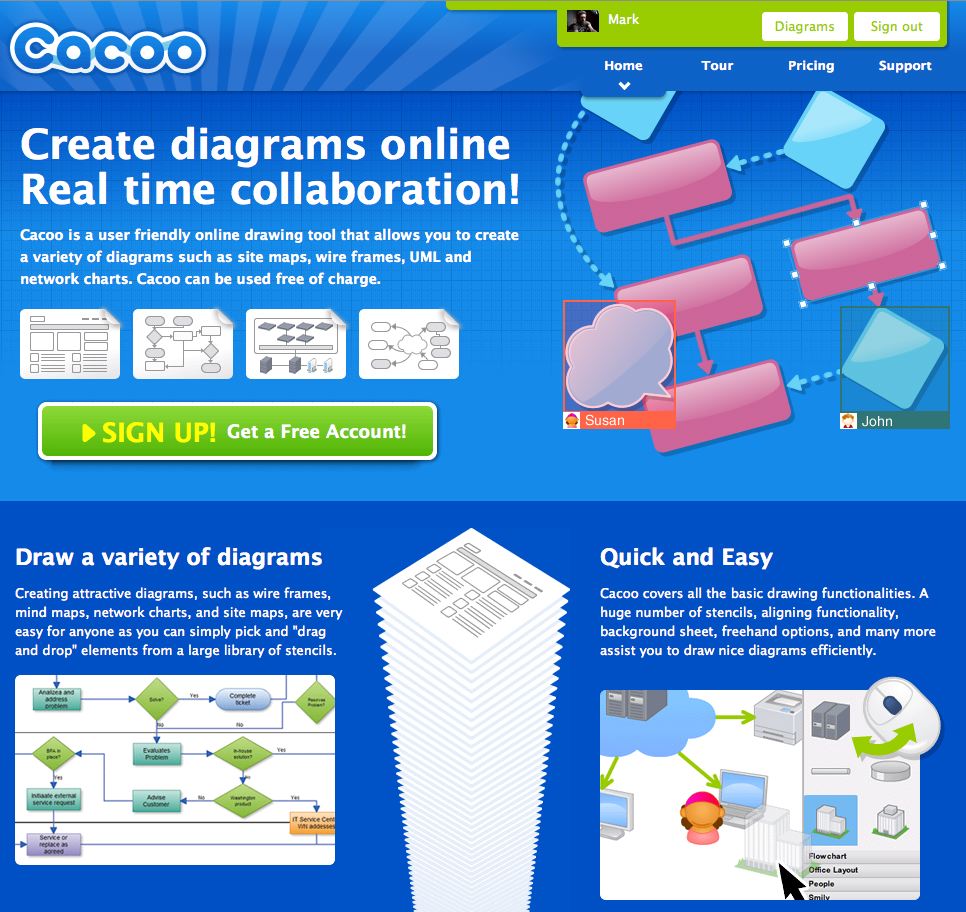
Photo Shoot Planning With Cacoo

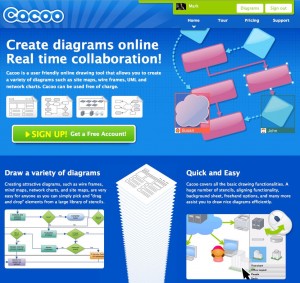
Like many things on the net, I have no idea where I first heard about Cacoo (via a link from somewhere sent by a someone I suppose), but it’s one of the most uniquely useful websites I know of. A startup from Japan, Cacoo is like an online diagramming tool, like an online version of OmniGraffle, which is the best diagramming software for the Mac. With the free version of Cacoo you can create complex and beautiful diagrams, mindmaps, wireframes, page layouts, etc. and share them with a few clicks to people, and even do real-time collaboration. With the paid version, you can do exactly the same, just with more diagram pages (free version is limited to 25) and exporting options.

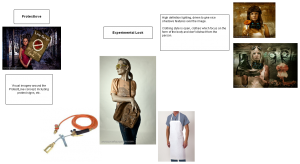
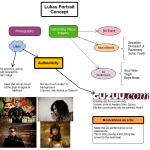
I started using Cacoo for photo shoot planning as a way to communicate with clients and collaborators. This seemed like an ideal use, as it allows the photographer/creative director to keep a history of project concepts to communicate directly to the client, and to be able to access and modify whenever desired. For photo shoot planning the workflow is like this: I have a concept meeting with a client where I get to know them – we toss ideas around, and basically just brainstorm. Then I take my notes from the meeting and create an idea map on Cacoo, detailing the type of portraits I want to create, and how the shoot will come together. You can view your diagrams directly on Cacoo, or export as a .png, .pdf., etc. The diagram can be shared securely with collaborators on Cacoo (with a Cacoo id) or via an open web link.

Why Plan?

For creative projects, often you want to communicate how an image will look like to show models/clients/collaborators what to expect during the shoot. With Cacoo clients can review your proposal, understand your thinking, and provide direct feedback on their desires. This allows photographers and clients who don’t have a lot of time to meet face to face to share ideas and give direction to a project any time of the day. It also builds confidence, because your clients see exactly what you want to do with them, and they’ll have confidence that you know what you’re doing. This helps to establish Trust – and there are few things more important during a shoot. If the MUA doesn’t trust that the photographer believes that the models know that they trust what they’re doing, then people become unsure of themselves and the end result can be lame. There’s nothing worse than going into a photo shoot without a clear idea of what to produce and just trying to throw something together in the moment under the guise of being creative. In the studio I create my decisive moments, I don’t wait for them to randomly happen. I find it’s 100x better when the clients, models, and makeup artists all know what will happen (or at least have a good idea) before the shoot starts. Photo shoots are collaborations, and the more input you have from the folks you’re working with the better the final images will be.

Planning With Cacoo

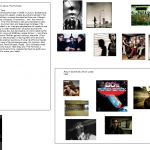
Cacoo is basically a large collection of wireframe objects and stencils that can be connected to one another while text and images can be easily added. With photo shoots clients often have an idea of what they want, and they can upload images that they’re inspired by via a weblink or direct upload to a Cacoo diagram. This makes it very easy to communicate with models or makeup artists so they know what will be expected of them for the photo shoot. Upload images of a shirt you want a model to wear, upload a hair or makeup style for the MUA/Designer to create, everyone can get everything ready before the shoot. I now use Cacoo anytime I need to communicate with models, clients, makeup artists, etc. It’s probably one of the most powerful free tools on the internet, and if you choose for a paid account, it’s probably the highest return on investment you’ll get anywhere on the web. Will Cacoo help your communication with clients? Hard to say, but it works brilliantly for me. Clients who are more web savvy will love it, and it’s a great way to get feedback from everyone involved in a potential photo/video project. Other folks, who aren’t so web savvy probably won’t be so into it. But, at the very least you can use Cacoo to show your clients exactly what you plan on doing before they step in front of your camera. Here are a few examples of how I used Cacoo on two different projects: Web Portraits Zurich and The Formers.

Case Study: Web Portraits

 With the Web Portraits Zurich project, I wanted to create cool portraits of people in the startup community around the Zurich area. I used Amazee.com to setup a group for the project and to communicate with members who were interested in participating. For each person we would have a brainstorming meeting, and then I would create a Cacoo diagram. This would often include sample images from my side so they could see what to expect from the shoot. Again, this gives people who likely have never been on a shoot before the ability to see what will be coming and to mentally prepare for the event. It also let them provide feedback to me on what they would like to have. On the main project page on Amazee (Web Portraits Zurich), I include Cacoo diagrams with portraits from each shoot, showing what we had in mind during brainstorming, and then you can check out the resulting images. Having these project diagrams also allows me to form a nice time-line, showing how the portrait project evolved. As a photographer it’s very helpful to look at what we had planned originally, and then compare it to what we ended up doing during the shoot, and what I ended up producing for the final images.

Case Study: The Formers

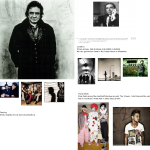
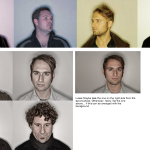
The Formers are a band from Zurich that I was contracted to do some portrait/video work for. They had some ideas for the overall feeling of the portraits they wanted, and we used Cacoo extensively in the pre-shoot planning process. First I made a Cacoo page for them and they uploaded imagery that they liked. Pictures from Johnny Cash and clowns, urban cityscapas, this showed me the way they wanted to represent themselves. This was a huge help for me as the photographer, because defined a direction, which was in line with the wishes of the band (we didn’t have time for meetings with the whole band before the first shoot). After our first portrait session Cacoo was used to get feedback on some composite image ideas I had, and also as a sounding board for new ideas. We liked the grittiness and sort of darkness of the images from the first session, and I dropped by their jam session to do another round of portraits. The results were tack sharp and exactly what I wanted. Cacoo allowed us to do a lot of this collaboration work on the fly, and reduced the time needed for organizational face to face meetings. I love meeting to brainstorm ideas, but it makes less sense when you’re just reviewing images or setting a date for the next shoot. Cacoo helps build trust with the people you’re working with, helps pre-visualize the results, it’s basically just awesome.

Amazing Value

Cacoo is really a fantastic value. By comparison, a standard license for Omni-Graffel costs $99 and isn’t on the web anytime you want to use it (although in a sense they address different user needs). The only drawback of Cacoo is that it’s not HTML5 based, and therefore doesn’t fly on the iPad (but I have high hopes it should work now or eventually on Android devices like an Asus Transformer). If a Cacoo app ever comes out for the iPad/iOS it’ll be a big hit. Aside from photo shoots, Cacoo is really great for anything where ideas need to be visually communicated from one person to another. For UX/UI design feedback it’s a great tool for creating wireframe designs of software or web applications. There are pre-made icons for Android and iPhone app design mockups, and you can now create your own stencil libraries for custom diagrams. For UX feedback, you can take a screen shot of a webpage and annotate it, showing what changes should be made in a conversation with your designer. Many new applications have been launched in the past 3 years, but Cacoo is by far one of the most valuable. I highly recommend it if you’re into online collaboration and idea sharing.
My Favorite Mobile Photo Apps for iOS

The daily smart phone is the camera that’s always on you, and by definition the best, because you can’t put a Sony A900 in your pocket to take around all day. At the moment, I don’t have a smart phone, I have a passingly-intelligent Samsung, that I’m embarrassed to pull out at Web Monday gatherings. I do however have an iPod Touch, and now enjoy using push-button applications to post-process my photos when I’m not by my computer. Here are my experiences with what works, what I find awesome and lame in the world of mobile apps for photo processing. Here’s a run down on what works for photo processing on my iOS device, what doesn’t work so well, and why. The goal here is to have an app that adds to my Photoshop work, is fast and easy to use, and gives easy access to social networking sites for uploading.
First is what I want/expect from a mobile photo app: I expect the app to do something useful and valuable to my photography/art, which can’t be done on my iMac – or, which is more convenient and faster to do with the mobile device. I expect connectivity, so that the processed images can be quickly distributed to social networks and saved to my device/phone. We have three contenders here, Photoshop Express, instagram, and Plastic Bullet.

Photoshop Express

PS Express for your mobile phone is ok, but for my purposes it basically sucks for anything besides viewing images and making a few basic color overlays. I have a Photoshop online account, and had high hopes (now dashed) that I would be able to use the mobile app as a way to process and then distribute images to different online areas and social networks. Alas, the app is basically useful for nothing but a little coloring and an assemblage of near-useless effects that only detract from my work. I’m probably being a tad hard here, and admit to being a post-processing snob, but it’s Photoshop, and should be the pinnacle of processing power. PS Express actually has some useful features: you can rotate, crop, and do some other basic things like overlay a rainbow filter or reduce noise in your images (useful for crappy-exposure camera phone images), but these minor tweaks are no reason to spend the time required to download and open the app. Adobe made a fair effort here, there’s some more advanced functionality like a tilt-shift blur filter, but the transition region from sharp to defocused is abrupt, unnatural, and basically just ugly, making the app near useless for me.

instagram

Instagram is all the rage (so I’ve heard), it’s sort of supposed to be like a Holga for your iPhone, and processes your images in a classic faded Polaroid feeling and light-leaky camera profiles. For some reason we like to push the boundaries of camera technology and then process the images to make them feel old. It’s a fun thing to do and is probably fun to use with a camera phone…however, much like PS Express, I feel that the effects are sort of flat and uninteresting. Uninteresting in the sense that it doesn’t really add to the content (or feeling) of the original images, but generally detracts from it. When you apply one of the filters, the app will basically just overlay a color or processing effect on your image, maybe add a film border for nostalgia (which is an important feeling) but it doesn’t seem to really target or balance between shadows and highlights. The result is a flat image that’s sepia or sort of black and white, but that doesn’t improve upon or add to the quality of the base image (in my elitist opinion). Of course, I’m highly biased to color and form in this respect and make no excuses for mediocrity. I do my own Photoshop work and don’t mind spending an hour or two doing a basic image composition for one portrait, and although I don’t expect the same attention to detail from a free app – still, as a single app instagram is sort of uninspiring for me. But, we don’t have to use just one app, do we? The true value of instagram is the easy integration with all the relevant social networks and microblog sites. Direct from the app I can upload to Facebook, Flickr, Tumblr, etc. and I think this is why some folks use the term Killer when describing instagram, it does everything Flickr should have been doing with from the start with their mobile app. The usability of a social app like instagram is more important than the quality of the product (like the best camera is the one you have on you), and that’s why I still have the app on my iOS device, it’s fun to play with and easy to upload. But there is a better, plastic fantastic choice in the app world.
Plastic Bullet

Plastic Bullet, like many apps, simply doesn’t get the recognition is deserves. Plastic Bullet is developed by Red Giant, a company you’re ever heard of unless you’re into video/film post-production software. Red Giant specializes in software that aids in things like video time code transcoding, color correction and color grading of films, all made available at a price point realistic for indy film makers and startup video hobby directors like myself. Plastic Bullet is a product from the folks who develop one of the best color grading programs on today’s market, packaged as a mobile photo app, and I love it so much I’m using it to produce looks I can’t do in Photoshop (or at least, don’t want to spend time doing). Plastic Bullet is the only photo app I have that really adds to my images. The processing Plastic Bullet applies to your photos isn’t just a color overlay, it really feels like the app is improving the image quality and emotion of my images (when the right effect is applied). Shadows and highlights in the images are processed differently (depending on the filter you choose) and you can’t predict exactly what it will do until you start playing with images. Of course, it’s not a magic bullet. I need to give it a nice image to work with, and I then go through a few finger taps, picking the processing that works best, but in the end it creates a unique image. The cool thing is that you never know exactly how the image will turn out, and that adds to the magic of the whole process. It gives images a much better Holga/Polaroid feeling than instagram, and brings out new colors for different images. From the app you can save your processed image to your device or upload it to Facebook, or Flickr. I would love the ability to upload to Tumblr and to my blog as well, but I can also just save the image and upload it from my library. Plastic Bullet isn’t free, but it’s an app I would pay for (full disclosure, I got it for free during a promotion from Red Giant) now that I know how good it is. But why limit yourself to just one?

Why Choose Just One?

Since I have both instagram and Plastic Bullet, I’ve actually just started using both instead of picking just one. I like the overall feeling of Plastic Bullet, so I use that first, and then save the image and open it in instagram for further processing and uploading to the instagram social network as well as Facebook, Twitter, Tumblr, etc. Since instagram renders a less aggressive treatment than Plastic Bullet, it’s ideal as the final touch to tweak color levels. So with both apps I get the best of both worlds, tight social network integration and excellent color processing. I’ve started using this combination to reprocess old portraits, pictures of my paintings, cow photos, and I simply love it. Sometimes I’ll go so far as to process in Plastic Bullet, then export back to Photoshop/Lightroom on my computer and tweak the colors and shadows, and then send it to the web.

Don’t get caught up in the information overload. All of these things are just tools, and with all the ways to share files an artist shouldn’t feel locked into any one app or processing philosophy. Use the tools that you discover to achieve the vision in your head, don’t be blinded by the marketing hype and pick one over the other. The human imagination is too small for just one photo app.

Voting Open! Collaborate On a Video Poetry Project

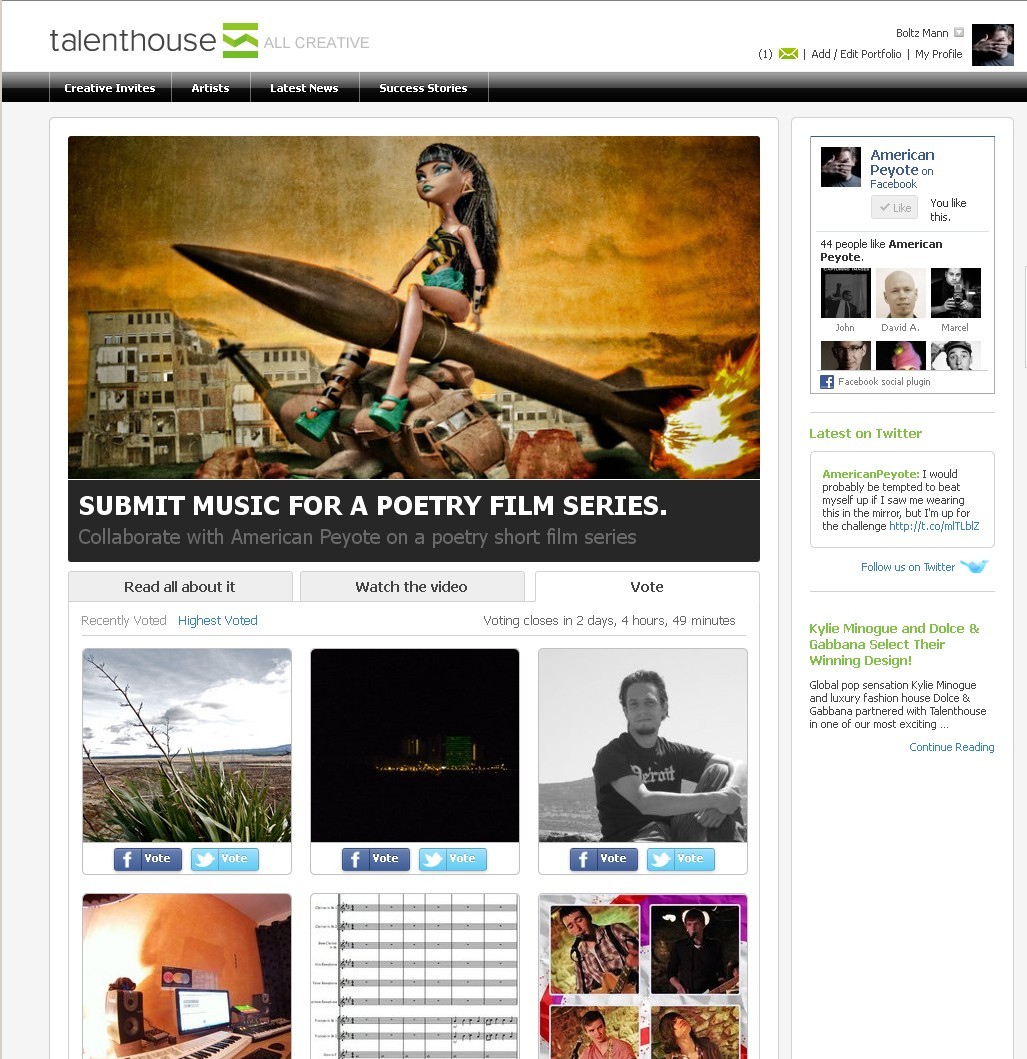
Voting is open on the video poetry creative invite at Talenthouse.com! To recap, I have a creative invite running on Talenthouse, where the winner will have the opportunity to work together with me on a video poetry series of short films. I wrote about the contest previously, and now this wonderful experiment in online collaboration and general creativity awesomeness is coming to an end. Well, the first part, then will come the video poetry series. For the contest, I provided some images of inspiration, including images of Bratz and War, and the participants then needed to create a music track to submit to the contest. The highest voted songs will get the first listens from me, and I’ll then work with the winner (whoever created the best mix in my mind) if they’re interested. For the video poetry part, I’ll create some poetry concepts and shoot the needed video, and the winner can have their music featured as a component of the final videos.  It’s all very non-linear and experimental, but when you challenge people, excellent things always happen. The voting is open here on Talenthouse:

Voting Open: Collaborate with American Peyote on a poetry short film series

Scaramanga Large Flight Bag Concept Images

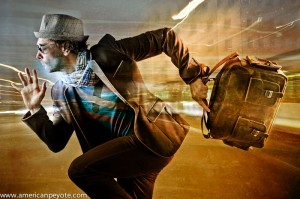
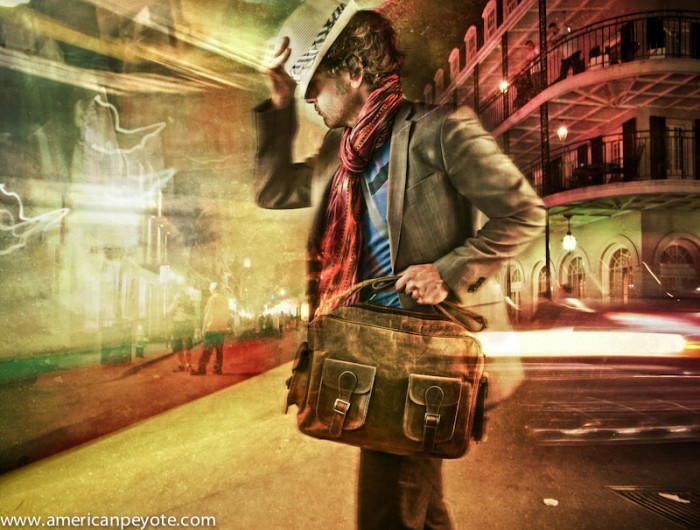
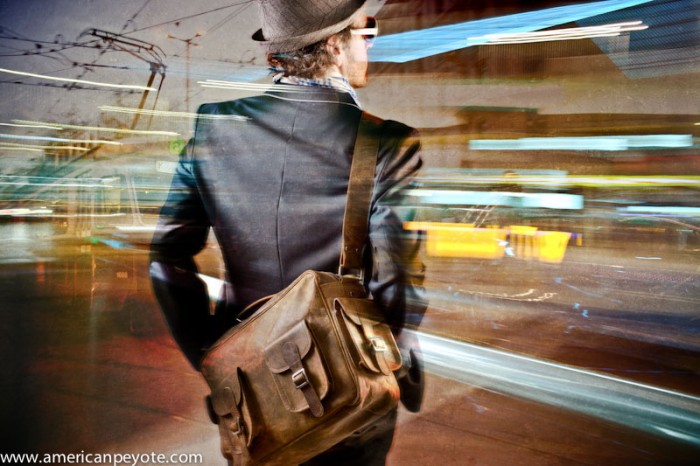
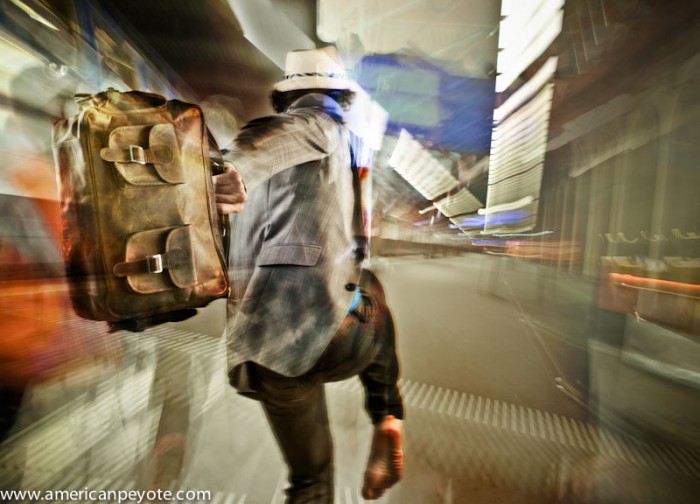
I don’t know how I found out about Scaramanga, but they’re just, basically my favorite vintage bag company in the world. Based in London they ship vintage bags, journals, cases, and other things around the world. They sent me this large version of the vintage Flight bag and I put together an image concept. I wanted to do something dynamic, something that combines the motion of the world with the bag concept. I had all the background images already in my head, I just needed to find and arrange them all together. I shot stills in my studio and then did some compositing in Photoshop to blend everything to my liking. You could say, this is how I imagine I feel like when I’m strolling through the street with the flight bag, naturally, my reality is a bit less dramatic. Enjoy. If you’re looking for a cool vintage leather bag or chest, check out Scaramanga Bags.

Work With Me on a Video Poetry Project

Something went live the other day, a fine determined attempt at creative collaboration on a global scale. It’s called, Collaborate on a Video Poetry Film Series. It’s a creative invite on Talenthouse.com, that fabulous website that connects creators together and is the current website to be on for interesting collaboration opportunities. Essentially I’m looking for a person to work with on a video poetry series. From my side, I’ll provide the visuals and words and you provide the soundtrack. I’ll mix everything together and we’ll ride the wave of internet propaganda to stardom together. On the creative invite page on Talenthouse is the inspiration. There’s a video of my latest still images, and the idea is that DJ’s, producers, etc. can be inspired by that to submit a track that fits to the images. I’ll pick the music submission that best fits in my brain and then we’ll collaborate together on a series of video poetry short films. It doesn’t matter who or where you are in the world, this is an opportunity to connect and work together across cultural, economic, societal and internet boundaries.

Where did the idea for this come from? It was a pretty organic evolution of the internet, inspiration, and motivation. In 2010 I submitted some paintings to a Talenthouse Creative Invite. I won the invite, and then participated at 1 Day of Art Copenhagen with (t)here magazine, then I printed a card of my best painting from Copenhagen and sent it to Jennifer Chalbaud in Venezuela who then had a dream inspired by my Gonzo Art and she created a cool design for Mambo Surf Deluxe. I wrote a blog post about it all and then Talenthouse contacted me, seeing if I would be interested in running a community creative invite. I said hell yes, and here we are.

I like painting because it’s the unknown. I never know what will come when I stare down that big white canvas, and I have no idea what will happen with this creative invite, but soon I’m going to find out. When I create I often think like a movie maker, I hear the music in my ears and break paintings up into little movies in my head. That’s why I’m excited about the possibilities of this opportunity. It’s the possibility of meeting someone motivated to create great music to mix well with the art I’m creating. In this context the idea of video peotry films is just natural for me, it’s the natural evolution of art and video. If you’re a music maker, please check out the creative invite, and you have my deepest gratitude if you pass the word on to anyone you know who might be interested. Click here to visit the page on Talenthouse.com, and below is a video explaining the idea.

and here is the inspiration…

http://www.youtube.com/watch?v=rAHC0rHMRdA

Bratz War Images

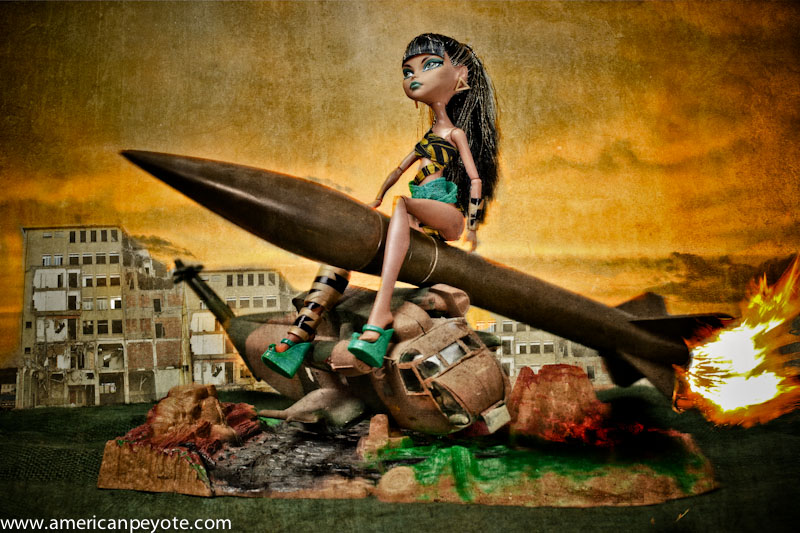
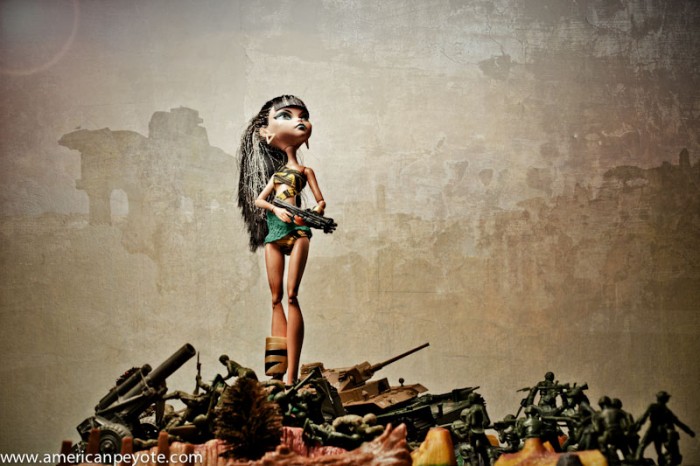
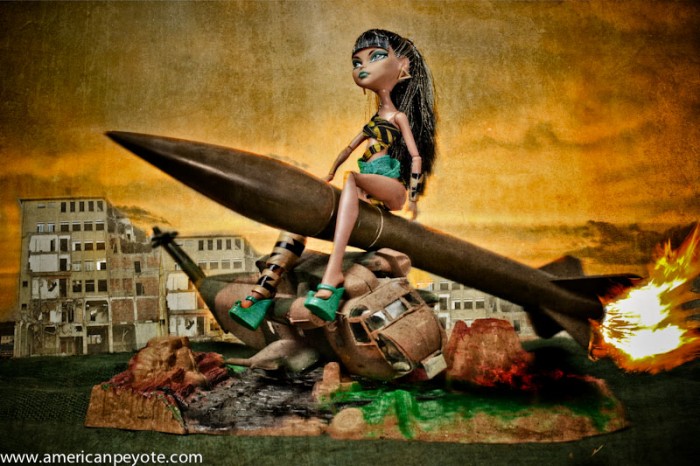
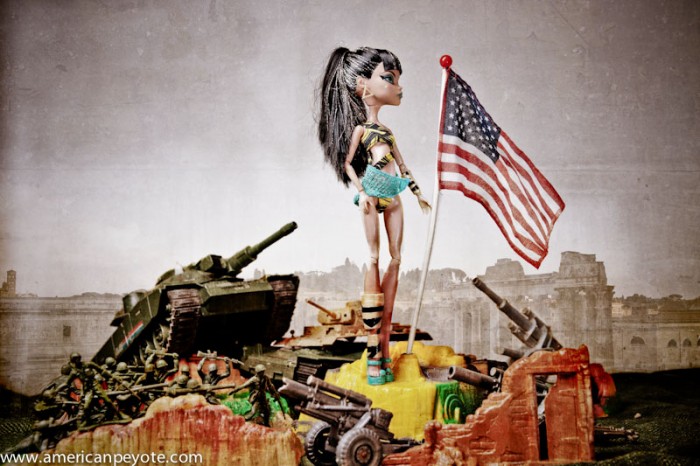
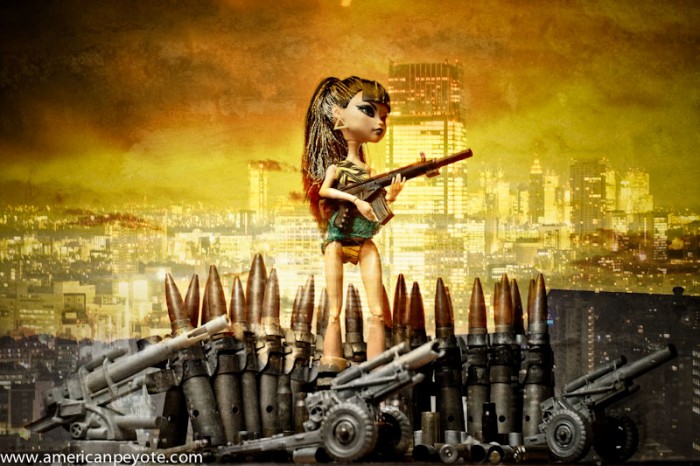
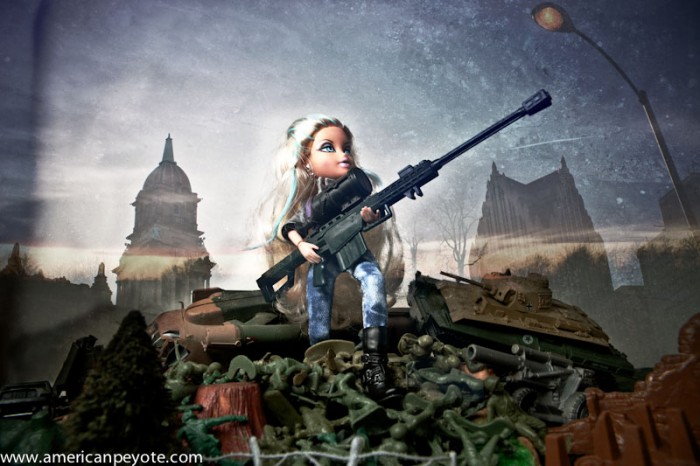
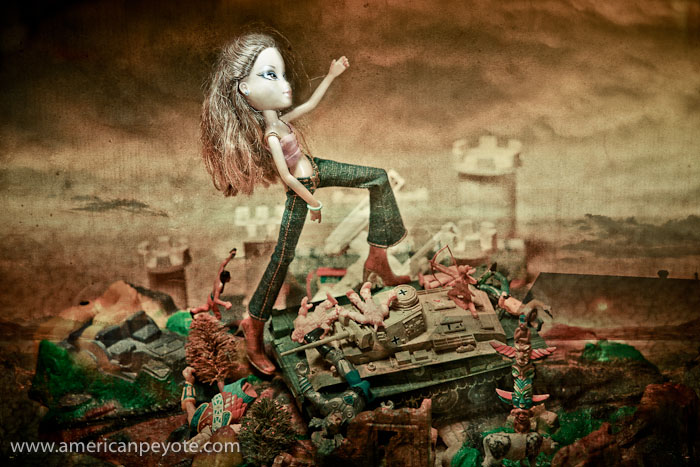
On my last trip back to Detroit I marched with the Nain Rouge, and then had a little buying madness toy-spree at Toys R Us. I also picked up a Cleo de Nile doll at Meijer one night after playing trivia at a bar during some low-level Thundersnow. Anyways, I then raided the toy chest that is the basement at my parent’s place and put together some small war sets with the various objects/subjects/toys. I took what I had to work with, that included a super old Estes model rocket, some plastic army soldiers, a landscape, a .50 cal sniper rifle from a G.I.Joe, some tanks, and, I guess that was about it. This is sort of an ongoing project. Every time I head back to Michigan I find another collection of toys to use, I setup a small stage, do some shot arrangements, and then bring the images back to Switzerland for post-processing in Photoshop. In these images I’ve added a lot of overlays from Rome, Zurich, Tokyo, and Detroit. Images of concrete and walls were added as well to texture the images, and the odd-sun flare is thrown in as well when needed. I’ve since picked up a copy of Strata Foto 3D, and am investigating the possibility of creating 3D models of the Bratz, Cleo de Nile, and various toys, and doing the images or a short movie all in the computer, but I need to learn me some 3D skillz first.

Anyways…enjoy…Bratz War

Ethan Oelman – Dancing with Water Video

I first met Ethan at the Strobist CERN workshop a couple years ago. Since then we’ve both grown our photographic styles and meet up for a coffee in Zurich to bounce ideas off one another from time to time. I’ve been getting into video and short film production, and Ethan was interested in doing a video project on his work. So it was a natural thing to make a video together about his photography. The goal was to do a behind-the-scenes video during a shoot, and then bring that together with the story behind the images. After the Dancing with Water shoot, I dropped by his apartment and filmed him talking about his work and the images from the shoot. During the shoot I also shot some footage of one of the dancers, Alexa, coming in and out of the water and put together a shot film called Birth-Kraft. Basically I just took everything I learned from watching Vincent Laforet on his CreativeLive film workshop, and produced this short video of Ethan Oelman and his photographic vision.

I had a wonderful time producing and shooting this video. I was getting intimidated a bit watching the CreativeLive workshop, but once you break things down to the essentials and put together the essentials of what you need for your project, all you need is to focus on your vision and forget about the rest. To see more of Ethan’s work, check out his website, Ethan Oelman Photography.

Tech Details

For those who are interested, the footage was shot with my Sony NEX-VG10, using a couple of different lenses including a Mamiya 645 80mm f/2.8 both on a tripod and using the Jag35 Field Runner rig. I used a Manfrotto 501 fluid head when on a tripod. The audio was recorded using an old Zoom H4 and was synced to the original footage using the Dual Eyes software. Everything was cut together in Final Cut. I’m looking forward to picking up a lapel microphone and also a shotgun mic to improve my audio gathering capabilities on future projects. The music is from Moby Gratis.

VG10: Jag35 Field Runner Rig Review

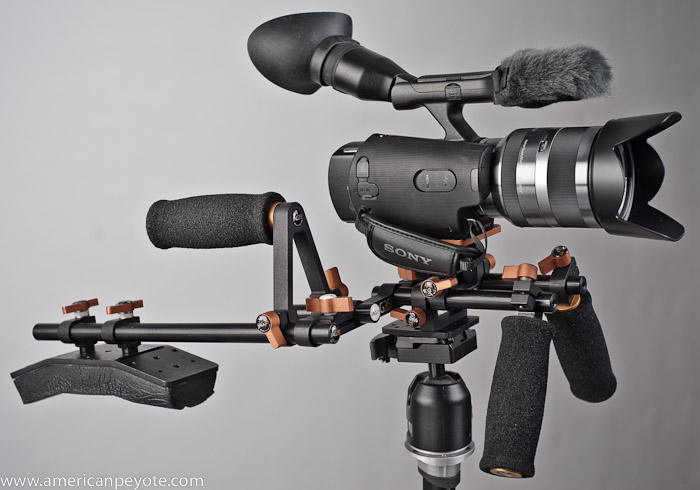
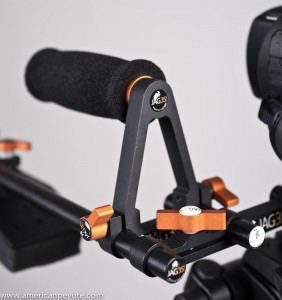
I picked up the Sony NEX-VG10 because it has more of an all-inclusive video camera design than going the DSLR route (Canon 7D, 60D, 550D, etc.). However, as I started using the camera I decided that a shoulder rig would add a lot of functionality to the system to stabilize the camera and to shoot in different situations (and I’ll admit so some gear lust driving my purchase decision). I opted for the Jag35 system because they offer rigs at affordable prices for people in my buying group: folks who are getting into Indy film production but don’t have a huge budget. I decided on the Field Runner because it’s under 300 USD and came with a free handle when I ordered it. I also picked up a tripod baseplate to quickly go from tripod to shoulder mount on shoots.

Shooting with the Field Runner

The Field Runner is fun to shoot with, and that’s an important point. I use the Field Runner with the NEX 18-200mm autofocus lens or something wide like the Sigma 20mm f/1.8 or a Minolta 20mm f/2.8 and stay mobile. Since the NEX is autofocus I don’t yet worry about pulling focus and haven’t added a focus follow to my camera kit just yet. With the 20mm lenses I set the aperture and manual focus as desired. I can then shoot with the rig on my shoulder, or down low from my hip. I’m currently using the Field Runner without any counter weight on the back since the VG10 is pretty light the counter weight isn’t such an issue, but I’ll probably add one in the future to stabilize the system.

On the shoulder the VG10 is very nicely stabilized, and is much better than shooting in the classic Handycam method of just holding the camera in your right hand and putting it up to your face like a tourist or last-rate pornographer. With the Field Runner the VG10 becomes a part of my body. It moves with me, rotates with my torso and feels connected to my center of gravity. In short, it does exactly what I was hoping for when I ordered it. The VG10 now sort of feels naked without the rig. I can imagine shooting without it, but don’t see the point. It’s also nice to cradle the rig in my right arm and hold it to my body, with my left hand on the front handle. I also often shoot from my hip. To do this I make the front handle parallel to the rig and hold that handle with my left hand while holding the raised handle with my right hand and then rest the shoulder pad on my hip and then pan with my body. This is a very secure was to do a low pan when needed and is very comfortable.

Mobility

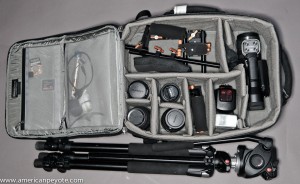
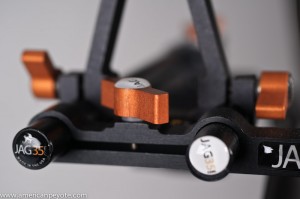
I like to be mobile as a film maker or photographer (or painter for that matter). I like gear that easily moves me and packs up quickly. I can easily pack up the Field Runner with my VG10 and an assortment of lenses into my Think Tank Airport Acceleration and go without any issues. When on location the Field Runner assembles in a few seconds and I’m ready to shoot. With the optional tripod plate I can mount the rigged camera on my Manfrotto 501HDV fluid head and quickly switch from tripod to hand-held in mere seconds. I just need to swing out the front handles to allow the rig to slide onto the 501 head, but since the handles are locked down with simple twist knobs, this is very easy to do. Then when I go from tripod to shoulder it just takes a second to swing the handle back into position and lock it down and I’m ready to shoot again.

Design Issues

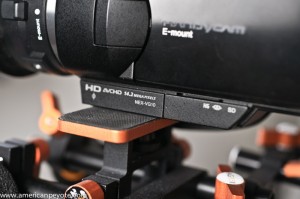
These are a few design issues I’d like to address that may be serious or totally irrelevant to potential buyers. Overall the Jag35 Field Runner is a good value for the money, but there are some areas of the design that need improvement in my opinion. The most serious is related more to the VG10 design than the rig, which is likely irrelevant with any another than the VG10, but needs to be mentioned. The connection of the VG10 tripod plate to the rig is very insecure, this is the heart of the rig system and should be the most well-designed and quality-controlled part. However, this is a design issue with the VG10, and not the Jag35. Now, this is has to have some context. The Field Runner is designed for a DSLR body, and I’m using it with my VG10, which has a long base like most camcorders do, while DSLR bodies are short and wide. For the VG10 you should have a long attachment area like a Manfrotto video plate, which produces a nice secure contact area on the bottom of the camera. This connection system is offered from IndySystem or Cinevate, where you can screw a long Manfrotto plate onto your camera and then just lock that into the baseplate on the rig.

To compare, I also tried the Jag35 camera plate with my Sony A900 just to see how secure it would be with a DSLR body, and it was totally different from the VG10. With a DSLR body the camera sits securely to the Jag35 base plate. With the VG10 it’s ok for basic shooting, but I don’t have faith in the attachment to my camera to forget about it, and is a primary reason I’m looking at adding an IndySystem camera plate to improve my rig setup. I also think the current design would be greatly improved by using a metal knob (similar to those on the rest of the rig) instead of plastic covered screw on the camera plate, as it would be easier to securely tighten the camera plate to the camera tripod socket.

I also found some minor misalignment issues with the connectors which hold the rods together, but this is a smaller issue and doesn’t affect the performance of the system. When the screws are tightened the rig is rigid and secure, and that is the function of the design that matters most. The optional handle could also be improved. The handle needs a lock-off screw to prevent it from rotating. As it is, the off-center handle can easily torque due to the weight of my camera and twist open when held, which is a basic design fix that should be addressed. For this reason, I always need to hold the rig by two hands to prevent unscrewing and rotation. For a rig of this price point and production volume, these design issues are more or less acceptable, and I’m confident they will be ironed out on future rig releases.

Design Update

Jehu Garcia, one of the people behind Jag35 pointed me to an updated design for the camera mounting plate to address the issue of camera-rig connection. There are two key and very welcome design improvements. First, there are a few screws in the base plate which can be screwed to contact with the bottom of the mounted camera. This then counters the tendency of the camera to loosen from the mounting plate. This addresses the torque loading on the rig-camera connection, which can occur when a follow focus is used. It can happen that reaction forces develop at the rig connection point, and these screws help resist those loads by counteracting the torque. From the design, it looks like the new plate will also improve the issue with the VG10 (and the poorly designed Sony tripod mount). The second modification is a nice big aluminum knob. This will make it much easier to tighten the rig to the tripod socket.

Overall I Like It

I’m a mechanical engineer by profession and a scientist by training, so you would expect I’d find and write about any mechanical design issues that I find with the gear I use. However, I can honestly recommend the Jag35 Field Runner, for the price it’s a great rig for new Indyfilm folks and those on a budget. It will be used by weekend warrior film makers and those who don’t mind a few design short-comings. The price difference between the Jag35 offerings and a similar rig from one of the pro-shops like Zacuto or Redrock Micro is nothing short of amazing, and I’m impressed that they have grown so fast and come so far in the short time Jag35 has been selling gear. They’re releasing a motorized follow focus, and they’re even making it wireless. The innovation and price point of their gear is really impressive. At one point I actually was going to start designing my own rig system and get some custom prototypes made, but once I saw what is coming out of Jag35, Habbycam, and IndySystems, I decided the market doesn’t need another rig maker in this category. Of course, the rig system in my head will be designed to be ultra-light using carbon fiber rods with a structural design optimized using Altair Optistruct, so it’s still possible I’ll do something in the future if I’m motivated enough. However, I’m more into spending my time shooting than rig designing.

The Formers Band Portraits

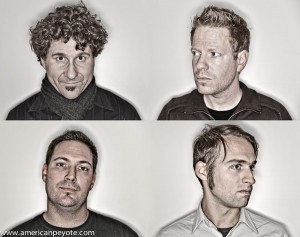
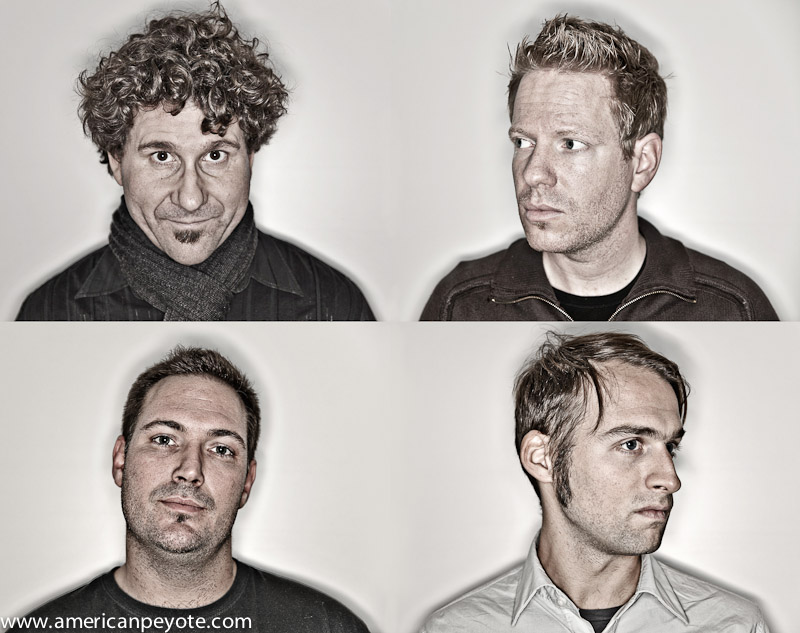
The Formers are a local Zurich band that I’ve been working with lately. It started with their show at Zak in Rapperswil, and I dropped by their jam session in Zurich to shoot some portraits. The Formers are the type of band I love working with. They’re motivated to play their music and you feel the passion they have just by walking into the same room. I also like their music, this might seem irrelevant for a portrait project, but it’s a powerful motivator for me as a photographer. When you can identify with the people you’re shooting you have a much better base for creating images which combine and communicate all the essential elements of those people.

The Concept

We wanted to go with something that combines the band members and also had a sort of gritty texture. I wanted to start out with individual portraits, because it gives you the ability to relate to each person as an individual, before figuring out a concept for everyone together. I decided to go with a ring flash and post-processing concept, which would give gritty portraits with a certain edginess, but allows each person to be focused on. So my concept was to put the portraits together in a classic square compilation. This is ideal since you can view and relate to each image, but see them together in one image. I like this because each member of the band has distinct features in their face and hair, and it would be a shame if we had highlighted the singer and left the drummer in a shadowed background, or simply lined everyone up in front of a brick wall (the worst cliche in band photos).

On the processing side I went with a high-definition look and desaturated everything a little bit. This makes the features of the face like cheek bones and beards stand out strong and gritty. I used my Sony A900 with a Sigma 24-70mm set on like f/3.5 for the aperture and my Sony F58 flash off-camera in an Orbis ringflash adapter. I then focused on the eyes and this makes the eyes sharp in focus with a nice defocused area around the rest of the face.

I’ve had a fabulous time making images of the Formers at their show and portraits at their jam session. If you’re in Zurich I can highly recommend checking out their next show and their music on  The Formers MySpace. Their next show is at Abart in Zurich on February 27th.

Blankpage Portraits

I was introduced to Blankpage through one of the team members, Lukas, who I met through Web Monday Zurich. Blankpage is an expanding startup in Zurich focused on B2B content distribution solutions. Blankpage was looking to be a part of the web portraits project, and this offered an opportunity to shoot a full startup team. I visited the Blankpage offices in Schlieren to discuss a shooting concept and get a feeling for the startup. Getting to know new people and hear about their startup ideas is one of greatest benefits of being part of the Web Portraits Zurich project. Blankpage is working on stuff I’m working on in the back of my mind, so it was great to see the iPad version of Das Magazine that they’re coding. Essentially, businesses like newspapers and magazines can come to Blankpage, and they offer solutions for getting that content onto mobile devices like iPhones and iPads, but this is better said on their website:

Design, build and customize electronic publishing technology to maximize business and usability impact for our customer solutions.

This was also my first location shoot for the web portraits project. All the previous shoots were done in my studio, and this offered the opportunity to see the company and get mobile with my lights. I brought a few lights to their offices and setup by a wall with enough space for a large softbox, reflectors, and a fill light.

For the concept, we wanted a certain uniformity between the shots (since it’s a team series), with a certain edginess, but not totally overdone with textures (like I normally do). I decided to go with some simple lighting, one large gridded softbox from one side to get some nice structure on the faces, another normal medium box from the other side, and some fill in the front reflectors.

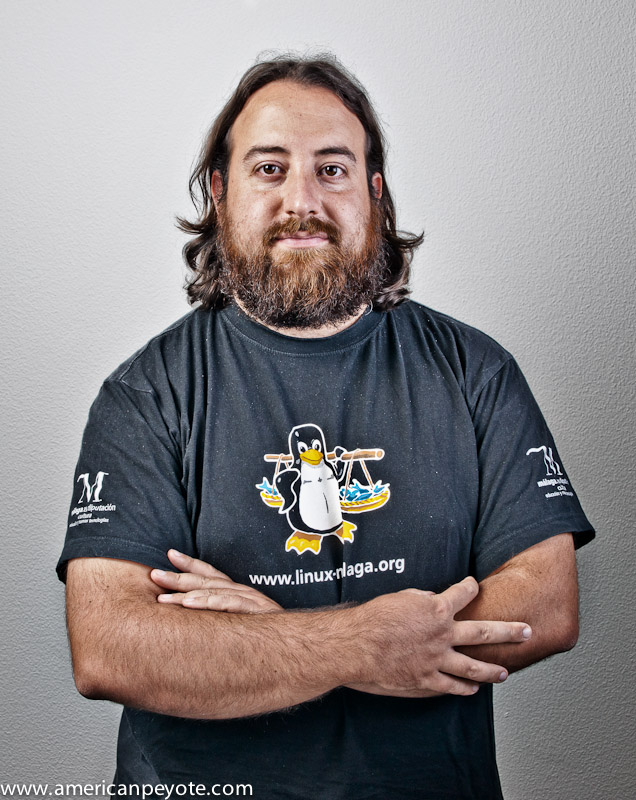
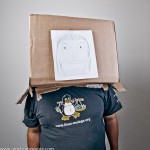
One of the most interesting portraits from the shoot is Bero, the Linux Guru of Blankpage. He came to the set with a box and a sketch of a face tapped to the front. This sort of humor is simply awesome. We shot a few portraits with the box and then pulled it off, Bero has that perfect mix of hippy and high-tech code warrior and I could easily do a whole series with this concept.

http://blankpage.ch

A Professional Photographer Portrait

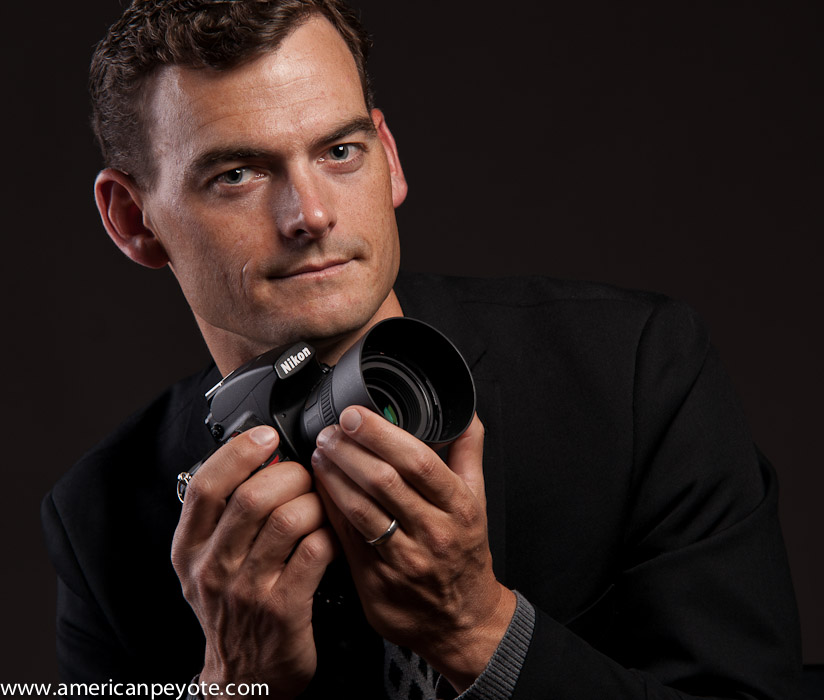
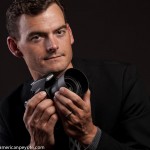
I was chilling at my computer the other day when a little project came across the computer screen. Matthew Anderson, the American wedding photographer living in Winterthur, Switzerland was looking for a respectable portrait for his website. Matt and I are neighbors and we do little shoots together from time to time. Previous little projects included portraits of me (the Urban Poet), and doing a little testing of the Panasonic LX3, Elinchrom RX strobes and some Coffee Madness flying through the air. So, naturally I said yes, as he was coming over with some beers.

Plus, what caught my attention is that he wanted, well, a more conservative portrait. The type of portrait that would instill confidence in the mind of perspective wedding clients. The type of portrait, which would instill trust and, possible even encourage people book Matt for weddings or portraits, or other jobs. This was a challenge. This was intriguing for me since it’s totally opposite to what I normally do with photography. I enjoy taking a normal looking person and infusing in a bit of strangeness, just subtle enough and brewing below the facade of a normal life. I want that strangeness to come out in my portrait, and Matt would need a normal, confidence instilling image, it couldn’t be more opposite. So, I said yes as a sort of challenge to myself to see if I could pull off a professional portrait of a fellow photographer, devoid of strangeness.

Portrait Setup

Matt already had an idea in mind of what he wanted for his portrait. Some nice shadows here and there, and including a camera of course. It would need to show his face with nice definition, but also have that Doors feel to it, of a person coming out of the darkness. I started off with a very sharp transition to the shadows, and on request brought out the features of his face in a more even lighting sort of way. The main light was an Elinchrom BxRi 250ws in a small Photoflex octabox. From the back left there was another BxRi in a gridded CreativeLight softbox to add some definition to Matt. The gridded softbox is great for lighting things like cameras since it gives a nice highlight to objects without much need to precisiely flag the light against spilling too much. I added some barn doors to the octabox by putting out the velcro panels from my Think Tank Airport Acceleration bag and putting then on the front of the octa. In the end, we pulled it off nicely, and it took far less time that I had planned for.

Return to Strangeness

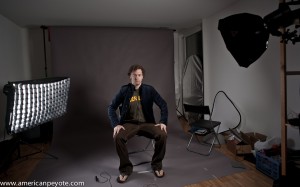
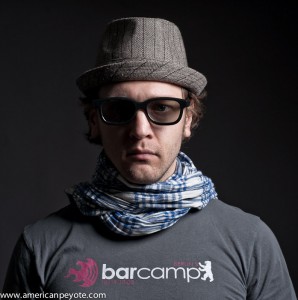
In the end Matt was happy with the result of my efforts, and I was amazed that I can take a normal looking portrait. It’s not something I plan to exploit in the future, but it’s nice to know you can pull off things like this if needed. Some people have been living in German-Switzerland for years and can’t speak enough Deutsch to order a beer in a bar. I’ve been into portrait photography for like 3 years now and I hadn’t attempted a normal professional portrait like this before – it just never occurred to me. However, I’m glad Matt contacted me for this little project, it was a fantastic learning experience. Naturally, before Matt even showed up I had done some lighting tests, pulling out my favorite hat and 3D glasses. I love strangeness in mild doses, it makes you look twice and, well, I have to admit that I like looking at myself. And so can you in the gallery below.