Ricoh

Ricoh GR Digital – Climbing Review

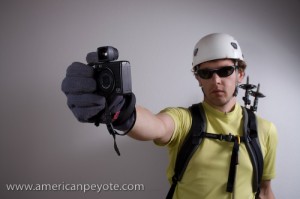
Fuji GA645wi Ricoh GR DigitalOne reason I bought the Ricoh GR Digital (GRD) was to use as a climbing and mountaineering camera. What follows is a user review and my impressions of the GRD in the mountain environment.

I live in Switzerland and mountain trips are frequently on my schedule. A basic day trip involves an elevation gain (and equally large loss) of 800-1200 meters, and involves hiking, rock scrambling or sections of actual climbing. This means that any weight savings makes a difference in terms of how fast and how far I can go on any given trip. It also means that if I want to use a camera, I don’t always have the benefit of using two hands when taking a picture. Sometimes trips just need to be documented, a shot for the blog, or just to record the day. Other times I go with the intention of bringing back some good-looking, printable photos. My current list of cameras includes: Contax G1 (28,45,90mm lenses), Fuji GA645, GA645wi, Minolta 7D.

In general, none of these cameras have been ideal in the mountains, although the Fuji GA cameras come pretty close to being perfect for landscapes. The Contax G1/G2 is a good choice, but if I’m just documenting a trip, then I don’t need or want to go through the costs of processing 35mm film, and then taking the time to scan the images. Plus, while 35mm film can produce some very nice detail and colors, it leaves me wanting more for landscapes. The Fuji GA645 and GA645wi are my favorite film cameras for mountaineering, but (aside from the developing costs) they don’t have a close focusing distance, which only makes them good for landscape shots, and is not ideal for focusing on close objects. The Minolta 7D is great, but generally needs to be accessed from my backpack and can’t be comfortably held with one hand for shooting purposes. Plus, a 7D with lenses is not a light kit to carry into the hills.
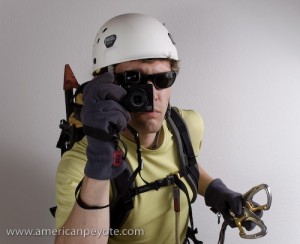
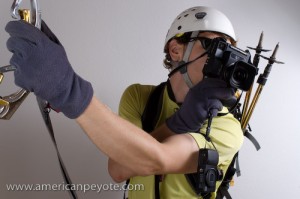
Climbing Ricoh GR Digital GRDFrom a certain perspective, the Ricoh GRD was seemingly made for mountaineers. The fixed 28mm and 21mm add-on lenses are ideal for landscapes and the camera is incredibly compact. In fact, it’s not a stretch to call the Ricoh GRD (and GRD-II) as well as the GX100/GX200 some of the most compact wide-angle cameras on the market. In addition, the GRD is incredibly light. The Contax G1/G2 is also a compact camera, but it isn’t really light from a pack-weight point of view.

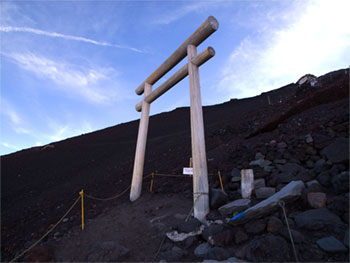
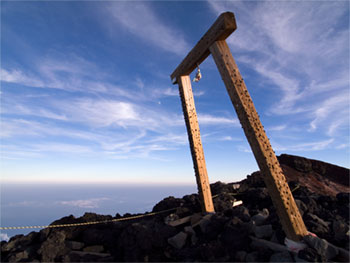
My first mountain trip with the Ricoh GRD was up Mt. Fuji in Japan, where I also took my Fuji GA645wi. The Ricoh performed wonderfully, but since Mt. Fuji can’t really be considered more than a hike, it wasn’t until I got back to mountaineering in Switzerland that I could get a feeling for how the GRD performs in a mountain touring environment, which is the focus of this article.

To date, I’ve taken my GRD ice climbing, mountain touring in Graubünden, hiking up Säntis in the Alpstein, and climbing on a klettersteig in Braunwald. I plan on ascending some higher peaks and undertaking some longer tours soon and think the GRD will be up to snuff. There are a few main criteria I’ll be focusing on including how well the GRD can be operated while climbing, it’s attributes such as the LCD screen, and creating good exposures in the mountains.
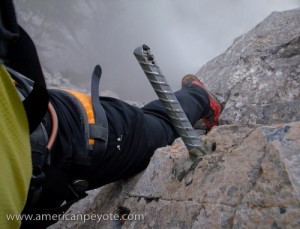
Braunwald Klettersteig Ricoh GRDOperation – One of the GRD’s strengths has always been customization and user control. I can hold the camera up to a scene, automatically see if the histogram looks good, and if not, two small clicks on the exposure compensation button and I know I can take a picture without blowing away the highlights. Similarly, the ISO, focusing mode, file type/size, shutter speed, and aperture can all be changed within a few seconds using one-handed operation. I can’t do that with any other camera I own without the risk of dropping the camera. While seemingly unimportant or at best a convenience for city use, when one hand is holding onto the mountainside, one-handed operation really does make the difference between possibly falling or getting the shot I want. With the GRD I can easily have my left hand secured on a handhold while operating the camera with my right hand.

Image Quality – As a small sensor camera, the Ricoh GR Digital obviously can’t compare with DSLRs or medium format film cameras for image quality. However, you don’t always need a perfect landscape image worthy of pixel-peeping. For trip documenting and small prints, the Ricoh GRD does pretty good. When the images are exposed correctly the contain a great deal of detail and you won’t have a problem creating large prints. Small sensor camera image quality degrades as ISO increases, however, in the mountain environment you generally have more than enough natural sunlight to create exposures with shutter speeds above 1/200 using ISO 64 (the base ISO of the GRD). Since these landscapes will nearly always be with a low ISO, noise won’t be much of an issue. I love the colors I get from GRD files and so long as the images aren’t over-exposed you’ll be pleased with the results.
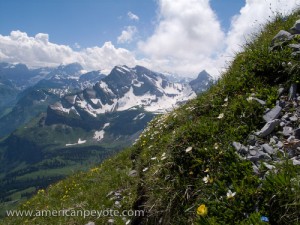
Braunwald Towards OrtstockRAW Write Time – This is by far the greatest drawback of the original GRD. When deciding to buy the GRD, one of the biggest draws was its ability to write RAW files at a time when pretty much every other pocket camera would only do jpeg. Depending on SD card type, the time to write a RAW file is about 9-12 seconds using the original GR Digital. Many users have produced reports detailing which cards write faster, but generally the difference is only a few seconds at best, and the three cards I have all write at different speeds. Depending on your shooting style, for landscape use the RAW write time is sort of irrelevant. With the exception of creating multiple images for stitched panoramas, I haven’t found the long write time to be a significant problem for landscape images. On the other hand, when you’re moving fast over a mountain landscape and trying to document the climb, I would no doubt love the improved RAW write time of the GX100/GX200 and GRD-II, which from what I read are on the order of 4-5 seconds.

Battery Life – At least with the GRD (not considering the GRD-II as I haven’t used one) the battery life and performance could be better. I find that I’m always getting low by the end of a climb, and although I always carry a second battery, this is one area that I would like to see improvement in. For multi-day trips nothing sucks more than running out of juice, which is one reason I still love my Fuji GA and other film cameras, as I’ve never had a similar battery problem. Cold also seems to be an issue, and hampered by ability to use the GRD while ice climbing during December.

LCD Screen – The LCD screen on the GRD leaves much to be desired in the mountain environment. It just sucks in bright sunlight, and is only good for framing the subject. I do have the external viewfinder, and I’m glad I bought it, but don’t use it very much in the mountains. Since the live histogram is available (and easy to see in sunlight), I’m of the opinion that having a perfect image on the LCD screen isn’t really a big deal. More exact framing can be accomplished with the aid of the external viewfinder. Here’s the thing, If you can monitor the histogram, you know if the highlights will be blown and can adjust the exposure as you like. It doesn’t really matter if you have a bright, perfectly defined image when framing a shot. Often times upon review, the images on the GRD LCD screen look extremely dark in bright sun, but when reviewed later indoors, the images are perfect. As long as you base your exposure on the live histogram, the quality of the image on the LCD is somewhat unimportant. The lack of a live histogram display is one big reason I’ve decided not to buy the Sigma DP-1. The live histogram is invaluable in producing well-exposed images the first time, and eliminates the need to reshoot a scene. It’s one of the things I love about digital cameras to start with, and the primary reason I want live-view in the next DSLR I buy (probably the Sony A900). As the DP-1 lacks this seemingly basic function, I’d rather take a Fuji GA rangefinder on a climb.

Edelweiss in Braunwald Ricoh GRDMacro Focusing – This is where the GRD really beats all my other cameras and is one big reason why I love climbing with it. You can get as close as 1cm from your subject to create sharp macro images of anything on a tour whenever you feel inspired. You might just think this is great for flower shots – and it is, but what I love is creating wide-angle macro shots during climbing for point-of-view (POV) images. I love getting the Ricoh close to my equipment or looking out over rock edges and creating unique shots that I haven’t seen before. The only way to get similar images with my current equipment is using my Minolta 7 film camera with the Sigma 20mm lens (very close focusing ability), which also is rather large, heavy, and also produces images with just a bit more distortion than I would like. Plus, with the Sigma 20mm you have a much shallower depth of field and a lot of Bokeh (diffused image areas), which isn’t a bad thing, but at the moment for climbing, I like close-up images with a good deal of sharpness across the image. With the small sensor of the GRD, you get really deep depth of field, and combined with the 28mm lens and one-handed operation, this means the ability to take crisp images that are more or less unobtainable with other camera systems.

Compact Size – This is one of the main requirements for a mountaineering camera, it needs as small and light as possible. The GRD is great because I can put it in a case and clip it to the chest strap on my backpack. This keeps it away from my carabiners or quick-draws, and is accessible whenever I want to shoot. It also means it won’t interfere with my climbing movements.

Wide Angle Lens – The lens on the GR Digital is very good, as has been reported elsewhere. I have the 21mm add-on lens, which supplements the fixed 28mm lens. The wide angle still sets the Ricoh apart from other compact cameras. Even the top of the line Canon G9 only has about a 37mm (in 35mm terms) lens, which is not ideal for landscapes. Distortion is very low and the lens will render a sharp image across its entire frame. For mountain landscapes, and in particular for climbing, the wide angle lenses on the GRD are unique and much more useful than those of competing cameras. Using the wide lens of the GRD I’ve been able to obtain shots in the mountains that would not have been possible otherwise.

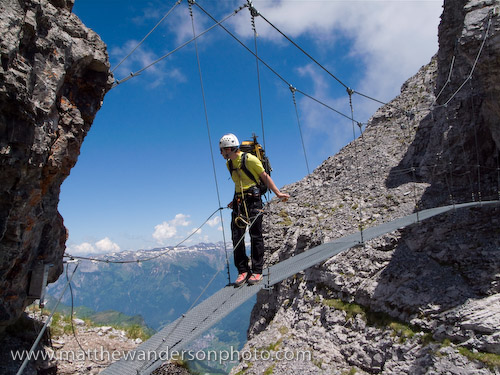
Braunwald Klettersteig Bridge

So, Why Do I Take My Ricoh GRD Mountaineering?

Great image quality
Unique macro image ability
Low weight
One-hand operation
Live histogram display

What Needs Improvement?

Battery life
RAW write time
LCD screen performance
Image stabilization would be nice

The strengths far outweigh the drawbacks of the GRD. It remains a high quality, extremely packable digital camera. If you’re in the market for a climbing and mountaineering camera, I highly recommend one of the Ricoh designs, including the GR Digital, GRD2, GX100, and GX200. In addition to using the GRD as a traditional landscape and portrait tool, it also works well for off-camera lighting, and I plan to do more trips packing the GR Digital with a small strobe flash and radio triggers.

Further Reading:
Ricoh GRD Articles

Hiking Mt. Fuji with the GRD

Fuji GA Camera Articles

Ricoh GR Digital Mountianeering

Big Three Camera Blood Bath

Rejoice all the digital junkies of the world, for the Gods have again bestowed upon mortals trinkets and tools to again usher in a new era of digital photographic expression.

These quick and dim-witted camera update articles are some of the more difficult and revolting for photography fanatics to write. But THEY’RE NECESSARY. If I don’t post a fast word-for-word copy of the Nikon D700 press release, I’ll loose all credibility as a respectable hack internet camera writer. It’s the tools you see, not the photography technique which makes great images, and if I don’t tell people to go out and buy a D700, the quality of images world-wide will plummet like a man with wax wings flying towards the sun.

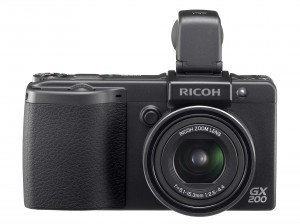
New from Ricoh, the GX200 was announced as a logical update to the fantastic GX100, one of the best compact digital cameras available. The GX200 sports a 12 megapixel sensor, and keeps the fantastic 24-72 mm zoom lens and electronic viewfinder – still in a class all it’s own without any competitors. the RAW write time will be a little bit better and the engineer-Gods at Ricoh promise an improvement in the signal-to-noise ratio. As a good priest to the Gods I can tell, nay, interpret this for you mortals…

The GX200 is better than the GX100, but basically the update is needed for Ricoh to remain competitive in a field of cameras where after 1 year on the shelf nearly every camera becomes obsolete as compared with the competition.

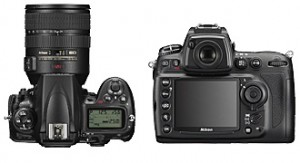
Ahhhh, and Nikon has finally done what Canon did two years ago with the 5D, and with the release of the D700 Nikon now offers a camera with a full 35 mm sized sensor and a price mark of $3000. In addition there’s an updated SB-900, with more power and added benefits for the Nikon flash fetishist (reference strobist).

Photo by Nikon

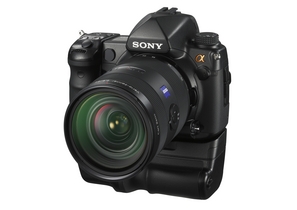
But what comes next? Gods have the power to bestow life as well as death…what happens when the Digital Gods become angry? No chance, digital junkies across the world are waiting for the fire storm of camera goodness sure to come at Photokina 2008, when Sony will for sure be unveiling and launching the A900 flagship camera, full-framed 35mm and 24 megapixels, the A900 will be competing against the Nikon D700 and Canon 5D-II (or whatever they call it) for market share in the bloodiest digital camera free-for-all since Canon battled Nikon in the pro-journalist and sport-shooter markets in the 1980’s and 90’s.

The end is near, make sure you buy the best glass and camera to capture it…

Sony flagship from PMA2008

Ricoh GT-1 40mm – The Sad Clown Portraits

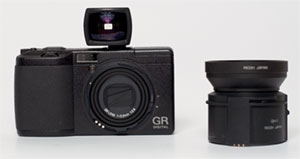
The Ricoh 40mm is one of those fantastic photo accessories which is amazing under certain conditions, and fouls the mind when used in sub-prime environments. The Ricoh GR digital is one of the best digital cameras around, and possibly has the most legacy support of any digital camera I’ve come across. I use an original GR Digital, and bought the 40mm lens for it, what follows is my review of it’s capabilities in a controlled light (studio) environment.

The original GRD (28mm lens) was released as a stand alone small sensor camera, and additionally with a 21mm lens in a creative set. Basically, the GR Digital is the most portable and useable wide angle point and shoot digital every created, which means it’s also the most portable and usable wide able camera ever created. There were limitations of course, one being that the 28mm and 21mm focal lengths are great for city and landscape work, but more difficult to use for portraits. So it was intensely cool when Ricoh released the GR Digital II, an updated version of the GRD, as well as a new 40mm add-on accessory lens. The new 40mm lens is compatible with the “old” Ricoh GR Digital camera. A weak dollar and rampant vacation through Detroit made purchasing the 40mm add-on a no brainer for me.

My main desire in buying the 40mm was to extend the portrait capability of my GRD, by using a more patriot-oriented focal length (40mm). I use my Ricoh for controlled light (studio) portraits, often employing a “strobist” inspired lighting philosophy. One advantage of using the GRD for controlled light portraits, is that it’s so small it can be used in many situations where a DSLR is too bulky to use, like in confined-space conditions.

Wait…why use a point-and-shoot camera when you have a full DSLR setup?

There are many benefits to using a small sensor camera with studio lighting for portraits. In general, one key element of portraiture is ensuring that the eyes remain in Focus. You can have all the diffused areas you want around the subject, blur out the mouth, whatever, but if the eyes aren’t in focus, you don’t get that feeling of being pulled into the image and conversing with the soul of that face staring back at you. This is where small sensor cameras are awesome compared with DSLRs, because with the Ricoh GRD and 40mm lens, the very large depth of field means that the eyes will pretty much always be razor sharp, and you can add all the blur and diffusion you want later in Photoshop.

When you start getting into a serious camera and photography knowledge collection one thing is clear, there’s no end to it. Once you understand cameras you move on to lighting, and once you know how to light for portraits and mood, you generally get into fashion and design, and once you get past basic fashion down, the most logical step is getting into make-up. This is confusing territory for guys who aren’t into drag, so I went to the Source to get a crash-course schooling in eyeliner and foundation.

The makeup was sort of a freak accident you see. I was strolling through the Somerset Collection, an upscale shopping experience a-la-mall in the suburbs of Detroit, and after checking out the Levi’s store I wandered into Sephora. Previously unknown to me, it’s one of the prime makeup stores in the States. I walked in with a vague idea about asking for eyeliner, and a minute later found myself sitting in a chair with a makeup artist named Susan applying foundation to my nose and facial structure. 10 minutes later I was being told by everyone in the store that I looked fresh from a rock stage. I ended up dropping $100 on eyeliner and makeup. With my new look intact I headed to suitable location to make some magic.

Cramped Basement

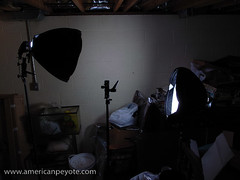
The perfect cramped studio location presented itself in the form of my parent’s basement in the Detroit suburbs. The place is still cluttered with things like my old G.I. Joe and Star Wars toys. I found a section of wall to work with and setup my lights: one Contax TLA280 and a Sunpak 383, both placed in Alzo digital softboxes. After a wardrobe change plus a few lighting adjustments I had a set of images called:
The Sad Clown

Every photo needs a back-story:

The Sad Clown has little ambition or direction in life, schooled on the streets and usually found sleeping in the gutters of Paris, he sports a stripped sweater, yellow button-down shirt by Ben Sherman, and occasionally a sport coat by “WE” and a tie by the same label.

The Sad Clown smokes 15 year old cigarettes and laments on the laughs he cannot produce due to this wasted life on the stage.

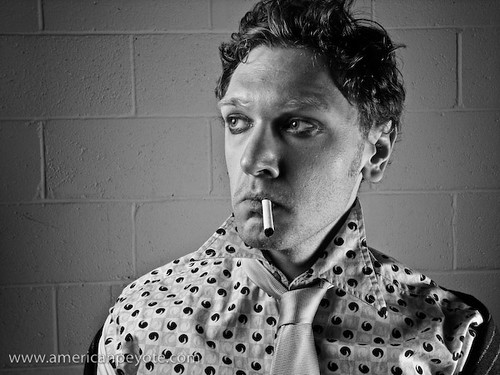
The Sad Clown I

From a tech standpoint, the 40mm Ricoh is a sharp and rather bad-ass piece of glass. The detail from well-exposed portraits is really excellent. However, the lens is also big, and pretty much kills the convert, concealable factor, for which the GRD is known for. The 40mm also flares like a Phoenix farting in your face whenever a light source is pointed even remotely towards the front element. This shouldn’t be a surprise, the main element is massive, and sets the perfect stage for ungodly internal reflections. I had to be sure my softboxes were not directed at the camera, otherwise big red blotches would show up in the images.

The Sad Clown II

You can see in this view that the eyes couldn’t be sharper. This is one reason to use a Ricoh Digital over a massive DSLR with an 85mm f/1.4 lens, the quality of small sensor Ricoh GR portraits include very sharply defined lines – and when properly exposed, excellent subject-background separation. I don’t think it would really even be feasible to produce an image like this using my Minolta 7D, or any other DSLR, unless using a very long lens to compress the image and increase the depth of field by using a very small aperture. With the Ricoh GR and Alzo Digital Softboxes, it took 5 minutes to setup and execute this portrait in a very confined and cluttered space.

Every piece of equipment has it’s limitations, and in total the 40mm is an excellent lens, extending the usability of the GR digital system considerably. With the 21mm and 40mm lenses, you have an excellent small sensor camera system, suitable for travel, landscapes, city, portrait, and the production of unique images with studio lighting techniques. Well, actually, you can use it for whatever your heart desires – go out and make the Sad Clown smile again.

The Sad Clown on Flickr

Ricoh GRD – Frozen Motion Street Photography

Street photography gets debated a lot in online photo forum elitist groups.  Favorite arguments will revolve around "What is Street Photography" and unknown photographers lavishing praise on figures like Cartier-Bresson – who in certain circles enjoys more mindless devotion than the Gods.

I like the idea of photography being a documentary tool, but documentary according to what?  We all perceive ideas and images in various ways, so it’s pretty hard to set down a specific definition of Street Photography.  Tokyo is probably one of the best places in the World to make street images.  The number and styles of people spread throughout the city is endless and sets an excellent stage for your humble photographer narrator.

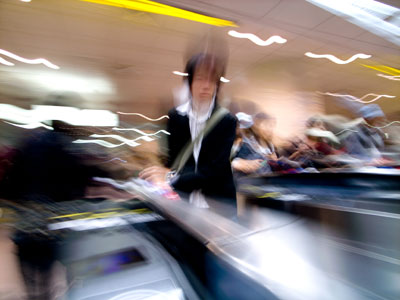
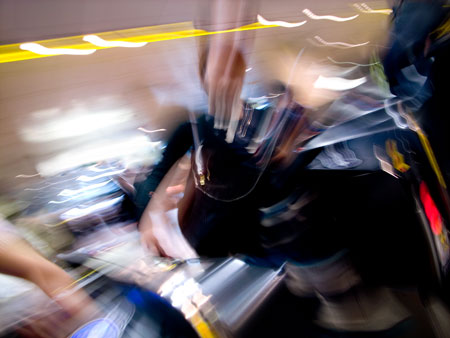
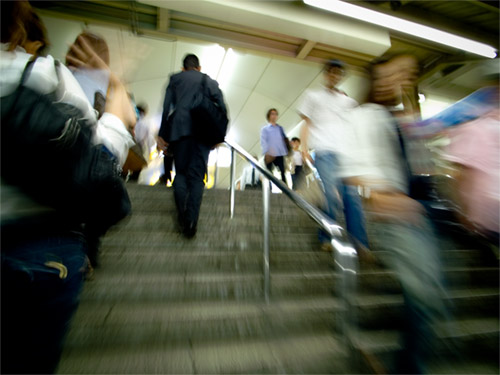
My day to day routine in Tokyo involves taking the train from Komaba and changing in Shibuya, one of the busiest stations in Tokyo.  This affords daily opportunities to exercise one of my favorite photography styles – capturing Frozen Motion of folks heading hither and thither.

Cameras are by default used to capture static moments in time.  This often entails sharp, defined images where you can clearly see what the photographer saw.  Or was it only what was recorded by the machine?  My mind doesn’t always percieve street photography as a static scene.  I want to see the unseen image, the one I didn’t know was there – the Motion.  I want to take an image with my camera to see what it will look like.  Capturing motion is pretty easy, you just reduce the shutter speed such that the resulting images capture enough definition so everything isn’t a total blur.

The Ricoh GRD is pretty much the perfect camera for street shooting, save for the long RAW write time – in which case the Ricoh GX100 or the new Ricoh GRD2 is probably the best camera available for these types of boredom deflecting activities.  With the wide angle 21 mm lens attachment you can pull in a very wide scene, with colors and motion from everywhere in front of the lens.

Motion capture can be very cool, but it’s also very easy to make mediocre images this way.  To my eye, if there’s just enough blur to make the image appear unfocused, but not enough for any colors to mix with one another, it’s just a waste of memory card space.

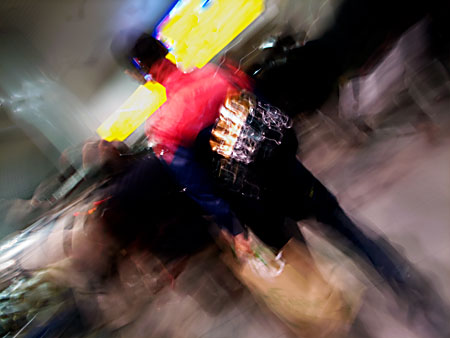
Many Japanese wear conservative suits to the offices, and when mixed together this renders a sea of grey.  The element I look for is something with a bright color, a hand bag, a light colored box, something that will stand out in the sea.

The second element I hunt for is mixed motion.  If you just stand there and shoot, all the motion is in one direction, one or two of these shots are cool if you’ve never used this technique before – but gets old crazy fast.  I like capturing motion from different directions.

In Shibuya, I usually head up the stairs and position myself on the edge of the up and down directions, then I can focus on someone with a non-standard element (color, geometry) and pan on them while I’m walking past.  This means that the image is a combination of them getting closer to me while my camera is rotating, if I’m lucky I can catch one element of their person in reasonable focus – like a hand or bag.  If executed with exacting imprecision this results in an element popping out from the chaos.

The Frozen Motion technique works for me because it’s the scene which I want to capture for Street Photography.  The important element isn’t capturing and documenting the scene exactly as it occurred, I want to paint with the motion, get the random colors mixing – chaos going and freeze it in-camera.

You can try stretching the image and using motion blur filters in Photoshop, but for my taste it’s like using a Lens Baby instead of a Holga, there’s no randomness to the image – it’s all been over-engineered, and hence – boring to my eyes.

Rioch GRD II – Deliverence from the Gods

In our digital age the Gods are real and our prayers answered with ever increasing frequency.  Two years ago the Japanese God Ricoh Ltd. gave to this Earth the digital incarnation of his most special creation – the Ricoh GRD, a digital version of the fabled razor sharp Ricoh GR and GR21.  Now the prayers of GR pilgrims has again been answered, in the form of an updated GRD-II.

The Ricoh GRD-II was announced this November and is due out in stores just before December.  The GRD2 looks pretty much exactly like the GRD and sports every new feature a GR fanatic could want.  The Raw write time has been reduced to a few seconds, higher ISO images will sport less noise and a 40 mm add-on lens will be available as well as a new smaller external viewfinder. 

The coolest thing about the GRD2 is that most of this new technology will be available to and compatible with the existing GRD model.  The 21 mm lens from the GRD works on  the GRD2, and the new 40 mm lens works with the GRD.  Ricoh isn’t just releasing a marketing hyped camera to replace your year old-one like most camera makers generally do.  Once again Ricoh is actually adding value to an existing product through a new firmware upgrade and accessories.  This pretty much cements my economic commitment to Ricoh for compact cameras, with the new 40 mm lens there’s far less reason to look at a Canon G9 for a compact portrait camera.

The only missing feature in the GRD2 is shake reduction.  An anti-shake function is built into the Ricoh GX100 and R-Series cameras, so many were GR disciples were expecting it to be in the GRD2 as well.  To be honest this isn’t a huge thing for me.  I shoot with a Minolta 7D, the first anti-shake DSLR, but with my GRD I often shoot at low speeds approaching 1/10 of a second with minimal blur.  The fact is that with a short focal length lens, anti-shake isn’t such a big deal.  Does it help?  Yes, but so does a camera strap wrapped around your shoulder, and that doesn’t increase manufacturing costs of the final product.

I see the minor upgrades of the GRD2 as an affirmation of Ricoh’s place as one of the best digital camera makers.  Aside from more resolution, anti-shake, better raw write time, and a mild-telephoto lens, there was nothing to improve upon with the GRD2.  Much like the Canon G9 is pretty much the same as the G7, but with the Raw format and a better LCD screen.

Yes dear digital imaging children it’s true, in certain circles the digital camera technology revolution is starting to plateau, technology is maturing, and one doesn’t have to worry about their camera being obsolete in a year.

Ricoh GRD Review
Tokyo Strobist Ricoh GRD
Ricoh GRD on Mt. Fuji

More info at:

Ricoh GRD II Page
GRD Blog

Lazy Tokyo Weekend – Mt. Fuji

Mt. Fuji, Fuji-san is possibly the easiest and most awestruck climbs I’ve ever done.  The term "climb" is a stretch when describing Fuji-san.  A winter ascent up the iced face might warrant crampons and axes, but a summer/fall experience falls into the hiking category.  The pathway is wide and primarily maintained with heavy machinery, and during the official climbing season, you can buy food and drinks along the way.  I climbed Fuji-san the third weekend of September, just after the close of the official climbing window of July 1 to August 27.  I’d been in Tokyo for about two weeks and my body and soul were screaming from some escape from the manic metros and crowded Shibuya streets.

Mountaineering has historically had a certain man vs. nature connotation.  Climbing magazines like Rock and Ice or Climbing sometimes use the terms assault to describe a person ascending to a mountain summit.  Popular culture uses terms such as conquer when to romanticize the act when a climbing team attains the summit of Everest.  But to say that one has attacked or conquered a large body of earth such as Fuji-san by the simple act of standing on the summit is like saying that the mosquito which buzzes near your sweaty head has made you it’s bitch.  Even the Swiss Alps with their cable ways and hotels and huts have not been conquered by mankind.

Despite the explicit traces of humankind and the rampant tourism and gimmicks associated with an ascent of Fuji-san, all the reverence and sacredness of the highest mountain on Japan, forged in the ring of fire, and risen from the sea like a God of old…none of these things are diminished by the fact that you can buy Fuji-Inspired custard snacks.  The gimmicks don’t make the mountain anything less than it is, one of the beautiful places on Earth.

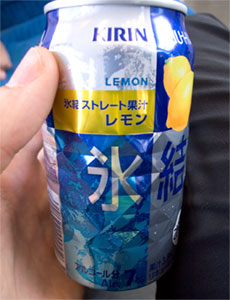
I left Tokyo early in the morning.  Normally one can catch a bus from Shinjuku, but I waited too long to reserve a seat and had to find my way there by train.  I pick up a rice ball and yummy looking lemon drink.  It had a funky taste, something in between sour and fire.  After downing half the can I looked and noticed that the funky lemon can of liquid was 7% alcohol.

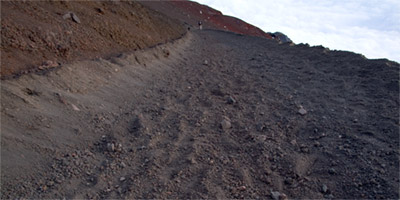
You can start the hike near sea-level, but I, like nearly everyone else started from Kawaguchiko-guchi Go-gome (Kawaguchiko Fifth Station).  It’s a bus stop and tourist trap, and signifies the start of the trailhead up to the summit.  The 5th is like any other tourist pit between the Mystery Spot in Northern Michigan or the Edelweiss-inspired shops in Grindelwald selling Swiss chocolate and cheese and kitsch.  You can get a can of fresh Fuji-san air at the 5th station, just like you can buy a sealed can of cosmic mystery in Sedona Arizona.

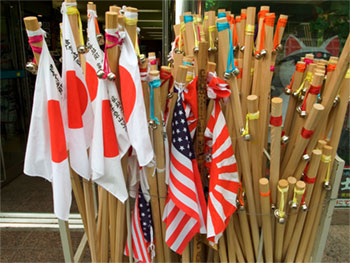
The most popular product is the walking stick.  During the summer you take the stick with you and get it stamped at each station.  I opted not to pick one up, partially because it would be hard taking back to Zurich, also because I was tired of spending Yen, but primarily because I would have entered into a Samurai fighting fantasy and ended up hitting someone by accident.

The real draw of Fuji-San is that everyone who can reasonably walk can make it to the top.  If you’re not in prime altitude condition, you can bring along an oxygen canister (available at the 5th station).  I highly recommend visiting Fuji in the early fall, there are fewer transportation possibilities, but there are far fewer people and the shops along the trail to the peak are closed.

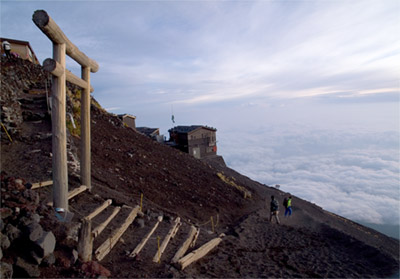
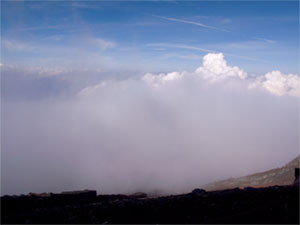
The hike up Fuji-san is uneventful at first.  You begin to rise from the forested slopes and move over some rock, passing huts here and there.  You wonder why you’re ascending and wasting time on this man-conjured joke until the moment you pass through the cloud curtain and see the world falling away below you.  At this point the Zen begins to set in, and you are propelled upwards with a deep sense of wonder, each step a prayer to the deity whom you are set to meet on the summit.

There are a number of station up to the summit, I have no idea when I passed which ones, I really didn’t care.  All I needed to mark my ascent was the continued view of my vantage point getting ever closer to the sky.

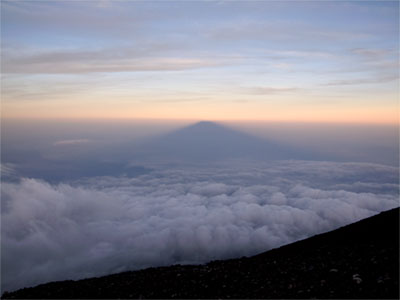
In the Ying of the Yang, there is no sunrise without a sunset.  The many visitors will do a night hike and arrive at the summit for the sunrise, and the mountain is a bustling highway at 5:50am.  But at 5:50pm there are only a few souls, those who haven’t found a hut for the night or already descended.  I can’t recommend the sunset enough.  The popular gimmick is the sunrise, but in my experience it in no way matches the calm magic of the sun falling behind the summits.  The clouds gather in full at the slopes and form the perfect curtain for the shadow of the mighty one to be projected upon.

I thought about descending after the sunset and finding one of the huts to stay at for the night.  The cost for one of these runs around 60-80,000 Yen, and for some reason I just didn’t feel like putting myself back into the confines of walls and windows.

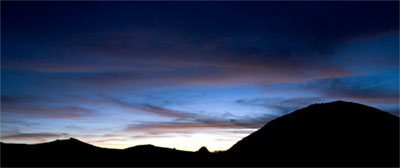
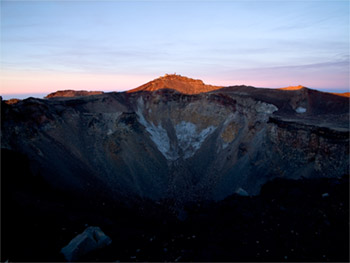
The cold was creeping over the ridges and rocks like it always does in an alpine environment after the sun leaves.  We get used to the comforts and confines and forget how vulnerable we are in the world.  I alternated between sitting and trying to sleep for a few minutes near rocks and walking around the volcano craters to move and stay warm.  This also allowed me to see the sky as I never had before.  The moon rose and set and the sky was filled with stars and at other times guarded by clouds.  It was quiet and cold and I’ll never forget the wonderful sleep depravation on the summit ridges and volcano rims of Fuji-san.

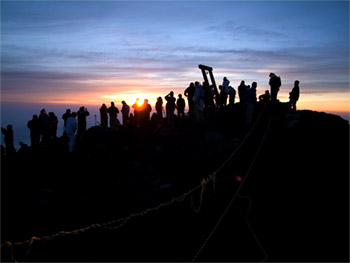
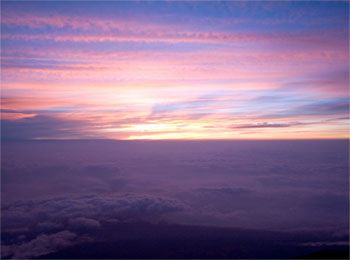
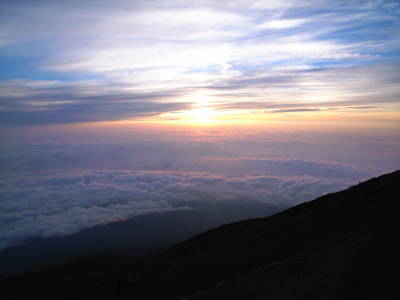
I was shivering at 4am when the first night hikers crested the over the last gate and began looking for the best place from which to see the rising sun.  You can see the sunrise from everywhere, but I opted for the more popular location, along with most everyone else.  The view is filled with cigarette smoke and the light of cell phones screens burns into the eyes as you wait for the sun.  The sunrise starts very slowly.  The sky lightens, and slivers of red start burning themselves into the atmosphere.  Eventually the red eye looks out across Japan and rises up above the clouds which have come to gather around the lower slopes.

The trip up and down Fuji-san was a wonderful experience.  It was a trip in the most spiritual sense, the way from Tokyo, finding the train, getting to the 5th station, watching the sun set and the stars revealed, the moon set and the sun rise and the eventual return to Shinjuku.

For the inexperience mountaineer Fuji-san is a colossal trek, an adventure of one’s lifetime.  For the lazy sometimes seasoned mountaineer such as your humble narrator, Fuji can be done as a day trip if desired.  One just needs to make sure of the transpiration issues.  Camping is officially prohibited, but like in the Swiss Alps, if you do and no one else is around, there’s no one to tell you to stop.  A number of travelers set up tents on the summit during the night, although I think this is only in the off-climbing season.  Either way, I highly recommend it for those in Tokyo seeking an escape from the manic rhythms of the city.  It is a majestic climb, no matter your skill level or previous mountain experiences.

Specifics on the climbing routes up Fuji-san can be found at the SummitPost page.  Photos and images from this trip were produced with the awesome Ricoh GRD digital camera.

Ricoh GRD Review
Ricoh GRD and Strobe Lighting

Ricoh GRD – Tokyo Strobist and Shoestring Lighting

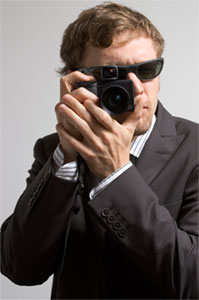
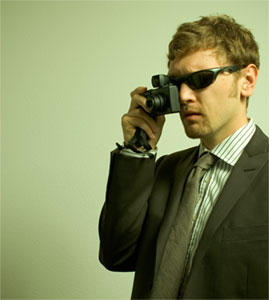
There are many thing to do in Tokyo, but on a Monday night after riding the metro one needs to relax. One of my favorite relaxing activities is the impromptu self-portrait session with a digital camera. This session focused on using off-camera flash with the Ricoh GRD. But here’s the problem, while checking in for my flight to Tokyo I was made aware of the fact that I was 15 kilos over weight, I’d either have to dump half my baggage or pay great fool-damned weight penalty.?While tossing things out of my luggage at Zurich I tried to cut it down to the essentials. The crampons and ice axe had to go, but perhaps a bit more regretful was leaving behind my light stand. Yes, I’ve made a habit of taking various cameras and at least one flash everywhere I fly to. As a compromise I kept the umbrella and flash bracket, thinking I’d find a solution in Tokyo.

Shooting in a cramped dorm room in Tokyo can be a bit limiting. With a desk, bed, and bookshelf there’s pretty much no room to do anything. I wanted a clear background and that meant setting up in the hallway. The cramped hallway presented an interesting shooting situation.? At only four feet wide, there was really no room for a normal camera to focus and capture the subject (me). Ah, but I had in my possession the fabled and non-standard wide angle Ricoh GRD digital camera. I setup a tripod and decided to go with the GRD and the 21mm add-on lens. This gave me a wide angle setup perfect for the cramped hallway.

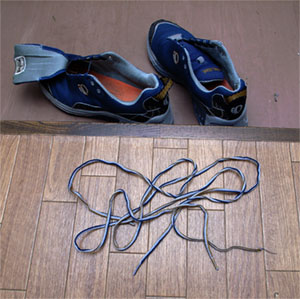
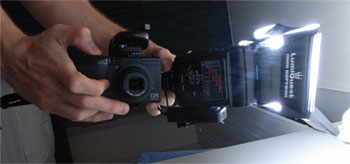
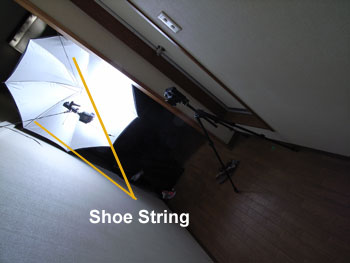
For the lighting, I had a set of Gadget Infinity radio triggers to trip my old Contax TLA280 flash. The Contax flash was fired on manual mode into a 40 inch umbrella, in the narrow hallway this provided a rather large body of light, perfect for the random portrait session. However, without a stand, it’s pretty hard to set up an umbrella anywhere. To solve this problem I borrowed from my climbing mind and decided the best course of action would be to suspend the umbrella and flash (with bracket) using two shoelaces from my running shoes.

In my experience, the Ricoh GRD has been awesome for mountaineering and city shooting, but I’d never used it with off-camera strobes before. One difficulty with self-portraits is triggering the camera. The GRD has a nice interval timer, I set it for a 5 second delay and started shooting after a few test shots to get a nice exposure setting. Doing off-camera flash with the GRD was totally painless. Using the interval setting the GRD refocuses for each shot and will keep shooting till the battery runs out or the SD card is full. Five seconds is perfect for changing poses and waiting for the camera to focus.

Compact digital cameras are generally ignored with it comes to flash work, and usually have horrible small flashes that create unnaturally ugly images. The Gadget Infinity radio trigger is very small, and fits extremely well on the GRD hotshoe. It means you have the freedom to take a small flash wherever you’re going and bounce it or diffuse it for awesome lighting on the fly and create excellent flash photos, even with a point and shoot digital like the GRD, Canon G9, or any digital with a hotshoe.

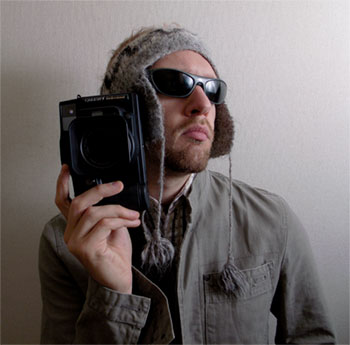
The extreme wide angle of the GRD was very cool to work with. The GRD has an awesome lens, and worked extremely well in the tight confines of mine small dorm room. I took to shooting myself in various combinations of the clothes I brought to Tokyo. It’s not rocket science, the images aren’t fantastic art or crazy creative, but I like them and plan to expand on the wide angle portrait technique.

Traditional portrait guidelines call for a camera with a focal length around 85mm (in 35mm format). Wide angle lenses are generally not used since distortions in the face can be considered unflattering. I found the 21mm GRD lens just awesome for portraits. The advantage is, with a few movements forward or backward and left or right, you can control which parts of your body are slightly distorted, made larger or small due to the distortions inherent in the lens. This means you can easily modify the subject of your portraits by making parts of the body larger or smaller, distorted or normal. Positioning various parts of your subject in the distorted range of the lens can dramatically increase how the subject is communicated to the viewer of the images.

I had an awesome time shooting with the Ricoh GRD and off-camera flash for the exposure. The wide angle 21mm lens gives the brave photographer a number of creative opportunities to portray your subject in ways not possible with traditional mid-telephoto lenses. The compact size of the GRD means you can set up anywhere, and break the myth that flash and small compact cameras doesn’t work.

If you found this information helpful and would like to experiment for yourself, check out Strobist for lighting info with off-camera flashes.

Ricoh GRD Awesome Digital Camera Experience

As a prelude to a forth coming stay in Japan and the desire to lower my mountain pack weight, I picked up a Ricoh GRD digital camera creative set with the 21 mm add-on lens.

Rioch GRD

The Ricoh GRD is a point-and-shoot 8 Mega-pixel digital camera with a fixed 28 mm and 21 mm add-on lens (from a 35 mm camera focal length prespective).  I’d been salivating after the GRD since it was released two years ago.  Like every digital camera, it’s value has dropped after being around so long, and with the release of the Ricoh GX100 and forth coming Ricoh GRD2, the price of the GRD Creative set has become very attractive here in Switzerland.

My motivations for getting the GRD were image quality, size/weight and wide angle lens capability.  After years of hauling various cameras through Europe and around the mountains of Bolivia, Colordao, New Mexico, and Switzerland I’ve come to asess the usability of a camera in relation to how much volume it takes up and how much it weighs as compared with the quality of the resulting photos.  The trade-off between performance and weight or volume is critical for travel and mountaineering.  I bought the Ricoh GRD because it offers high image quality with a wide angle lens in a light weight design.

I also bought the GRD because with its macro capabilities, it opens up more options to explore.  Therefore, the Ricoh GRD was pretty much a no-brainer for me.  Wide angle lenses are generally harder to design and implement in any camera platform.  That’s why most digital cameras have focal lengths from about 35 mm onwards.  This posses a problem for a traveler/mountaineer, since the subjects, mountains and buildings are often times too close to be captured effectively using the 35 mm focal length.  When balanced on a razor rock edge, there’s no possiblity of taking a few steps back to get more of that mountain in the picture frame.  Hence, a wide angle lens is essential for my travels.

People tend to get lost in the Mega-pixel debate.  A consumer is liable to check out the price of a Canon Rebel or Nikon D40 and not give a thought to the lenses that would really excel with those bodies.  An 8 Mega-pixel point-and-shoot with a sub-par lens might be on par with a 2 Mega-pixel DSLR (like the Canon D2000) simply because of the lense quality difference between the two cameras.

So it really makes sense to design a camera and lens together, which is basically what one has with the Ricoh GRD.  The lens is tack sharp as can be, and the image quality with the 28 mm or 21 mm lenses is just outstanding.  But no lens-sensor combination is worth anything without kick-ass user control.  The Ricoh GRD and GX100 are the only point-and-shoots with full manual control.  Yes there’s the Fujis and Leicas/Panasonics which claim full manual, but they don’t have adjustment wheels, you have to do it via menus.  The Canon G7 and G9 come close, but you only have one control wheel.  Plus, and this is huge, the Ricoh GRD has the Raw image format.

Now, it does suck that the time required to write a Raw file on the GRD is a tad long, on the order of 10-15 seconds.  Amateur camera critics and professional equipment complainers throughout the internet have decreed the long Raw write time as a "deal breaker" meaning that they’ll feel entitled to not buy the camera and then waste a great deal of their day complaining about the GRD instead of taking photos in the real world.  The Raw write time is an issue, but it hasn’t been an obstacle for me.

The GRD has no built-in viewfinder.  But an external high-quality finder fits into the hotshoe.  I love this combination because it allows me to get the exposure right by monitoring the historgram on the LCD screen and then composing using the viewfinder for excellent framing and stabilization.  The viewfinder is bright and works great with eyeglasses, sunglasses, or no glasses.  In a sense, the GRD actually exceeds the capabilities of my DSLRs because I get exposure information in realtime (via the live historgram) and only need to take one image.  With a DSLR I have to take an image and then review the historgram (chimp the image), then retake the shot if the exposure was off.  It doesn’t matter if your DSLR can take multiple Raw images per second if the exposure isn’t correct.  So, for a landscape shot, I actually waste more time getting the exposure right with a DSLR than with the 10-15 seconds Raw writing time with the GRD.  Hence, the long Raw write time is a non-issue with me.  Now, it’s true that the new crop of DSLRs have live-view, so one can get the exposure right the first time, but it will be a while before I pick one up.

So far the Ricoh GRD has been along on trips through Zurich, the Alps, and now Tokyo.  I love the GRD, I love the image quality, I love the manual control, and I love how easy it is to use.  When you buy a Ricoh, you’re also supporting the camera design efforts of a company which actually listens to it’s users.  Ricoh cameras like the GRD and GX100 will include a number of firmware updates.  Some will say this is proof that the camera was released too soon, and should have gone through more testing before release.  I see it as Ricoh listening to their customers and providing support to improve the funtionality of their product after the sale.  Ricoh is one of the most foreward looking and innovative camera makers today, and I like the idea of supporting them.  If you’re looking for a take everywhere high-quality camera with wide angle lens, manual control, and Raw image capabilities, the GRD might be for you.  The GRD is stealthy and robust.  It can go dressed up in the city or rugged into the mountains and continually retain its cool factor.