Features

Bad Bloggers go to Berlin

Good bloggers go to San Fransico, Bad bloggers go to BarCamp Berlin 3.  At least, I’m hoping that’s what will be written on the BarCamp Berlin 3 T-shirts.  BarCamp Berlin 3.0 is setting up to be the coolest blogging event of 2008, and probably one the best held so far in the history of the BarCamp.  Paris has flair, Zurich beauty, and Detroit has true grit.  But Berlin is one of those unique cities with an excellent mix of history, tech, art, design, and badassness.  In Berlin the people are hip, beer is plentiful, and the clubs get hotter as the night turns into morning.  It’s also easily one of my favorite places for photography in the world.  Berlin is a city in flux, it has a flow, and between new buildings filled with new ideas the old walls give the determined poet inspiration.  I could easily spend a month there, but this is the wrong attitude.  If you spend a month anywhere you run the risk of getting comfortable.  Better to enter and leave the environment as harshly as possible, keep the mind alert and the senses hightened, otherwise you’ll miss what you came for.  It’s all the more interesting when you have to push youself for a few days with little rest.

First, the main deal: there are something like 650 participants from Germany and around the world attending BarCamp Berlin 3 (Oct. 18th and 19th), and it kicks off a Web 2.0 week in Germany.  Two big parties are happening on Friday and Saturday night, with the camp festivities starting Saturday and ending on Sunday. Sponsored by a number of tech companies, including Oracle and Nokia…I’m incredibly geeked about attending.  Of course, to get in, you have to be on the list.

Getting on the list wasn’t easy, the day registration opened I followed the link in my email only to get denied on the spot, because it seems like the available spots were filled up in a near simutaneous flurry of internet mouse clicks.  Fortunately for me, the cool folks at BarCamp Belin had reserved space specifically for international guests.  Since I come from the US and live in Zurich, I seemd to qualify.  This naturally brings up what I would do at BarCamp.  The concept, as with every barcamp is no spectators, you give a talk, volunteer or blog about the blogcamp.  I’m always in the presentor category.  Not because I know what I’m talking about, but some days you like to hear yourself speak, and preparing a talk means you have to have a grasp of the content.  This isn’t like attending a scientific conference where only two people out of twenty will be able to understand the words flowing out of your mouth.  At a BarCamp you want to communicate ideas for the pure sake of spreading knowledge and inspiring people.  My last apperance was at BlogCampSwitzerland3.0, where I rambled on about integrating Flickr and blog content.  As a speaker, I always come out of the process with a deeper understanding of the material and of myself.  Additionally, speaking reaffirms how much I don’t know about the world.  I like to think I offer a unique perspecitve, trained as a research engineer I blog about cameras, photoshop, creativity, phtography and produce imagery for Flickr.  My main interests for BarCamp Berlin are delving into the production process of visual imageray for blogs, and distributing that content in diffenet ways on the web.  My video production skills are improving, and I’ll post my talk in two or three videos after the show.

Now the only question is what to pack?  I’ll take three cameras to Berlin, burn through as much Velvia film as possible in 35mm and 645 formats and try to capture the feeling of the adventure.  Street sounds and poetry will be handled with my Zoom H4 digital audio recorder.  My short list of cameras includes the Ricoh GRD, Contax G1, and Fuji GA645 (wi) cameras.  The Contax G1 might not make sense to some people – who still shoots 35mm in a digital world?  Well, here’s a better question, how can one spend time photographing in place like Berlin and not do it with Carl Zeiss lenses?

BarCamp Berlin 3

Photokina Nikon-Canon-Sony A900 Deathmatch

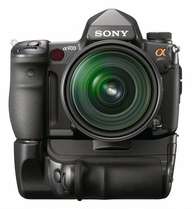
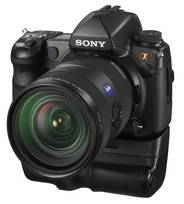
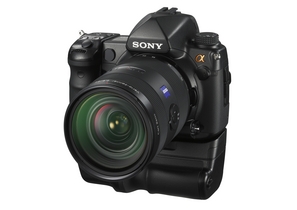
Sony A900 DSLRThe Sony A900 is a camera of purpose and symbolism. Probably the most important and influential DSLR release in the past 5 years. For some, it’s the realization of a Minolta dream that a robust full-featured behemoth in the spirit of the Maxxum 9 film camera would be realized. A professional tool for those of true grit. For others it’s a symbol of the megapixel race, and is decried as a waste of sensor area. I see it as the near final orgasm of a tantric seduction which Sony initiated nearly 2 years ago with the showing of two concept models at Photokina 2006. Now, just a digital blink a – few years after release the A100, Sony boasts a robust line of DSLRs, for soccer mom’s, guys with cameras, (GWCs) hobby fanatics, and now studio, landscape, and fashion photographers.

The reason to buy into the Sony system is similar to why people pick Macs over PCs. There are differences in this analogy, the Alpha system isn’t inspired by LSD flash backs and Sony is as large as Microsoft. But the point is, if Sony (like Apple) wants any market share from Canon and Nikon (versus Dell, Microsoft, etc.), they have to produce excellent products. They have to innovate, they have to do it right the first time, and they have to listen to consumer needs. These are things which arguably, neither Nikon nor Canon have any need to, and don’t do. With its dominate market share in the DSLR world Canon has become complacent, releasing camera models which are impressive but lack any market pressure innovations. Nikon is starting to ramp up it’s game with the D3, D700, and D90, the first DSLR to offer video recording. There’s little doubt that the Canon 5D replacement will as well, because the wolves are now out of the woods and looking to satisfy their appetites for Canon blood and camera sales.

With the A900 Sony has released a real tool for studio and fine art photographers. Enough resolution to beat the freakishly expensive Canon flagship 1Ds Mark III, in-body lens stabilization, weather sealing, and micro tuning of lens focus are nice features to have, but considering the market price of $3000, the A900 offers the greatest price-performance combinations in any DSLR ever released so far. The A900 can accommodate fine tuning focus profiles for 30 lenses, so critical focus adjustments can be made on the spot by the user. Of course, Sony might prefer to get paid for tuning lenses like Canon does (instead of allowing users do it), but at the moment the infrastructure and pro service centers don’t exist like they do for Canon. Ahhh, and the lenses…the Carl Zeiss line of autofocus glass now includes a 16-35 and 24-70 f/2.8 lenses, the ideal objectives for a 35mm full-frame body. Then there’s the 85mm and 135mm lenses, fabulous for portraits and razor sharp. Then there’s the ability of using full-frame lenses or cropping to 11 megapixels for APS-sized lenses on the A900, which means one doesn’t have to debate about lens type, they’ll all work with the new Sony.

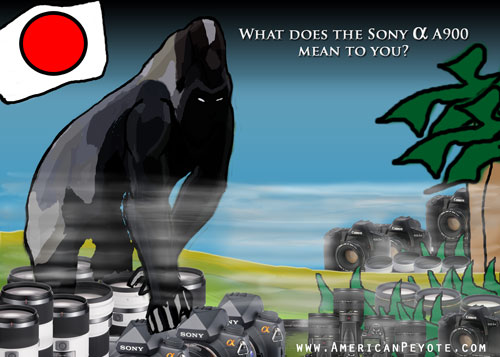
Of course, as an 800 pound Gorilla, everyone knew Sony was coming to the DSLR jungle, they could feel the ground shake as it approached and heard the monster when it began to roar with the A350 and A700 cameras. The recent news of the Nikon D90 is nice, but we all know that’s not the end of Nikon for this year. The Nikon D3, while a revolution for Nikon users, was only a stop-gap camera so they wouldn’t jump ship to Canon, it was meant to pacify Nikon pros for a little while before the real prophet was ready to be released. The Nikon D4, a capable 24 Megapixel DSLR will for sure be released at Photokina 2008, there’s just no reason for it not to be. The Nikon D300 has essentially the same chip as the Sony A700, and the D4 will probably have a chip very similar to the A900. The last question is what Sony will release in early 2009? The A900 is nice, but will all know the A700 is starting to age against the competition, and an A800/A850 with a full-frame sensor to fill the price gap between the A700 and A900 seems painfully logical.

It took some time to go from the A100 to the A900, and the Sony marketing tactic has been to tell everyone the end of the story first. “We want to take serious market share of the DSLR market, and this will be our flagship, the A900.” This was a bold and unheard of attempt in the digital camera world. Pentax tried this and then failed to deliver a digital version of their medium format camera system, and have since stayed in the shadows producing a niche DSLR for committed followers.

The tactic is designed to prevent users from purchasing from competitors and is very simple. You tell people about the awesome camera 18 months early because it’s a way to drum up enthusiasm for a new camera without immediately releasing a product. The point is to encourage people who are thinking of not buying a Sony A700 versus a Nikon D200 to go ahead and invest in Sony, because Sony is committed to being a contender and producing a full DSLR system. Such a system can’t be supported if people think that Sony is interested in only selling glorified point and shoot DSLRs. An 800 pound gorilla can do this.

The beast tells you what it will do and then laughs as the bush men try to kill it before the Kong destroys the village. But this is the DSLR world, far more dangerous than any jungle, and Sony is indeed a vulnerable beast. While Sony has been enticing consumers with dreams of the A900 for two years, Nikon and Canon have been gearing up for the death match. In particular Canon, the DSLR company which doesn’t need to innovate, has had more than enough heads-up on what would be coming, and are going to release a 5D-II for Photokina, which is rumored to have 24 megapixels, live-view, and movie capabilities. They have to, because at the moment the Canon line is aged and stiff compared to Nikon and Sony. 2009 will be the year of the full-frame DSLR death match between Nikon, Canon, and Sony, for all of them will have monster cameras to sell and all will have to be below the $3000 price point.

Competition is good for the consumer and forces innovation, so what other forces are at play? What comes next you wonder? Look to the planet Mars…children of the night, for the Red One uber innovative digital movie camera maker is rumored to be developing its own DSLR, which will be more of a hand-held high definition video production system than a camera.

No one knows when this DSLR war will end, or exactly when the difference between DSLRs and camcorders will be a matter of marketing strategy, but it’s certain that the jungle will get bloody this year. The air is filled with the scent of DSLR blood, and it’s a great time to be a consumer of digital camera technology.

Further Reading:

A Sony Alpha A900 Gorilla Eyes the DSLR Jungle

BlogCampSwitzerland 3.0 Flickr-Blog Integration

I had the excellent opportunity to join in the third BarCamp in Zurich. BlogCamp Switzerland 3.0 was held on August 29th, 2008 at the Technopark in Zurich. ?This was my second attendance at BlogCamp Switzerland, I did a talk at the first one on March 24th, 2007 where I gave a talk called ?Photography and Writing for Blogs.

BlogCamp Switzerland 3.0 included a cool mix of people and ideas.  I listened to Cédric Hüsler (http://keepthebyte.ch/blog.html) talk about the impact of polling feed networks and how much traffic is wasted on checking if blogs have been updated.  In the afternoon I went to hear Patrick Liechti from Sun Microsystems talk about organizing a Startup BarCamp type conference to educate people on how to form and succeed with new startups.  This underscores the advantage of attending a BarCamp, lots of new ideas and exposure to new areas.  I’m looking forward to attending BarCamp Berlin 3, which will be the third for that awesome city.

This time I put together a talk centered on using Flickr as a way to integrate photography into a blogging workflow.  This sounds a bit technical and boring, but I tried to get all blogging philosophical and hit on the idea that photos can be used to instantly communicate feelings in invoke emotional responses in ways which aren’t possible by blogging just using text.

The fusion of text blogs with Flickr postings means you can market your blog content to a large number of people who are interested in visual stimulation.  If your images communicate an essential message, they can be used as ways to bring traffic to your site.  Furthermore, using the community aspects of Flickr enables very good interaction with blog readers.  David Hobby knows this, the author of Strobist has skillfully used Flickr to build a reader base that wouldn’t have been possible if he had only blogged using his Blogger account.  And after learning some things from David, I used Flickr to market my blog posts about photographer Joey Lawrence and his Photoshop DVD Tutorial with the Strobist Flickr group discussion board.  I also hit on how Flickr is currently one of the best solutions to the problem of finding photos on an internet when search engines are still all text based.

Anyways, since I’m exploring the transition from text blogging to integrated photo blogging I thought I’d add some video and audio to the mix.  This first one sort of sucks, but I’m looking to improve.  Below I’ve embedded a version of my talk entitled:

Marketing Blog Content with Flickr

Timing and Community

Concept to Photo – Workflow Tutorial

For some reason the job details between photographers and scientific researchers are dramatically different, but from my perspective the motivation and work-flows are almost indistinguishable. Maybe it’s just my will to be weird, but when I sketch out a photo concept or think up a new research project, the exact same centers of my brain are working at peak capacity. This was the inspiration in developing this article on the creative workflow from concept to realization as applied to photography.

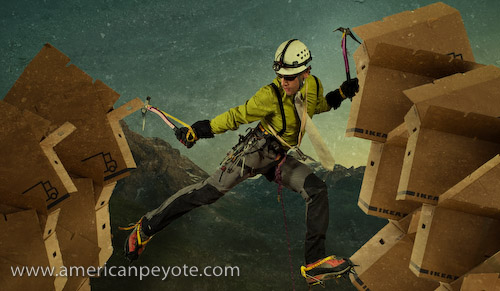
IKEA Dry Tooling

IKEA Dry Tooling

The generic view of artists is that they’re filled with an abundance of talent and drive and create through pure inspiration – bubbling from a magical fountain in their soul.  The generic view of a scientist/engineer is one of a logically cold calculating individual slaving for days and nights and eventually years with a sort of mad-scientist personality detached from reality – characterizing the world in theories and mathematics that normal folks just don’t understand.

The more I started actually doing photography I began to realize some things would go faster and come out better if I actually thought about them – laid them out beforehand you see. It’s not like I need to define the process in a textbook. After all, photography is Art, the result of intuitive inspiration and amazing talent…blah, blah, blah. But the fact is, as an engineer I acutely appreciate the poetry in a well executed project. An elegant well-thought out project map is as beautiful as a fleeting mountain vista or abstract impression. The link between art and science/engineering/design is indistinguishable, so why not integrate them all? Take the analytical themes of science and fuse them with the free out-of-the-box thinking of art and photography.

I like to take the analysis aspects of science, combine with the project management aspects of engineering, mix with the artistic element of design and cap it off with the fool-proof ease of digital photography and computer imaging. We end up with a total process for the concept develop though image execution and output.

I’m not defining the creative process because I feel a need to before producing an image. Yes I can pick up a camera, set up lights, or not use any lights and produce great images. Sure art is supposed to be free-wheeling and off the cuff and pure inspiration and guess what – so is engineering. Even if you don’t think there’s a process going on inside the nicely packaged computer inside your skull, doesn’t mean it’s not happening. So why not exploit it? Why not explore the creative production process and learn how to improve it?

So, for clarity let’s quickly define the photo production process as:


Concept – Production – Shooting – Processing – Deliverables


Concept

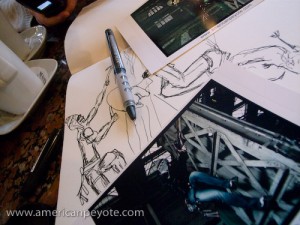
Dry Tooling Concept Sketch

This stage probably doesn’t need to include a camera or computer or anything more complicated than a pen and paper and your thoughts. You just think up what you want to do and start putting it down so it doesn’t get erased in your short-term memory banks. Sure this can be done inside your head, visualize a subject with lights and angles and photoshop layers and then try to produce it directly with a camera. Alternatively setting things down on paper usually brings up more questions. Like, what color should the pants of the model be, will I need a grid to highlight the face or will two soft boxes suffice. Of course, all of this can be worked out on the fly as you’re shooting, but if you can visualize everything before you start, you will naturally get more accomplished and probably get closer to realizing of your vision faster than doing it all on the fly. Essentially the concept stage is there for brainstorming: subject, location, colors, lighting, message, mood, etc. These are realized as sketches, mock-ups, whatever you need. Figuring these things out early means not having to screw around with them later.


Production/Logistics

Once everything is set up in your head, you just need to go through the actual process of producing the work. How will lights be set up, what equipment and wardrobe is needed? Do we need to buy a purple velvet jacket? How about some clear makeup to reduce glare on the nose? Where will the shoot will take place, and how do we get equipment and the models together in production. You could even include a subsection purely for logistics. Screwing things up here means you forgot to bring batteries and your cool new flash doesn’t work or that awesome Octabox is useless because you didn’t pack the speedring. And that means not having the elements necessary to get the image you wanted. Developing equipment lists, maintaining an organized lighting kit which can be taken when needed, and knowing how to set everything up and execute the shooting session efficiently means it could take 10 minutes instead of 60 to get the images you originally wanted.


Shooting

With the concept in your head, and all the logistics worked out and the various elements of the production set up, all you have to do now is press the shutter and head to the next step (in theory). We could also call this the execution stage, but that sounds a tad morbid. Probably it won’t go so smoothly as simply depressing the shutter button, but the point is that if you work out the concept and logistics before you actually start shooting, you won’t have to run around looking for random flashes or light modifiers or – trying to come up with a totally new concept on the fly and not have the resources to see it realized. Many people will say they’re in their “element” when running around fiddling with flash position and making models wait because they didn’t prepare beforehand. I’d rather take the least amount of time as needed to do the actual shooting and move on to Processing the images moving on to the Deliverables. The idea is, get the shot and make great exposures that can be successfully processed into the final image you want.


Processing

In the golden ages of darkrooms and chemicals the main essence of your image was produced in-camera, unless you were a real wiz who lived in the darkroom. I now more or less consider the image from a camera to be a nice starting point – or a possible end point. Processing can be as easy as tweaking the levels or a bit more complicated, leading to various layers, filters, and electronic brush strokes in Photoshop. Processing can mean compositing multiple images together or working exclusively on one from the camera. Processing can make an angry man look approachable or a little girl look like a devil. The colors, shadows, image sharpness, it can all be defined and/or modified at this point to realize the final interpretation of your original concept/vision. How you do it is up to you. My processing work-flow starts by loading images in Adobe Lightroom, editing those images to focus on the images I want, the ones which best communicate the original concept I had. Those are further edited down and the finalists are exported to Photoshop for editing and compositing (if needed), whatever is needed before finishing and moving on to Deliverables. The final images are generally exported from Lightroom (even if heavily modified in Photoshop), primarily because last minute exposure tweaks, cropping, and adding watermarks is far easier in Lightroom than in Photoshop. Depending on your output destination color management is either irrelevant (like to the web) or essential (like for printing).


Deliverables

Website, Flickr, print, Flash movie, printed tattoo, however the image gets from your computer to your audience/client is the Deliverable. Here, beyond sizes, formats, and possibly printer and color profiles there’s not much to enhance or to dilute the vision conceived in the Concept stage. If the Concept-Production-Shooting-Processing stages were done well then the output will look great in any media. If you got lost somewhere between Concept and Processing and forgot to pack an extra flash, then the Deliverable might be lacking, it’s the culmination of everything which came before.


The End?

Here it was and now it’s not, a guide to conceptualizing and producing the fantastic images you want out of your digital life. You can be an engineer, naturally untalented Artist or a librarian, or anything else you can imagine to classify yourself, but if you recognize and follow a process or develop your own and stay true to the vision in your head (and pay attention to the details) the images will come out fantastic. Getting down to Brass Tacs, any project, whether scientific or artist can be thought of as the effective management of resources. You have models, locations, lighting equipment, etc. The job is simply to communicate a message/concept based off of those resources in the least painful way.

A Sony Alpha A900 Gorilla Eyes the DSLR Jungle

The end is near, and hack camera writers across the web are digging in for the mad-capped pseudo blood-bath set to be unleashed on the digital camera world. The release of the Sony A900, the full-framed 24 Megapixel beast will be launched before the end of 2008. There’s little doubt that Sony will unveil a DSLR marketing spectacle like the world has never seen at Photokina 2008 in Cologne (September 23rd-28th), and it might even be worth attending this year.

For give-or-take a decade now the DSLR market has been dominated by small sensor APS-sensor sized offerings, and Full Frame 35mm sized image sensors have been integrated into only a few cameras models, such as in the release of high-end Canon cameras such as the EOS-1Ds and more affordable 5D models, plus a few washout releases by Kodak. Full-frame 35mm image sensors have many advantages, in particular that the majority of DSLR lenses are designed for that sensor size. All the benefits of selective focus and shallow depth of field can be fully exploited when paired with 35mm sensors, which are less pronounced when one uses a 35mm-designed lens on an APS-sized camera body. So far the benefits of larger imaging sensors have stayed in the plus of $2500-$3000 (at the low end). Even the recent release of the affordable ($3000 MSRP) 35mm full-frame camera by Nikon; the D700 is really only there for professionals and gear heads thirsty to drop money on a new trophy camera. The D700 competes directly with the Canon 5D, which originally brought full-frame capabilities to pros and advanced amateurs the world over for the lowly MSRP price of $3299. The release of the Canon 5D and Nikon D700 were significant, but for true innovation the market need competition.

Competition benefits the consumer, and Canon has been the Microsoft of the digital camera market, nearly fully dominating the 35mm full-frame digital segment since it started. There’s good reason for it; Canon does cameras, lenses, sensors, and software/firmware, all of which are key components needed to produce a successful digital camera. Canon has the means of developing all of these essential components in-house using one design strategy.

By comparison, every other DSLR company has been able to do maybe two of the above (at most), but without the last piece of the development puzzle it’s been difficult to match Canon, which generally means the ability to develop and manufacture the imaging sensor. Many companies, such as Nikon have relied on partner companies to design and manufacture the imaging sensors. So while Nikon, Pentax, Minolta, Leica and Olympus could design great cameras and lenses, they couldn’t build DSLRs without sensors from companies like Sony. Sony produces many of the imaging sensors used in current point-and-shoot as wells as DSLR cameras. But it wasn’t until Sony bought the camera technology from Minolta that they could start developing the Alpha DSLR System. The true strength of Canon has been its ability to develop, manufacture, and release DSLR models faster and with more precision than the competition. Even Nikon hasn’t kept up with the Canon camera release cycle and only released its first full-frame model a year ago in the form of the D3. Nikon is improving in this respect, but there is now another beast in the DSLR Jungle.


Enter an 800 Pound Gorilla…

Unlike every other camera company, Sony can actually match and beat Canon in the camera development game. Sony bought the camera and lens technology from Minolta, who got out of the camera business because it couldn’t develop and release cameras at the rate of competitors. Sony has partnered with Carl Zeiss, who now designs and oversees production of high-end lenses and markets the Zeiss ZA line for the Sony Alpha mount. And as a final piece in the puzzle, Sony can design and produce their own imaging sensors, which is something only Canon does at the moment (although Nikon has recently started down this road with the D3 and D700). Add to that the fact that Sony is huge, with distribution centers and marketing people in every corner of the globe, and it’s a sure bet that with an aggressive business strategy they’ll change the DSLR playing field. Why? Because Sony doesn’t enter markets just to release products, they’re a contender. Sony over turned the high-end video and camcorder markets, and they’re poised to do the same with DSLRs – with the new A900.

The soon to be released A900 from Sony could change the status quo of the DSLR world. The release of the A900 will mean that together with Canon and Nikon, there will be three major development and manufacturing entities producing and marketing DSLRs with full-framed 35mm image sensors to the general consumer market. The potential technology infusion and price reductions could be the first real signs of an end (or at a least plateau) to the DSLR evolution game. The 2007/08 DSLR offerings from Sony have been significant. The A700 was released in late 2007.  Essentially the upgrade to the Minolta 7D, which fans of the camera had been waiting for, which showed the world that Sony can design and manufacture a serious DSLR.  Sony has implemented excellent Live-View capabilities as well as vibration reduction technology into their camera bodies (like the Sony A350), at prices which make the Alpha system extremely attractive for camera buyers transitioning from point-and-shoot models to DSLRs.

Once one transitions from a Sony W300 point-and-shoot to an A200, A300, A350, or A700 DSLR; the energized customer will be thirsty for something…more. The A900 will be the ultimate fulfillment of that thirst (at least until the next model), and has the potential to establish Sony as a serious camera Brand – not a rebagged Minolta camera maker, not a me-too-jump-on-the-bandwagen DSLR distributer, but a full-time serious contender in the DSLR Jungle. The most important notion here is that a full-frame DSLR from Sony will have to have a price lower than that of Nikon and Canon to be competitive.  The A900 will have Sony Super SteadyShot (SSS) built into the body as well as a 24.6 Megapixel CMOS imaging sensor. According to Mark Weir (Sony Digital Imaging and Audio Division), the senior technology and marketing manager of the Alpha camera line, the 24.6 Megapixel sensor will achieve very low noise due to an intelligent A/D converter technique (as reported at PMA 2008 in a Calumet Photo interveiw).  This could be significant, since it is generally felt that sensor noise has to dramatically increase with high pixel density.  If the A900 retains it’s high resolution with low noise levels and is offered at a price point below that of the competitors, the A900 could be an excellent options for photographers needing medium format resolution in a 35mm sized body.  The next camera with such features is the Canon 1Ds-Mark III, which boasts 21 Megapixels and retails for nearly $8,000. 

The true profits for digital camera makers is not in the cameras but in the system. Sony lenses, memory cards, flashes, and other random add-ons is where the long-term profit strategy exists. The point is to get people into the Alpha System, because once you have a sweet 24 megapixel beast in your hand, you want to fully exploit its potential with a Carl Zeiss 24-70 f/2.8, Sony 80-200 f/2.8, or any of the variety of other lenses which are currently available – as well as those that will be released into the marketplace. Not to mention a vertical grip to make the camera look cool, as well as the flagship Sony FL-58 flash, which actually has one of the most innovative head designs of any other maker, and boasts excellent wireless control for additional flashes.

I’m looking forward to the Sony A900, and might actually buy one. The successful Canon 5D is now essentailly discontinued and can be had for less than $2000, but only until the successor is released (probably called the Canon 6D). Aside from the new Canon 5D replacement and the new offerings from Nikon (the just released D700 and soon to be here D3x), the Sony A900 should have the biggest impact on the DSLR market in 2009. It will affect camera prices, encourage (more like force) innovation, and no matter your favorite brand, the release of the A900 will have a positive impact on the DSLR Jungle.


Ricoh GR Digital – Climbing Review

Fuji GA645wi Ricoh GR DigitalOne reason I bought the Ricoh GR Digital (GRD) was to use as a climbing and mountaineering camera. What follows is a user review and my impressions of the GRD in the mountain environment.

I live in Switzerland and mountain trips are frequently on my schedule. A basic day trip involves an elevation gain (and equally large loss) of 800-1200 meters, and involves hiking, rock scrambling or sections of actual climbing. This means that any weight savings makes a difference in terms of how fast and how far I can go on any given trip. It also means that if I want to use a camera, I don’t always have the benefit of using two hands when taking a picture. Sometimes trips just need to be documented, a shot for the blog, or just to record the day. Other times I go with the intention of bringing back some good-looking, printable photos. My current list of cameras includes: Contax G1 (28,45,90mm lenses), Fuji GA645, GA645wi, Minolta 7D.

In general, none of these cameras have been ideal in the mountains, although the Fuji GA cameras come pretty close to being perfect for landscapes. The Contax G1/G2 is a good choice, but if I’m just documenting a trip, then I don’t need or want to go through the costs of processing 35mm film, and then taking the time to scan the images. Plus, while 35mm film can produce some very nice detail and colors, it leaves me wanting more for landscapes. The Fuji GA645 and GA645wi are my favorite film cameras for mountaineering, but (aside from the developing costs) they don’t have a close focusing distance, which only makes them good for landscape shots, and is not ideal for focusing on close objects. The Minolta 7D is great, but generally needs to be accessed from my backpack and can’t be comfortably held with one hand for shooting purposes. Plus, a 7D with lenses is not a light kit to carry into the hills.
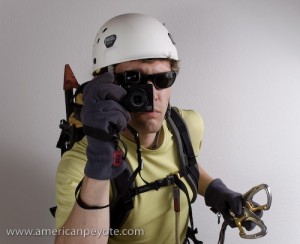
Climbing Ricoh GR Digital GRDFrom a certain perspective, the Ricoh GRD was seemingly made for mountaineers. The fixed 28mm and 21mm add-on lenses are ideal for landscapes and the camera is incredibly compact. In fact, it’s not a stretch to call the Ricoh GRD (and GRD-II) as well as the GX100/GX200 some of the most compact wide-angle cameras on the market. In addition, the GRD is incredibly light. The Contax G1/G2 is also a compact camera, but it isn’t really light from a pack-weight point of view.

My first mountain trip with the Ricoh GRD was up Mt. Fuji in Japan, where I also took my Fuji GA645wi. The Ricoh performed wonderfully, but since Mt. Fuji can’t really be considered more than a hike, it wasn’t until I got back to mountaineering in Switzerland that I could get a feeling for how the GRD performs in a mountain touring environment, which is the focus of this article.

To date, I’ve taken my GRD ice climbing, mountain touring in Graubünden, hiking up Säntis in the Alpstein, and climbing on a klettersteig in Braunwald. I plan on ascending some higher peaks and undertaking some longer tours soon and think the GRD will be up to snuff. There are a few main criteria I’ll be focusing on including how well the GRD can be operated while climbing, it’s attributes such as the LCD screen, and creating good exposures in the mountains.
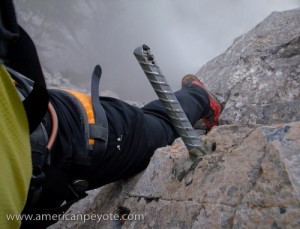
Braunwald Klettersteig Ricoh GRDOperation – One of the GRD’s strengths has always been customization and user control. I can hold the camera up to a scene, automatically see if the histogram looks good, and if not, two small clicks on the exposure compensation button and I know I can take a picture without blowing away the highlights. Similarly, the ISO, focusing mode, file type/size, shutter speed, and aperture can all be changed within a few seconds using one-handed operation. I can’t do that with any other camera I own without the risk of dropping the camera. While seemingly unimportant or at best a convenience for city use, when one hand is holding onto the mountainside, one-handed operation really does make the difference between possibly falling or getting the shot I want. With the GRD I can easily have my left hand secured on a handhold while operating the camera with my right hand.

Image Quality – As a small sensor camera, the Ricoh GR Digital obviously can’t compare with DSLRs or medium format film cameras for image quality. However, you don’t always need a perfect landscape image worthy of pixel-peeping. For trip documenting and small prints, the Ricoh GRD does pretty good. When the images are exposed correctly the contain a great deal of detail and you won’t have a problem creating large prints. Small sensor camera image quality degrades as ISO increases, however, in the mountain environment you generally have more than enough natural sunlight to create exposures with shutter speeds above 1/200 using ISO 64 (the base ISO of the GRD). Since these landscapes will nearly always be with a low ISO, noise won’t be much of an issue. I love the colors I get from GRD files and so long as the images aren’t over-exposed you’ll be pleased with the results.
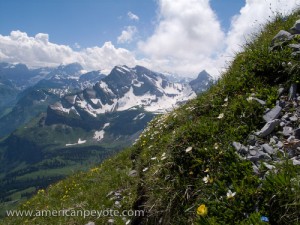
Braunwald Towards OrtstockRAW Write Time – This is by far the greatest drawback of the original GRD. When deciding to buy the GRD, one of the biggest draws was its ability to write RAW files at a time when pretty much every other pocket camera would only do jpeg. Depending on SD card type, the time to write a RAW file is about 9-12 seconds using the original GR Digital. Many users have produced reports detailing which cards write faster, but generally the difference is only a few seconds at best, and the three cards I have all write at different speeds. Depending on your shooting style, for landscape use the RAW write time is sort of irrelevant. With the exception of creating multiple images for stitched panoramas, I haven’t found the long write time to be a significant problem for landscape images. On the other hand, when you’re moving fast over a mountain landscape and trying to document the climb, I would no doubt love the improved RAW write time of the GX100/GX200 and GRD-II, which from what I read are on the order of 4-5 seconds.

Battery Life – At least with the GRD (not considering the GRD-II as I haven’t used one) the battery life and performance could be better. I find that I’m always getting low by the end of a climb, and although I always carry a second battery, this is one area that I would like to see improvement in. For multi-day trips nothing sucks more than running out of juice, which is one reason I still love my Fuji GA and other film cameras, as I’ve never had a similar battery problem. Cold also seems to be an issue, and hampered by ability to use the GRD while ice climbing during December.

LCD Screen – The LCD screen on the GRD leaves much to be desired in the mountain environment. It just sucks in bright sunlight, and is only good for framing the subject. I do have the external viewfinder, and I’m glad I bought it, but don’t use it very much in the mountains. Since the live histogram is available (and easy to see in sunlight), I’m of the opinion that having a perfect image on the LCD screen isn’t really a big deal. More exact framing can be accomplished with the aid of the external viewfinder. Here’s the thing, If you can monitor the histogram, you know if the highlights will be blown and can adjust the exposure as you like. It doesn’t really matter if you have a bright, perfectly defined image when framing a shot. Often times upon review, the images on the GRD LCD screen look extremely dark in bright sun, but when reviewed later indoors, the images are perfect. As long as you base your exposure on the live histogram, the quality of the image on the LCD is somewhat unimportant. The lack of a live histogram display is one big reason I’ve decided not to buy the Sigma DP-1. The live histogram is invaluable in producing well-exposed images the first time, and eliminates the need to reshoot a scene. It’s one of the things I love about digital cameras to start with, and the primary reason I want live-view in the next DSLR I buy (probably the Sony A900). As the DP-1 lacks this seemingly basic function, I’d rather take a Fuji GA rangefinder on a climb.

Edelweiss in Braunwald Ricoh GRDMacro Focusing – This is where the GRD really beats all my other cameras and is one big reason why I love climbing with it. You can get as close as 1cm from your subject to create sharp macro images of anything on a tour whenever you feel inspired. You might just think this is great for flower shots – and it is, but what I love is creating wide-angle macro shots during climbing for point-of-view (POV) images. I love getting the Ricoh close to my equipment or looking out over rock edges and creating unique shots that I haven’t seen before. The only way to get similar images with my current equipment is using my Minolta 7 film camera with the Sigma 20mm lens (very close focusing ability), which also is rather large, heavy, and also produces images with just a bit more distortion than I would like. Plus, with the Sigma 20mm you have a much shallower depth of field and a lot of Bokeh (diffused image areas), which isn’t a bad thing, but at the moment for climbing, I like close-up images with a good deal of sharpness across the image. With the small sensor of the GRD, you get really deep depth of field, and combined with the 28mm lens and one-handed operation, this means the ability to take crisp images that are more or less unobtainable with other camera systems.

Compact Size – This is one of the main requirements for a mountaineering camera, it needs as small and light as possible. The GRD is great because I can put it in a case and clip it to the chest strap on my backpack. This keeps it away from my carabiners or quick-draws, and is accessible whenever I want to shoot. It also means it won’t interfere with my climbing movements.

Wide Angle Lens – The lens on the GR Digital is very good, as has been reported elsewhere. I have the 21mm add-on lens, which supplements the fixed 28mm lens. The wide angle still sets the Ricoh apart from other compact cameras. Even the top of the line Canon G9 only has about a 37mm (in 35mm terms) lens, which is not ideal for landscapes. Distortion is very low and the lens will render a sharp image across its entire frame. For mountain landscapes, and in particular for climbing, the wide angle lenses on the GRD are unique and much more useful than those of competing cameras. Using the wide lens of the GRD I’ve been able to obtain shots in the mountains that would not have been possible otherwise.
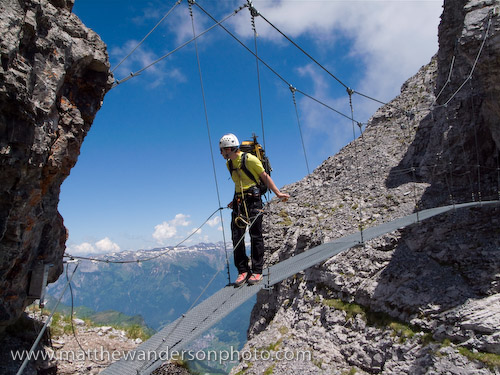
Braunwald Klettersteig Bridge

So, Why Do I Take My Ricoh GRD Mountaineering?

Great image quality
Unique macro image ability
Low weight
One-hand operation
Live histogram display

What Needs Improvement?

Battery life
RAW write time
LCD screen performance
Image stabilization would be nice

The strengths far outweigh the drawbacks of the GRD. It remains a high quality, extremely packable digital camera. If you’re in the market for a climbing and mountaineering camera, I highly recommend one of the Ricoh designs, including the GR Digital, GRD2, GX100, and GX200. In addition to using the GRD as a traditional landscape and portrait tool, it also works well for off-camera lighting, and I plan to do more trips packing the GR Digital with a small strobe flash and radio triggers.

Further Reading:

Ricoh GRD Articles

Hiking Mt. Fuji with the GRD

Fuji GA Camera Articles
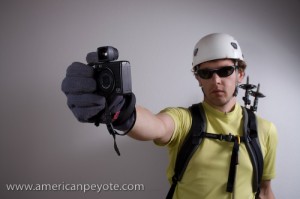
Ricoh GR Digital Mountianeering

Fantastic Magazines for Photographers

If you find anything about concept or design in a photography magazine, it’ll most likely be a puff piece about digital workflow or boring model shoots. I don’t need to read about what a softbox is or how putting my flash off my camera will enable better light control. What I’m interested in is advancing and expanding my ability to visualize and create cool-looking photographs. That’s why I’ve compiled a review of the best magazines (as I see it) to read if you’re interested in pushing your photo-making creativity abilities and improve your image-making capabilities.

The Background

What’s Photography without Design? If you go through the trouble of picking out the lens, capture medium, lighting, wardrobe and makeup, are you a designer or a photographer, or the art directory? If you’re trying to improve your photography, does it make sense to read meaningless photo publications with over-written gear reviews, or should you pick up fashion and design magazines instead? Photography magazines are often touted as places to learn about image capture and advancing your in your ability as a photographer – and they generally are if you don’t do much more than take generic pictures of sunsets and cats, but why be mediocre?

When I thumb through magazine racks, the photography-specific magazines are usually filled with little more than the latest meaningless gear reviews and photoshop tips, or the rare technique tutorial. Too often images in photography publications are generally boring and uninspiring because they serve no purpose but being content for selling a magazine which explains how to take generic photos.

The best way to get inspired and expand your conceptual mind is to learn about stuff aside from the easiest art form ever created (digital photography). To do this, I recommend reading a seemingly random combination of design, fashion, and commercial photography publications.

Archive

I always feel weird about buying Archive because it’s really just a giant collection of the best commercial images. So, I’m basically paying good money to look at advertisements. Ahhhh, but high quality ads are more than just good visual input for the brain. Archive shows you the trends and visual markers, which are driving advertising dollars. If nothing else, it’s probably the best place to go if you want exposure to the latest fresh ideas. You don’t have to be into commercial photography to enjoy Archive, because at this level the ads are art and it’s packaged in a form you won’t find anywhere else. One issue is on the order of $15, but it’s not something you buy every month.

Paper

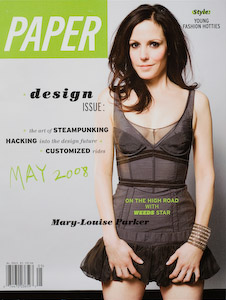
I used to think design was just an abstract marketing tool for high-end Swedish furniture companies and million dollar ad agencies. The cool thing about Paper is that it’s basically easy-to-digest design for non-art people. By reading Paper you get exposed to design concepts in different areas; from high-end art to the coffee maker on your desk, and it’s done in a very unpretentious, inspiring way. A lot of the written content will seem more like a pop-culture magazine, but it’s one of my favorite reads because it really shows you the artistic, design, and style elements in every day life.

CITY

The Destination for Style CITY is a magazine somewhere in between high-end fashion and practically unobtainable design. Some highlights from the iSPY 2008 Design Issue (#56) covers product design in Tokyo, the internal design of a Volkswagen factory, and a photo spread shot by Vincent Skeltis (styled by Julie Ragolia). CITY is great because it gives the reader a wide range of high-end design and style input.

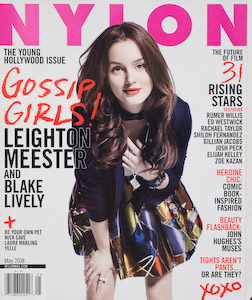
Nylon

The more photography and portraits I make, the more I realize how little I know about fashion and current trends. It’s not like I want to copy every new fashion trend I see, but I like being exposed to new things. Nylon is a great publication because it has a certain street edginess and gives you all the latest fashion trends and insights without reading like an uppity advertisement-filled tome like Cosmo or In Style. Once you learn to translate a certain fashion style to your own work, you basically open up a whole new set of tools for visually communicating your concepts.

Metro.Pop

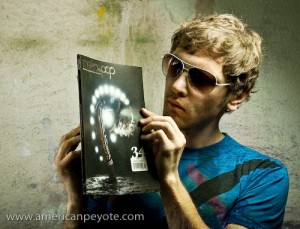
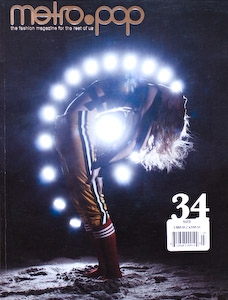
“A fashion magazine for the rest of us.” Most of the time when you pick up a fashion magazine it’s like 60 percent advertisements, 30 percent boring articles, and the actual fashion content in terms of photography and style can sometimes be very small. That’s why Metro Pop rocks, it’s basically a well-done fashion mag where the total focus is on presenting daring fashion images. Every time I pick up a copy of Glamour, the images are all easy, boring (from my viewpoint) well-lit glamour images. Conversely, the content in Metro Pop is sometimes out of focus, maybe a tad blurred, and the lighting will mostly be non-standard and definitely not flat. Read Metro Pop to get a feeling for how bad your fashion images suck.

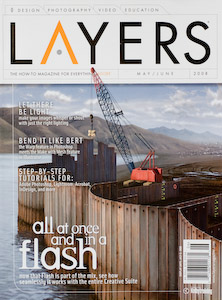
Layers Magazine

No progressive list of magazines for photography in the modern day and age is complete without the inclusion of Layers Magazine; the place to learn about all things Adobe. In the mixed-media world into which photography is heading, the image will just be part of the larger story. Layers gives you a feeling for how vast the possibilities are for producing visual content using Photoshop, Flash, Illustrator, InDesign, and any other Adobe product. Photography is often included in one form or another, either in Photoshop articles or in articles like the recent inclusion of a piece by Joe McNally, detailing the use of different modifiers in camera lighting.

What Does It All Mean?

Look, there’s not really anything wrong with reading magazines like Popular Photography, but pretty much all important parts of the content can be found online, so why pay for the hardcopy? Ahhh, yes, they publish all of those cool camera reports. So what, Your Camera Doesn’t Matter, well, at least not as much as most marketing people want you to think it does. For those learning photography, the difference between all DSLRs is pretty much nothing, so use the time and money you would have wasted on dissecting the differences between the Canon 5D and the Nikon D700 and produce some images or get inspired.

In its essence, a photo is just a capsule of concepts and elements of communication. I never buy photography-based magazines because they generally don’t contain engaging imagery or feed my creative mind. Instead, I’ve stared reading design, fashion and commercial photography publications to feed my need for visual exploration. The act of image making is the same as ever before, a lens focuses light on an image capture medium and the exposure is controlled by the shutter and lens aperture. That’s all photography is.

You can get all the near-meaningless (for most photographers) technical gear reviews and puff pieces about taking generic photos on the web, so why pay for the same lame content in magazine form? I love strong content, it drives my imagination, and I love seeing engaging imagery, (not limited to engaging photos).

If you want to push yourself and get exposed to new ideas move beyond the old photography publications, which have become largely redundant in the digital age. Get crazy and expose yourself to new ideas and be daring – otherwise, what’s the point in getting out of bed every morning?

Big Three Camera Blood Bath

Rejoice all the digital junkies of the world, for the Gods have again bestowed upon mortals trinkets and tools to again usher in a new era of digital photographic expression.

These quick and dim-witted camera update articles are some of the more difficult and revolting for photography fanatics to write. But THEY’RE NECESSARY. If I don’t post a fast word-for-word copy of the Nikon D700 press release, I’ll loose all credibility as a respectable hack internet camera writer. It’s the tools you see, not the photography technique which makes great images, and if I don’t tell people to go out and buy a D700, the quality of images world-wide will plummet like a man with wax wings flying towards the sun.

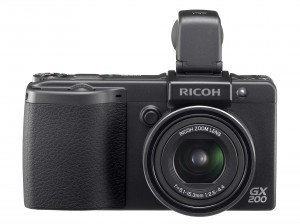
New from Ricoh, the GX200 was announced as a logical update to the fantastic GX100, one of the best compact digital cameras available. The GX200 sports a 12 megapixel sensor, and keeps the fantastic 24-72 mm zoom lens and electronic viewfinder – still in a class all it’s own without any competitors. the RAW write time will be a little bit better and the engineer-Gods at Ricoh promise an improvement in the signal-to-noise ratio. As a good priest to the Gods I can tell, nay, interpret this for you mortals…

The GX200 is better than the GX100, but basically the update is needed for Ricoh to remain competitive in a field of cameras where after 1 year on the shelf nearly every camera becomes obsolete as compared with the competition.

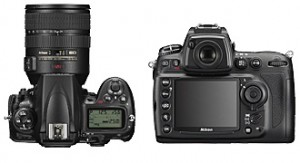
Ahhhh, and Nikon has finally done what Canon did two years ago with the 5D, and with the release of the D700 Nikon now offers a camera with a full 35 mm sized sensor and a price mark of $3000. In addition there’s an updated SB-900, with more power and added benefits for the Nikon flash fetishist (reference strobist).

Photo by Nikon

But what comes next? Gods have the power to bestow life as well as death…what happens when the Digital Gods become angry? No chance, digital junkies across the world are waiting for the fire storm of camera goodness sure to come at Photokina 2008, when Sony will for sure be unveiling and launching the A900 flagship camera, full-framed 35mm and 24 megapixels, the A900 will be competing against the Nikon D700 and Canon 5D-II (or whatever they call it) for market share in the bloodiest digital camera free-for-all since Canon battled Nikon in the pro-journalist and sport-shooter markets in the 1980’s and 90’s.

The end is near, make sure you buy the best glass and camera to capture it…

Sony flagship from PMA2008

LOVE LIFE STOP AIDS on Mars

Interpreting the world around you and understanding the small graphic design and photography aspects of ad campaigns can be very useful for any aspiring photographer. Open your eyes when you walk down the street, and take in advertisements you’re exposed to. By thinking about their message and how well the advertisers present their visual message, you can begin gaining insight into how the visual medium can be used to communicate different messages and concepts. In particular, lookout for the overdone cliche messages and sex-sells overtones which seem to permeate ad campaigns the world over.

After four years in Switzerland, I’m still generally at a loss when it comes to interpreting advertisements and billboard messages. Understanding these things is essential to becoming at least somewhat integrated in any society. How advertisers communicate with the public gives great insight into the mind set of a people.

One of the more peculiar ad campaigns in Switzerland, and particularly around Zurich is the LOVE LIFE STOP AIDS campaign to bring exposure to the idea of having only protected sex, and thereby reduce the spread of the most notorious sexually transmitted disease in modern history, the HIV/AIDS virus.

A primary visual communication tools for LOVE LIFE STOP AIDS is billboards; on street corners, at train stations, wherever people might glance and have their attention diverted to the idea of stopping the spread of HIV/AIDS. As with any advertisement, it’s the way in which the viewer’s attention is diverted which makes the LOVE LIFE STOP AIDS campaign stand out.

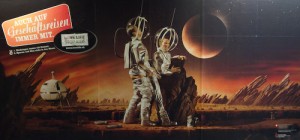
Each billboard involves two people having sex – somewhere. Attached is the message: LOVE LIFE STOP AIDS and promotes safe sex in Switzerland. The real attention grabber is the location. For some unrelated reason, the sex acts take place in unique locations: under water, in caves, in the jungle and…on Mars, yes, the planet – not the candy bar.

LOVE LIFE STOP AIDS on Mars

Now, there are various ways of interpreting this ad, obviously the message has to do with sex, seemingly of a homosexual nature, and the dull witted observer might suppose the idea is to have unprotected sex on Mars to stop AIDS – unprotected in the sense that Mars has no atmosphere, and if you open your space suit to engage in intercourse, the pressure difference will no doubt force your eyeballs out of their sockets; thus leaving the love-struck stud gasping for air like Arnold in Total Recall after he’s ejected onto the arid martian surface.

LOVE LIFE STOP AIDS on Mars

Poorly translated, the written part of the ad basically says, “Always with, also on the business trip” and no doubt encourages people to take condoms with them wherever they are going. Because, obviously if you’re going to Mars it’s going to be for business, as commercial tourist flights are not currently flying to that planet – and if you happen to have sex on the surface of the planet, using a condom is far more important than ensuring your space suit is properly sealed against the Martian atmosphere.

On some level the LOVE LIFE STOP AIDS message is communicated well using the gay-sex-on-Mars analogy. Now, it’s obvious that sex on Mars won’t stop AIDS, and that opening your space suit on the Martian surface will mean certain death. So in some sense the space suit could be analogous to using condoms during sex, implying that simply that engaging in unprotected sex in a dangerous environment will dramatically increase the possibility of contracting the HIV virus. Most likely the aim is that the shock value of displaying a somewhat graphic depiction of homosexual intercourse on the street will shock people and lock a visual marker in their brain, connecting condoms and AIDS prevention.

A thorough description of the 2008 LOVE LIFE STOP AIDS campaign can be found on the official Swiss Federal Office of Public Health (FOPH) website. It includes TV spots, printed ads, and a pretty cool flash-based webpage (check-your-lovelife.ch), which shows that some serious design thought and photography was put into the LOVE LIFE STOP AIDS message.

Sweet Flickr-Blog Integration

Creating and marketing fabulous pictures on Flickr is more or less the same as producing any fabulous web content. If you produce unique things that people want to look at, then more people will look at your stuff. For Flickr this means producing interesting photographs or engaging images.

Generally, internet users are looking for content which holds value for them. This might be interesting news stories, connecting with friends, getting video/audio entertainment, or just learning about random things. In Search Engine Optimization philosophies, internet pages are designed so that the content, webpage titles, and metadata are all related to one another. So when Google looks at your page about the Ricoh GR Digital, it believes this page will be important for people who are Googling “Ricoh GRD” and as a result many people might find your content via Google.

Flickr operates in a similar manner. You produce photographic content, give it a cool title, add tags to accurately describe it, post it to relevant Flickr groups, and people will find it in Flickr, or via search engine queries (Google, Yahoo, etc.). Additionally, Flickr assigns it interestingness and based on that figure your images can get a ton of exposure on the Flickr Explore page.

Flickr coined (and patented) the term Interestingness as a way of ranking photos. Interestingness has been written about extensively and for good or bad is one of the main factors in determining exposure. Basically it’s the measure by which your photos might be viewed by thousands or only a few. Like all web content, Flickr images don’t have to be “good” in the technical sense, they just have to be…well, interesting.

My Flickr photos are generally not interesting, and instead I just set about producing images that I like and which I find interesting. If you set about trying to crack the Interestingness formula and produce images specifically for their Interestingness value, you’ll just end up diluting your own style. It’s the same reason I don’t write blog posts about WordPress plugins (a popular topic for any search engine).

If I wrote content souly based on how popular the content might be, I’d just be writing the same stuff a thousand other people on the net write about. I choose to be uninteresting and boring and rebel against the idea that blog posts have to be short and near useless updates to generate keywords for Google to follow. However, if you are into the marketing of you creative images and blog content, combining Flickr and blog postings is really a powerful technique.

Flickr and blogs were seemingly made for one another other. There are two things I have a real problem separating in life, writing and photography. With Flickr and blogging, I don’t have to. When I write blog posts they often include some sort of visual content, generally images from photo shoots I’ve done. It just makes sense to attract viewers to my written content using visual images posted on Flickr. Combining Flickr and blogs is painfully easy, and is a powerful tool for satisfying the content desires of readers and image seekers.

Why should you host blog images on Flickr instead of just uploading everything in WordPress or whatever blog platform you use? Because the integration of blog postings with Flickr posts can be very powerful, because by combining the two, you’re essentially expanding and combining two audiences, those looking for written and those looking for visual content.

The Basic Idea:

When people read your webpage and see an interesting image, they should be able to click on that image and be directed to the image hosted on Flickr. Conversely, when people see your cool images on Flickr they should be able to click on the link to your website (which you included in the Flickr description). Then, when people search for things on Google/Yahoo both your Flickr images (via Flickr keywords and tags) and web content will be indexed, and hence the two will increase the exposure of your digital content on the web via search engine listings.

Is Flickr-Blog Integraion Effective?

If you have a Flickr Pro account and a Google Analytics account, you can directly track how many people are referred to specific posts from Flickr, and how many people are going from your blog to your Flickr account. This helps in figuring out who is interested in your images and how that translates into more visitors to your site. This, of course, gives the keen digital content author the ability to optimize written and visual content for their visitors. I mean, if no one wants to read about how I use my Ricoh GR Digital camera, why should I write stuff about it? As it turns out, the written and visual content pertaining to my Ricoh GRD camera is some of the most popular on my blog and on my Flickr account.

The most popular posts on An American Peyote Scribble are related to Joey Lawrence, the Ricoh GR Digital and the Fuji GA645 cameras. Continuous hits come each day from Google and Flickr to these topics. And…often times the most viewed images on my Flickr account just happen to be images relating to those posts.

JoeyL Tutorial After

I originally started integrating my Flickr and blog content due to David Hobby at Strobist, who has pretty good Flickr-Blogger integration. Generally he generates interest in new blog content by first posting the images he’ll be using to his Flickr account. This generates initial interest for the forthcoming blog post, and gets die-hard Strobist readers on Flickr ready for his next blog post. Then he’ll post the the written content to his blog.

But Who Cares?

There’s no real long-lasting substitute for quality content. You can integrate your blog and Flickr accounts all you like, but if you don’t post high-quality (or interesting) images to Flickr no one will be interested and motivated to follow the link to your website. If you write about boring generic stuff on your blog, no one is going to care about clicking on your photo and heading to your Flickr account because they won’t care about the story behind your images.

Integrating Flickr and blog postings won’t in and of itself bring more people to your site, but by integrating the two together you can create a method whereby your visual and written content both are getting exposure and relating back to one another

I’ll still continue writing about what I want to write about, the stuff I find interesting. But it’s nice to have method for delivering this content to people who actually want to read it.

Rancor Courts Barbie

Zoom H4 – Sweet Photo-Audio Fusion

I’m a tech fiend, not from a mad-capped desire to own every little gizmo I see, but rather from the philosophy to collect the tools needed to create whatever creative thing I imagine – or am driven to explore. I’ve been running through film and digital raw files for a many years now – landscape, cityscape, portrait, studio and location lighting, it’s all up there in my head. Creative vision and work flow? It’s all good – but there’s always a way to expand and take things to the next level.

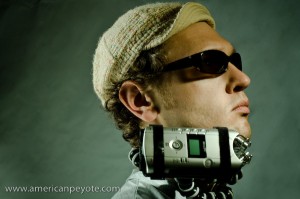
Gorilla Pod neck-mounting of the Zoom H4

Photography only excites the visual areas, but some concepts require – or at least are greatly enhanced by communicating audio elements as well. I love the concept of getting into video, but it’s also another medium to master and a fortune of gadgets to collect. Plus, I love using just one or a series of high-quality images to communicate a concept. Must photography become video in the form of a super video device like the Red One Scarlet? If the story can be told with one high quality image, why use video? Well, I often imagine concepts as videos in my head, combining audio and imagery in one to convie an experience to the viewer. So how can I use current photographic techniques and add elements of audio excitation?

Often I walk dark city streets and bad poetry fills my mind. An image of that dark street doesn’t communicate the poetry I’d like to rap to the viewer. And if you add text, like in a blog, the tone and depth of the voice is lost. Bacially, photography only gets you so far, and the idea of integrating audio with photography has been sticking in my head for a while. But how to do it? How do you collect high-quality audio to effectively complement the visual? With another high-priced gadget, in this case, a studio quality digial audio recorder like the Zoom H4.

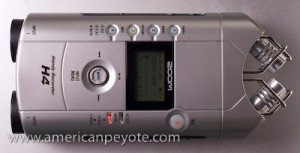
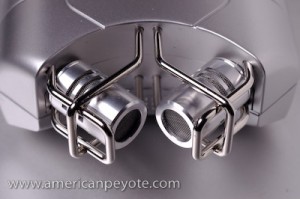
The Zoom H4 is a handheld studio quality digital audio recorder. After a not so intensive research look into the different digital audio devices on the market, the Zoom H4 was an easy pick, as it comes with a high-quality microphone and a reasonable pirce tag. There are various extremely well-written reviews of the H4, but the one you are currently reading comes from a film/digital photographer who needed a device to mix well with his other digital capture and expression devices (expensive toys).

I’m not what you would call “knowledgeable” about audio gathering. Bascially I wanted something like the Ricoh GR Digital camera; high quality media capture in a hand-held package. My desires for the H4 were pretty simple: the ability to quickly choose between uncompressed WAV for high quality sound gathering, or mp3 for lower quality when desired. Analogous to choosing .tiff or .jpeg as a digital camera analogy.

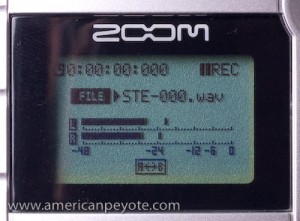
The Zoom H4 is crazy easy to operate, there are a few buttons to control microphone gain, file type, and recording. On the left side of the Zoom you choose between mp3, or various uncompressed WAV file sizes. Push the big record button once and it starts flashing, with the headphones on you can hear in real-time how the audio sounds. On the display you can see if the sound levels are being read well. If they’re too low, you just increase the microphone gain (low-medium-high).

This allows you to boost the microphone sensitivity higher or lower (like changing camera exposure) as needed to optimize the recording quality. You know if you need to or not because the input levels are displayed (similar to a histogram in digital cameras), which gives you an idea of which gain sensitivity (low-medium-high) to use.

In general you want the audio input levels to be as high as possible without exceeding the range of the microphone. This is akin to pushing the exposure on your digital camera as far as possible without clipping the highlights (exceeding the exposure limit of your camera). Press the record button a second time and you start recording. Press it a third time and the recording stops and the file is saved. You can easily navigate the recorded files and play them back, delete them, format the card, etc.

The Zoom H4 looks like a taser, but feels more like a Star Trek tricorder. For collecting ambient street and bar music you only have to be sure the microphones are protected from the wind or not bumped/touched during recording. It’s somewhat directional, something akin to using a 28mm wide angle lens on a 35mm camera. Just point in the direction of your audio subject and start recording.

There are a number of more advanced features which I’m not qualified to get into. With the XLR inputs you can hook up fancy microphones and record multiple tracks to use the H4 as a pocketable studio, or record directly to a computer via the USB connection. No doubt this is crazy useful for journalists, podcasters, and people who are really into the home studio thing, but I’m into the high-end hobby photography thing, and recording directly to the solid state SD card is what I bought H4 for.

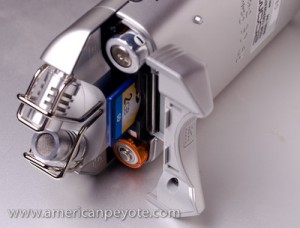
Recording in uncompressed WAV format can eat up a lot of memory if you’re recording speeches or are out for the whole night doing street poetry. Like with a digital camera, the audio files are easily downloaded to a portable drive like the Hyperdrive Space. For basic recording, a couple of 2GB SD cards will serve your recording needs well. The H4 takes AA batteries, and will last for a couple hours of actual recording time before dying, this and the fact that the SD card is actaully incoviently difficult to access are the only real drawbacks I’ve found so far.

Zoom H4 I

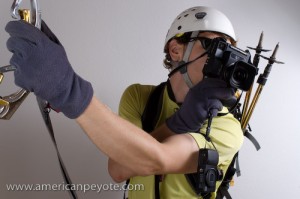
Those of us who got interested in the concept of Gonzo reporting by watching Johnny Depp in Fear and Loathing in Las Vegas walk around a bombed out hotel room with a microphone taped to his head will appreciate the flexiblity of mounting the Zoom. For a throat-to-the-wall night of fast moving action and high qualitiy auido gathering, the H4 can be mounted to a Gorilla Pod and wrapped around the neck of the reporter. If Hunter S. Thompson were just starting out in 2008, I could imagine him picking up a Zoom H4 to do his work. The Gorialla-Pod-around-the-neck mounting system allows hands free continuous recording of events after the record button has been pushed. It can also be easliy mounted to the forearm and the Freak reporter can then run around all night pointing the Zoom H4 at people like a dropout from the X-men school of Gonzo reporting.

Zoom H4 IIZoom H4 III

I imagine I’ll move towards video at some point. But here’s my rational: I love having a high quality image which invokes emotion or tells a story. Doing video just because you can won’t necessarily create a better story telling style. I just feel limited in that many times the environment/subject is not just a still life, but a combination of audio and visual elements. Yes, many point-and-shoot cameras do video and audio recording, but we all know the output is not high quality. The ability to record studio quality audio right along with high quality images is a very powerful combination. Now the challenge is to elegantly combine the photography and audio in one media package. If you combine great photography with cheesy audio you’re just going to turn people off because it will come across as a gimmick. One needs to take the “eye” for creativity from photography and find the creative “ear” for audio recording.

No review is complete without output, so here is a sample from the Zoom H4, of some bad street poetry put together on a warm summer night in New Orleans, somewhere near Burboun Street. The wedding I had just attended was over, but I had no desire for sleep and instead walked through the city collecting ambient sounds and spewing lines into the open air for the H4 to record. It’s not my best work, and is highly reminiscent of my worst photography work, ill-thought-out and laking in focus or direction. The coming challenges include developing a mixed-media workflow to elegantly combine visual and mixed-down audio into one package.

But for now, there’s just this short piece of Bad New Orleans Street Poetry, a combination of spoken word and ambient sounds.

[audio:http://blog.americanpeyote.com/wp-content/uploads/new-orleans-street-mp3.mp3]

What comes next? I don’t know for sure, but if I wanted to describe the Zukunft in an unoriginal and overdone way I’d say, “the Future looks and sounds fantastic.”

Other reviews of the Zoom H4

Mark Nelson at O’Reilly.com

Jeff Towne at transom.org