Mark

Mark is a guy from Michigan who lives in Switzerland. He's a photographer, occasional writer and trained research engineer. His free time is sometimes monopolized by mountain touring or travels. On occasion he attends and presents at BarCamps and blogging events.

Sweet Flickr-Blog Integration

Creating and marketing fabulous pictures on Flickr is more or less the same as producing any fabulous web content. If you produce unique things that people want to look at, then more people will look at your stuff. For Flickr this means producing interesting photographs or engaging images.

Generally, internet users are looking for content which holds value for them. This might be interesting news stories, connecting with friends, getting video/audio entertainment, or just learning about random things. In Search Engine Optimization philosophies, internet pages are designed so that the content, webpage titles, and metadata are all related to one another. So when Google looks at your page about the Ricoh GR Digital, it believes this page will be important for people who are Googling “Ricoh GRD” and as a result many people might find your content via Google.

Flickr operates in a similar manner. You produce photographic content, give it a cool title, add tags to accurately describe it, post it to relevant Flickr groups, and people will find it in Flickr, or via search engine queries (Google, Yahoo, etc.). Additionally, Flickr assigns it interestingness and based on that figure your images can get a ton of exposure on the Flickr Explore page.

Flickr coined (and patented) the term Interestingness as a way of ranking photos. Interestingness has been written about extensively and for good or bad is one of the main factors in determining exposure. Basically it’s the measure by which your photos might be viewed by thousands or only a few. Like all web content, Flickr images don’t have to be “good” in the technical sense, they just have to be…well, interesting.

My Flickr photos are generally not interesting, and instead I just set about producing images that I like and which I find interesting. If you set about trying to crack the Interestingness formula and produce images specifically for their Interestingness value, you’ll just end up diluting your own style. It’s the same reason I don’t write blog posts about WordPress plugins (a popular topic for any search engine).

If I wrote content souly based on how popular the content might be, I’d just be writing the same stuff a thousand other people on the net write about. I choose to be uninteresting and boring and rebel against the idea that blog posts have to be short and near useless updates to generate keywords for Google to follow. However, if you are into the marketing of you creative images and blog content, combining Flickr and blog postings is really a powerful technique.

Flickr and blogs were seemingly made for one another other. There are two things I have a real problem separating in life, writing and photography. With Flickr and blogging, I don’t have to. When I write blog posts they often include some sort of visual content, generally images from photo shoots I’ve done. It just makes sense to attract viewers to my written content using visual images posted on Flickr. Combining Flickr and blogs is painfully easy, and is a powerful tool for satisfying the content desires of readers and image seekers.

Why should you host blog images on Flickr instead of just uploading everything in WordPress or whatever blog platform you use? Because the integration of blog postings with Flickr posts can be very powerful, because by combining the two, you’re essentially expanding and combining two audiences, those looking for written and those looking for visual content.

The Basic Idea:

When people read your webpage and see an interesting image, they should be able to click on that image and be directed to the image hosted on Flickr. Conversely, when people see your cool images on Flickr they should be able to click on the link to your website (which you included in the Flickr description). Then, when people search for things on Google/Yahoo both your Flickr images (via Flickr keywords and tags) and web content will be indexed, and hence the two will increase the exposure of your digital content on the web via search engine listings.

Is Flickr-Blog Integraion Effective?

If you have a Flickr Pro account and a Google Analytics account, you can directly track how many people are referred to specific posts from Flickr, and how many people are going from your blog to your Flickr account. This helps in figuring out who is interested in your images and how that translates into more visitors to your site. This, of course, gives the keen digital content author the ability to optimize written and visual content for their visitors. I mean, if no one wants to read about how I use my Ricoh GR Digital camera, why should I write stuff about it? As it turns out, the written and visual content pertaining to my Ricoh GRD camera is some of the most popular on my blog and on my Flickr account.

The most popular posts on An American Peyote Scribble are related to Joey Lawrence, the Ricoh GR Digital and the Fuji GA645 cameras. Continuous hits come each day from Google and Flickr to these topics. And…often times the most viewed images on my Flickr account just happen to be images relating to those posts.

JoeyL Tutorial After

I originally started integrating my Flickr and blog content due to David Hobby at Strobist, who has pretty good Flickr-Blogger integration. Generally he generates interest in new blog content by first posting the images he’ll be using to his Flickr account. This generates initial interest for the forthcoming blog post, and gets die-hard Strobist readers on Flickr ready for his next blog post. Then he’ll post the the written content to his blog.

But Who Cares?

There’s no real long-lasting substitute for quality content. You can integrate your blog and Flickr accounts all you like, but if you don’t post high-quality (or interesting) images to Flickr no one will be interested and motivated to follow the link to your website. If you write about boring generic stuff on your blog, no one is going to care about clicking on your photo and heading to your Flickr account because they won’t care about the story behind your images.

Integrating Flickr and blog postings won’t in and of itself bring more people to your site, but by integrating the two together you can create a method whereby your visual and written content both are getting exposure and relating back to one another

I’ll still continue writing about what I want to write about, the stuff I find interesting. But it’s nice to have method for delivering this content to people who actually want to read it.


Rancor Courts Barbie

Zoom H4 – Sweet Photo-Audio Fusion

I’m a tech fiend, not from a mad-capped desire to own every little gizmo I see, but rather from the philosophy to collect the tools needed to create whatever creative thing I imagine – or am driven to explore. I’ve been running through film and digital raw files for a many years now – landscape, cityscape, portrait, studio and location lighting, it’s all up there in my head. Creative vision and work flow? It’s all good – but there’s always a way to expand and take things to the next level.

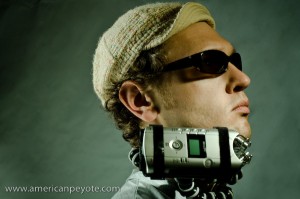
Gorilla Pod neck-mounting of the Zoom H4

Photography only excites the visual areas, but some concepts require – or at least are greatly enhanced by communicating audio elements as well. I love the concept of getting into video, but it’s also another medium to master and a fortune of gadgets to collect. Plus, I love using just one or a series of high-quality images to communicate a concept. Must photography become video in the form of a super video device like the Red One Scarlet? If the story can be told with one high quality image, why use video? Well, I often imagine concepts as videos in my head, combining audio and imagery in one to convie an experience to the viewer. So how can I use current photographic techniques and add elements of audio excitation?

Often I walk dark city streets and bad poetry fills my mind. An image of that dark street doesn’t communicate the poetry I’d like to rap to the viewer. And if you add text, like in a blog, the tone and depth of the voice is lost. Bacially, photography only gets you so far, and the idea of integrating audio with photography has been sticking in my head for a while. But how to do it? How do you collect high-quality audio to effectively complement the visual? With another high-priced gadget, in this case, a studio quality digial audio recorder like the Zoom H4.

The Zoom H4 is a handheld studio quality digital audio recorder. After a not so intensive research look into the different digital audio devices on the market, the Zoom H4 was an easy pick, as it comes with a high-quality microphone and a reasonable pirce tag. There are various extremely well-written reviews of the H4, but the one you are currently reading comes from a film/digital photographer who needed a device to mix well with his other digital capture and expression devices (expensive toys).

I’m not what you would call “knowledgeable” about audio gathering. Bascially I wanted something like the Ricoh GR Digital camera; high quality media capture in a hand-held package. My desires for the H4 were pretty simple: the ability to quickly choose between uncompressed WAV for high quality sound gathering, or mp3 for lower quality when desired. Analogous to choosing .tiff or .jpeg as a digital camera analogy.

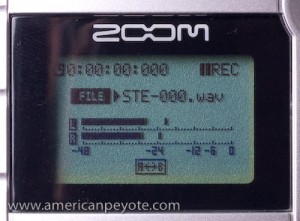
The Zoom H4 is crazy easy to operate, there are a few buttons to control microphone gain, file type, and recording. On the left side of the Zoom you choose between mp3, or various uncompressed WAV file sizes. Push the big record button once and it starts flashing, with the headphones on you can hear in real-time how the audio sounds. On the display you can see if the sound levels are being read well. If they’re too low, you just increase the microphone gain (low-medium-high).

This allows you to boost the microphone sensitivity higher or lower (like changing camera exposure) as needed to optimize the recording quality. You know if you need to or not because the input levels are displayed (similar to a histogram in digital cameras), which gives you an idea of which gain sensitivity (low-medium-high) to use.

In general you want the audio input levels to be as high as possible without exceeding the range of the microphone. This is akin to pushing the exposure on your digital camera as far as possible without clipping the highlights (exceeding the exposure limit of your camera). Press the record button a second time and you start recording. Press it a third time and the recording stops and the file is saved. You can easily navigate the recorded files and play them back, delete them, format the card, etc.

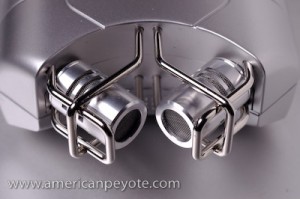
The Zoom H4 looks like a taser, but feels more like a Star Trek tricorder. For collecting ambient street and bar music you only have to be sure the microphones are protected from the wind or not bumped/touched during recording. It’s somewhat directional, something akin to using a 28mm wide angle lens on a 35mm camera. Just point in the direction of your audio subject and start recording.

There are a number of more advanced features which I’m not qualified to get into. With the XLR inputs you can hook up fancy microphones and record multiple tracks to use the H4 as a pocketable studio, or record directly to a computer via the USB connection. No doubt this is crazy useful for journalists, podcasters, and people who are really into the home studio thing, but I’m into the high-end hobby photography thing, and recording directly to the solid state SD card is what I bought H4 for.

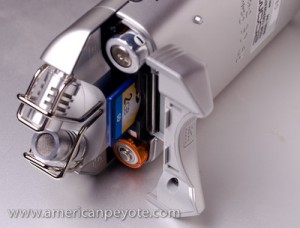
Recording in uncompressed WAV format can eat up a lot of memory if you’re recording speeches or are out for the whole night doing street poetry. Like with a digital camera, the audio files are easily downloaded to a portable drive like the Hyperdrive Space. For basic recording, a couple of 2GB SD cards will serve your recording needs well. The H4 takes AA batteries, and will last for a couple hours of actual recording time before dying, this and the fact that the SD card is actaully incoviently difficult to access are the only real drawbacks I’ve found so far.

Zoom H4 I

Those of us who got interested in the concept of Gonzo reporting by watching Johnny Depp in Fear and Loathing in Las Vegas walk around a bombed out hotel room with a microphone taped to his head will appreciate the flexiblity of mounting the Zoom. For a throat-to-the-wall night of fast moving action and high qualitiy auido gathering, the H4 can be mounted to a Gorilla Pod and wrapped around the neck of the reporter. If Hunter S. Thompson were just starting out in 2008, I could imagine him picking up a Zoom H4 to do his work. The Gorialla-Pod-around-the-neck mounting system allows hands free continuous recording of events after the record button has been pushed. It can also be easliy mounted to the forearm and the Freak reporter can then run around all night pointing the Zoom H4 at people like a dropout from the X-men school of Gonzo reporting.

Zoom H4 IIZoom H4 III

I imagine I’ll move towards video at some point. But here’s my rational: I love having a high quality image which invokes emotion or tells a story. Doing video just because you can won’t necessarily create a better story telling style. I just feel limited in that many times the environment/subject is not just a still life, but a combination of audio and visual elements. Yes, many point-and-shoot cameras do video and audio recording, but we all know the output is not high quality. The ability to record studio quality audio right along with high quality images is a very powerful combination. Now the challenge is to elegantly combine the photography and audio in one media package. If you combine great photography with cheesy audio you’re just going to turn people off because it will come across as a gimmick. One needs to take the “eye” for creativity from photography and find the creative “ear” for audio recording.

No review is complete without output, so here is a sample from the Zoom H4, of some bad street poetry put together on a warm summer night in New Orleans, somewhere near Burboun Street. The wedding I had just attended was over, but I had no desire for sleep and instead walked through the city collecting ambient sounds and spewing lines into the open air for the H4 to record. It’s not my best work, and is highly reminiscent of my worst photography work, ill-thought-out and laking in focus or direction. The coming challenges include developing a mixed-media workflow to elegantly combine visual and mixed-down audio into one package.

But for now, there’s just this short piece of Bad New Orleans Street Poetry, a combination of spoken word and ambient sounds.

[audio:http://blog.americanpeyote.com/wp-content/uploads/new-orleans-street-mp3.mp3]

What comes next? I don’t know for sure, but if I wanted to describe the Zukunft in an unoriginal and overdone way I’d say, “the Future looks and sounds fantastic.”

Other reviews of the Zoom H4

Mark Nelson at O’Reilly.com

Jeff Towne at transom.org

Ricoh GT-1 40mm – The Sad Clown Portraits

The Ricoh 40mm is one of those fantastic photo accessories which is amazing under certain conditions, and fouls the mind when used in sub-prime environments. The Ricoh GR digital is one of the best digital cameras around, and possibly has the most legacy support of any digital camera I’ve come across. I use an original GR Digital, and bought the 40mm lens for it, what follows is my review of it’s capabilities in a controlled light (studio) environment.

The original GRD (28mm lens) was released as a stand alone small sensor camera, and additionally with a 21mm lens in a creative set. Basically, the GR Digital is the most portable and useable wide angle point and shoot digital every created, which means it’s also the most portable and usable wide able camera ever created. There were limitations of course, one being that the 28mm and 21mm focal lengths are great for city and landscape work, but more difficult to use for portraits. So it was intensely cool when Ricoh released the GR Digital II, an updated version of the GRD, as well as a new 40mm add-on accessory lens. The new 40mm lens is compatible with the “old” Ricoh GR Digital camera. A weak dollar and rampant vacation through Detroit made purchasing the 40mm add-on a no brainer for me.

My main desire in buying the 40mm was to extend the portrait capability of my GRD, by using a more patriot-oriented focal length (40mm). I use my Ricoh for controlled light (studio) portraits, often employing a “strobist” inspired lighting philosophy. One advantage of using the GRD for controlled light portraits, is that it’s so small it can be used in many situations where a DSLR is too bulky to use, like in confined-space conditions.

Wait…why use a point-and-shoot camera when you have a full DSLR setup?

There are many benefits to using a small sensor camera with studio lighting for portraits. In general, one key element of portraiture is ensuring that the eyes remain in Focus. You can have all the diffused areas you want around the subject, blur out the mouth, whatever, but if the eyes aren’t in focus, you don’t get that feeling of being pulled into the image and conversing with the soul of that face staring back at you. This is where small sensor cameras are awesome compared with DSLRs, because with the Ricoh GRD and 40mm lens, the very large depth of field means that the eyes will pretty much always be razor sharp, and you can add all the blur and diffusion you want later in Photoshop.

When you start getting into a serious camera and photography knowledge collection one thing is clear, there’s no end to it. Once you understand cameras you move on to lighting, and once you know how to light for portraits and mood, you generally get into fashion and design, and once you get past basic fashion down, the most logical step is getting into make-up. This is confusing territory for guys who aren’t into drag, so I went to the Source to get a crash-course schooling in eyeliner and foundation.

The makeup was sort of a freak accident you see. I was strolling through the Somerset Collection, an upscale shopping experience a-la-mall in the suburbs of Detroit, and after checking out the Levi’s store I wandered into Sephora. Previously unknown to me, it’s one of the prime makeup stores in the States. I walked in with a vague idea about asking for eyeliner, and a minute later found myself sitting in a chair with a makeup artist named Susan applying foundation to my nose and facial structure. 10 minutes later I was being told by everyone in the store that I looked fresh from a rock stage. I ended up dropping $100 on eyeliner and makeup. With my new look intact I headed to suitable location to make some magic.

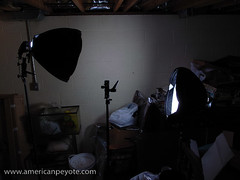
Cramped Basement

The perfect cramped studio location presented itself in the form of my parent’s basement in the Detroit suburbs. The place is still cluttered with things like my old G.I. Joe and Star Wars toys. I found a section of wall to work with and setup my lights: one Contax TLA280 and a Sunpak 383, both placed in Alzo digital softboxes. After a wardrobe change plus a few lighting adjustments I had a set of images called:

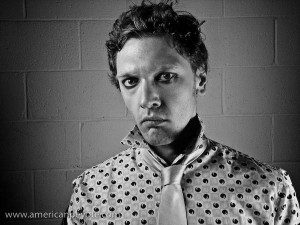
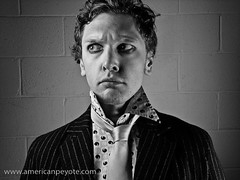
The Sad Clown

Every photo needs a back-story:

The Sad Clown has little ambition or direction in life, schooled on the streets and usually found sleeping in the gutters of Paris, he sports a stripped sweater, yellow button-down shirt by Ben Sherman, and occasionally a sport coat by “WE” and a tie by the same label.

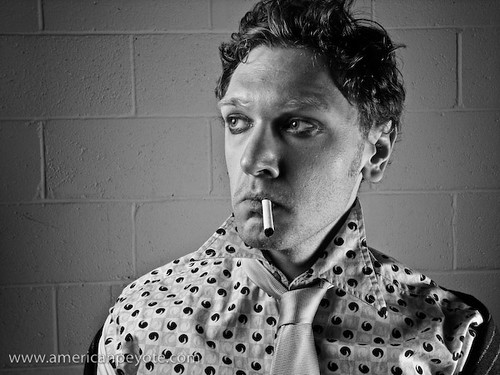
The Sad Clown smokes 15 year old cigarettes and laments on the laughs he cannot produce due to this wasted life on the stage.

The Sad Clown I

From a tech standpoint, the 40mm Ricoh is a sharp and rather bad-ass piece of glass. The detail from well-exposed portraits is really excellent. However, the lens is also big, and pretty much kills the convert, concealable factor, for which the GRD is known for. The 40mm also flares like a Phoenix farting in your face whenever a light source is pointed even remotely towards the front element. This shouldn’t be a surprise, the main element is massive, and sets the perfect stage for ungodly internal reflections. I had to be sure my softboxes were not directed at the camera, otherwise big red blotches would show up in the images.

The Sad Clown II

You can see in this view that the eyes couldn’t be sharper. This is one reason to use a Ricoh Digital over a massive DSLR with an 85mm f/1.4 lens, the quality of small sensor Ricoh GR portraits include very sharply defined lines – and when properly exposed, excellent subject-background separation. I don’t think it would really even be feasible to produce an image like this using my Minolta 7D, or any other DSLR, unless using a very long lens to compress the image and increase the depth of field by using a very small aperture. With the Ricoh GR and Alzo Digital Softboxes, it took 5 minutes to setup and execute this portrait in a very confined and cluttered space.

Every piece of equipment has it’s limitations, and in total the 40mm is an excellent lens, extending the usability of the GR digital system considerably. With the 21mm and 40mm lenses, you have an excellent small sensor camera system, suitable for travel, landscapes, city, portrait, and the production of unique images with studio lighting techniques. Well, actually, you can use it for whatever your heart desires – go out and make the Sad Clown smile again.

The Sad Clown on Flickr

Santis – Mountaineering and Strobes

June 1st was a sunny Sunday in the Swiss-German land, and seemed like the perfect day to begin my return to the mountain environment.  On another sunny day in April, the 28th to be exact, I’d sweated through my dissertation defense, and after jumping from Zurich to Amsterdam, to Zurich to New Orleans to Detroit, to Boston, to Detroit, and finally back to Zurich, I found myself unemployed and in need of a mountain tour.

Santis-2
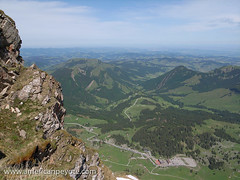
So on a sunny Sunday, the first of June, I headed out for a tour up Santis, the iconic mountain massif floating in the green landscape of Appenzeller, the heart of Swiss-German speaking peoples in Switzerland.

Santis is one of those mountains that people grow up with, starting with hikes as children and continue into old age.  This was something like my 5th trip up the mountain, and the first early summer ascent.  It was also an introductory trip for Matt Anderson, the Seattle mountain guide-turned Zurich-based commercial photographer.

I’ve photographed Santis in Summer and Winter, blanketed in snow and covered in wildflowers.  However, I’ve long since grown bored with basic landscape shots, the type perfected on postcards sold all over Zurich.  So to make the trip more interesting I packed along some off-camera lighting gear.

Route Up Santis
The essential problem with mountaineering and photography is the weight trade-off.  In the Swiss Alps every once counts, and as your desire to include cameras, flashes, and light modifiers goes up, your physical mobility in the mountains decreases.

A normal hike in the Swiss hills generally means a minimum elevation gain of 1000m, and by the time you finish the tour, the elevation gain over summits and passes adds up pretty fast.  So, in principle it’s ill advised to take more than a DSLR and a lens or two.  My photo and lighting kit included a Fuji GA645wi, a Ricoh GR Digital, Sunpak 383 flash and Gadget Infinity radio trigger.

The Ricoh GRD has proven itself many times as more than capable with it comes to off-camera, or Strobist flash techniques.  Choosing the Ricoh dramatically minimized the weight penalty as compared with packing my Minolta 7D DSLR with a macro lens.  The Fuji was used for basic landscape shots. 

Santis-7
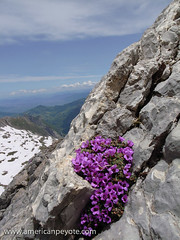
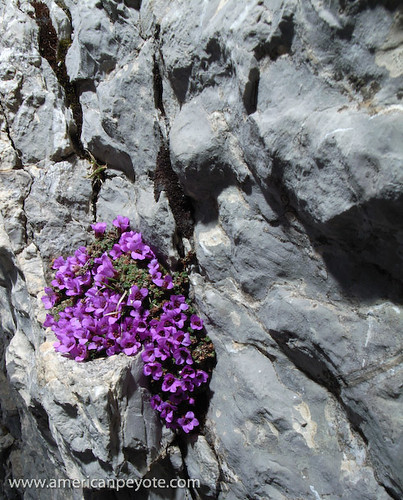
Off-camera lighting on a mountain side isn’t so easy.  After you’ve ascended 1000m the body is shaking a bit, and when you’re on a rock ridge, it’s not like there’s any place to set up light stands.  I put a Gadget Infinity radio trigger on the Ricoh GR and held the Sunpak 383 at arms length from above the wildflowers growing on the mountain ridge.  In a few minutes and a little exposure management I could balance the landscape exposure with the flash lighting the flowers.  Wham!  Bahm!  And there we have a mountain photo I haven’t seen in the postcard stand.
 
Santis-5

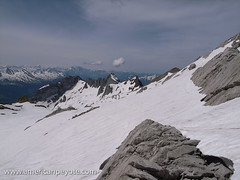
In early June there are few people making the ascent up Santis, mainly due to the snow, which covers most of the Alpine route.  Many people will ascend with nothing in the way of mountaineering equipment, but I recommend taking crampons and an axe, because slipping on an exposed snow-covered 50 degree slope on a Sunny June Sunday is probably as stupid and just as deadly as putting a bullet in your brain.

Santis-13
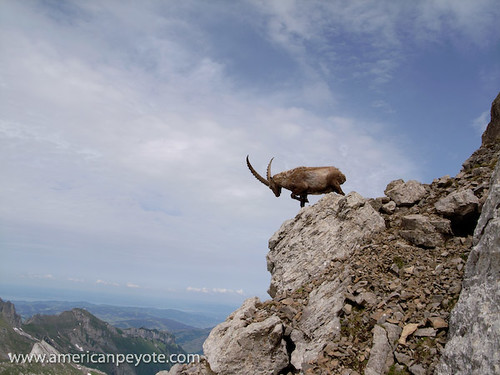
Santis is a tamed mountain.  There’s a weather station at the summit and Steinbock have long since lost any fright-or-flight instinct.  The animals roam the Santis as they like and have no fear of humans, which means it’s pretty easy to make some of those iconic mountain wildlife shots.
Santis-14
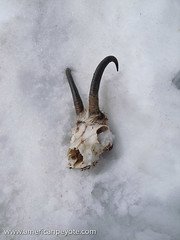
Well, the Steinbock have one predator – avalanches.  And if you climb up Santis in early Summer don’t be surprised to find a decayed carcass or skull in the snow.

Lazy Sunday – Fun with Flower Photos

After too many days and weeks of rain and snow and late spring sleet the Sun shown bright and strong over Zurich on the second Sunday of April in the year 2008.  I took the opportunity to sun bathe and then set up flashes, picked up my Minolta 7D and Ricoh GRD and set about photographing the excellent garden on the terrace.

Flowers I

One of the coolest things you can do with off-camera lighting is balancing the power of Sunlight with the watt-seconds of your strobe.  Now, with powerful studio flashes from Alien Bees, Elinchrom, Profoto, and many others, this is easy.  But the technique is often overlooked by amateur photographers since normal camera flashes are too weak to balance, or to over-power the exposure from the Sun.

Flowers Setup

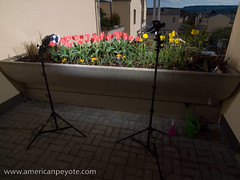
I set up two flashes, a Contax TLA280 and Metz MZ40-3i.  Gadget Infinity radio triggers were used to fire them.  I had to use direct flash, with both set to nearly full output, since the high afternoon sun made weaker flash settings and any umbrella diffusers useless.

This meant I could light the main parts of the garden and create a nice blue sky in the background.  The flowers take on a sort of unrealistic shine, a certain texture your eyes can’t perceive in reality.  Ah, but the magic of simple off-camera lighting makes the magic appear with little effort.

A number of photos were taken during this session with the Minolta 7D and 20mm lens, but the best were produced using the Ricoh GR Digital with a 28mm lens.  The near infinite depth of field of the Ricoh GRD coupled with the with wide angle of view of the 21mm and 28mm lenses produced nothing short of perfection for capturing the cool colors of the flowers to contrast against the deep blue sky.  The Ricoh GRD rendered excellent saturation and sharpness of the flower petals and sharp green stems.

Flowers V Flowers IV

The setup for this shot took all of 10 minutes and there was no real concept I was trying to communicate.  The motivation was keenly contained within a desire to play around with my cameras and flashes and produce an image I’d never seen before.

Flowers III

There’s little doubt that flash photography and flowers has been around for decades and countless photographers will produce more countless generic flower photos with deep blue skies and saturated petals.  However, these will stick in my memory for a while, mainly because I was just playing around, and that’s when all the really cool things are done, when we don’t mean to do anything beyond killing the time we find on our hands.

Concept to Photo – Urban Dry Tooling

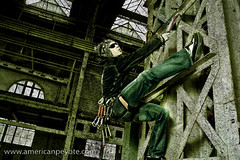
How was that image created?  What was the workflow from the initial idea to the finished product?  Concept to Photo is a growing collection of articles detailing how various images were produced, starting from the initial concept stage through to the final image.  What worked, what didn’t, could the concept be translated to an image, and how successful was the experiment?  This installment includes the development of the Urban Dry Tooling Concept: the perfect mix of climbing coolness and the industrial edge.
The Concept:

I’ve been moving towards combining climbing and urban concepts for a while.  It’s a natural result when you have little time to climb and too much camera equipment combined with a night of self-portrait experimentation.  Everyone knows what the generic city mountaineer looks like: jeans, fuzzy hat, fleece gloves, cool sport sunglasses, Teva or Chaco sandals in the summer and hiking boots in the winter, all topped off with an expensive Gortex jacket fit for Nepal but mainly used to fend off the wind in front of Starbucks.  I’m not an exception, except that I keep the boots at home in favor of Dr. Martens.  Anyways, I wanted to take the Urban Climber/Mountaineer look a bit further than the coffee shop.

Dry Tool Garage Concept

The concept started with a sketch and was simple, take the best parts of Urban and combine with the edginess of mountaineering.  I wanted something sort of dramatic, I wanted movement (or the sense of it), and I wanted it to look cool (at least to my eyes).  For the Urban part this meant that dark industrial backdrop only available from a circa 1940’s sky scape or an old factory.  It also meant fashion and not just taking a mountaineer and putting them onto the side of a building.

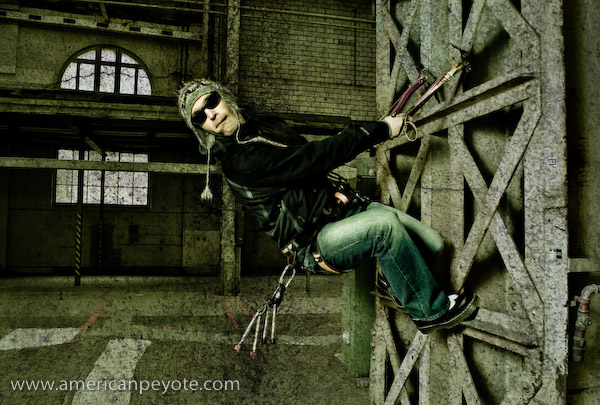
I wanted the coolest elements from mountaineering: ice tools, quickdraws, well-fit jacket, cool hat, and sunglasses – and then combine with a clean hip urban look.  Unless you ice climb you probably know what an ice axe is but don’t have any idea what an “ice tool” is supposed to look like.  Ice tools are short and meant for climbing frozen waterfalls or hanging from rock edges in winter.  They’re curved, wicked and stylish.

The clean hip Urban look was realized by integrating jeans and super-fly Dr. Martens into the mix.  The location was an old industrial area, in conjunction with a zuerichflickrdrinks Flickr group outing.

Urban Dry Tooling Location
The Location:

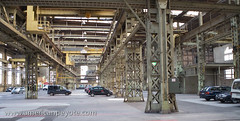
The old industrial Sulzer-Areal complex in Winterthur, just outside of Zurich, Switzerland.  Originally a manufacturing complex, since transformed into an ultra-chic locale with apartments and one fantastic parking garage which is largely unused on the weekends.

The Wardrobe:

Mountain Hardware Jacket
Levis Jeans
Dr. Martins wing tips
Bolivian Hat
Trango Captain Hook Ice Tools
Random Accessories (quickdraws and ice screws)

The Execution

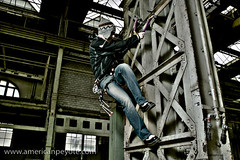
The original idea was to hang on to the columns of the parking garage with the ice tools and be pulled by a rope attached to the harness.  Then the model could have his legs pulled out into space or jump out.  This actually seemed a lot more dangerous in real life with actual steel and concrete to bash his head into – and hence was scraped as an option.  After killing that notion static posing on the steel column in classic climbing fashion became the main focus.  Assisting with the camera was done by ubiquity_zh.

Urban Dry Tooling Setup

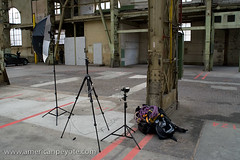
Sometimes the lighting dominates the subject and other times very simple lighting is paired with a subject.  There are a number of things which could have been done better, like lighting the steel column or mixing soft overhead light with some hard lights for contrast, but in the end a simple (somewhat pathetic) one umbrella setup mixed with the natural light filtering through the ceiling was used.  A Contax TLA280 was reflected into an umbrella high camera left and a 20 mm lens was used to get some slight distortion and bring out the Dr. Martens when the feet were properly positioned.

The Processing

Dodging and burning was used on the jeans to bring them out.  Then various curves, high-pass and levels adjustment layers were used to stylize and a deep green color was added with a fill layer.  Layer masking was used where appropriate to bring back facial features lost in the layers.  A grung texture was produced from the concrete in the factory and used as the final step.

The Debrief

The images from the Urban Dry Tooling shoot were ok, more or less what was wanted, but in many ways don’t really pop in the way intended.  On the one hand this is good, it means the photographer is not egotistical to the point where he’s fooled into thinking that crap photography is fabulous because he designed it.  On the other hand it means one can see the road of improvement.
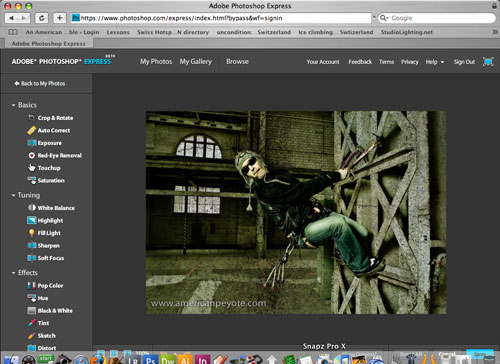
One main problem is the poor separation between the black Mountain Hardware jacket and the background.  A light grey jacket or T-shirt would have absorbed less light, and would’ve rendered better defined shadows.  Furthermore, a diffused light from the right would have illuminated the torso of the model better.  Of course, adding some back-lighting would have helped as well to improve separation, and grid spot to light the ice tools probably would have prevented them being lost in the shadows of the steel framework.  What comes next?  Only the Shadow knows.

Cutting Edge Online Imaging Research

There has and is and maybe always will be a problem with the internet and media production. What you see on your monitor might not be what another person perceives. A deep dark red rose might be engaging for me and lack a certain depth for someone else.

On going research at Media Technology dept. at Empa, a research center in Switzerland is currently testing an online image evaluation system. The test is simple, you go there, click through a few calibration images to calibrate the test to your monitor according to their standards, and start looking at images. Some images will look good to you, some will seem not right. You pick the image you like and in the end a better print algorithm will be developed.

This may sound simple, but it’s a fantastic platform for the future. It means the possibility to set up a testing environment for images and colors for a multitude of media. The more participants the better, and by taking this quick exam you will be contributing to cutting-edge research into how colors and images can be evaluated using the internet.

Online Psychovisual Test

The Project is headed by the smart, talented, and amazingly beautiful Iris Sprow (pictured below):

G7 Strobe 1

Those who are working with images, are familiar with the difficulty of color representation in computer systems: one captures an image, scans it, or already has the file on his computer, works with it, saves it, puts it up on the Internet-and suddenly colors look differently than intended. When looking at the Internet page, colors appear yellowish in on the office monitor, they look too dark on the beamer of the colleague, dad’s laptop alters the bright colors blueish and grandma’s plasma display gives an overall pastel appearance.

This has to do with each monitor’s adjustment, with the system used, with the image processing program, the browser, etc. This is how the Internet works at the moment and is exactly what we want to take advantage of. Our research group tries to use this circumstance to draw conclusions to quality estimations and employed standards. Normally, for such ‘psycho-visual tests’, people are invited to evaluate a bunch of images in a darkened, standardized room on expensive high-end displays. This is a very costly and time-consuming task which leads, amongst other things, to why the issue of color, particularly in computers, still is not solved to a common satisfaction. We are trying to create such tests more efficiently by having the user investigate images at home on his own computer.

For this, we are looking for volunteers who take part in this test; since the start last week about 150 people already took the test. It is simple and takes, depending on enthusiasm, ten to twenty minutes and has no side effects. The test is available in English, German and Polish, all information is stored anonymously. There is no right or wrong; we are simply trying to find out how the average Internet user evaluates images.

The research group of Empa’s Media technology department and especially the project leader Iris Sprow would be glad if many ECI members would participate in the test; of course all others are encouraged as well, family, friends, etc.

Link to the test:

http://www.empamedia.ethz.ch/

-Iris Sprow

Photoshop Express – Divine Deliverance

In the dark ages there came to pass the revelation in imaging technology, which has since come to define and dominate the photo world.  Photoshop, has and will continue to be the premier photo editing go-to program for millions of minions – but it what form will the program take?  The introduction of Adobe Photoshop Lightroom brings the easy of photo organization and keywording to a new level.  Work-flows are faster, letting one access and edit images with gleeful ease.

But when one has images and feels a need to share them Photoshop and Lightroom falter, for they offer no output directly to the web.  And if your image are not on the web, then they don’t exist.  Images, like cartoons die without the attention of viewers.

This is why we love Flickr.  The easy of image uploading and keyword tagging means you can post and distribute your images across the web in femtoseconds.

What if some freak accident fused the awesomeness of Photoshop with the web-coolness of Flickr?
Bow down Earthly photo-crazed mortals, for the Divine ones from the digital sanctuary have again blessed us with new gifts.

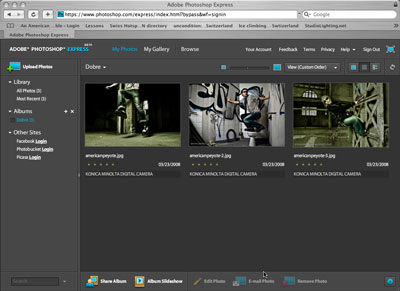
Photoshop Express

The cosmic programmers at Adobe seem to have taken the best of Photoshop and Lightroom and fused those excellent image editing and browsing tools with the goodness of Flickr.

With a free Photoshop Express account one gets 2 GB of storage and a browsing and image editing interface similar to Adobe Lightroom.  You can upload images, edit them, their colors, tones, crop, fix exposure, red eye, white balance,sharpen, and do black and white conversions, but that’s not all.

Images can be distributed similar to Flickr, which means embedding images in websites and blogs and having them linked to you Photoshop Express account.  Naturally you can set up a gallery and show your images directly from Express.  The really cool thing is the images are not public until you make them so.  In Flickr everything is just up on your photostream.  Express also offers integration with Facebook, Photobucket and Picasa.

The Future with Photoshop Express?

Sweet Jesus, just imagine the future with me for a second…
You take a picture with your WiFi enabled camera, it uploads directly to Photoshop Express, with your WiFi laptop you do the editing and then distribute you digital media to blogs and website, all online, no computer program to load on a computer, it’s all online, in the air, across the radio waves.  The need for redundant backup harddrives at home is less needed and you can access and edit your photos anywhere with an internet connection.

…or whatever, brass tacks Photoshop Express is a pretty kickass – a cool photo editing and sharing platform, and it’s what we’ve been expecting for a while.  Program distribution over the net, and all you need is a license agreement with the provider.  Many are surprised Microsoft hasn’t already done this with Windows.

Here’s the future: No software, just onlineware, nolineware, and for now it’s freeware, but for how long?

You can sign up here:

Photoshop Express

And quick tutorials are here:

Photoshop Express Techniques

Joey L Photoshop Tutorial – After the Honeymoon

The worth of any product does not lie in the first impression, but is rather exposed after having used the thing for an extended time period.  Given the turnover in digital camera technology, 4 months is probably a decent time frame to assess the worth of the Joey L Behind the Scenes Photoshop DVD Tutorial.  I purchased the Joey L DVD Photoshop Tutorial just after it was released in October of 2007 and it is now March of 2008.  After having viewed and used the tutorial for an extended period, did it have a lasting, positive impact on my image making abilities?  Am I now a Photoshop Buddha?  Is it time for me to organize my own DVD and start teaching workshops?  Was the Tutorial a wise investment in my education or an overpriced, rash, ill-thought out toss of my money out the digital window?

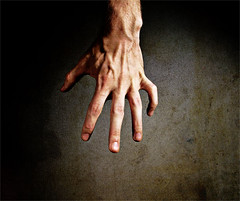
Relax Hand Hard Shadow

The Back Story

There are few things which I view with a need-it-now mentality, in particular when it comes to education.  It might suck to learn long division as a disgruntled youth, but it pays dividends later in life when you can calculate things fifty times faster than someone who needs a calculator.

Similarly, I didn’t buy the Joey L DVD thinking it would change my Photoshop skills overnight, but rather, over time it would either have a positive, or absent affect.  The purpose of this extended After-the-Honeymoon review is to look at how the material from the Joey L DVD affected my photoshop and photography capabilities – after the initial joy of buying another digital imaging product had worn off.

First: Why Buy a DVD Tutorial?

The main criticism of the Joey L DVD Tutorial in various internet circles is that it’s overpriced, and doesn’t show anything that can’t be learned on the internet, either for free, or via modest monetary costs.  So why buy it?

It’s true, there are countless opportunities to learn Photoshop and Photography on the web.  Sites like Scott Kelby, Layers Magazine, Photoshop User TV, Dr. Brown, and a number of random totally free videos and written tutorials (often with sample files) are sitting there in virtual space, begging to be viewed.  There’s also libraries of books on-hand dealing with every aspect of Photoshop.

I also know from experience that a number of the tutorials are little more than simple near-pointless tips on using curves, the healing brush, and converting to Black and White.  Not all of course, the paid ones have more real value and there are many gems at Layers Magazine.  However, my main experience is that many almost universally use bland uninspiring images for their examples, and often times it feels like I’m watching a copy of a copy of a copy.  I was looking for something more original to supplement my Photoshop education.

One main draw of the Joey L DVD tutorial is that Joey Lawrence is an actual working photographer.  A dynamic beacon of creativity in an industry of imitators.  The draw of learning from an active Pro is unique for me, as I often have the feeling that too many tutorials are done by people who realized it was more profitable to teach Photoshop instead of being a photographer.  This is probably a pessimistic view, and there’s really nothing wrong with that business model, I encourage folks to make money in any legal fashion they wish, and teaching is one of the noblest professions.  Still, I get my science education from world class-researchers.  Why skimp on my Photoshop education?

A tutorial like the Joey L DVD instantly makes me think of photography workshops.  Workshops are popular from a few perspectives; when you get to the point as a photographer that you want to expand your creative consciousness or skills in a certain areas, or you travel to some distant hard-to-organize location.  Workshops are generally considered to be money-well-spent, and in general I would never spend money on a workshop because many just seem like an excuse for people with too much money to pay someone to tell them to use their camera equipment.  There are exceptions, if David Hobby or Don Giannati flew into Zurich for a Strobist or Lighting Essentials workshop, I’d probably be there to welcome them at the airport.  Basically, I wanted a Photoshop tutorial, and the Joey L DVD seemed like a good fit.

Hanging Hand

Playing and Criticism

Another main criticism is that Joey doesn’t teach good Photoshop technique.  From a technical stand-point I’d say this is true – but if I was technically a Photoshop whiz, I wouldn’t have bought the Tutorial in the first place.  The Joey L tutorial is primarily about using destructive editing techniques and just doing what "seems" right for the image – you know, to make it look good.  I don’t really think this is a bad thing.  This is what artistic expression is all about, if you stick to rigid guidelines in books and always listen to your teachers, you’ll always be one step behind your peers and more or less copying from the old Master’s.

If you copy what Joey does point-for-point, you’re not learning anything that a monkey couldn’t learn (yes, it could take a generation or two of breeding and genetic engineering).  Anytime you’re confronted with a large, intimidating construct like biomechanics, quantum physics or Photoshop, playing around isn’t such a bad thing – and should be encouraged.  "Playing around" has brought more ground breaking discoveries than I care to list, including penicillin and bubble wrap.  Playing in Photoshop is an important lesson I’ve taken away from the tutorial, which is also how Dave Hill developed his legendary style that so many geeks try to achieve.  This doesn’t mean I use the techniques Mr. Lawrence has described in his tutorial.  I do Photoshop with my own workflow and so should you.  But it’s not bad to learn from someone who isn’t using Adobe standard practices.

Ah, But the Cost

The Joey L DVD is not cheap, but education is what the student makes of it more so than what the teacher teaches.  This is contrary to many philosophies of modern pedagogy, but after going through three engineering degrees and a few semesters as a teaching assistant, I feel comfortable saying that a motivated student will learn no matter how dimwitted the professor may be.  Ahhh, but inspiration from a teacher, is sometimes priceless.  The Joey L DVD was inspiring for me, and that is hard to put a dollar sign on.  But it might not be for other pupils.

Draw Like the Maple Tree Young Grasshopper

I feel like the DVD has helped open up the horizons of Photoshop.  This doesn’t mean that now I think that every photo needs to emulate Dave Hill and Joey Lawrence, it just means that my mind is more open to what I can do with the raw image – and the DVD Tutorial had a part in that.

I love to draw and do images on paper, but I’ve generally felt constrained in Photoshop, "Hmmmm, I should make layers with correct names and make sure I can go back and change everything."  So, again one of the important lessons from the Joey L DVD is that a desire to play in Photoshop is essential, the program is a tool, not a defined process.  My Photoshop skills are getting more fluid and playful, which opens up more creative directions in photo manipulation – and hence visual expression.

Was the Joey L Tutorial a good buy?

After 4 months, I’m still comfortable with the amount of money I threw down for the Joey L DVD.  I come back to it and replay a lesson here and there when I need to, thinking back to the techniques, imagining how to use and create them differently, and often also disregarding them and doing something different.

I like being able to replay different lessons quickly, and then go back to other projects – something you can’t do with a workshop (unless they include a DVD).  I’ll probably never buy another DVD like this again (ok, maybe one), the exception being the forthcoming Strobist DVDs or the offerings from Lighting Essentials.

Why not go crazy buying more DVDs?  Because I’ve hit the point where all the other fine points of Photoshop can be easily found or discovered, maybe I didn’t need to buy the Joey L DVD to get to this point, but that’s the way I’ve arrived here, and I don’t regret the path I’ve taken.

Brass Tacks

Here’s the thing, with Photoshop I was looking for a spark, something to open the flood gates and broaden my horizons on this subject of digital post-processing.  The Joey L Tutorial DVD did that – exactly that – I see images in layers and masks and color shifts and shadowed hues now.  When I look at setting up a shot, I think about the post-processing, the way the lighting will define how the image can be manipulated later.  This isn’t a certain style, it’s an addition to my digital visualization abilities – the same as visualizing a wide angle effect before taking a picture.  The horizons for communicating a certain message have now been expanded.

Could the Joey L Tutorial DVD have been done better?  The crazy thing about the Joey L Tutorial DVD is that it could have been one of the most fantastic photography-centered Photoshop learning tools ever created – if it had been created with an eye towards integrating the lighting and photoshop techniques.  However, it doesn’t take long to see for yourself which type of images "work" and which ones "don’t" based on their lighting.  No Photoshop action can "fix" images which don’t have the right lighting to start with.  That’s the shortcoming of the Joey L DVD, the lighting-processing connection is mostly missing.  However, playing around with different images and the Joey L actions will quickly reveal how lighting affects the post-processing.

Here’s an example, both of the images shown below were processed using the Joey L Signature Action, and should be slightly representative of how this technique works.  It’s pretty obvious how the first image doesn’t really look all that great.  It’s flat and desaturated, and more or less boring.  This is because the face and torso are turned away from the light source, and all we have is definition of the jacket. However, the second image is better-lit, and renders the deep-grudge shadows much better than the first one.  Once you see which type of images and lighting combinations work it’s easy to draw up in your mind how to design shots specifically for this type of deep-shadow processing.

Floating in the Air Drama in the Air
Poor lighting, only shadow and definition in the jacket Better lighting, good shadow definition of the arms, torso, and face.

Monkey See Monkey Do?

There is a pervading attitude from many dark corners of the web that if you buy his DVD to learn from someone like Joey Lawrence, you’re trying to adopt or steal his look/style instead of developing your own.  If such an attitude existed in the scientific research world, we’d still be riding horses and the telegraph would probably be 200 years from being invented.  In general everything has been done before.  There are very few truly new things.  There was Dragan, people copied him by creating Photoshop actions, Joey Lawrence no doubt learned from these influences, and developed his own style.  He made a DVD, I bought it, and here we are.  That’s how progress and the evolution of style sometimes works in the digital imaging world.

As you move through life you learn things – and the knowledge you retain becomes tools which you can use to do other things: build bridges, take pictures, climb mountains, relax on a beach.  The real mistake is not learning as much as you can and using those tools as desired.  I didn’t set out to imitate Joey Lawrence, or to create iconic art that will stand the test of time.  But if that iconic art thing happens, well – cool.

The Joey L Tutorial DVD is just an addition to my photography digital image making toolset, what comes next no one knows.  Should you buy the Joey L DVD Tutorial, or that Canon 85 mm lens or that Nikon D300?  Will a set of Profoto strobes make you a better photographer?  Figure out what you "need" to accomplish what you’re seeking to accomplish – acquire those tools, and then go write your book, develop your look, live your life, whatever.

No one single piece of knowledge or equipment will improve your skills in life unless you’re motivated to push yourself to the next level, but once you know how things work…well, maybe I’m working on my own tutorial DVD…

Learning Photography Online – A Road Map to Madness

The combination of the web and efficient search engines coupled with the crazy ease of online publishing has made one thing clear: learning photography can be easy and almost essentially free.  What follows is a breakdown and review of some of the best sites on the internet to learn photography and lighting.

Learning Photography Technique

Strobist: In my experience Strobist is one of the best photo lighting-oriented sites on the internet.  Interactivity between readers and author is taken to an extreme level.  Interaction on the internet generally means at best that readers are willing to comment on whatever your write, with Strobist it means readers buying flashes, light modifiers, and producing pro quality images based.  Readers are inspired organize Strobist get-together’s from Germany to Seattle.  The great thing about Strobist is that it teaches lighting – without which there can’t be any photography.  Gear is covered, but only to the minimal extent needed to produce excellent images.  Every type of photographer from portrait to landscape or commercial can benefit from this site, and if you’re a beginner, Strobist will probably take you farther than any other in a given timeframe.  Strobist isn’t just a cool site, David Hobby has started a movement and created his own adjective without even trying.  This movement has grown beyond the simple blog, and Mr. Hobby now teaches sold-out lighting workshops throughout the world.

Lighting Essentials: When David Hobby started Strobist he ignited a movement.  Maybe Lighting Essentials would have been launched without Strobist, but the connections between the sites are evident.  Both focus on lighting, both contain some of the most easily accessible and relevant information on lighting on the net, and both are not only websites, but portals for their owners to organize and lead lighting workshops from coast to coast.  One big difference between Strobist and Lighting Essentials is layout and presentation.  Lighting Essentials is the well-organized website that Strobist could be if organized and designed outside of the anti-CMS (Content Management System) Blogger platform.  Yes, this is a public plea for a redesign of the Strobist site and implementation of a CMS friendly system like WordPress, Joomla, etc.  Lighting Essentials and the partner Magazine site feel like they were built from the ground up to be the best online resource for lighting and photography around.  The author, Don Giannatti is extremely approachable and shares volumes of knowledge on the net, his Flickr (wizwow) account is filled with photos with some of the best lighting setup information around.

The Luminous Landscape: My internet photo education started here.  Published by Michael Reichmann, the Luminous-Landscape is probably one of the most comprehensive photography knowledge sites on the net.  Composition, discussions on perspective, and any technical aspect including Bokeh is included.  The site is so comprehensive that new material is rarely added (as it’s not really needed), the What’s New section is basically an update board for new super-expensive (the locations sometimes worth it) workshops and moderately priced tutorial DVDs.  Otherwise, thoughts of the camera industry sometimes embody the new content along side the occasional mini-dissertations by Alain Briot, which generally make me think he’s harboring some deep subconscious regret about not finishing his PhD.  If you need a good background in photography go through the Understanding Series and you’ll never need to buy a book on photo basics.  But once you get the basics, move on to more interactive sites like Strobist or Lighting Essentials.

StudioLighting.net: When you first visit StudioLighting.net you might be put off by the content-centered Google ads and brush it off as a me-too photo splog.  The format is simple, and the content unique; two guys who are learning about photography have built a lighting-centered site with arguably the best photo-niche podcast on the Net.  Every week or so they do a radio style podcast with a new photographer or similarly notable figure.  The archives include interviews with Michael Grecco, Dave Hill, David Hobby, Chase Jarvis, and a ton of people I’ve never heard of.  The great thing is that StudioLighting.net is run by guys who are developing their skills, and are more or less intermediate shooters, which means they ask questions which the thousands of photographers like me are interested in; like how different photographers work, how their businesses got started and what type of equipment, or lack there of is used in shoots.  There are other attributes to the site like video lighting tutorials and gear reviews, but the reason to visit is the podcast archive.

Learning To Expand

Chase Jarvis: An internet photography icon, Chase Jarvis is a full-time professional commercial photographer with the desire to share his knowledge and inspire the people around him.  His work is fresh and his blog is filled with good stuff to exercise the mental side of a photographic mind.  His commentary on the business and views on the art form mix with his business skills and philosophy university degree to be a unique voice which many photographers can learn from.  Plus, he’s just an all-around inspirational figure, well-spoken and energetic, he embodies the image of how a pro photographer should act.  There are a number of videos on his site, depicting photo shoots with ninjas, REI products, and the gear he uses.  Once you know what you’re doing with a camera, delve into ChaseJarvis.com and get inspired to push yourself further.

Layers Magazine: True it’s technically focused on all things Adobe, why should photographers learning technique care?  What does Dreamweaver and web publishing have to do with making great images?  Given the dominance of Adobe in everything including digital image manipulation, web publishing, Flash, and Lightroom, keeping abreast of the tutorials and random creative insights on Layers Magazine will keep the inquisitive photographer knowledgeable on many aspects of imaging from capture to print and publishing.  You can also buy the print magazine if you like.  The videos and written tutorials are excellent.  When you want to understand the tools of digital image manipulation head to Layers Magazine and delve into all things Adobe.

Photoshop User TV: Sort of a sometimes non-free companion to Layers Magazine, Photoshop User TV is one of the best pay-oriented video sites around for learning photoshop.  If you try do everything in-camera that’s great.  However, not utilizing Photoshop as a tool and learning how to use it well just seems so archaic.  Digital imaging manipulation isn’t just magic for graphic artists, Photoshop is a tool to communicate concepts via visual interpretation.  Of course you can do photography without it, but knowing how to use all of that power in your finger tips opens up worlds of expression.  Current videos are free, while the archived ones require a reasonable fee.

Russell Brown: International Photoshop guru and Mad Scientist-like personality, Doc Brown has one of the best Photoshop podcasts on the net.

Learning the Business

Dan Heller: It’s sometimes said that professional photography is 20% photography and 80% business.  One of the best places on the net to get the business perspective on photography is Dan Heller’s blog.  He writes nice long thorough posts focused on the stock photo industry, and if you’re serious about getting into the industry on any level Dan Heller has content and insight you won’t find anywhere else.

A Photo Editor: If you gravitate towards the business side of the industry the middle-person between the photographer and printed magazine is critical.  Photo editors find and hire photographers based on what the magazines want for visual interpretation of their magazine content.  Originally a blog by an anonymous photo editor at a national magazine, now the premier source on the net for getting inside the head of the person you need to please to get hired to shoot for magazines.  A Photo Editor is fresh and unique in an internet populated by imitators.

Avoid the Gear Craze

Many internet photography junkies either worship or curse Ken Rockwell.  His site is vastly popular and certain people will hang on his every word as gear gospel.  Although his site is basically a giant gear review site, and hence of little value to someone learning photography, he has some very relevant and interesting essays including: Your Camera Doesn’t Matter.

Don’t Feed the Trolls

I won’t mention any photo forums, mainly because their usefulness is defined by the members and active participation and your own motivations.  For example, Photo.net used to be the premier forum center on the net, and now is passé.  Dpreview is filled with thousands of people who are more interested in asking questions than taking pictures, and there are far too many forums to list and review.  If you need answers for specific gear problems, a number of forums will be able to answer your questions.  If you’re looking for ego boosting kudos there’s plenty of forums to post pictures where half the viewers will love and the others will decry your images as a bane on humanity.  If you have the determination to read through this article, your curiosity will no-doubt eventually lead you to the photo forum which is best for you if you search it out.  Experimenting with different lighting setups, locations, and subjects will push your craft farther and faster than any forum will.  In general, once you find one or two forums you really like, never speak of them or promote them to others on the net, lest they become diluted with trolls looking for attention.

Brass Tacks

Photography, like science, is best learned by doing and playing around.  I recommend the following course of internet study:

Learn the basics, just enough to be dangerous and then start photographing (or splitting atoms).  The means checking out the camera technique series on the Luminous Landscape as well as lighting with Strobist and Lighting Essentials.

Learn to Expand, delve into Photoshop, Dreamweaver, and the main Adobe programs.  Photography is basically light painting, and now that pallet exists on digital media more so than printed.  Understanding how images can be created and published on the Net expands how you view subjects and can open doors in your mind.

Never Stop Learning

Explore photo sites and try different techniques.  Listen to StudioLighting.net podcasts and develop your eye.  That’s really all photography is.  Check out blogs like ChaseJarvis and realize that there’s always something new to learn.  Avoid forums unless necessary, because if you need to ask random people on the Net which lens to buy then you don’t need it.  Photography can be very simple and cheap or needlessly complex and expensive, the choice is up to you.
Translating a Vision into a Photo Concept

I’m somehow drawn to photography – not to necessarily document an interesting or unique view of the world, but to get the picture that I didn’t know existed.  That concept, that image in my head which sits there till I try and make it for real.  This is generally means combining bokeh, focus, and wide angle lenses with a subject to get that certain “look” which the eyes don’t intuitively capture.  And few things are harder for the eye-brain connection to interpret than motion.  That’s why the use of off-camera strobe flash was developed by Harold Edgerton in the first place: to capture motion in ways never before possible.  Adding motion to a static subject can add a certain “something” it’s unexpected and generally produces an image that sticks in my head.  So, I took the concept in my head and set about translating it into a viewable form.

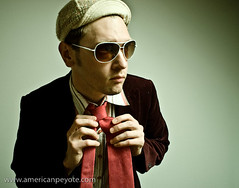
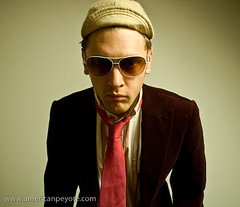
Red Tie and Velvet

Creating a Dramatic Motion Image

When you live in a place that doesn’t include a vast studio space, improvising and designing a shoot becomes important.  It’s the best environment to learn in because you’re challenged to make things look “cool.”  Cool is easy when you’re shooting a Swatch Watch commercial with a full staff and art director, but I don’t do these things – and need to organize things like models and locations and wardrobes on my own.
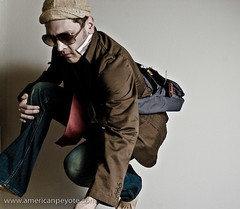

For the concept, I wanted the images to have movement, some sort of dramatic character, and to look “cool.”  “Cool” is at best a meaningless relative term and I don’t profess to having my finger on the pop-culture pulse of the trend setting world…but I went for the concept in my head anyways.

Floating in the Air

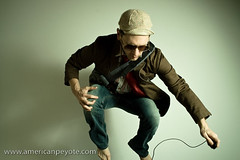
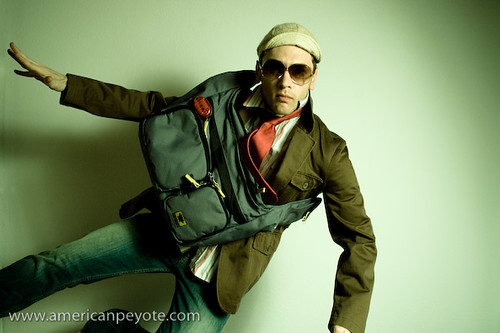
Having no budget or creative vision, I decided to go with my only available model, myself – and capture myself in a dramatic fashion: Flight (jumping through the air).  The apartment has wood floors, so first I set about setting up crash pads (guest beds) to land on and then added wardrobe elements and props which would add motion effects to to the final images.

Wardrobe: Shirt (BC Ethic), Tie (H&M), Jeans (Levis), Olive Jacket (We), Messenger Bag (MountainSmith)

Equipment: Crash Pads, 1 Flash w/umbrella, Radio Trigger (Gadget Infinity), Minolta 7D, 20mm lens, Remote Trigger

Crashing in Action

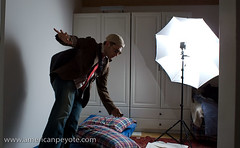
The crash pads were setup in front of a white wall and the camera went on a tripod.  I started out using the 2 sec. shutter delay function on my camera, but coordinating my jump with the delay wasn’t’ working so well.  Instead I opted for using a wired cable release.  My hand was often out of the frame, instinctively trying to break my fall – but the trigger release could eventually be Photoshopped out of the picture.

Jumping with a Trigger

The wardrobe seemed to work, the jacket and tie floated in the air when needed and a stack of paper added another element, a main focus for the eyes to lock onto and juxtapose against the main subject.  The Mountain Smith courier bag was, well, one of those Urban elements, suggesting the subject is “going somewhere” and has “things to do” – people to see.  I love my MountainSmith bags like I love my ice tools, and try to integrate them into shots whenever possible.

MountainSmith in the Air

Post processing of the images was done in Lightroom and Photoshop, sometimes using some processing elements I picked up in the Joey Lawrence Tutorial DVD.

In the end, I fell short of achieving the vision in my head, mainly because I didn’t have a trampoline and the cielings were too low for one anyways. This meant jumping on my own, and since I don’t jump very high I had a very short time to pose while in freefall.  The jump and freefall where rarely timmed correctly to the camera shutter and my head statred hurting from the impacts after a while.  Still, achieving 1/4 of your vision is far more productive than 2 hours of watching TV.

Drama in the Air

Jumping looks easy, and it is twice in a row, but if you’ve spent the previous day ice climbing and every other photo sucks because the timing is off and you’re out of the frame, well…the jumps add up and the photos session quickly turns turns into a workout fast.  I think of Michael Grecco’s book The Dramatic Portrait – he’s shooting Jet Li doing a flying kick at one point, and the translator says, Jet Li doesn’t need a trampoline.

Velvet and Glasses

Zurich Notes – Photo 07 Photography Show

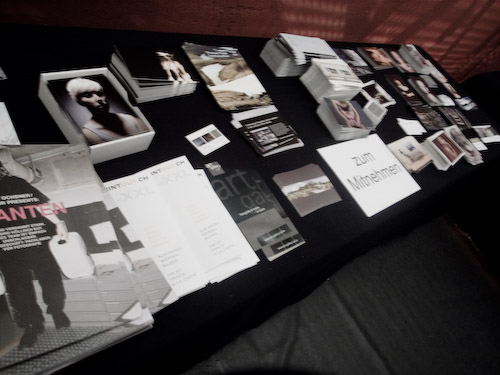
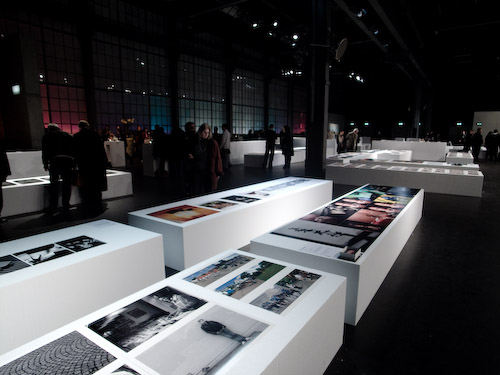
Photo 07 is a photography show in Zurich, held once a year to highlight Swiss photographers and their work from that particular year.  So, actually the name changes every year; Photo06, Photo07, Photo08, etc.  It generally takes place in the Maag Event Hall near Hardbrücke, the cool Zurich club district.  In short, an old factory is rented out and hundreds of photos are put on display by the represented photographers for anyone interested.  A pallet of Faces magazine was sitting unattended for pilfering, the same as you’re likely to find at a Kunsthaus-techno party or other art-type exhibition around Zurich.  You can also grab free literature and promotional cards from the photographers.
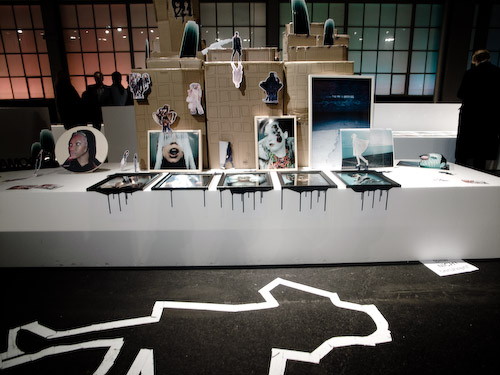
There’s no real theme for the iconic Zurich photo show, the only qualification being that the photographs were produced during the year of the show.  This lends a broad subject matter, everything from photos that are “supposed” to be out of focus to tables bleeding black blood, fantastic aerial shots and high fashion.

This also means there’s no pretentiousness about the presentation of the work.  The goal of the night is to exhibit Swiss photography, network, hang-out, basically just chill and have a good inspiring time.  The work of a high-paid fashion photographer can be found next to that of high-adrenaline hobbyist.  It’s all about the images.  Of course, because the show highlights the work more than the artist, I can’t remember a single name of anyone who exhibited at Photo07.  So, it’s fortunate that a list of all of them can be found on the Photo07 site.  There you can find the contact info for Sandor Rozsas, who can produce sharp photos if kindly asked.  You can also find out about Oliver Oettli, who’s glamor works sometimes includes pink plastic dolls from IKEA.

The actual presentation of the works is left up to their owners and might range from well-matted to frame-less prints seemingly freshly removed from the cutting room floor.  The display surface was uniformly white Styrofoam – cut into giant blocks, which fit nicely with the concrete flooring and dark industrial setting.

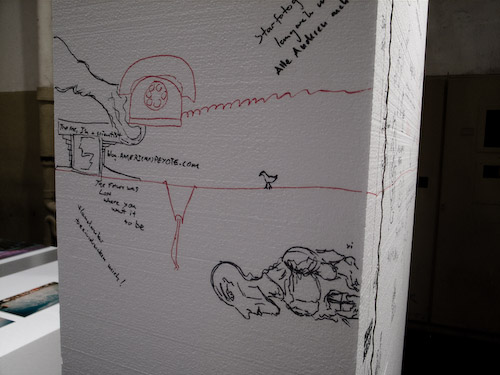
The coolest and most enjoyable art is the type you can interact with.  And one of the first exhibits was a giant foam column with a permanent marker on hand for every anonymous person to draw or write whatever they felt like.  Naturally I produced a strange looking creature with large Alien-like head and human nose.

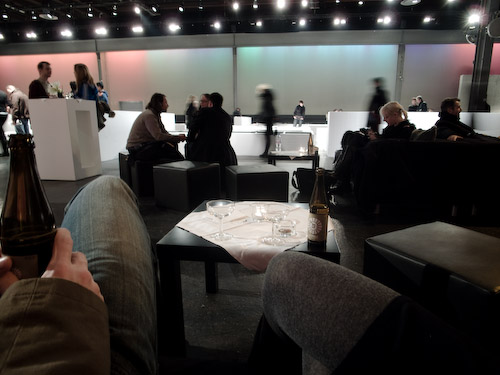
After walking through the avant-foam maze of faces of colors you end up near on the other side of the cool-factory ambiance and can chill in the lounge – by the bar.  The perfect setting to sit back and reflect on the experience you’ve just witnessed.

Photo07 was a cool experience, situated conveniently in between Christmas and New Years, the show is an excellent reason to wander into the crisp December Zurich night.  I’m looking forward to Photo 08 in Zurich, and might even submit a portfolio to the show.