Mark

Mark is a guy from Michigan who lives in Switzerland. He's a photographer, occasional writer and trained research engineer. His free time is sometimes monopolized by mountain touring or travels. On occasion he attends and presents at BarCamps and blogging events.

Piotr Soluch – Web Portraits Zurich

The latest addition to the Web Portraits Zurich project is Pitor Soluch, he just opened his web design business in Zurich, and I photographed in my new studio space in Hedingen. I hadn’t worked many projects lately, between moving out and moving in and running a few marathons I didn’t find a lot of time to organize any shoots or projects this summer. I met Piotr at a few web gatherings in Zurich like Web Monday, and we also ran into one another at the 2011 Swiss Startup camp in Basel. He’s an intricate designer with that required attention to detail that makes the difference between a professional site, and the ones that I throw together. For the shoot be came by with cookies and Polish beer. This was a fantastic combination and the shoot went smoothly for both of us.

I wanted to get back to fine painterly shadows and images with a dramatic feeling. This included lighting Piotr with some CreativeLight strip boxes from behind either shoulder, a Metz MZ40 in a beauty dish from the front and LastoLite TriLite reflectors from the front. I then pulled in some textures from Rome and the abandoned hospital of Beelitz, just outside of Berlin. There’s no substitute for fantastic texture images. I’ll walk around a city for hours shooting walls and the streets and then maybe not use them till a year later. They add something you never expected when the shoot started.

Strata Conference 2011: Complete Video Compilation Review

The big data Strata conference in February of 2011 was a three day event covering everything a data scientist needs to go from zero to data hero. I’m reviewing the Strata videos as part of the O’Reilly blogger review program. The full video series covers those three days composed of 78 sessions, with so much information it’s taken me about half a year to write up a review. If you could clear your calendar you could easily spend a solid week just watching the content (which I didn’t have the ability nor desire to do, hence the long wait). It’s enough information overload when you’re just attending a three day event and only going to one session at a time. My mind often goes numb after the first two hours with all the information, and by the end of a two day conference I want to jump out the nearest window. The Strata video collection is a much more enjoyable way to take in the content.

Watching the Videos

There is an very large amount of information in the video collection. What I did was to identify the sessions which I felt would be most interesting for me. This entailed starting from the end middle, with topics like, Mining the Tar Sands of Big Data, and then I worked my way back to the start with the Data Bootcamp sessions. This gave me a more practical overview of the value of big data now and for the future, giving me motivation to learn the basics of data collection and interpretation in the bootcamp sessions. I like the Executive Summit sessions because it gives me a feeling for how the top managers might perceive the value of big data, which would naturally be different than my perspective. I’m still going over all the information in the videos, but I now know what big data means for the present and the future. The bootcamp sessions get you up and running with open source data tools based around Python and R. You can download these while watching the videos and follow along with their presentations.

Why Big Data Matters

How was Osama bin Laden found? Big data analysis helped pinpoint his location (according to Frontline). Big data analysis will replace individual intelligence gathering as a tool to pinpoint terrorist activity, troop movements, flood danger, probably even tsunami disasters, famines etc. Big data analysis holds huge potential for both good and evil, and is how we will predict the future trends with increasing accuracy, and the Strata videos will help you get your head around how to do it.

Why is Strata relevant? Big data is the commodity of the now, and of the foreseeable predictable future. Big data means being able to collect, digest, and interpret large data sets to find something useful. Useful could imply building a data consulting startup, data mining social networks, understanding from an executive position how big data can be used to improve your existing company. It will be an essential component in many businesses as we venture further into a future defined by data collection. Data market places will no doubt evolve where people can buy or license the use of big data sets, and probably big data use wars will ensue instead of patent disputes to dominate the intellectual property legal landscape of tomorrow. Strata covers all of the background topics necessary to make sense of the data future. There are talks on the ethics and privacy with big data, how startups use big data, how large corporations benefit, and what can be expected of a data scientist as a profession in the future. There’s also little nuggets of how to lie with big data and hide things you don’t want people to realize when visualize data with curves and diagrams. I find this essential to being a savvy consumer of news and political poles, and it will only get more and more relevant. Who wants to be a data journalist?

Does Strata Deliver?

So, does Strata deliver? Yes. The videos are well-done, sound is clear and the speakers are quite good. All the critical information is there to get up and running on the big data subject. If you know nothing about big data the Strata videos will get you up to speed. If you are looking to understand the potential impact of big data on future business Strata delivers. If you already are a data scientist you’ll probably find the bootcamp sessions redundant, but will no doubt find a lot of good info on the current state of the industry in the executive sessions. I may look back in five years and remark on how watching the Strata videos was a defining point in my career. However, remember that this is a really big set of videos, almost more of library than a conference. You’ll probably feel overwhelmed when you first look at the topic list, but skim over the topics and just start where it looks interesting. This is a video collection where you watch specific parts a few hours at a time, and not try to just crunch through all information in one night (or even in just one week), in fact, in may take you nearly a year.

Buy the Strata Conference 2011: Complete Video Compilation on O’Reilly.com

Le BonBon Paris Portraits by Emilie Brion

Paris is one of the those iconic places that you don’t want to get sucked into because it’s so well known (like Las Vegas), but there’s a reason that it’s so popular. No matter how much you may think it’s a cliche to stroll down the Champs-Élysées, it’s still a unique experience. The Effel Tower simply does not get boring, and I’ll never pass up a trip to this wonderful heart of Europe. The last time I was back there I met up with Emilie Brion, we know each other from an eternity ago in Michigan and I promised to look her up next time I was Incognito in Versailles. We killed a few hours at a cute cafe near the Opera and we got into some heavy conversations about photography, portraits, and the Decisive Moment. She appreciates the capture of a singular moment in time, which can never be relived or improved upon, I say that I produce decisive moments in the studio when I decide to. In truth there’s a never a way to relive a photograph, either from a darkroom or from the computer, and it was excellent when I regained this sense of fleeting time captured in a camera after our conversation. Since that time Emilie has started shooting a portrait project with Le Bonbon magazine, which features portraits of people from the different districts of Paris. I wanted to write about her project, my mind freshly finely tuned for some prose after watching the trailer for the Rum Diary (the novel by the late Hunter S. Thompson) with Johnny Depp playing Paul Kemp. But to be honest, some things are best left in their perfect natural state – and no post processing or editorial drama is necessary. So I present here, in Emilie’s own words – her portrait project of the 6th and 7th districts of Paris for Le Bonbon.

The online version of her portraits can be found here pages 48-49:

Le Bonbon Juillet 2011 Rive Gauche

In Emilie’s words…

Le Bonbon, ‘the candy” in French, is a local free Parisian magazine by arrondissements (for each districts of Paris) made for and close to the locals. It includes information on what’s happening in each district and promotes local restaurants, stores and events. Each magazine includes two pages dedicated to 32 snapshots of people from that district. Since I love to take pictures, I was asked if I wanted to take the pictures for the magazine for the 6th and 7th district of Paris. I thought it would be a new challenge and interesting project.

Since the pictures are snapshots, I did not want to use a digital camera but simply use my iPhone 4 so that when I would approach people to ask for their permission to take pictures, I wouldn’t be a photographer – but like them, a pedestrian walking on the street with an iPhone in her hand…. Less intruding I find…

Shooting street portraits of strangers is challenging. Often when you see a stranger you want to photograph, you can’t seem to ask them for their photo. For my part, I don’t want to intrude and I have the fear of the rejection. The struggle to shoot through the fear is worth it as when you get a spontaneous approval then you get excited and want to shoot more.

The reaction varies, either you get a firm “no”, or a spontaneous “oh, ok” or some people ask you numerous questions s as they are intrigued by the reason they were chosen and what the purpose is. Approaching people on the street is quite a sociological and psychological experience in itself…

The light is my biggest challenge… I walk around and find someone that I feel represents the districts or I am just struck by their face but I don’t want them to pose and position them to get the best light. I prefer the “instant” moment as these are not professional photos but snapshots so I often disregard the light and the one thing I want to capture with every portrait was that ‘unguarded’ natural look… that look that moved me in the first place when I spotted them on the street… I want to avoid that usual snapshot smile… you know, that smile that you’ve smiled a thousand times whenever you’re in front of a camera that “forced and fake smile and posture”. I want it to be REAL and spontaneous.

This project was a challenging and rewarding experience for me. I remember each and every encounter I’ve had with all these strangers: how I spotted them, how nervous i felt, how they reacted to me, and the rewarding feeling afterwards knowing that I just got one more keeper in a set of a hundred keepers I was aiming to get. Now I feel so lucky having been able to connect with these people even for just a few seconds. Different faces… all of them beautiful in very different ways with whom I have had a brief encounter that I tried to capture to its best in its instant.

As Marcel Proust said: “The only real voyage of discovery consists not in seeking new landscapes but in having new eyes.”

My Swiss Alpine Run – Luaterbrunnen to Eiger Rotstock

One week to go before the Jungfrau Marathon, and I was in the Jungfrau region to train. This was a special training run in fact, because it was an essentially unplanned for screw up. See, I got a few dates mixed up in my head and when I left the house on Friday morning on the 2nd of Sept. I thought I would be running the Jungfrau Marathon the next day. As it turns out – in reality, the race is on Sept. 10th, one week away. I realized this later that morning, but since the hotel was already booked I figured I would just go there anyways and run from Lauterbrunnen to the Kleine Scheidegg, which is the last 20km of the official Jungfrau Marathon race route. Now I am relaxing on a German train speeding towards Bern with my netbook and a fine Franziskaner Weissbier to recount the adventure, all is well in the world.

A Jog in the Alps

The run up from Lauterbrunenen was uneventful, the roads give way to trees and dirt and little rocks. This climbs passed Wengen and soon the view of the mountains comes into view. Those high peaks kissed with snow fields and glaciers melting into history. I try to get into the Alps and shoot a lot of pictures so maybe one day I’ll show some grandkids what it was like the when the Alps still had ice and snow. I’ve done this route before when hiking with Kate, a friend of mine who was visiting Switzerland and I decided to show her the Alps. Any route which starts in trees and green and ends in glaciers and high peaks is a fun day for me. This route is a fun run, but leaves my body unfulfilled and a lingering desire is present at the end, with a lust for thinner air. When I reached the remnants of the Eiger glacier my legs were a little tired, but I must be in half-way decent shape, because I didn’t feel any need to stop or have a beer at the restaurant. It was still early, just 10:30am and since I was already there, I figured there could be more to do and see. This is the mountaineer in me, always pushing for more. I imagine I’ll feel differently when I run the full Jungfrau Marathon, which starts in Interlaken and ends at the Kleine Scheidegg. But on this day, my spirit desired something more.

Thinner Air

It took me just over two hours and thirty minutes to get from Lauterbrunnen to the end of the race at the Eiger glacier (what’s left of it at that altitude). This was only 20 km and I really wasn’t that tired and it was still early so I decided to just keep going. Beyond the Eiger Nordwand train stop there’s the trail leading up to the mountaineering routes, and I decided to just see what was up there. The normal trail stops at this point but there’s one of those nice blue SAC Alpine trails which includes ropes to climb up. I kept ascending till just below the famous wall of the Eiger and then saw a continuation of blue to a little peak to my left. To be honest, if I had had a climbing axe and better shoes I might have just kept on going up – but this of course, would have be irresponsible and…totally awesome (maybe another day). Instead of climbing the Eiger I continued to the smaller peak and a few minutes later I was on the summit of the Rotstock at 2660 meters. At the Rotstock I stayed to run around and pose for some self-portraits, naturally I want to look cool in my Salomon running gear. I also figured it would be a good time to record some thoughts in the SAC summit book. So, in total I started from Lauterbrunen at 796m and ended up at 2660m, a nice workout for the day. This was my version, what I call the Jungfrau-Rotstock half-marathon, which ascends just a few more vertical meters than the SwissAlpine K42.

Mountain Zen

I’ve never been much of a runner, but mountain running has a fine allure. Being light, going fast and traversing up and down peaks gives me a certain sense of freedom. I find it fun to train for marathons when I take the opportunity to just run and see what I’ll find. You might find Swiss Army tank bases doing target practice or just some peace of mind pushing yourself over passes and through mountain ampitheaters, either way it’s a fun way to spend the day and if you take a camera you’re sure to capture some wonderful mountain vistas. That’s the real reason why I like this mountain marathon thing, the adventure of discovering new places and just pushing myself a little to see what will happen. Cape diem and all that mens sana en copre sana bullshit. Plus I like to dress up like an X-man in Salomon running gear and do something with the look aside from planning a trip to comic-con in San Diego (although it’s on my to visit list).

Jungfrau Marathon

Next weekend on the 10th of September 2011 is the official Jungfrau Marathon, it starts just in front of Hooters in Interlaken (or in front of the Grand hotel, depends on where you look), and ends at what is left of the Eiger glacier. I still need to find a hotel, I imagine that Interlaken will be booked out so I may be staying in Spiez. I’m looking forward to the starting bell (I’m assuming a giant cow bell will kick things off). I didn’t die on the SwissAlpine K42 so I’m planning to survive and write an article about the Jungfrau Marathon experience. And then, well, who knows? The passes don’t have snow yet so I’ll probably go on a few more running adventures in the Alps before the ski touring season starts.

Dynamic Color Portrait Photoshop Tutorial

Here I present a workflow for creating a dynamic image using layers in Photoshop. Why? Well, because I like to share and because I got some requests on my Google+ album asking how it is done. To illustrate the process, I’ll use a set of images I created for Scaramanga Bags, a cool company in the UK that sells vintage leather bags and other things like journals and vintage suitcases and trunks (see the Scaramanga Concept Images here). On their website Scaramanga already has nice urban portraits with their bags, so I wanted to go in a different direction. I wanted to create portraits that convey a feeling of abstract motion. Something to invoke a feeling of movement and action. I love photography and painting. I began with photography looking for image perfection, and then moved to painting after developing a color palette in Photoshop. I like to light an image in layers, and in Photoshop I layer colors and backgrounds to add a sense of visual movement to an image. I look at a scene, put on a pair of rose-colored glasses, and I have a layered image (because at the base, this is all Photoshop does). When you can do this in your mind you then just need to translate that to something other people can see, and for that we have Photoshop. The aim of this article is to show you how to combine images together to create unique, balanced color combinations, which add a desired character to the original image.

The Basic Recipe

I generally apply this concept to portraits, where I want to add a certain character which complements the person photographed. First, begin by realizing that the person is a person, not simply a subject (A Person is not a Subject) for academic study. I start out with a base portrait image, generally shot in a studio environment with a two or three light setup using softboxes and maybe a beauty dish. Why? Because we need a decent (well exposed) portrait to start with. It should be something that speaks to you and has the look and pose you want. The layers in Photoshop are just there to modify the intention of the original image (otherwise just go ahead and create an image from scratch and render it in 3D).

I always start with a well-exposed base image that defines the main textures, tones, and colors of the person. In the Scaramanga Flight Bag images I used a Sony A900 and Elinchrom lights with a CreativeLight softbox. You don’t need an expensive camera and equipment, but you do need to know that a properly focused image with proper exposure will give you the largest amount of information to work with. If your initial image has high contrast or deep and dark shadows, then you just need to know that you can’t modify those areas of the image very much, and they will not blend so well when we layer a new image on top of it, since the very dark areas contain very little color to modify. So, let’s start from the base image.

The Base Image

In reality we’re mixing static image layers one on top of the other. In my mind I’m painting on layers of color movement to complement a portrait. I began with images produced in my apartment studio, and posed in such a way as to communicate the idea of running or of standing still, with motion in the background. This is my base, a strong pose which will be modified (enhanced) by a new layered color environment. For more info on creating a dramatic pose portrait check out my post on this subject (Urban Ninja – Dramatic Pose Tutorial). In short, I take my inspiration for poses like this from comics and graphic novels such as Conan the Barbarian, 300 and Watchmen.

After importing the images into Lightroom I chose the best and then increased the Fill Light to reduce the contrast in the image, and then exported to Photoshop for layering work. When exporting from Lightroom I don’t want deep and dark shadows, but rather a lot of information to work with and which will respond well to layering. Once in Photoshop I will often start by adding a Black and White and High Pass layers to the base image (although I didn’t need to do that for this image set). I first copy the original layer, add a High Pass filter, and set the blending on that layer to Soft Light. This has the same effect as increasing Clarity in Adobe Lightroom, but in a more controlled way. I reduce the Fill value on this layer so that everything blends well together and the image doesn’t look gaudy or like it was just run through an actions industrial meat grinder. I will often also create a Black and White adjustment layer, and then set the blending to Multiply. You can then adjust the values for reds and greens and blues. This desaturates the color while intensifying the shadows of your base image. It can darken the image a lot, but the goal here is to modify the tones of different parts of the image (such as skin tones). Again, I will often reduce the Fill of this layer so as not to totally kill the base colors.

Choose Layers

I always start from the base portrait and then choose layers on the fly. For the Scaramanga images I wanted a lot of bright colors with movement. So, I opened up Adobe Bridge and looked for long-exposure night scenes with lots of color and light streaks. To achieve this abstract motion goal, I picked a few images that I had shot in New Orleans, Zurich and Berlin. The key here was to have images with long light streaks and pockets of intense color, which would blend in with the form of the person in the Scaramanga portraits. By blending well I mean that the lines of the night scenes would coincide with the lines of the runner (think of drawing lines over his body and comparing it to the flow of the layer images – check out my Dynamic Pose Tutorial for clarification). There’s no formula here, you just need to pick images that work well together. Aside from light streaks, these images also have very interesting pockets of color, and also recognizable object elements such as a tram or street scene, which then defines the background environment of the final image. The night images from Zurich give the feeling of running through a city of lights, while the one of Bourbon St. gives the idea of a person standing still while the environment is exploding in color around him. Now that I have chosen the layer images, I just need to blend everything together.

Blending Layers

After picking the layer images in Adobe Bridge I opened them in Photoshop, and automatically set the blending mode to Overlay. This allowed me to preview how the different light and color elements of the layers would work together, and how the flow of the lines of the layers would mix with the base portrait. At this point, the image just looks like a couple of images stacked on top of one another, and that lazy sort of image production just doesn’t do it for me. To properly blend the images you need to play around with the blending modes, like Overlay, Softlight, etc. and also change the Fill and begin masking individual areas with a paint brush or gradients. To mask a layer by painting simply select the layer and then choose the layer mask icon. When you now paint with black, the layer will be masked (or hidden). You can change the Opacity of the brush to mask the layer gradually with each new brush stroke (the recommended method). When masking in this way I usually use a brush Opacity between 3-20 with a soft brush. This is where I act more like a painter than a photographer, masking and blending the layers uniquely together. I rarely use the entire layer image. Often I use a gradient to mask out half of it, and also paint away most of the layer over the person. I will also add full Color Fill layers (usually set to Overlay blending) to tweak the overall color. Eventually, the final image will then start to come out. To illustrate this process, you find here the secret goldmine of any Photoshop artist, the screenshots of my Layers window on my two favorite images from this set, the Runner and Bourbon St. You can clearly see how the different layers were masked, and what the original layer images looked like before blending.

That’s All

If this sounds complicated don’t be deterred. Essentially all I do here is to mask out the parts of the individual layers which don’t flow well together, and in the end I have an image with all the flow and color vibrancy I desire. The main idea is that the character of the layers complements the base portrait. I save the image and open it up in Lightroom. From Lightroom I play with the colors further, adjust shadow and highlight colors, Vibrance, Clarity, etc. until the final color tones are correct and then I export.

For more info on layers and portraits, check out my Hyper-Realistic Portrait Photoshop Tutorial. This covers the main topics I addressed in this post, but you get to see a screen cast of the whole process.

Analogue Lust: Dark(bath)room Escapades in Photography

I got into photography a few years before the digital revolution exploded and people everywhere began remarking on the death of film as a capture medium for light painting (er, photography). Some say film is dead – I say film is as dead as painting, which is still a vibrant activity for millions throughout the world. Having a darkroom in my apartment has been a quiet dream of mine for a long time, and recently became a reality (till I had to take a shower). This is a summary of my latest analogue escapades with black and white printing. When you develop your own film and enlarger your own prints, there’s this mystic feeling of having a hand in the total process from image capture to final print. A sense of being able to push and pull your development and watch the prints magically grow from the arid white vastness of the unexposed paper to a finely contrasted representation of reality. It’s the embodied feeling of getting it right in the camera. Cartier-Bresson, the decisive moment, Joey L with a Polaroid and capturing the moment. Anyways, I just moved to a new place and hadn’t setup my digital studio yet.

For the past few weeks I’ve been working with a friend of mine to setup a pinhole camera project for a 6th grade class she’s teaching. We began with a Polaroid pinhole camera, but it’s too expensive to have each kid build a camera with a Polaroid back on it, and you also can’t tell the whole story of how an image is developed, as it’s all contained within the Fuji/Polaroid insta-magic photos. So, instead my friend went back to her roots and decided to have the kids build a traditional pinhole camera using black+white paper as the film, and then create the final image via contact printing. It’s a great project for students, especially in this techno-world of today where every gadget can take photos and then upload your electronic images to Facebook, creating and instantly distributing a perfect copy of a copy of a copy that can be shared and retweeted and posted all over the planet. You lose of course, the uniqueness of the printed image. A printed photo is unique – this transience, this fleeting fleck of uniqueness can be seen and felt in each print you develop by your own hand, because no two will be exactly the same (well, at least the way I do it they’re all unique accidents).

Dark(bath)room Setup

We needed a darkroom setup of course to realize the project. I easily found a Rollei enlarger setup on Ricardo.ch (a Swiss auction site) for 250 CHF with two new packs of Iflord Multigrade paper. It was a no-brainer to pick it up. The enlarger was a classic Rollei, coming direct from Lisa, a photographer in the Zurich area. From HobbyLab.ch we ordered the developer and fixer chemicals. Film may be dead (as some say), but it’s super easy to find everything needed for a darkroom. We took ownership of the enlarger and accessories on a sunny Sunday morning, and spent the rest of the day setting up the laboratory and making prints in the bathroom. We put the developer trays and chemicals in the shower to have some running water. Ideally you don’t want to balance the enlarger on a toilet, but you sometimes need to make do with what you have, which is exactly what we did (thankfully it never fell off).

First Prints

My friend started out doing exposures of me sitting outside with her pinhole camera. This was nothing more than a shoebox with a piece of Iflord paper in the back and a pinhole in the front. This piece of paper was developed (creating the negative) and she created the final positive image via contact printing of the negative pressed flat against a second piece of paper under the light of the enlarger. As it was a wonderful sunny Sunday and I had just done some laundry, we hung the prints out to dry along with the whites. This was my first experience seeing pinhole images like this, and I think they rock. The kids in her class are going to have a fabulous time building their own cameras, doing prints, and learning valuable lessons about optics during the process.

I opted to print images I already had, and pulled out the first black and white negatives I could find, which happened to be some ISO 50 Ilford PanF exposures I had made in Bolivia during a trip back in 2003. This is a high contrast film, and it prints very nicely on Ilford Multi-grade paper. I decided included the film carrier holes in my prints, mimicking those retro-film borders you can apply to your iPhone photos using many random retro-cam apps. Fuck the apps, if you desire ultimate interactivity and user experience then consider a darkroom. Oh, do you have a retina display? I have a retina as well – two in fact, they’re called my eyes. Wow, cool, you can view your images on your iPad – know what’s cooler, looking at the smooth fantastic surface of a new print drying in sun along with your laundry. I also pulled out a Fuji Neopan 120 negative from my favorite place in Berlin, and played around printing images of this club front and sticking them to the bathroom mirror. I love how films all have cool names like PanF, Neopan, Provia, Velvia – all with individual character traits and unique personalities, a concept generally lost in the Canikon pissing matches and pointless megapixel branderbating orgies that dominate too many conversations in the photo circles of the world.

Digital Is Not Worthless

I know there are photographers today who have never touched a piece of film, let alone developed or printed their own images. I love creating images with Photoshop and my Sony 24 mega-beast A900, but it’s not the same as creating in the darkroom. I started out with film, moved on to a film scanner to create files for prints, then went on to digital cameras and then expanded to Photoshop. From Photoshop I went a little analogue – started doing paintings, and now my journey has come full circle back to where I thought would be awesome 15 years ago – doing my own prints in a darkroom. No regrets at any point. Use the technology tools you have as you see fit and never stop exploring.

Web Monday Zurich #21

It was a fine summer Zurich night, and I was heading back to the Web Monday Zurich gathering to check out what was happening at our wonderful host, Interxion. There were many events worth noting during this Monday, but the main points include Interxion, 42 Matters, Restorm, and above and beyond customer support by a Googler.

Interxion

Eddy van den Broeck presented Interxtion, a data center in Glattbrugg in Zurich, and the host of this 21st Web Monday Zurich. I had a little trouble finding the Interxion building, but it’s probably a little hard to find because it’s better that way for the security of their business. Interxion is a data center. A large data center. In fact, a very large data center in the center of Europe. I never really appreciated the data center business until this presentation. Interxion sells secure reliable data space. A simple idea executed with high precision and reliability. The scope of their operation is huge, and these types of centers will be the backbone of our digital future (actually they’re already pretty integral to everything). Politicians keep harping on cyber security and the next big war, but I’m guessing that in the future if you really want to fight a war with someone you won’t care about their military bases or missile silos, you’ll just target their data centers with tunneling cluster bombs in an effort to cut the beast off at its head (this part about wars and beasts and decapitation with cluster bombs is my own fantasy – not part of the Interxion presentation).

Interxtion is located in the very near vicinity of the Zurich airport. I didn’t realize this was relevant information, but I’m sometimes slow comprehending the world around me. Why near the airport and why in Switzerland? Power, fiber optics, customers, political stability, connectivity. All things a giant information storage space needs to be successful. As we do more and more on the net we tend to forget that big data needs to be somewhere…physical. Even the cloud has be a cloud somewhere, it’s not just a fanciful collection of Smurfs shuffling your data between magic mushroom fields and your iPad or Asus Transformer – and there are many real-world factors that need to be in place. For example, Interxion uses more power than the Zurich airport and yet are CO2 neutral. The mechanical engineer in me found this absolutely fascinating. I actually chose my latest internet service provider iMountain largely because they run their operation on solar power, and I like to support Green. Interxtion offers this choice to their customers as well, allowing and promoting the use of alternative energy sources for customers, for example, wind power sources for energy consumption instead of nuclear. Why Switzerland? Best power grid in Europe, politically stable, in the center of everything – makes sense to me (I can list these same reasons for choosing to live and work in der Schwiez myself).

In closing Eddy spoke about the drive to create a Silicon Valley inspired innovation culture in the Zurich area – code named: The Zurich IT Valley. This is a theme people are often talking about, but implementation is always a question. Swiss startup folks visit places like San Francisco and them come back with tales of how awesome it is over there and how things need to change in the Zurich area. However, Silicon Valley wasn’t built by purpose (at least there was no city planning blue-print, even Apple doesn’t have a central campus yet), it was an organic evolution of the innovation society, probably dating all the way back to the atomic bomb. There are real grass-roots movements in the Zurich area like Web Monday, Mobile Monday, Web Tuesday and The Hub, where the locals meet and organically develop communities that define a healthy environment for startups and innovation culture. The Zurich IT Valley sounds like a more structured approach, let’s see what the next five years will bring.

42 Matters

The first startup presentation was by Andrea about AppAware.org – the first app offering from a new startup out of ETH Zurich called 42 Matters. The name of the company is self-explanatory if you’ve read the till the end of the Hitchhiker’s Guide to the Galaxy, and it not then it doesn’t matter. I mean, the relevance of the name, not the worth of the company. AppAware is an application which shows you what people are installing on Android devices. You can see the installation trends, see what’s hot, what’s not, and based on that info decide for yourself what apps to install on your own device. AppAware is location aware, so you can see what the people around Zurich have installed (and uninstalled). Naturally you can connect to friends to see what they’re doing and copy their behavior if you happen to be a sheep grazing in the mobile app feeding fields. You can tag apps and…do what most social network type apps are doing – and in this field, idea execution is everything. As I began to consider an ASUS Transformer I understand why this sort of app is needed. By contrast you can easily see in the Apple app store if a an app is good or not, read reviews and see if there’s compatibility issues with the latest release. I couldn’t really find the same info planning which apps to buy for an Android device, and AppAware would fill that need.

Is there a way that AppAware is making money? Not at the moment, but there are high hopes for the future, such as providing apps for money and data mining. AppAware/42 Matters is an ETH startup, it originally began as part of a PhD project, and was successful enough to found a company. Seems like a reasonable direction, but in the SWOT sense of the mobile landscape it seems like AppAware could be a stepping stone to something better for the founders – as opposed to the final killer product. The thing is, apps like AppAware have no security against competitors, and even if you’re the first to market it doesn’t necessarily mean anything. A new hot trending app can come along with the same\similar technology and suck up your users like a sponge wiping across the universe or a second straw in your milkshake. Still, part of the reason the founders put their ETH studies on hold was because their idea got so big so quickly, and that pulse could continue to grow with the explosion of mobile devices on the world. I wish them well.

Restorm.com

I’m a Doktor of Science, but I’m also into photography, painting, and small production video creation. So Restorm.com was naturally very interesting for me to learn about. There is a very large market for licensed music and media on the internet, but a lot of it is simply shared or pirated. I know this well, and there are many times I want to use a piece of music in a video production, but as an independent hobby-director I have no way to license music legally to use in my work. I’ve resorted to creating my own music, and now I’m collaborating with a DJ from Atlanta I met on Talenthouse.com. Working with DJCue is a great solution for me, and this anecdote is actually a success story for Talenthouse, but the vast majority of folks don’t have time to forge partnerships like I’ve had the ability to do, and just want to easily license music for their projects as easily as buying the song on iTunes. Restorm is a company trying to do that (well, compared to the way it is now it would be as easy as iTunes).

Philippe (from Restorm) wants to make it easy to allow direct licensing agreements between musicians and producers needing music for films and other projects. This is huge for people like me, who have been wondering since the beginning of time (ok, maybe 3 years at least) why we can’t do this already. From the presentation, it seems like Restorm is taking the right angle on the licensing issue. The photography stock market has basically been destroyed by microstock companies such as ShutterStock, who built unsustainable business models ideal for designers needing cheap images but pretty poor for photographers (think ShutterStock) looking to profit from their imagery. Companies like Photoshelter and Alamy provide credible licensing options for photographers, but I think that Restorm can do something really significant in the area of creative works licensing if they’re successful starting with licensing music. I’m looking forward to their full launch.

The After Party

After the presentations the best part of any given Web Monday begins, the time of drinks by the BBQ and networking with all manner of interesting people. I was mingling and hanging out with folks like Mike Byte to catch up on his latest projects and by the end of the night witnessed a customer feedback session that forever proves in my mind that Google is not evil, and is composed of caring people focused on providing an enjoyable experience for their customers.

It went down like this, I was talking in a circle of friendly conversation with some folks (including a Googler), admiring business cards (I had forgotten mine) and making smart remarks about this and that newest thing. I vaguely recall something about tactile surfaces perhaps, or a smart phone display built wth thin-film piezo technology, which will power the devices by user gestures. Then a tall man in a light colored suit, and pressed shirt walked up to us. He seemed out of place at a Web Monday, where even the folks from IBM don’t come in suits. He was a well-dressed man with well-groomed hair and a suit and a tie in a sea of web hipsters with tactile business cards, Freitag bags, disheveled hair cuts, and relaxed-fit jeans (I was sporting a fine pair of white leather Adidas by the way).

One of our circle of conversation was a Googler, wearing his fine Google t-shirt. The well-dressed man didn’t seem to be very happy, and we soon found out it had to do with Google. The conversation started off innocently, our Googler was showing off his phone sporting Android, and we were engaged in dialogue about how some people put a piece of paper over the camera port on their iMac because they’re a little freaked out at the new technology (as did I at first). The iPhone location tracking scandal was in the news at that time, and then our well-dressed friend began making remarks about Google being evil and how he deleted his account. We asked about his line of work and turns out he was a risk manager. So he was keenly clued in to all manner of freaky things that could go wrong in life, backed up by mathematical models, and I think he was a little paranoid – Paranoid that Google was evil and hell bent on taking over all our lives, but then the real reason for his quiet rage came out.

You see, he had set up a Google AdWords account, and he was pissed off that AdWords wasn’t showing up on his chosen search terms, even when his colleagues tried to search from different browsers. He seemed like a meticulous person, and as it turns out, had double checked and tried everything. The main page of his company was on the front page of Google (thanks to organic search optimization), but apparently for AdWords the search terms didn’t hit. There’s no customer service line for AdWords, and he was uber frustrated at the whole experience. Our Googler friend began a solution-oriented approach, bringing up different things that could be wrong, desperately trying to help our well-dressed friend with now fiery eyes, slightly reminiscent of lava about to explode from a deep crack in the surface of the Earth. This went on for maybe 10 minutes…did you try..ah…YES I TRIED THAT..what about..YES I DID THAT AS WELL.

It’s hard to describe the crescendo of rage that was now emanated from the eyes of our well-dressed friend, and for a second I thought we were heading to an apex in energy and he was going to rip off his blazer and punch our Googler in the face because of his poor AdWords user-experience. I’ve been studying user experience this past year, and also have shared this personal rage at wanting to throw a computer out the window, but when you have a representative of the company at the root of your rage directly in front of you, well, the bull’s eye is obvious for your rage canon. This is the point in a confrontation when you either fight back or accommodate to and empathize with the feelings of the aggressor and diffuse the bomb as it were. Our brave Googler handled the situation as any upstanding professional should. He pulled out his Google business card and offered to personally help in the matter.

This defused the situation because some one was listening – and listening is at the heart of user experience satisfaction. It’s the difference between OSX and Windows Vista. It’s the center that this social media tech world revolves around. A real person was offering to help and get to the root of the issue and was sincere in showing that he cares. In an instant the fiery eyes cooled and the rage diffused into the cool Zurich night sky. Our well-dressed friend remarked to me (now with a slight smile on his face), that if Google didn’t change its ways that everyone would simply leave and go to some other search giant. I remarked, that unlike the US economy, Google is too big to fail. He laughed now with genuine joy and agreed with me – a huge smile upon his face, and faded into the fine Zurich night like the Cheshire Cat blending into the background of Wonderland.

Photo Shoot Planning With Cacoo

Like many things on the net, I have no idea where I first heard about Cacoo (via a link from somewhere sent by a someone I suppose), but it’s one of the most uniquely useful websites I know of. A startup from Japan, Cacoo is like an online diagramming tool, like an online version of OmniGraffle, which is the best diagramming software for the Mac. With the free version of Cacoo you can create complex and beautiful diagrams, mindmaps, wireframes, page layouts, etc. and share them with a few clicks to people, and even do real-time collaboration. With the paid version, you can do exactly the same, just with more diagram pages (free version is limited to 25) and exporting options.

I started using Cacoo for photo shoot planning as a way to communicate with clients and collaborators. This seemed like an ideal use, as it allows the photographer/creative director to keep a history of project concepts to communicate directly to the client, and to be able to access and modify whenever desired. For photo shoot planning the workflow is like this: I have a concept meeting with a client where I get to know them – we toss ideas around, and basically just brainstorm. Then I take my notes from the meeting and create an idea map on Cacoo, detailing the type of portraits I want to create, and how the shoot will come together. You can view your diagrams directly on Cacoo, or export as a .png, .pdf., etc. The diagram can be shared securely with collaborators on Cacoo (with a Cacoo id) or via an open web link.

Why Plan?

For creative projects, often you want to communicate how an image will look like to show models/clients/collaborators what to expect during the shoot. With Cacoo clients can review your proposal, understand your thinking, and provide direct feedback on their desires. This allows photographers and clients who don’t have a lot of time to meet face to face to share ideas and give direction to a project any time of the day. It also builds confidence, because your clients see exactly what you want to do with them, and they’ll have confidence that you know what you’re doing. This helps to establish Trust – and there are few things more important during a shoot. If the MUA doesn’t trust that the photographer believes that the models know that they trust what they’re doing, then people become unsure of themselves and the end result can be lame. There’s nothing worse than going into a photo shoot without a clear idea of what to produce and just trying to throw something together in the moment under the guise of being creative. In the studio I create my decisive moments, I don’t wait for them to randomly happen. I find it’s 100x better when the clients, models, and makeup artists all know what will happen (or at least have a good idea) before the shoot starts. Photo shoots are collaborations, and the more input you have from the folks you’re working with the better the final images will be.

Planning With Cacoo

Cacoo is basically a large collection of wireframe objects and stencils that can be connected to one another while text and images can be easily added. With photo shoots clients often have an idea of what they want, and they can upload images that they’re inspired by via a weblink or direct upload to a Cacoo diagram. This makes it very easy to communicate with models or makeup artists so they know what will be expected of them for the photo shoot. Upload images of a shirt you want a model to wear, upload a hair or makeup style for the MUA/Designer to create, everyone can get everything ready before the shoot. I now use Cacoo anytime I need to communicate with models, clients, makeup artists, etc. It’s probably one of the most powerful free tools on the internet, and if you choose for a paid account, it’s probably the highest return on investment you’ll get anywhere on the web. Will Cacoo help your communication with clients? Hard to say, but it works brilliantly for me. Clients who are more web savvy will love it, and it’s a great way to get feedback from everyone involved in a potential photo/video project. Other folks, who aren’t so web savvy probably won’t be so into it. But, at the very least you can use Cacoo to show your clients exactly what you plan on doing before they step in front of your camera. Here are a few examples of how I used Cacoo on two different projects: Web Portraits Zurich and The Formers.

Case Study: Web Portraits

 With the Web Portraits Zurich project, I wanted to create cool portraits of people in the startup community around the Zurich area. I used Amazee.com to setup a group for the project and to communicate with members who were interested in participating. For each person we would have a brainstorming meeting, and then I would create a Cacoo diagram. This would often include sample images from my side so they could see what to expect from the shoot. Again, this gives people who likely have never been on a shoot before the ability to see what will be coming and to mentally prepare for the event. It also let them provide feedback to me on what they would like to have. On the main project page on Amazee (Web Portraits Zurich), I include Cacoo diagrams with portraits from each shoot, showing what we had in mind during brainstorming, and then you can check out the resulting images. Having these project diagrams also allows me to form a nice time-line, showing how the portrait project evolved. As a photographer it’s very helpful to look at what we had planned originally, and then compare it to what we ended up doing during the shoot, and what I ended up producing for the final images.

Case Study: The Formers

The Formers are a band from Zurich that I was contracted to do some portrait/video work for. They had some ideas for the overall feeling of the portraits they wanted, and we used Cacoo extensively in the pre-shoot planning process. First I made a Cacoo page for them and they uploaded imagery that they liked. Pictures from Johnny Cash and clowns, urban cityscapas, this showed me the way they wanted to represent themselves. This was a huge help for me as the photographer, because defined a direction, which was in line with the wishes of the band (we didn’t have time for meetings with the whole band before the first shoot). After our first portrait session Cacoo was used to get feedback on some composite image ideas I had, and also as a sounding board for new ideas. We liked the grittiness and sort of darkness of the images from the first session, and I dropped by their jam session to do another round of portraits. The results were tack sharp and exactly what I wanted. Cacoo allowed us to do a lot of this collaboration work on the fly, and reduced the time needed for organizational face to face meetings. I love meeting to brainstorm ideas, but it makes less sense when you’re just reviewing images or setting a date for the next shoot. Cacoo helps build trust with the people you’re working with, helps pre-visualize the results, it’s basically just awesome.

Amazing Value

Cacoo is really a fantastic value. By comparison, a standard license for Omni-Graffel costs $99 and isn’t on the web anytime you want to use it (although in a sense they address different user needs). The only drawback of Cacoo is that it’s not HTML5 based, and therefore doesn’t fly on the iPad (but I have high hopes it should work now or eventually on Android devices like an Asus Transformer). If a Cacoo app ever comes out for the iPad/iOS it’ll be a big hit. Aside from photo shoots, Cacoo is really great for anything where ideas need to be visually communicated from one person to another. For UX/UI design feedback it’s a great tool for creating wireframe designs of software or web applications. There are pre-made icons for Android and iPhone app design mockups, and you can now create your own stencil libraries for custom diagrams. For UX feedback, you can take a screen shot of a webpage and annotate it, showing what changes should be made in a conversation with your designer. Many new applications have been launched in the past 3 years, but Cacoo is by far one of the most valuable. I highly recommend it if you’re into online collaboration and idea sharing.

Polaroid Pinhole Camera Recipe

This is a story (or a tutorial) about creating a Polaroid pinhole camera. The initial motivation was to make a pinhole camera for use with a 6 grade class to teach them all about optics, but the camera is also super fun for me. This is my first experiment with a Camera Obscura imaging device, or commonly called: pinhole photography, one of the most accessible high-technologies of this and the last century. It’s a way to create interesting images without an expensive camera, and is an excellent way to demystify photography.

Kids are easy to impress, you give them a smart phone and they’re all like, oohhhhh, awesome, and you can make pictures with these fantastically plastic devices. But with a smart phone you have no understanding at all about what’s going on. Even most folks with a digital SLR probably don’t have a great concept about light capture and the reality that the physics behind your super amazing 24 megapixel Sony A900 can still be boiled down to nothing more than a very advanced light box. That uber-awesome Carl-Zeiss lens is built to high standards, but all it does is focus a little light on a light-sensitive surface – and with a pinhole camera, we don’t even need glass to focus the light.

The Idea

Originally this pinhole idea was for a school project, and I wanted to have something as cheap and easy to build and use as possible. While researching Polaroid pinhole I found a tutorial on Flickr where you put a piece of Polaroid film into the back of an aluminum container to build the camera. This is the cheapest way to do it and works well enough, but you need to change the film in total darkness. You also need a way to press the film correctly to apply the developer to the image, requiring the rollers from an old Polaroid back. Sure, we could do that with a light-tight tent and a rolling pin, but I wanted something more…instant. Also something with fewer things to go wrong to demonstrate the concept to the kids before they built their own. So, I looked at what I had in the house, and I ended up taking apart a Polaroid film back from my Mamiya 645 camera and then taping the aluminum container to it. I painted the inside black with spray paint, and then pressed a pin through the front before taping the film back in place. Hence the name, Polaroid pinhole camera. Now, you can also do things like measuring the pinhole (possible using a projector) and do some calculations to know your exact exposure for your film, but I didn’t feel like doing math and just took the camera out to shoot around Zurich with. More anticipation for the result, less thinking, more fun.

Polaroid Pinhole Recipe

  • Aluminum tin (or box, or whatever)
  • A Polaroid back (any one that accepts film will do)
  • Black paint (choose another color for interesting effects)
  • A pin
  • Polaroid/Fuji Instant film

The aluminum tin or box you buy from a supermarket or find in your house/apartment along with the black paint and the pin. The Polaroid back you can find on eBay (probably the cheapest) or the used departments at places like Keh or Adorama. You can probably also buy an old Polaroid camera and rip it apart for the film back, but that sounds a tad aggressive. Once you have a Polaroid back, you need to remove the front of it. Why? Because these backs are designed to show film areas for 6×4.5 or 6×6 (depends on the back you have), which are smaller than the Polaroid film area, and you want to use the whole piece of film. On my Mamiya Polaroid back I just removed the rubber backing, removed a few screws, and could then pull the face off of the back with out creating any permanent damage. The loading area for the film was perfectly intact, and ready for the pinhole camera body. If you want a wide angle camera, the distance from the film plane to the pinhole should be 2-3 inches, and will correspond to about a 20-35mm lens from a 35mm film camera. If you want more of a telephoto just use a box with a larger distance.

The film isn’t too hard to get, even in Switzerland. You can get Fujifilm or Polaroid. Now, there are two types of instant film from Fuji, one for legacy Polaroid systems, and one for their new Instamatic line. These are not interchangeable, and you want to buy the legacy Polaroid type, otherwise it won’t fit in your Polaroid back. There is also the Impossible Project, a company which makes Polaroid film in various flavors like black and white. The Impossible Project products are direct copies of the now discontinued Polaroid films and will work well with this system. The Fuji however, will be the cheapest and easiest to find, and I would recommend going with the Fuji to start out with to perfect your technique.

What comes next?

I’m having a blast with the Polaroid pinhole, but I see room for biggering. First, I want to start shooting portraits with strobes. It’ll be easy, just take some flashes along, set them up as desired, and trigger them by hand for the shoot. Second, is biggering to a Fuji 4×5 Polaroid back. This is a back for 4×5 large format cameras, and can be found on eBay or in Japan via the Japan Exposures webshop. This will allow me to easily use a larger film size, which can be easily bought in color or black and white from FujiFilm. Excessive? No doubt, but should make for an interesting project.

Analogue to Digital

Once you have your fabulous pinhole images, you might still want to share them with those kids with the smart phones. And on smart phones, you might want to make them look like classic faded Polaroid images, as has become oh, so, so popular with Hipstamatic/instagram mobile apps. I like to scan my image on a flatbed scanner (I have an Epson 4990) and then transfer it to my iPod Touch. From there I run can run the image through Red Giant Plastic Bullet, and then instagram, where I can easily upload to Twitter and Tumblr. For more info, check out article: My Favorite Mobile Photo Apps for iOS Excessive? No doubt, but I don’t like to use just one imaging technology. I mix, I match, and I love the ability to apply the classic Polaroid look to Fuji-instant film on an image captured in a aluminum box and processed on my iOS device. In closing, here are some images showing the disassembled Polaroid back, painted aluminum camera body, assembled camera, and example images.

SwissAlpine K42 Marathon Report

I paid for the ticket and decided to run the race. I finished the SwissAlpine K42 in just over six hours. 1800m up, 1600m down, 42 km from the start to finish, my first marathon experience and enough of an adventure to peak my interested in future races. SwissAlpine, more than a race, but sometimes it’s mostly a walk. Here are my thoughts on the race. What it was like running the highest marathon in Europe – what I learned, what worked, and what comes next.

But First: Why?

Running a marathon makes as much sense as climbing a mountain – there is no point to it. Why put your healthy body through such a torment when it’s not going to directly help your survival in this life? For the sense of adventure and accomplishment, an honest answer indeed. I didn’t decide to run the marathon for any particular reason except that my girlfriend suggested it, and I agreed. Although there’s no point in it, it seemed like an interesting challenge, my nose smelled a wisp of adventure and I was committed. I’ve been living in Switzerland for going on 8 years now. Hiking in the Alps turned into mountaineering, I like to ski tour, sport climb, and just generally enjoy finding adventure in the mountains. I don’t really feel a need to run anywhere however. There are no ghosts from my past I feel a need to get away from and I enjoy taking my time strolling down the streets. The draw of the SwissAlpine was to see if I could do it and to feel like an American hero. Of course, this was all in my head. When you stand at the foot of a mountain, the brain will always tell you to turn back. It is the concept of failure, of not being able to climb a crack to summit that makes mountaineering interesting. I like the idea of moving fast over rocks and across wide distances like I can do ski touring – and if you drop the weight of a climbing pack and use light shoes, you have this wonderful combination of speed and can experience the mountain environment in ways only mountain goats and lions know. Plus, you get to wear awesome running gear from brands like Salomon.

Training

I started with the best intentions, and began training for the SwissAlpine back in May. I ran in the mountains around Zurich like the Hornli, and then Rigi Kulm and even headed to Bettmeralp to train at altitude. I found that I could generally maintain a pace of 500m/hr elevation gain and I only trained on vertical ascents, not focusing so much on flat land running. Then an emotional bomb exploded in the start of July and I spent the rest of the month pulling out of the heart breaking madness. For nearly all of July and most of June I hardly ran at all. However, I subscribe to the notion set down by Hunter S. Thompson, that if you buy the ticket, you take the ride, and I set out with the goal of finishing the K42, and a day or so before affirmed in my head that I would go to Davos and do this thing. The morning of the race, July 30th, 2011 I heated up some pasta and took the three hour train trip to Bergun, a little mountain village where the race would start.

Bergun – Kesch – Pass

I felt good waiting for the race to start in the little mountain village of Bergun. I had a start time at 11:30am (for those of us who would need more than five hours to finish). The speakers blared some music I can’t quite remember, it could have been “you’re never gonna keep my down” but it’s irrelevant now. My mind was lucid, but with a determined focus sitting in the back of my primal brain. The purest times in life are when you know that you’ll embark on an adventure, but harbor few expectations for the outcome. Then it was time, and we started running. We started in a field of the village and then went through the main street. From the onset of the race I was getting passed right and left as we exited Bergun and began ascending in altitude. I expected this – I hate running on pavement. I was a little bummed at the start of the race, because we were running on pavement and asphalt, the reason I don’t normally like running races in the first place. “Get me off this dammed surface and onto some rocks” I thought. After a few kilometers we started the ascent up the mountain along a little river, and the trail turned to compacted earth and rock. At some point, everyone around me started walking, and I did as well. This was the point that I started passing people on their rights and lefts. I hate running on flat pavement, but love going up mountain trails. By walking with a long stride I was actually able to pass some people who were still trying to run up the beast. My training was in mountaineering you see, so I had no problem maintaining a quick walking pace up to the hut. Sure my legs were getting fatigued, but normally I’m doing an ascent like this with a 20-30 kg back on my back and mountaineering boots on my feet. The biggest hassle was trying to pass by people on the trail who didn’t see the point in standing aside and letting me go by. Beyond the river our path began winding through the trees and wisps of the cool mountain air began permeating my skin. There were clouds in the sky, but the sun was warm and I wondered why I had taken a jacket in my pack.

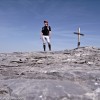
As the woods gave way to alpine loveliness the landscape opened up. That wide rocky expanse flooded my soul and I felt at home. Now we were on the mountain hiking trails above 2000m, climbing up to the hut – the high point of the race at 2625m. On these trails it’s easy to lose your sense of time and think you’ll be there forever in a perpetual quest for the end, but then you turn a bend and catch a glimpse of the hut, it gives your body hope – and you try to run a little way before your lungs complain about the lack of oxygen. The weather on the ascent up to the hut was rather nice. A little bit of sun and nice cool temperatures, perfect for my body type. They checked us at the hut, looked into our eyes to see if were still coherent or not. My lungs were feeling fine and my legs didn’t want to sit, it was far easier than some of the 4000m peaks I’ve ascended. I contemplating stopping to rest, but only stayed long enough to put on my jacket as a wind was blowing from the ridge. From the hut we had to descend down and then climb back up to the pass. The fun was about to begin.

Over the Sertigpass

From the Kesch hut we had to descend to the mountain plateau and then up to the Sertigpass. Often times one side of a mountain looks fine and the other is grey and cold, and that’s what we had here. After the hut the wind was blowing and it started to rain on the way to the pass. For me this is the best weather to run in. I love it when it turns nasty, clouds envelope the ridges and the Gods start to forsake you. Your body is more efficient when it’s a little cold. Muscles don’t overheat, you just need to worry about tendons and ligaments losing elasticity, making an injury more of a risk. I just put on my super light Salomon running jacket and Mammut gloves and was good to go. Most folks on the race had nothing but their shorts and shirts, and wrapped themselves in the light orange ponchos the organizers were handing out. I couldn’t imagine running up a mountain in shaky weather in only light shorts and a T-shirt, but I guess it’s what a lot of people like to do. I prefer staying warm and flying down the mountain trails like a half-human mountain goat super hero. In the future, I’ll pick up a pair of Salomon running pants, probably the 3\4 length version – it would have been better to keep my knees warmer.

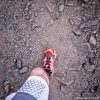
I think the cold and terrain was a torture for some people, but I relished in the nastiness. This is my environment. My body is tuned to survive when the weather wants to kill you. My only challenge was trying to pass all the people on the mountain trails. These trails are only for one person at a time, and it’s hard to find room to overtake, but I’m a resourceful basterd. See, most folks had basically no idea how to run down on mountain trails, and that is by far my greatest strength. Running down hiking trails is what I excel at. It’s sort of a combination of dancing and climbing technique. I get into a rhythm and my legs just dance along the trail. My training has been descending down those trails with a 30 kg mountaineering backpack, and when you remove the mass of the pack and put me in light trail running shoes, well…I can literally fly down the trails. I only saw two other runners who also knew how to jump along the rocks and float with the environment. Everyone else was going sort of slow, small little steps and trying not to slip. They would avoid all the big rocks and timidly step down the trail. I on the other hand would jump from one rock to the next in long strides and sometimes float for 2 meters of trail in the air before the next foot placement. I was easily gliding past runners and felt like a bird. Rocks are your friend on these trails. The big ones are the best, you only need some decent shoes to grip a bit (and the Salomon shoes were excellent for this), and then just let gravity pull you down the mountain, hopping from rock to rock to maintain direction and to control your momentum. I was a super hero. I was spiderman and I felt an amazing sensation of freedom and quiet calm letting my legs navigate the trail like a jigsaw puzzle that I could solve without thinking. Then the descent ended, back on the normal trails were the fun ended.

The Long Run to Davos

I probably sound like an arrogant cocky prick describing how easy it was to pass people on the ascent and descent, but that’s just my environment. Running on a flat surface is by far my largest weakness however, and after we got off of the mountain trails I was again getting passed right and left by folks who seemed to know how to run a marathon. After the descent from the pass the race was just another 20 or so kilometers to Davos Platz. The trail was basically flat at this point, descending gradually to the stadium and the finish line. This is where I slowed down and many who I had passed on the mountain were now going by me with large smiles on their faces. For the past 6 or 7 years I’ve been doing mountaineering and climbing. So my legs are highly optimized with muscle memory reactions for going up and down mountains, balancing on thin rock ridges, and going all day long, but I hate running on flat surfaces, my body literally doesn’t know how to do it (and has shown to desire to learn). Unless I’m sprinting my body doesn’t feel right and I would rather walk. On the flats your feet are just going the same way with the same stride, and my mind sort of gets bored and I think it would be more enjoyable to walk. In the future I’ll train more on flat runs to get the right stride and increase my flat stride endurance, but for the 2011 K42 the last 15-20 km is where I took the most time.

Heart Exploding Finish

The last 15 km to Davos Platz were enjoyable (despite being mostly flat). Green and grassy, probably the easiest leg for most of the runners. Since this part is closer to the mountain villages, we were often greeted by random folks along the trails ringing giant cow bells – a fine motivation it was. The locals all seemed to show a great respect for us mountain marathon fools, and I thank them for that. A gradual downhill grade and drink stands with water and warm flat cola and random cow bells. Not a bad way to spend a Saturday. I started drinking the cola at this point, the Isostar mix I had in my backpack sort of tasted like banana and made my stomach ill. Eventually the valley opened up and you could hear the music coming from the stadium area – the finish. But it was also 7 or kilometers away. My energy wasn’t tapped out at this point, but I could feel the tension in my legs, and figured it would be a shame if I pulled a tendon on my first marathon, and walked a lot to go easy on my legs. At this point I knew I would finish, and wanted to do it strong.

I know that with a marathon you’re supposed to ramp up your energy from start to finish, but I love sprinting to the finish line. This implies that I didn’t use enough energy during the rest of the race, and I’m fine with that. I ran the last 2 kilometers non-stop on flat asphalt (my least favorite thing in the running world) and when I heard a woman yell from the sidelines that it was only 500m to the finish I ramped up my speed. As I entered the stadium my lungs were exploding but I had some energy reserves and decided to push myself just a bit more and I passed a guy next to me as we ran around the track at Davos Platz to the giant Migros finish line. People were lined along the finish corridor cheering, and that energy feeds you like an adrenaline shot, and I had a fine sense of super-human accomplishment as I passed the final line and resisted the temptation to collapse. The official time was 6 hours and 6 minutes. 1800 meters up, 1600 meters down, 42 km all the way, the first time I’ve run more than 10 km in my life, the first race I’ve run since the last Detroit Turkey Trot I did back in 1998 or something. Was it worth it? Hells yes. Mountain marathons are a fun way to experience the Alps. Ascending fast, moving over the mountain terrain like a wind spirit and pushing my lungs to the limit at the finish was a fantastic feeling. Now for some thoughts on gear and trash.

What Gear Worked

Basically, all the gear I had worked fucking amazingly well. The Salomon running gear is just basically the most wonderfully designed gear you could imagine for the sport. The compression shorts and calf compression things really are like a second skin, breathing extremely well, and actually help to support your muscles. The Lab running pack feels like nothing on your back and I could trek all day and night with it. I also took a pair of Mammut gloves along, which are essential for me when the weather turns nasty. When it rains and gets cold you stand to lose a lot of energy via your hands, and a nice pair of wind-proof gloves will keep you comfortable when it starts to rain or snow. The light running jacket from Salomon was also essential. It’s super light, fits easily in a backpack or on your belt and actually keeps the rain off of your body. It has a hood, which was great and kept my ears from freezing. The Pearl Izumi arm warmers were fantastic as well. They retain heat over your arms even when it rains and you can pull them down over your forearms if you get too hot. Plus, all of this gear weighs next to nothing. And now for a scolding…

Pick up your trash

No, I get it, you’re running a marathon in the beautiful Swiss alps and you think you have the right to litter? Oh right, you’re just so exhausted, you just got a cup of water and it’s just too much trouble to drink it and put in the multiple trash cans so you just drop it somewhere along the trail? Really, are those few seconds needed to stop at the trash bag going to cost you the race? I think not, please pick up your trash and leave it at the next station. I can understand dropping cups near the water stations (like those nicely lined up in this photo), however, I came across a lot of things like empty power gels and rain ponchos along the race path, and it was sort of amazing to me that people would just leave their shit along the beautiful mountain trails. If you’re running in a city at least a cleaning crew can easily follow the race and collect trash, but it’s not so easy in the mountains. Just because you paid a race fee doesn’t give you the right to litter. See, it’s easy, if you consume a power bar or gel, then just stick the wrapper in your pocket. Is that really so hard? The next time I see someone just dropping their power bar wrapper on the mountain trail I may just push them off the side, but I guess then it would be even more work cleaning up the wrapper of their body impacted on the rocks, and…I’m not an aggressive person to start out with. I follow the ethos of “pack it in, take it out.” It implies that you’re personally responsible for the waste you generate and transport out of the backcountry. With my backpack it’s easy, I eat a candy bar, and then stick the wrapper back in the pocket, then I throw it out when I get to a trash can. Respect the mountains that your choose to run in…trash rant over.

The SwissAlpine K42 was an awesome race. It’s a fabulous was to experience the Swiss mountains and I can highly recommend it for those adventurous souls who like to run at altitude. Thank you to all the organizers, to Florian Kistler from Salomon for making awesome race gear, and to my girlfriend for suggesting that I run. What comes next? Well, I have a spot in the Jungfrau Marathon in Sept. It goes from Interlaken up to the Eiger North Wall and sounds like a fun time. The SwissAlpine was indeed more than a race, it was an experience.

My Favorite Mobile Photo Apps for iOS

The daily smart phone is the camera that’s always on you, and by definition the best, because you can’t put a Sony A900 in your pocket to take around all day. At the moment, I don’t have a smart phone, I have a passingly-intelligent Samsung, that I’m embarrassed to pull out at Web Monday gatherings. I do however have an iPod Touch, and now enjoy using push-button applications to post-process my photos when I’m not by my computer. Here are my experiences with what works, what I find awesome and lame in the world of mobile apps for photo processing. Here’s a run down on what works for photo processing on my iOS device, what doesn’t work so well, and why. The goal here is to have an app that adds to my Photoshop work, is fast and easy to use, and gives easy access to social networking sites for uploading.

First is what I want/expect from a mobile photo app: I expect the app to do something useful and valuable to my photography/art, which can’t be done on my iMac – or, which is more convenient and faster to do with the mobile device. I expect connectivity, so that the processed images can be quickly distributed to social networks and saved to my device/phone. We have three contenders here, Photoshop Express, instagram, and Plastic Bullet.

Photoshop Express

PS Express for your mobile phone is ok, but for my purposes it basically sucks for anything besides viewing images and making a few basic color overlays. I have a Photoshop online account, and had high hopes (now dashed) that I would be able to use the mobile app as a way to process and then distribute images to different online areas and social networks. Alas, the app is basically useful for nothing but a little coloring and an assemblage of near-useless effects that only detract from my work. I’m probably being a tad hard here, and admit to being a post-processing snob, but it’s Photoshop, and should be the pinnacle of processing power. PS Express actually has some useful features: you can rotate, crop, and do some other basic things like overlay a rainbow filter or reduce noise in your images (useful for crappy-exposure camera phone images), but these minor tweaks are no reason to spend the time required to download and open the app. Adobe made a fair effort here, there’s some more advanced functionality like a tilt-shift blur filter, but the transition region from sharp to defocused is abrupt, unnatural, and basically just ugly, making the app near useless for me.

instagram

Instagram is all the rage (so I’ve heard), it’s sort of supposed to be like a Holga for your iPhone, and processes your images in a classic faded Polaroid feeling and light-leaky camera profiles. For some reason we like to push the boundaries of camera technology and then process the images to make them feel old. It’s a fun thing to do and is probably fun to use with a camera phone…however, much like PS Express, I feel that the effects are sort of flat and uninteresting. Uninteresting in the sense that it doesn’t really add to the content (or feeling) of the original images, but generally detracts from it. When you apply one of the filters, the app will basically just overlay a color or processing effect on your image, maybe add a film border for nostalgia (which is an important feeling) but it doesn’t seem to really target or balance between shadows and highlights. The result is a flat image that’s sepia or sort of black and white, but that doesn’t improve upon or add to the quality of the base image (in my elitist opinion). Of course, I’m highly biased to color and form in this respect and make no excuses for mediocrity. I do my own Photoshop work and don’t mind spending an hour or two doing a basic image composition for one portrait, and although I don’t expect the same attention to detail from a free app – still, as a single app instagram is sort of uninspiring for me. But, we don’t have to use just one app, do we? The true value of instagram is the easy integration with all the relevant social networks and microblog sites. Direct from the app I can upload to Facebook, Flickr, Tumblr, etc. and I think this is why some folks use the term Killer when describing instagram, it does everything Flickr should have been doing with from the start with their mobile app. The usability of a social app like instagram is more important than the quality of the product (like the best camera is the one you have on you), and that’s why I still have the app on my iOS device, it’s fun to play with and easy to upload. But there is a better, plastic fantastic choice in the app world.

Plastic Bullet

Plastic Bullet, like many apps, simply doesn’t get the recognition is deserves. Plastic Bullet is developed by Red Giant, a company you’re ever heard of unless you’re into video/film post-production software. Red Giant specializes in software that aids in things like video time code transcoding, color correction and color grading of films, all made available at a price point realistic for indy film makers and startup video hobby directors like myself. Plastic Bullet is a product from the folks who develop one of the best color grading programs on today’s market, packaged as a mobile photo app, and I love it so much I’m using it to produce looks I can’t do in Photoshop (or at least, don’t want to spend time doing). Plastic Bullet is the only photo app I have that really adds to my images. The processing Plastic Bullet applies to your photos isn’t just a color overlay, it really feels like the app is improving the image quality and emotion of my images (when the right effect is applied). Shadows and highlights in the images are processed differently (depending on the filter you choose) and you can’t predict exactly what it will do until you start playing with images. Of course, it’s not a magic bullet. I need to give it a nice image to work with, and I then go through a few finger taps, picking the processing that works best, but in the end it creates a unique image. The cool thing is that you never know exactly how the image will turn out, and that adds to the magic of the whole process. It gives images a much better Holga/Polaroid feeling than instagram, and brings out new colors for different images. From the app you can save your processed image to your device or upload it to Facebook, or Flickr. I would love the ability to upload to Tumblr and to my blog as well, but I can also just save the image and upload it from my library. Plastic Bullet isn’t free, but it’s an app I would pay for (full disclosure, I got it for free during a promotion from Red Giant) now that I know how good it is. But why limit yourself to just one?

Why Choose Just One?

Since I have both instagram and Plastic Bullet, I’ve actually just started using both instead of picking just one. I like the overall feeling of Plastic Bullet, so I use that first, and then save the image and open it in instagram for further processing and uploading to the instagram social network as well as Facebook, Twitter, Tumblr, etc. Since instagram renders a less aggressive treatment than Plastic Bullet, it’s ideal as the final touch to tweak color levels. So with both apps I get the best of both worlds, tight social network integration and excellent color processing. I’ve started using this combination to reprocess old portraits, pictures of my paintings, cow photos, and I simply love it. Sometimes I’ll go so far as to process in Plastic Bullet, then export back to Photoshop/Lightroom on my computer and tweak the colors and shadows, and then send it to the web.

Don’t get caught up in the information overload. All of these things are just tools, and with all the ways to share files an artist shouldn’t feel locked into any one app or processing philosophy. Use the tools that you discover to achieve the vision in your head, don’t be blinded by the marketing hype and pick one over the other. The human imagination is too small for just one photo app.

Winner Announcement: Video Poetry Project


The grand video poetry creative invite experiment is going to the next level. I am pleased to announce that Bobby Cuevas is the winner. There were 15 entries from artists in different corners of the world submitting to the contest, and I had the opportunity to pick one to work with. Thank to everyone who submitted to the contest, it was truly an honor to see people creating music for the project, and using Talenthouse to connect us was excellent. The winner of the contest has the opportunity to work together with me on my next series of video poetry short films. I’ve never been in the position of choosing a contest winner, and in the end the choice was made on context.

Context

Judging creative work of others is a strange business, and in the end it comes down to tastes and context. There’s really no other honest way to do it. Something can be technically great but not be what you’re looking for. The context is the head of the person choosing, and isn’t something that can be predicted or necessarily designed for. This was one of the main lessons from the Professional Artists seminar I attended at the F&F Kunst schule in Zurich this summer. Art is bought in the gallery scene based on context. Is it new, does it fit with the gallery, is it maketable, does it create a reaction – and how does it do that in relaitonship to all the other art in the Zurich art world? Art doesn’t have value without context, and as the context changes, so does the value of the art.

Decisions Decisions

For the decision process, I mainly looked to see what the music would create in my head, and based off of how ambivalent or twisted those images were, I decided to go with that artist. I figured, the music which creates the strongest reaction in me is probably the best one to go with. This was a measure of how the work of the artists would match my work. There were a number of entries which were excellent, and I could imagine creating a movie with them, but just didn’t fit into the context of the project I have in my head. As an artist, the most important thing is to connect with people who like your work, that is the context in which you will be successful, and sometimes it just needs to be one or two people.

Bobby did a production called Coming Together, it starts with a cut from the song Come Together, and then drops into a drumming rhythm, it sort of bores into my head and remixing into a fluid menagerie that just mixes well with images of a Bratz doll 50 feet tall, walking through Detroit with a .50 Cal sniper rifle. It was the later part of the track that started pushing my neurons around. I could see a sort of blackness with interspiced flashes and a person walking down the street, the camera in my head did a pan and then a steadycam momevent around a guy’s face, then the scene was reversed in editing and then there was a robot fish crawling out of the ocean and started to walk.

So, I look forward to working with Bobby on a video poetry short film series. Thank you to Talenthouseadambriozaybudmanlollyjean and everyone who submitted to the video poetry creative invite.

Bobby Cuevas