portrait

Dynamic Color Portrait Photoshop Tutorial

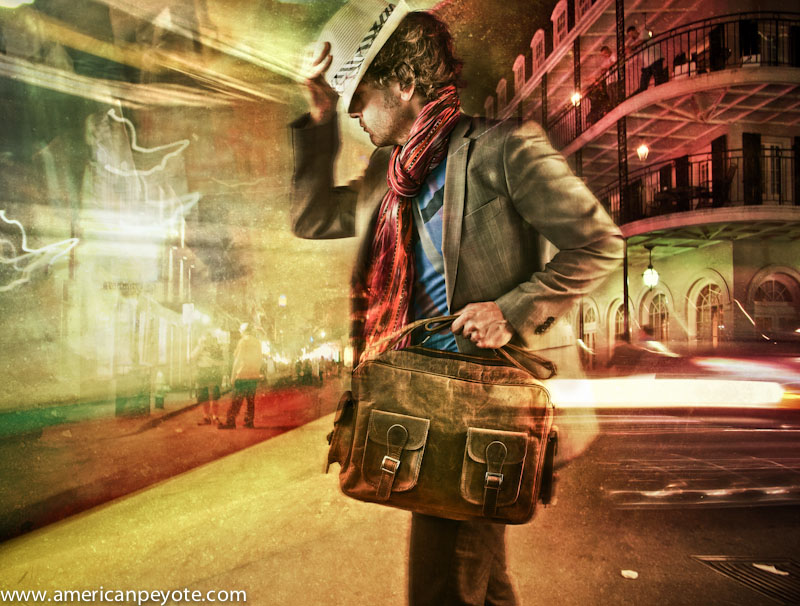
Here I present a workflow for creating a dynamic image using layers in Photoshop. Why? Well, because I like to share and because I got some requests on my Google+ album asking how it is done. To illustrate the process, I’ll use a set of images I created for Scaramanga Bags, a cool company in the UK that sells vintage leather bags and other things like journals and vintage suitcases and trunks (see the Scaramanga Concept Images here). On their website Scaramanga already has nice urban portraits with their bags, so I wanted to go in a different direction. I wanted to create portraits that convey a feeling of abstract motion. Something to invoke a feeling of movement and action. I love photography and painting. I began with photography looking for image perfection, and then moved to painting after developing a color palette in Photoshop. I like to light an image in layers, and in Photoshop I layer colors and backgrounds to add a sense of visual movement to an image. I look at a scene, put on a pair of rose-colored glasses, and I have a layered image (because at the base, this is all Photoshop does). When you can do this in your mind you then just need to translate that to something other people can see, and for that we have Photoshop. The aim of this article is to show you how to combine images together to create unique, balanced color combinations, which add a desired character to the original image.

The Basic Recipe

I generally apply this concept to portraits, where I want to add a certain character which complements the person photographed. First, begin by realizing that the person is a person, not simply a subject (A Person is not a Subject) for academic study. I start out with a base portrait image, generally shot in a studio environment with a two or three light setup using softboxes and maybe a beauty dish. Why? Because we need a decent (well exposed) portrait to start with. It should be something that speaks to you and has the look and pose you want. The layers in Photoshop are just there to modify the intention of the original image (otherwise just go ahead and create an image from scratch and render it in 3D).

I always start with a well-exposed base image that defines the main textures, tones, and colors of the person. In the Scaramanga Flight Bag images I used a Sony A900 and Elinchrom lights with a CreativeLight softbox. You don’t need an expensive camera and equipment, but you do need to know that a properly focused image with proper exposure will give you the largest amount of information to work with. If your initial image has high contrast or deep and dark shadows, then you just need to know that you can’t modify those areas of the image very much, and they will not blend so well when we layer a new image on top of it, since the very dark areas contain very little color to modify. So, let’s start from the base image.
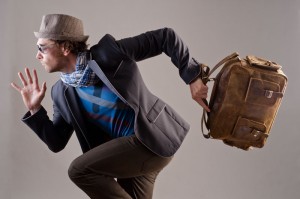
The Base Image

In reality we’re mixing static image layers one on top of the other. In my mind I’m painting on layers of color movement to complement a portrait. I began with images produced in my apartment studio, and posed in such a way as to communicate the idea of running or of standing still, with motion in the background. This is my base, a strong pose which will be modified (enhanced) by a new layered color environment. For more info on creating a dramatic pose portrait check out my post on this subject (Urban Ninja – Dramatic Pose Tutorial). In short, I take my inspiration for poses like this from comics and graphic novels such as Conan the Barbarian, 300 and Watchmen.

After importing the images into Lightroom I chose the best and then increased the Fill Light to reduce the contrast in the image, and then exported to Photoshop for layering work. When exporting from Lightroom I don’t want deep and dark shadows, but rather a lot of information to work with and which will respond well to layering. Once in Photoshop I will often start by adding a Black and White and High Pass layers to the base image (although I didn’t need to do that for this image set). I first copy the original layer, add a High Pass filter, and set the blending on that layer to Soft Light. This has the same effect as increasing Clarity in Adobe Lightroom, but in a more controlled way. I reduce the Fill value on this layer so that everything blends well together and the image doesn’t look gaudy or like it was just run through an actions industrial meat grinder. I will often also create a Black and White adjustment layer, and then set the blending to Multiply. You can then adjust the values for reds and greens and blues. This desaturates the color while intensifying the shadows of your base image. It can darken the image a lot, but the goal here is to modify the tones of different parts of the image (such as skin tones). Again, I will often reduce the Fill of this layer so as not to totally kill the base colors.
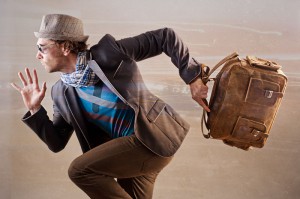
Choose Layers

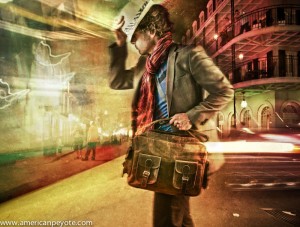
I always start from the base portrait and then choose layers on the fly. For the Scaramanga images I wanted a lot of bright colors with movement. So, I opened up Adobe Bridge and looked for long-exposure night scenes with lots of color and light streaks. To achieve this abstract motion goal, I picked a few images that I had shot in New Orleans, Zurich and Berlin. The key here was to have images with long light streaks and pockets of intense color, which would blend in with the form of the person in the Scaramanga portraits. By blending well I mean that the lines of the night scenes would coincide with the lines of the runner (think of drawing lines over his body and comparing it to the flow of the layer images – check out my Dynamic Pose Tutorial for clarification). There’s no formula here, you just need to pick images that work well together. Aside from light streaks, these images also have very interesting pockets of color, and also recognizable object elements such as a tram or street scene, which then defines the background environment of the final image. The night images from Zurich give the feeling of running through a city of lights, while the one of Bourbon St. gives the idea of a person standing still while the environment is exploding in color around him. Now that I have chosen the layer images, I just need to blend everything together.
Blending Layers

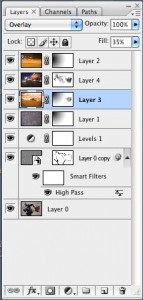
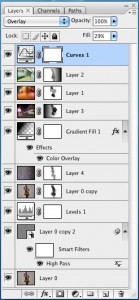
After picking the layer images in Adobe Bridge I opened them in Photoshop, and automatically set the blending mode to Overlay. This allowed me to preview how the different light and color elements of the layers would work together, and how the flow of the lines of the layers would mix with the base portrait. At this point, the image just looks like a couple of images stacked on top of one another, and that lazy sort of image production just doesn’t do it for me. To properly blend the images you need to play around with the blending modes, like Overlay, Softlight, etc. and also change the Fill and begin masking individual areas with a paint brush or gradients. To mask a layer by painting simply select the layer and then choose the layer mask icon. When you now paint with black, the layer will be masked (or hidden). You can change the Opacity of the brush to mask the layer gradually with each new brush stroke (the recommended method). When masking in this way I usually use a brush Opacity between 3-20 with a soft brush. This is where I act more like a painter than a photographer, masking and blending the layers uniquely together. I rarely use the entire layer image. Often I use a gradient to mask out half of it, and also paint away most of the layer over the person. I will also add full Color Fill layers (usually set to Overlay blending) to tweak the overall color. Eventually, the final image will then start to come out. To illustrate this process, you find here the secret goldmine of any Photoshop artist, the screenshots of my Layers window on my two favorite images from this set, the Runner and Bourbon St. You can clearly see how the different layers were masked, and what the original layer images looked like before blending.

That’s All

If this sounds complicated don’t be deterred. Essentially all I do here is to mask out the parts of the individual layers which don’t flow well together, and in the end I have an image with all the flow and color vibrancy I desire. The main idea is that the character of the layers complements the base portrait. I save the image and open it up in Lightroom. From Lightroom I play with the colors further, adjust shadow and highlight colors, Vibrance, Clarity, etc. until the final color tones are correct and then I export.

For more info on layers and portraits, check out my Hyper-Realistic Portrait Photoshop Tutorial. This covers the main topics I addressed in this post, but you get to see a screen cast of the whole process.
A Professional Photographer Portrait

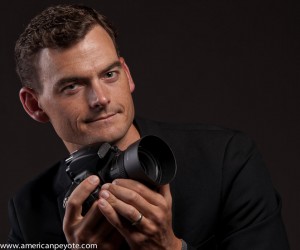
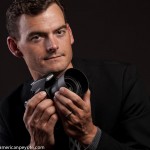
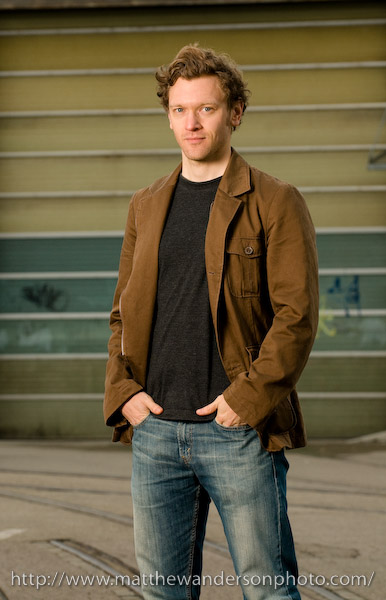
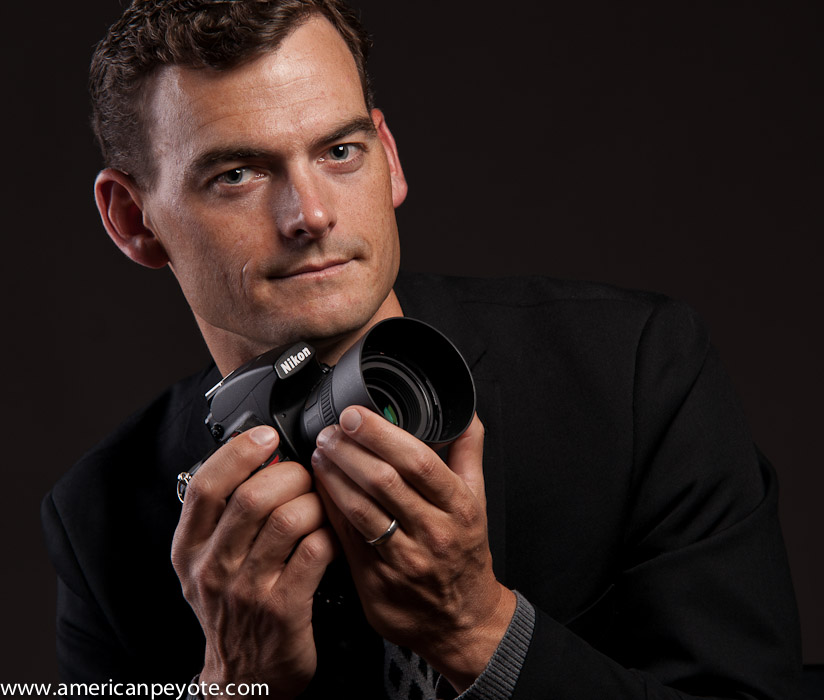
I was chilling at my computer the other day when a little project came across the computer screen. Matthew Anderson, the American wedding photographer living in Winterthur, Switzerland was looking for a respectable portrait for his website. Matt and I are neighbors and we do little shoots together from time to time. Previous little projects included portraits of me (the Urban Poet), and doing a little testing of the Panasonic LX3, Elinchrom RX strobes and some Coffee Madness flying through the air. So, naturally I said yes, as he was coming over with some beers.

Plus, what caught my attention is that he wanted, well, a more conservative portrait. The type of portrait that would instill confidence in the mind of perspective wedding clients. The type of portrait, which would instill trust and, possible even encourage people book Matt for weddings or portraits, or other jobs. This was a challenge. This was intriguing for me since it’s totally opposite to what I normally do with photography. I enjoy taking a normal looking person and infusing in a bit of strangeness, just subtle enough and brewing below the facade of a normal life. I want that strangeness to come out in my portrait, and Matt would need a normal, confidence instilling image, it couldn’t be more opposite. So, I said yes as a sort of challenge to myself to see if I could pull off a professional portrait of a fellow photographer, devoid of strangeness.

Portrait Setup

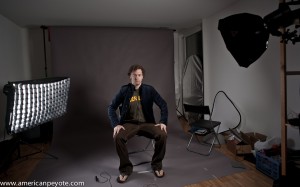
Matt already had an idea in mind of what he wanted for his portrait. Some nice shadows here and there, and including a camera of course. It would need to show his face with nice definition, but also have that Doors feel to it, of a person coming out of the darkness. I started off with a very sharp transition to the shadows, and on request brought out the features of his face in a more even lighting sort of way. The main light was an Elinchrom BxRi 250ws in a small Photoflex octabox. From the back left there was another BxRi in a gridded CreativeLight softbox to add some definition to Matt. The gridded softbox is great for lighting things like cameras since it gives a nice highlight to objects without much need to precisiely flag the light against spilling too much. I added some barn doors to the octabox by putting out the velcro panels from my Think Tank Airport Acceleration bag and putting then on the front of the octa. In the end, we pulled it off nicely, and it took far less time that I had planned for.

Return to Strangeness

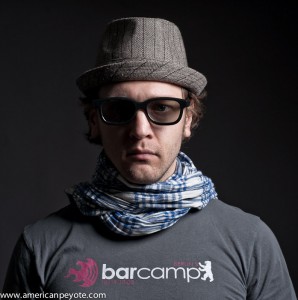
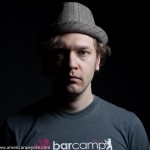
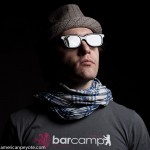
In the end Matt was happy with the result of my efforts, and I was amazed that I can take a normal looking portrait. It’s not something I plan to exploit in the future, but it’s nice to know you can pull off things like this if needed. Some people have been living in German-Switzerland for years and can’t speak enough Deutsch to order a beer in a bar. I’ve been into portrait photography for like 3 years now and I hadn’t attempted a normal professional portrait like this before – it just never occurred to me. However, I’m glad Matt contacted me for this little project, it was a fantastic learning experience. Naturally, before Matt even showed up I had done some lighting tests, pulling out my favorite hat and 3D glasses. I love strangeness in mild doses, it makes you look twice and, well, I have to admit that I like looking at myself. And so can you in the gallery below.

Wallpaper to One Another

Sometime ago I was on vacation around Detroit and while chilling in an internet cafe I got a contact from Arctica, via ModelMayhem. She was going to be in Switzerland and was wondering if I wanted to set up a shoot date. After some time I figured, “sure, why the Hell not?”

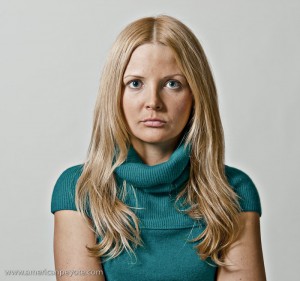
For this shoot I put together some concepts for ProtestLove imagery, and also wanted to do some straight-up portraits. Easy things to filter through the camera lens and fill the imaging sensor with smooth skin and textured eyes. I was also geeked to use my new Creative Light softbox. It’s a decent size, about 60 by 90cm and I picked up a grid to go along with it. After all, a serious photographer needs serious gear. directional light, place it where you like and sculpt out an image from the darkness. The setup for the above image was this…

An Elinchrom BxRi 250ws strobe in a Creative Light softbox (60x90cm) (w/grid) from camera right. Sunpak 383 in Kacey Beauty Reflector above and slightly left (with diffusion sock), and Lastolite Trilite reflectors setup in front.

I was sort of screwing around at this point, I’d paid her to stand there and give off some sort of radiant Architecture of the soul. Lets take a moment and peer into the unknown. The element which draws you in and holds the gaze in an awkward embrace and the mind fades off along visionary walkways through tangible (but untouchable)  elements of the imagination. That’s what I was looking for in her.

Within this construct, the shoot was a success. There are many different types of models. Many varieties of photographers, and once you buy a camera you might tend to think. “Well, fuck, I paid so much for the damn thing, everything else should be free.” That’s why people start looking for TFP models and become consumed with getting make-up artists for free and buying the cheapest flash gear possible. There is a notion inside my head, and it is that the camera and lens are the least important. The light and image are all that is relevant, and no amount of gear masturbation will bring a vision into your head, it comes from the deranged depths of humanity, and no Photoshop God can render even a minute contribution to your vision.

The model: Arctica MM# 1356612
The photographer: MM# 879737

Jurgita – Informal Photo Sessions

Probably the most frustrating thing about shooting with someone is that you generally only get to do it once. You notice things during a shoot and afterwards, and often time I wish I could shoot more with folks like Demari Vi Syth, Margarita or Arctica, but one lives in England, the other is based in the Ukraine, the third is in Germany, and being models, they’re often traveling to different shoots anyways. So if I were able to shoot with any of them more than once a year, it would be a miracle.

That’s why it’s always awesome to have a local model to shoot with, and to develop a body of work with. When a model is living right next door you have the freedom to plan and re-shoot concepts as needed. You also come understand one another in a way, the shooting style, the posing methods, and this can bring a greater depth to a shoot and concepts. That’s why I’m eternally grateful that Jurgita lives next door.

I met Jurgita over the summer while shooting with Margarita, and we’ve since met to shoot on different occasions, either with a specific idea or just to produce some more imagery. We shoot in the studio and I’ve shot Jurgita around the Sulzer-Areal of Winterthur, that fabulous urban location every photographer in Winterthur and Zurich knows about. You go there on a sunny day in spring or summer and there’s always a wedding shoot, skate shoot, urban portrait thing or another going on.

Having access to the Areal is like having access to a large urban movie set. There’s a large parking garage to shoot in, which is mainly empty on the weekends and after 5pm on other days. I seems like you can basically do whatever you like there, including dry tooling (but probably you’d better not). There’s also a lot of small areas in the Sulzer-Areal complex including parking spaces, walls, staircases, and an illuminated bridge, all of which gives a vast canvas for the nimble photographer and model to play within.

On location and in the studio Jurgita is open and easy to work with. She has a certain look, a subtle shadow of knowing in her facial features and cheekbone structure which give a certain something to the images. Shadows curve around her eyes like the the old songs of a mystic fire dance. She also has an eye for style and posing, which makes the shoot all more natural and authentic (sometimes difficult to find).

Since both Jurgita and I like to shoot and model around, it’s been fun playing with lighting gear and concepts. For example, using an Orbis ringflash to add some shadow texture to the face, in a poorly-lit parking area. Or perhaps using a gridded octabox to define a lighting poem for the whole image, or just stepping out of that constrictive Strobist-Mindset and shooting with the natural street lights.

If you stagnate, your creativity and drive dies with your indecision and only the mediocre sentiments of lonely idea will sit upon your mind for a second before flying off into eternity. So stop hesitating and shoot, develop something and challenge yourself to be something which society has taught you that you’re not. My mind is a blank and the words have run on into obscurity so that I’ve forgotten the point.

If you’d like to work with Jurgita she’s on Model-Kartei…

Jurgita on Model-Kartei

Web Portraits Zurich – Mathias Shoot

The first willing subject for the Web Portraits Zurich project was Mathias Möller, Editor and Community Manager at Amazee who agreed to have his portrait taken.

The shoot was relaxed, the way a portrait shooting session should be. We had had a concept meeting a few weeks before, and organized some ideas on Google Wave, so there was a clear direction for the shoot. Grungy and not too bright, a little counter culture and gritty. This wasn’t a high pressure shoot, Mathias just dropped by the apartment studio and we talked about random stuff like the Spores (a band out of L.A.) and imagery from Joy Division. An observer might call this “connecting with the subject” but I just call it a fun time talking with an interesting person. There were two main looks we went with during the session, Mathias had a vintage Swiss Army jacket and a cool band denim jacket. I was shooting on white seamless with a few lights and reflectors.

Lighting Philosophy

Mathias wanted some darker sort of photos, which is what I’ve sort of developed a style shooting, so our expectations worked well together. For me this meant creating lighting with shadows and darkness, while allowing the main features of Mathias be revealed. This meant some directional lighting on the face, casting dark shadows across his body, and a grungy post-processing philosophy. I worked primarily with my Elinchrom BxRi 250ws strobes and a Sunpak 383, with Lastolite Trilite reflectors and a large 5-in-1 silver reflector.

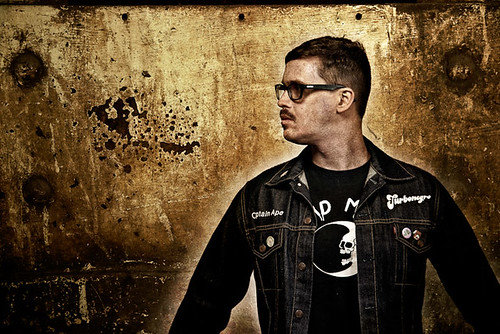
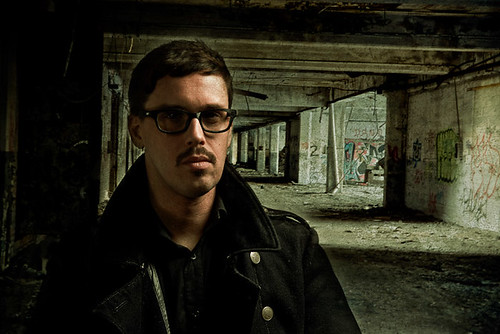
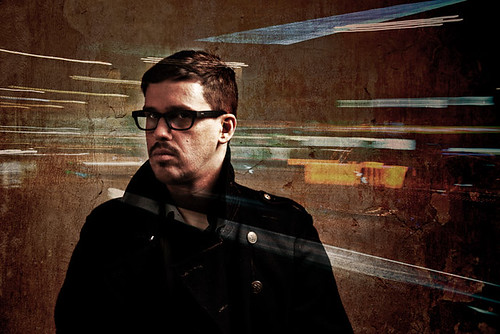
For the portrait with a Swiss Army jacket I put a BxRi in an extra small Photoflex octabox, and used this to create a large contrast on his face. A sort of Yin-and-Yang, darkside/lightside sort of lighting. A reflector and Orbis ringflash (with Sunpak 383) were used to maintain lighting detail of his cool vintage jacket. For post-processing I used some industrial grunge, including compositing Mathias into the old abandoned Packard car plant in Detroit, Michigan. Other background images and textures were shot around Zurich and Winterthur in Switzerland.

For a cleaner look, I shot Mathias with a BxRi flash in a large Creative Light softbox (60x90cm) with a grid, and added some fill using the Photoflex extra small octabox. The Creative Light softbox was placed on the side, and gave a lot of bright directional light, which works well for creating defined shadows with smooth but small transitions.

Visual Results

The idea with Mathias was to create images with a certain grungy darkness to them. This was accomplished via lighting and post-processing in Photoshop using layers of concrete and industrial scenes. Overall I think we accomplished the not-to-bright and not-to-sterile look without making Mathias look like a grungy gangster from the Zurich hood.

I’m always looking for new faces to shoot, if you’re interested in the idea of documenting the people from the Zurich startup and web scene it’s easy to get in contact with me to set up a concept meeting. More about the Web Portraits Zurich project can be found on Amazee.com or the articles here:

Web Portraits Zurich – Amazee Project
Web Portraits Zurich on the blog

Mathias Web Portraits Zurich

Lazy Swiss Sunday – Urban Poet Portraits

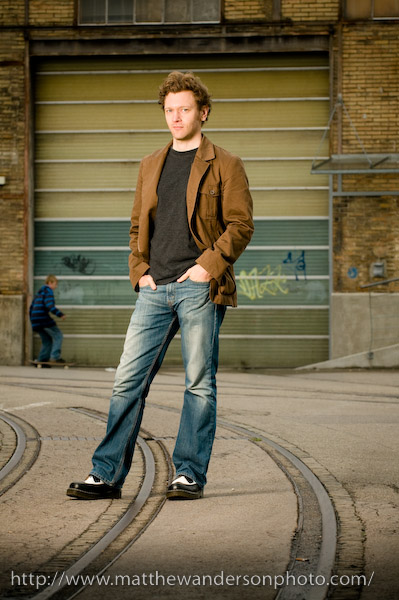
Urban_Poet.jpgThere are many boring things to do on a lazy Sunday in Switzerland. You can climb up a klettersteig, go paragliding, chill in a coffee shop, enjoy a movie, brunch in die Giesserei in Oerlikon, tour over a glacier, vegetate in front of the TV, but if you did all of that last weekend, then the obvious option is to go shoot urban portraits in Winterthur. As a Strobist-educated photographer, it’s nice to go out and shoot with someone who actually makes money taking photographs, and has an Elinchrom Ranger RX system. So, on a Lazy Swiss Sunday Matt and I headed to the old industrial area of Winterthur, just outside of Zurich to shoot some pictures that we called, the Urban Poet series.

I’m a bit of strange guy, and when I shoot images I naturally try to infuse a bit a strangeness into the process. Dry Tooling in a parking garage, vintage glacier goggles, and hiding my beautiful eyes behind sunglasses are my thing at the moment. This contrasts wonderfully with Matt’s take on portraiture, which is influenced by his background in photo journalism and wedding photography. He captures the beauty of reality, while I try to do anything but.  Fortunately, I was able to add my hint of strangeness during the post-processing.

Our location was at the back of the Lagerplatz near the train tracks in Winterthur. Winterthur is a historic industrial manufacturing base of Zurich, Switzerland. Since the Swiss economy has transitioned away from large-scale industrial manufacturing and become focused on biotech, medical, and technology companies, the hard industrial areas of Winterthur have gone through a large transformation in the past 50 years. Lagerplatz translates from German as something like loading or inventory place, basically it’s where you have warehouses for loading trains, and is right next to the old Sulzer manufacturing area. Since it’s industrial heyday, the whole area has since been transformed into a hip business location for designers, swanky apartments, a climbing gym, and is the go-to place for wedding photographers who want to make urban portraits for high-paying clients.

The Concept

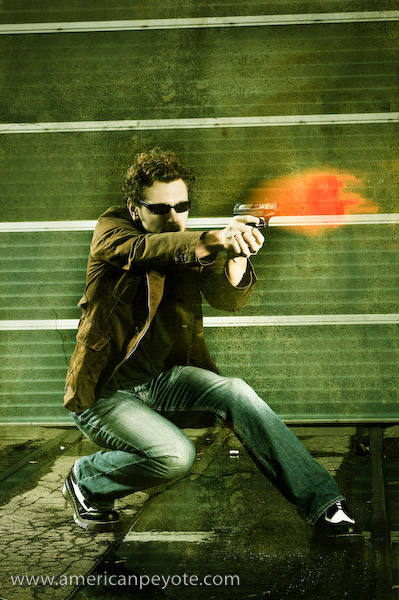
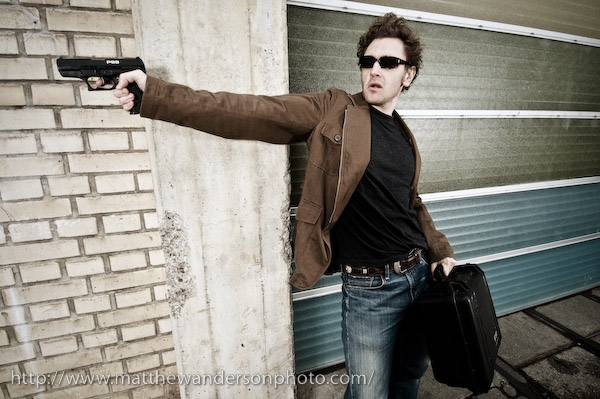
We had two ideas in mind, one as an experimental action image, and would then go do some reality based shots. For the action shot, I had picked up a toy gun at the store the day before. In addition I took along my Pelican hard case and a simple wardrobe, consisting of Levi’s jeans, a form fitted T-shirt, and olive jacket with nice clean lines. As per Matt’s direction, I kept my vintage motorcycle goggles in my pocket and wore instead a pair of traditional black sport glasses.

The Gear

Nikon D300
Nikon 80-200 f/2.8
Nikon 12-24 f/4.0
Elinchrom Ranger RX strobes
Skyport RX radio triggers
Shoot-through and silver umbrellas
Medium Elinchrom octabox

Urban_Poet-2.jpgBullets Are My Prose

The night before I had been watching Casino Royale, getting ready for the release of Quantum of Solace, so I was pretty geeked to pick up a toy version of the P99 and pretend to be an extra from James Bond, Spy Game or a Jason Bourne movie for 1/100th of a second. The occasional kid would stop to look on his way to the indoor skate park at Block, asking what we were doing, and, “is that a real gun?” For the lighting Matt alternated between hard lighting and flatter diffused looks using the umbrellas. I went with this wardrobe because I like modeling with my olive We sport coat and relaxed Levi’s, the light blue and white of the jeans contrasts well against the green of the coat. Overall it has a sort of hip urban feeling mixed with funtionality of something I actually like to wear. Additionally, both types of clothing give great definition with harder or flatter lighting schemes. The shadows from the creases along the arms give a subtle dramatic texture to the overall image with the right light. I went with my Doc Marten wing tips (model 3989) because their large soles have a very defined edge, forming a nice separation visually between the subject and the ground. Again, the whiteness of the Docs juxtaposes nicely against the coat and sunglasses. It might have been better to have gone with a lighter T-shirt, as the dark grey shirt needs more direct lighting to bring out features of the subject’s torso area. Here it acts more like a visual void in the image, or maybe this is just my science mind making too much of nothing. The gun and Pelican case were added to give some story elements, and because Matt and I wanted to experiment with different visual elements in this series.

Urban_Poet-3.jpgThe Urban Poet

For the main Urban Poet portraits, Matt positioned me well in front of one of the buildings with one of those large garage doors in the background. This renders a nice geometry to the background, without over-powering the colors of the subject. For this shot Matt used the Nikon 80-200 f/2.8 lens, which gives a nice compressed image and control over depth of field to isolate the subject from the background elements of the shooting environment. And, the Nikon 80-200 is of course, very sharp. The lighting was done with one medium Octabox with an Elinchrom head. You can see in the portrait how the light is basically hitting about 1 meter in front of the subject, and then lighting the whole person. For this image, Matt designed a very cool portrait by separating the subject from the background using his choice of lens, and by keeping a shadow on the foreground, he minimizes the tendency of the viewer’s eye to be drawn away from the subject. So, basically it means your eye is drawn directly to the subject and not distracted by either the foreground or background elements. At the same time, having this foreground an background elements in place is what defines the urban environment, and makes the image look cooler and much more interesting than a simple studio shot.

Urban_Poet-4.jpgCould this shot have been done with small flash gear, yes, to a certain extent I’m sure it would have been possible, but if you happen to have an Elinchrom Ranger RX system with a medium-sized octabox, dealing with a small flash Strobist setup is just crazy. The Elinchrom octabox combined with the Ranger strobe heads gives you beautiful diffused light, and using the Skyport RX system meant that Matt was able to control the strobes without moving from his shooting position. If you have an assistant running around changing your lighting settings, then it’s fine to use a Pocket Wizard to trigger your lights, but when working alone the Skyport RX system makes the whole process painless. The use of the octabox is what made this image possible, otherwise it would be more difficult to create this dark shadow seen in the foreground, and hence, the image would have a different character.

Shooting with Matt was a great experience from multiple perspectives.  First, being directed by a photographer and doing what models do gives one valuable experience on how best to ineract with people which I shoot in separate projects. If you’re a photographer who has never gotten in front of the lens, I highly recommend it.  When you act out the part of a model, you become more aware of you body movements, and more aware of the difficulties of taking direction.  So, when you shoot your own projects, you now have a base for better connecting with your models.  You understand what it’s like to be on stage, their insecurities, and it will make you a better photographer.  It’s also important to work with photographers who have a vision and style which differs from your own.  You understand the value of different working methods, different lighting schemes, different portrait techniques, and in the end you are then challenged to reassess your own style  and become a stronger photographer because of it.

More of Matt’s work can be found at his website:

http://www.matthewandersonphoto.com/

Translating a Vision into a Photo Concept

I’m somehow drawn to photography – not to necessarily document an interesting or unique view of the world, but to get the picture that I didn’t know existed.  That concept, that image in my head which sits there till I try and make it for real.  This is generally means combining bokeh, focus, and wide angle lenses with a subject to get that certain “look” which the eyes don’t intuitively capture.  And few things are harder for the eye-brain connection to interpret than motion.  That’s why the use of off-camera strobe flash was developed by Harold Edgerton in the first place: to capture motion in ways never before possible.  Adding motion to a static subject can add a certain “something” it’s unexpected and generally produces an image that sticks in my head.  So, I took the concept in my head and set about translating it into a viewable form.

Red Tie and Velvet

Creating a Dramatic Motion Image

When you live in a place that doesn’t include a vast studio space, improvising and designing a shoot becomes important.  It’s the best environment to learn in because you’re challenged to make things look “cool.”  Cool is easy when you’re shooting a Swatch Watch commercial with a full staff and art director, but I don’t do these things – and need to organize things like models and locations and wardrobes on my own.

For the concept, I wanted the images to have movement, some sort of dramatic character, and to look “cool.”  “Cool” is at best a meaningless relative term and I don’t profess to having my finger on the pop-culture pulse of the trend setting world…but I went for the concept in my head anyways.

Floating in the Air

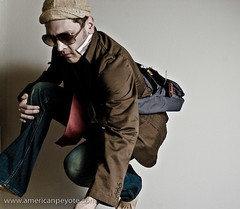
Having no budget or creative vision, I decided to go with my only available model, myself – and capture myself in a dramatic fashion: Flight (jumping through the air).  The apartment has wood floors, so first I set about setting up crash pads (guest beds) to land on and then added wardrobe elements and props which would add motion effects to to the final images.

Wardrobe: Shirt (BC Ethic), Tie (H&M), Jeans (Levis), Olive Jacket (We), Messenger Bag (MountainSmith)

Equipment: Crash Pads, 1 Flash w/umbrella, Radio Trigger (Gadget Infinity), Minolta 7D, 20mm lens, Remote Trigger

Crashing in Action

The crash pads were setup in front of a white wall and the camera went on a tripod.  I started out using the 2 sec. shutter delay function on my camera, but coordinating my jump with the delay wasn’t’ working so well.  Instead I opted for using a wired cable release.  My hand was often out of the frame, instinctively trying to break my fall – but the trigger release could eventually be Photoshopped out of the picture.

Jumping with a Trigger

The wardrobe seemed to work, the jacket and tie floated in the air when needed and a stack of paper added another element, a main focus for the eyes to lock onto and juxtapose against the main subject.  The Mountain Smith courier bag was, well, one of those Urban elements, suggesting the subject is “going somewhere” and has “things to do” – people to see.  I love my MountainSmith bags like I love my ice tools, and try to integrate them into shots whenever possible.

MountainSmith in the Air

Post processing of the images was done in Lightroom and Photoshop, sometimes using some processing elements I picked up in the Joey Lawrence Tutorial DVD.

In the end, I fell short of achieving the vision in my head, mainly because I didn’t have a trampoline and the cielings were too low for one anyways. This meant jumping on my own, and since I don’t jump very high I had a very short time to pose while in freefall.  The jump and freefall where rarely timmed correctly to the camera shutter and my head statred hurting from the impacts after a while.  Still, achieving 1/4 of your vision is far more productive than 2 hours of watching TV.

Drama in the Air

Jumping looks easy, and it is twice in a row, but if you’ve spent the previous day ice climbing and every other photo sucks because the timing is off and you’re out of the frame, well…the jumps add up and the photos session quickly turns turns into a workout fast.  I think of Michael Grecco’s book The Dramatic Portrait – he’s shooting Jet Li doing a flying kick at one point, and the translator says, Jet Li doesn’t need a trampoline.

Velvet and Glasses