review

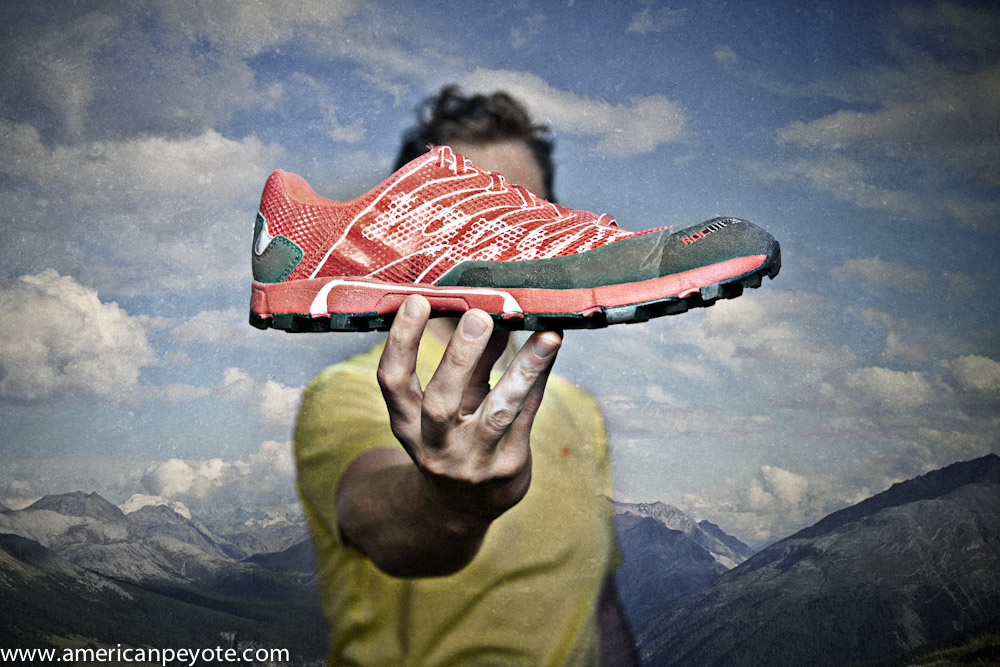
Inov-8 RocLite 285 User Review

In 2011 my do-it-all shoe was the Salomon Crossmax XR Neutral, and lately I’ve been running a lot on the On Cloudsurfer on non-technical trails (mainly flat, wide, and few tree roots or large rocks). However, I’m a gear whore and am always looking out for new concepts, lately I came upon the Inov-8 RocLite 285.

I was out running with Christian Langenegger the other day and he mentioned he as going to have a talk with the good folks from Inov-8. A week later I dropped by his place and he had two pairs of shoes to show me, the pair I took home to test was the RocLite 285 trail running shoe. I’ve since been running on them and pondering the design, and the following is the result of my meditations on them but I’ll just jump the gun and tell you straight up: the RocLite 285 is a wonderful minimalist trail running shoe. (more…)

Salomon XT Advanced Skin S-Lab 5 – User Review

I am a gear whore, sort of a bag slut. I have packs and bags for everything from urban adventures to backcountry camping, biking, climbing, painting, photographing, writing, skiing, summit assaults, but nothing I had fit right for mountain running and ultra marathons. Nothing worked until I was able to get my hands on a Salomon XT Advanced Skin S-Lab 5 running pack last year when I signed up to run the SwissAlpine K42 mountain marathon. The S-Lab 5 is now my pack for mountain and trail running in Switzerland. After a nice season of running with it in 2011, here are my thoughts on the S-Lab, let’s call it a user review…

Salomon S-Lab Line

Before we jump in, some background is in order. Salomon is an interesting company. I know them mainly from ski gear, but now they have branched out into serious trail and long distance (ultra) running. From my perspective they’re the only large sports company which is really trying to capitalize on the trail running and ultra-marathon market, in some ways actually pushing the sport forward (and are essentially expanding the market need for their products). Unlike other companies which are now bringing out trail running products in a me too fashion, I have the feeling that Salomon is more committed to creating great products for this growing sport, and they also have the design and distribution capacity to bring innovative products to the market. This lends more confidence in Salomon as a company and I consider their products to be the benchmark by which others are measured by.

The pinnacle of their effort is the S-Lab line (I guess this stands for Salomon Laboratory). Basically S-Lab means high-end clothing, shoes, and accessories for trail running. There’s an actual S-Lab place (a sort of prototype shop) where they design, build, test, and refine these products (check out this video on YouTube). They have a guy on their running team named Kilian Jornet who is a sort of a trail running God from Spxain. He wins a lot of ultra races (and came in 3rd after Dakota Jones and Andy Symonds at the 2012 Transvulcania) and is setting the pace for the sport. Salomon sponsors and learns from the best runners in the world, but it seems like the relationship with Kilian is very close. So close, that as I understand it, that various products in the S-Lab product line are developed with direct feedback from Kilian like the new Salomon Sense running shoe (and the S-Lab 5 pack). The result is a product line with a high level of design and attention to detail that addresses the needs of people pushing their personal limits on the trail.

The S-Lab products are lean, light, fit close to your body and really move with you. Normally clothing is something that you need to wear for protection, but in an ideal world you would go without, it’s just there because we want to protect our bodies from the elements. But the S-Lab products actually improve your performance in subtle ways (my scientist opinion). Function and design are combined in a beautiful way, and the 5 pack is a wonderful example of designing a product to specifically fulfill the needs of long-distance athletes.

S-Lab 5 Overview

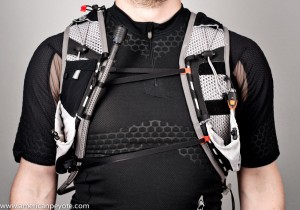
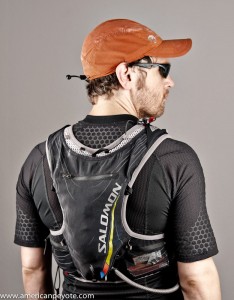
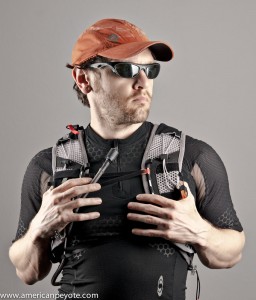
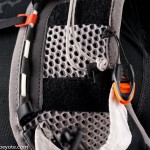
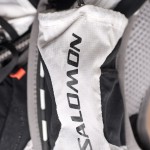
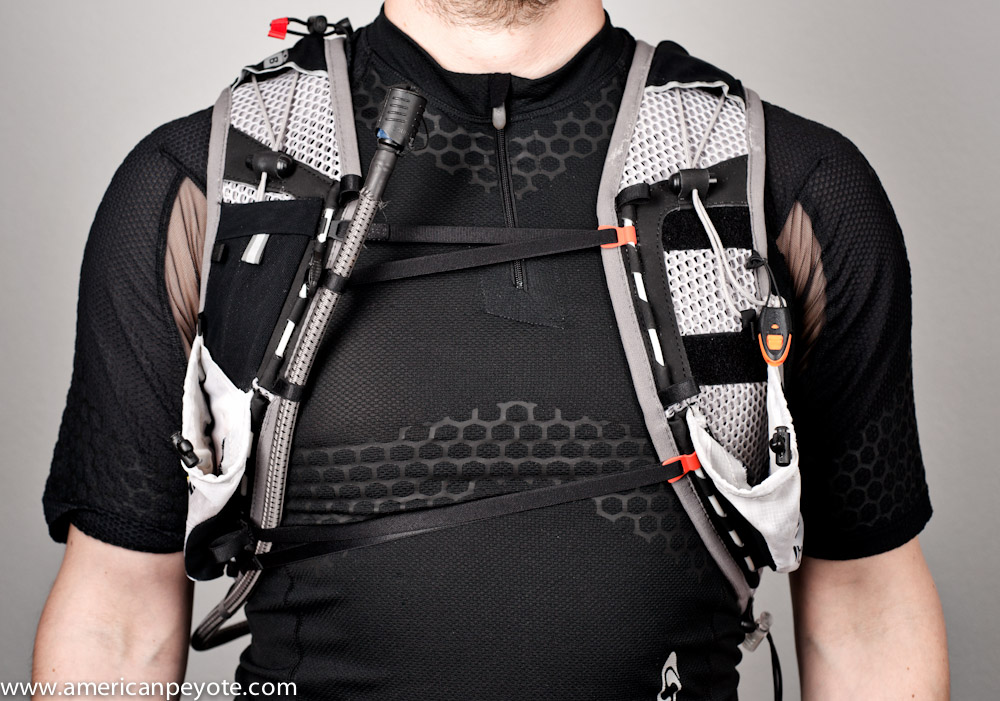
The S-Lab 5 is made very well with materials that stretch and conform to your body as you move (they call it Sensifit construction). The pack fits very close to your body and the fits like a glove analogy makes sense here. I have a fabulous pair of Mammut gloves that often wear with the pack when the weather is cold, and the two products give me the same sense of perfect form and function. Designed as a hydration pack with space for minimal gear, it’s not the type of pack you can stuff full of gear you might need. It’s a minimalist pack where you need to make sure you only take what you really need. There are two water bottle pockets on the shoulder straps (which also work well for small cameras, food, etc) and a water bladder in the main pocket on the back. The bulk of the pack is composed of a hexagonal mesh material. It’s an elastic 3D weave of hexagons (or you could call it honeycomb) that defines the core function of the pack, to feel like a second skin so that you almost forget that you’re wearing it. The open mesh also lets perspiration move through the material and dry quickly.

If you’re a material scientist (like me) you’ll instantly think of a hexagonal crystallographic lattice when you pick up the pack. The hexagon is a beautiful structure with three main directions and corresponding planes of symmetry that make it ideal for this application. From a mechanics viewpoint, this means the the fabric should stretch with an equal resistance in three directions. Other packs usually have 2D weave like normal nylon (think of the fabric weave of your clothing) which is basically orthotropic. This means it will provide equal stretch in two, the 0 and 90 degree directions, but at 45 degrees you get a different mechanical response. Anyways, I digress, the point is that a hexagonal arrangement isn’t an accident here and if I had designed this from scratch I would have taken a similar design path (the hexagonal crystal structure was inspiration for one of my patents on heat shield technologies).

The only real thing you need to know is that the design of the pack reduces pressure points over your body. It hugs and maintains contact with the surface of your back and frontal torso, more like a tactical vest than a traditional pack. Due to the multi-directional symmetric planes of the hexagon array the pack material expands as you move in different directions, differentiating from all other pack designs (as I know them).

Breath Easier

A huge problem with non-running packs when used for trail running is compression across the chest. In general, to keep a backpack on your body you need to stabilize the pack by closing down the shoulder and chest straps. As you start to run and the weight of the pack becomes more unstable and you can only counteract this by going slower or tightening the straps to their limit. However, this then constricts the ability of your torso to move, which constricts the volume of air you can take into your body. Basically your breathing ability is impeded and your running performance is reduced by your reduced ability to take in oxygen. Usually the only solution is to not wear a pack, or to reduce the load so that there isn’t as much mass to stabilize.

Traditional packs are designed so that load is carried by the shoulders and via contact with the lower back, generally using materials that are essentially static (don’t stretch). The S-Lab 5 is made of dynamic material that stretches easily in three different directions (thanks to the hexagon array) and maintains contact over your torso. This design greatly reduces and almost eliminates the stabilization problem (from my perspective). Since the pack is more like a vest, it maintains a large surface area in the back and over the shoulders. This essentially reduces the need for a chest closure system, because the pack is almost one with the form of your body. The S-Lab pack uses just two thin elastic bands that cross over your chest to close the pack around your torso. Since the pressure isn’t localized on the chest strap system and shoulders, the expansion of your chest isn’t restricted as much as with other packs. The pack remains stabilized around your body and therefore you can breath more naturally as the pack fabric expands and moves with you, so your breathing rhythm and oxygen flow isn’t restricted. The system makes for a much more natural running experience.

Detailed Construction

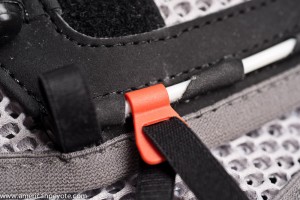
The manufacturing of the S-Lab is really top notch and includes a lot of attention to detail. Seams are sewn correctly, the materials are durable, and the design is streamlined. The main rear pocket has a stretch front, so you can cram in arm warmers, a jacket, water bottle, whatever, and it keeps the mass compressed as close as possible to your spine. I find this is important for running and balance because it means that the moment of inertia of the pack is minimized, and over the length of an ultra marathon this can greatly reduce fatigue as compared with a pack where the mass is positioned out too far from your center gravity (or is off-center from the vertical axis of your spine). Inside the main pocket you have a small magnet to close the opening. There is an adjustment system to pull the pack higher up on your back if needed (to customize the fit). The elastic cords are all high quality as are the plastic clasps which secure the chest compression straps. The front pockets have draw string closures making them super easy to access. I use them for gloves, snacks, cameras, or water bottles. The pack comes with a Source hydration water bladder, and includes a sleeve with reflective backing, which would help keep liquids cool from the heat of your back as you’re running. The drinking tube comes under your arm and then up the shoulder strap, so it isn’t flying around over your shoulder like on other packs. You can secure running sticks to the pack as well, although I haven’t tried this yet. There are small side pockets that are nice for a cell phone, extra snacks (like magnesium sticks) or keys.

Trial By Trails

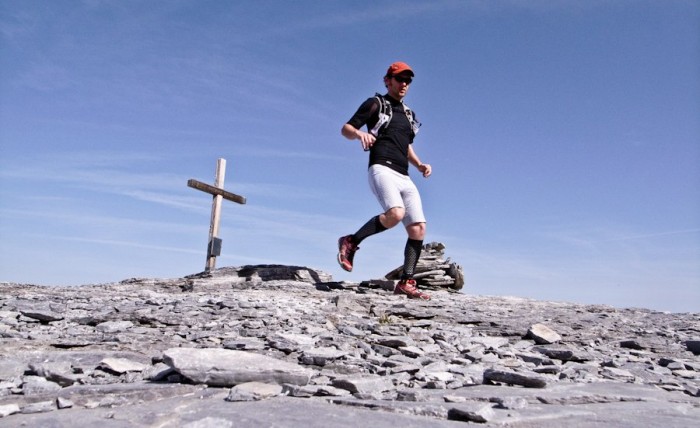
I got into trail running because it combines the elements of speed from ski touring with the technical footwork of climbing and the thrill of mountaineering. I’ve taken my S-Lab 5 on the SwissAlpine K42, the Jungfrau Marathon, and on various mountain runs around Switzerland including Rigi Kulm, Lauterbrunnen – Eiger Rotstock, Braunwald, Elm – Linthal, biking from Winterthur to Bauma, and then running up and down the Hornli. In general I’m not one to count kilometers, but I’ve run with the S-Lab over long distances and terrain variations including asphalt, basic off-road and mountain trails, ascending and descending at high and low velocities, and S-Lab pack have been marvelous. It could also be the most comfortable pack I have for multi-pitch sport climbing, but for storage reasons I take my Lowe Alpine Attack pack. If I carry a normal mountaineering load I will often get a strained shoulder muscle (think it’s connected to cracking my clavicle long ago). I found this happens also if I run with a small pack like the Lowe Alpine Attack, but with the S-Lab I never have this problem. This tells me directly that the pack fits very well and distributes weight better than anything else I own (and biomechanics engineer side of my brain agrees).

Yes, It’s Worth It

If you’re looking for a casual running pack don’t even bother considering the S-Lab. It retails for 180 USD and you probably won’t use it enough to appreciate it (the true benefit comes when you’re logging lots of km). This is a piece of gear for serious distance and ultra runners, where you want a pack that will minimize your energy expenditure over long distances and will feel like a second skin around your body. The pack comes in two sizes, and this is probably the greatest limitation. If it doesn’t fit you well there isn’t much room to adjust it. I’ve tried mountain running with my Lowe Alpine Attack pack, my minimal Mountain Smith bike pack and other small packs, nothing compares to the S-Lab 5. It is vastly more comfortable and puts less stress on my shoulders than any other pack I have ever tried, and that makes the price totally worth it. I have loved running over the Swiss Alps with the S-Lab 5, and I’m now desperately trying to find the new larger version, the S-Lab 12 to take on the Swiss Irontrail T71 in July 2012.

Strata Conference 2011: Complete Video Compilation Review

The big data Strata conference in February of 2011 was a three day event covering everything a data scientist needs to go from zero to data hero. I’m reviewing the Strata videos as part of the O’Reilly blogger review program. The full video series covers those three days composed of 78 sessions, with so much information it’s taken me about half a year to write up a review. If you could clear your calendar you could easily spend a solid week just watching the content (which I didn’t have the ability nor desire to do, hence the long wait). It’s enough information overload when you’re just attending a three day event and only going to one session at a time. My mind often goes numb after the first two hours with all the information, and by the end of a two day conference I want to jump out the nearest window. The Strata video collection is a much more enjoyable way to take in the content.

Watching the Videos

There is an very large amount of information in the video collection. What I did was to identify the sessions which I felt would be most interesting for me. This entailed starting from the end middle, with topics like, Mining the Tar Sands of Big Data, and then I worked my way back to the start with the Data Bootcamp sessions. This gave me a more practical overview of the value of big data now and for the future, giving me motivation to learn the basics of data collection and interpretation in the bootcamp sessions. I like the Executive Summit sessions because it gives me a feeling for how the top managers might perceive the value of big data, which would naturally be different than my perspective. I’m still going over all the information in the videos, but I now know what big data means for the present and the future. The bootcamp sessions get you up and running with open source data tools based around Python and R. You can download these while watching the videos and follow along with their presentations.

Why Big Data Matters

How was Osama bin Laden found? Big data analysis helped pinpoint his location (according to Frontline). Big data analysis will replace individual intelligence gathering as a tool to pinpoint terrorist activity, troop movements, flood danger, probably even tsunami disasters, famines etc. Big data analysis holds huge potential for both good and evil, and is how we will predict the future trends with increasing accuracy, and the Strata videos will help you get your head around how to do it.

Why is Strata relevant? Big data is the commodity of the now, and of the foreseeable predictable future. Big data means being able to collect, digest, and interpret large data sets to find something useful. Useful could imply building a data consulting startup, data mining social networks, understanding from an executive position how big data can be used to improve your existing company. It will be an essential component in many businesses as we venture further into a future defined by data collection. Data market places will no doubt evolve where people can buy or license the use of big data sets, and probably big data use wars will ensue instead of patent disputes to dominate the intellectual property legal landscape of tomorrow. Strata covers all of the background topics necessary to make sense of the data future. There are talks on the ethics and privacy with big data, how startups use big data, how large corporations benefit, and what can be expected of a data scientist as a profession in the future. There’s also little nuggets of how to lie with big data and hide things you don’t want people to realize when visualize data with curves and diagrams. I find this essential to being a savvy consumer of news and political poles, and it will only get more and more relevant. Who wants to be a data journalist?

Does Strata Deliver?

So, does Strata deliver? Yes. The videos are well-done, sound is clear and the speakers are quite good. All the critical information is there to get up and running on the big data subject. If you know nothing about big data the Strata videos will get you up to speed. If you are looking to understand the potential impact of big data on future business Strata delivers. If you already are a data scientist you’ll probably find the bootcamp sessions redundant, but will no doubt find a lot of good info on the current state of the industry in the executive sessions. I may look back in five years and remark on how watching the Strata videos was a defining point in my career. However, remember that this is a really big set of videos, almost more of library than a conference. You’ll probably feel overwhelmed when you first look at the topic list, but skim over the topics and just start where it looks interesting. This is a video collection where you watch specific parts a few hours at a time, and not try to just crunch through all information in one night (or even in just one week), in fact, in may take you nearly a year.

Buy the Strata Conference 2011: Complete Video Compilation on O’Reilly.com

My Favorite Mobile Photo Apps for iOS

The daily smart phone is the camera that’s always on you, and by definition the best, because you can’t put a Sony A900 in your pocket to take around all day. At the moment, I don’t have a smart phone, I have a passingly-intelligent Samsung, that I’m embarrassed to pull out at Web Monday gatherings. I do however have an iPod Touch, and now enjoy using push-button applications to post-process my photos when I’m not by my computer. Here are my experiences with what works, what I find awesome and lame in the world of mobile apps for photo processing. Here’s a run down on what works for photo processing on my iOS device, what doesn’t work so well, and why. The goal here is to have an app that adds to my Photoshop work, is fast and easy to use, and gives easy access to social networking sites for uploading.

First is what I want/expect from a mobile photo app: I expect the app to do something useful and valuable to my photography/art, which can’t be done on my iMac – or, which is more convenient and faster to do with the mobile device. I expect connectivity, so that the processed images can be quickly distributed to social networks and saved to my device/phone. We have three contenders here, Photoshop Express, instagram, and Plastic Bullet.

Photoshop Express

PS Express for your mobile phone is ok, but for my purposes it basically sucks for anything besides viewing images and making a few basic color overlays. I have a Photoshop online account, and had high hopes (now dashed) that I would be able to use the mobile app as a way to process and then distribute images to different online areas and social networks. Alas, the app is basically useful for nothing but a little coloring and an assemblage of near-useless effects that only detract from my work. I’m probably being a tad hard here, and admit to being a post-processing snob, but it’s Photoshop, and should be the pinnacle of processing power. PS Express actually has some useful features: you can rotate, crop, and do some other basic things like overlay a rainbow filter or reduce noise in your images (useful for crappy-exposure camera phone images), but these minor tweaks are no reason to spend the time required to download and open the app. Adobe made a fair effort here, there’s some more advanced functionality like a tilt-shift blur filter, but the transition region from sharp to defocused is abrupt, unnatural, and basically just ugly, making the app near useless for me.

instagram

Instagram is all the rage (so I’ve heard), it’s sort of supposed to be like a Holga for your iPhone, and processes your images in a classic faded Polaroid feeling and light-leaky camera profiles. For some reason we like to push the boundaries of camera technology and then process the images to make them feel old. It’s a fun thing to do and is probably fun to use with a camera phone…however, much like PS Express, I feel that the effects are sort of flat and uninteresting. Uninteresting in the sense that it doesn’t really add to the content (or feeling) of the original images, but generally detracts from it. When you apply one of the filters, the app will basically just overlay a color or processing effect on your image, maybe add a film border for nostalgia (which is an important feeling) but it doesn’t seem to really target or balance between shadows and highlights. The result is a flat image that’s sepia or sort of black and white, but that doesn’t improve upon or add to the quality of the base image (in my elitist opinion). Of course, I’m highly biased to color and form in this respect and make no excuses for mediocrity. I do my own Photoshop work and don’t mind spending an hour or two doing a basic image composition for one portrait, and although I don’t expect the same attention to detail from a free app – still, as a single app instagram is sort of uninspiring for me. But, we don’t have to use just one app, do we? The true value of instagram is the easy integration with all the relevant social networks and microblog sites. Direct from the app I can upload to Facebook, Flickr, Tumblr, etc. and I think this is why some folks use the term Killer when describing instagram, it does everything Flickr should have been doing with from the start with their mobile app. The usability of a social app like instagram is more important than the quality of the product (like the best camera is the one you have on you), and that’s why I still have the app on my iOS device, it’s fun to play with and easy to upload. But there is a better, plastic fantastic choice in the app world.

Plastic Bullet

Plastic Bullet, like many apps, simply doesn’t get the recognition is deserves. Plastic Bullet is developed by Red Giant, a company you’re ever heard of unless you’re into video/film post-production software. Red Giant specializes in software that aids in things like video time code transcoding, color correction and color grading of films, all made available at a price point realistic for indy film makers and startup video hobby directors like myself. Plastic Bullet is a product from the folks who develop one of the best color grading programs on today’s market, packaged as a mobile photo app, and I love it so much I’m using it to produce looks I can’t do in Photoshop (or at least, don’t want to spend time doing). Plastic Bullet is the only photo app I have that really adds to my images. The processing Plastic Bullet applies to your photos isn’t just a color overlay, it really feels like the app is improving the image quality and emotion of my images (when the right effect is applied). Shadows and highlights in the images are processed differently (depending on the filter you choose) and you can’t predict exactly what it will do until you start playing with images. Of course, it’s not a magic bullet. I need to give it a nice image to work with, and I then go through a few finger taps, picking the processing that works best, but in the end it creates a unique image. The cool thing is that you never know exactly how the image will turn out, and that adds to the magic of the whole process. It gives images a much better Holga/Polaroid feeling than instagram, and brings out new colors for different images. From the app you can save your processed image to your device or upload it to Facebook, or Flickr. I would love the ability to upload to Tumblr and to my blog as well, but I can also just save the image and upload it from my library. Plastic Bullet isn’t free, but it’s an app I would pay for (full disclosure, I got it for free during a promotion from Red Giant) now that I know how good it is. But why limit yourself to just one?

Why Choose Just One?

Since I have both instagram and Plastic Bullet, I’ve actually just started using both instead of picking just one. I like the overall feeling of Plastic Bullet, so I use that first, and then save the image and open it in instagram for further processing and uploading to the instagram social network as well as Facebook, Twitter, Tumblr, etc. Since instagram renders a less aggressive treatment than Plastic Bullet, it’s ideal as the final touch to tweak color levels. So with both apps I get the best of both worlds, tight social network integration and excellent color processing. I’ve started using this combination to reprocess old portraits, pictures of my paintings, cow photos, and I simply love it. Sometimes I’ll go so far as to process in Plastic Bullet, then export back to Photoshop/Lightroom on my computer and tweak the colors and shadows, and then send it to the web.

Don’t get caught up in the information overload. All of these things are just tools, and with all the ways to share files an artist shouldn’t feel locked into any one app or processing philosophy. Use the tools that you discover to achieve the vision in your head, don’t be blinded by the marketing hype and pick one over the other. The human imagination is too small for just one photo app.

VG10: Jag35 Field Runner Rig Review

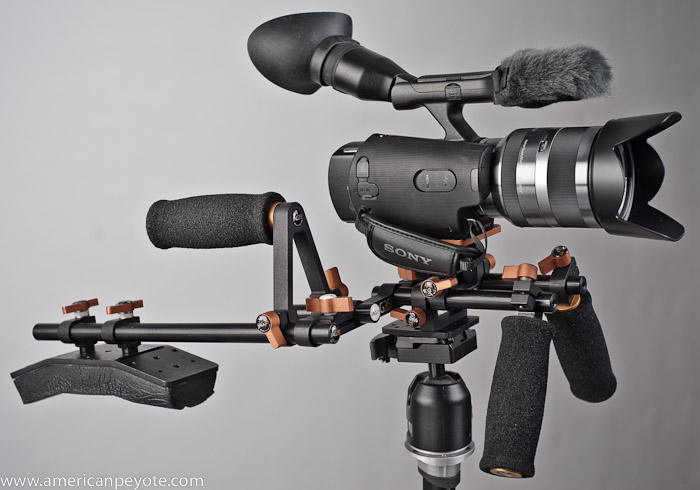
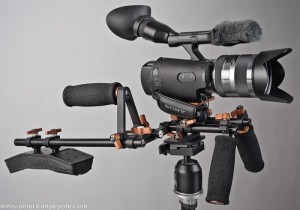
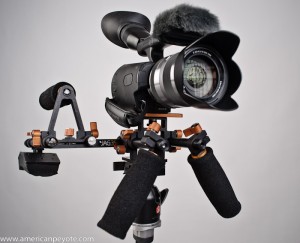
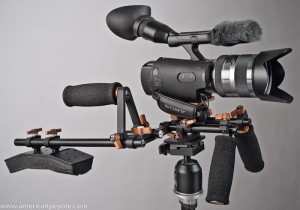
I picked up the Sony NEX-VG10 because it has more of an all-inclusive video camera design than going the DSLR route (Canon 7D, 60D, 550D, etc.). However, as I started using the camera I decided that a shoulder rig would add a lot of functionality to the system to stabilize the camera and to shoot in different situations (and I’ll admit so some gear lust driving my purchase decision). I opted for the Jag35 system because they offer rigs at affordable prices for people in my buying group: folks who are getting into Indy film production but don’t have a huge budget. I decided on the Field Runner because it’s under 300 USD and came with a free handle when I ordered it. I also picked up a tripod baseplate to quickly go from tripod to shoulder mount on shoots.

Shooting with the Field Runner

The Field Runner is fun to shoot with, and that’s an important point. I use the Field Runner with the NEX 18-200mm autofocus lens or something wide like the Sigma 20mm f/1.8 or a Minolta 20mm f/2.8 and stay mobile. Since the NEX is autofocus I don’t yet worry about pulling focus and haven’t added a focus follow to my camera kit just yet. With the 20mm lenses I set the aperture and manual focus as desired. I can then shoot with the rig on my shoulder, or down low from my hip. I’m currently using the Field Runner without any counter weight on the back since the VG10 is pretty light the counter weight isn’t such an issue, but I’ll probably add one in the future to stabilize the system.

On the shoulder the VG10 is very nicely stabilized, and is much better than shooting in the classic Handycam method of just holding the camera in your right hand and putting it up to your face like a tourist or last-rate pornographer. With the Field Runner the VG10 becomes a part of my body. It moves with me, rotates with my torso and feels connected to my center of gravity. In short, it does exactly what I was hoping for when I ordered it. The VG10 now sort of feels naked without the rig. I can imagine shooting without it, but don’t see the point. It’s also nice to cradle the rig in my right arm and hold it to my body, with my left hand on the front handle. I also often shoot from my hip. To do this I make the front handle parallel to the rig and hold that handle with my left hand while holding the raised handle with my right hand and then rest the shoulder pad on my hip and then pan with my body. This is a very secure was to do a low pan when needed and is very comfortable.

Mobility

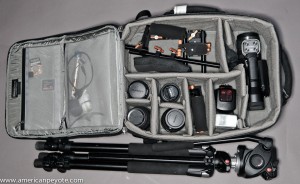
I like to be mobile as a film maker or photographer (or painter for that matter). I like gear that easily moves me and packs up quickly. I can easily pack up the Field Runner with my VG10 and an assortment of lenses into my Think Tank Airport Acceleration and go without any issues. When on location the Field Runner assembles in a few seconds and I’m ready to shoot. With the optional tripod plate I can mount the rigged camera on my Manfrotto 501HDV fluid head and quickly switch from tripod to hand-held in mere seconds. I just need to swing out the front handles to allow the rig to slide onto the 501 head, but since the handles are locked down with simple twist knobs, this is very easy to do. Then when I go from tripod to shoulder it just takes a second to swing the handle back into position and lock it down and I’m ready to shoot again.

Design Issues

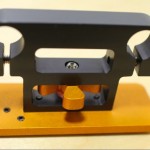
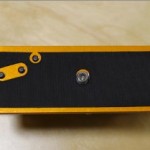
These are a few design issues I’d like to address that may be serious or totally irrelevant to potential buyers. Overall the Jag35 Field Runner is a good value for the money, but there are some areas of the design that need improvement in my opinion. The most serious is related more to the VG10 design than the rig, which is likely irrelevant with any another than the VG10, but needs to be mentioned. The connection of the VG10 tripod plate to the rig is very insecure, this is the heart of the rig system and should be the most well-designed and quality-controlled part. However, this is a design issue with the VG10, and not the Jag35. Now, this is has to have some context. The Field Runner is designed for a DSLR body, and I’m using it with my VG10, which has a long base like most camcorders do, while DSLR bodies are short and wide. For the VG10 you should have a long attachment area like a Manfrotto video plate, which produces a nice secure contact area on the bottom of the camera. This connection system is offered from IndySystem or Cinevate, where you can screw a long Manfrotto plate onto your camera and then just lock that into the baseplate on the rig.

To compare, I also tried the Jag35 camera plate with my Sony A900 just to see how secure it would be with a DSLR body, and it was totally different from the VG10. With a DSLR body the camera sits securely to the Jag35 base plate. With the VG10 it’s ok for basic shooting, but I don’t have faith in the attachment to my camera to forget about it, and is a primary reason I’m looking at adding an IndySystem camera plate to improve my rig setup. I also think the current design would be greatly improved by using a metal knob (similar to those on the rest of the rig) instead of plastic covered screw on the camera plate, as it would be easier to securely tighten the camera plate to the camera tripod socket.

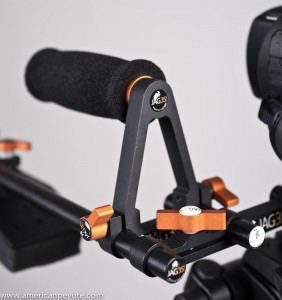
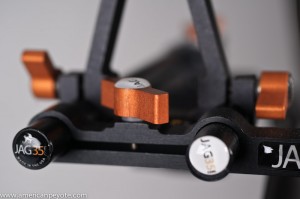
I also found some minor misalignment issues with the connectors which hold the rods together, but this is a smaller issue and doesn’t affect the performance of the system. When the screws are tightened the rig is rigid and secure, and that is the function of the design that matters most. The optional handle could also be improved. The handle needs a lock-off screw to prevent it from rotating. As it is, the off-center handle can easily torque due to the weight of my camera and twist open when held, which is a basic design fix that should be addressed. For this reason, I always need to hold the rig by two hands to prevent unscrewing and rotation. For a rig of this price point and production volume, these design issues are more or less acceptable, and I’m confident they will be ironed out on future rig releases.

Design Update

Jehu Garcia, one of the people behind Jag35 pointed me to an updated design for the camera mounting plate to address the issue of camera-rig connection. There are two key and very welcome design improvements. First, there are a few screws in the base plate which can be screwed to contact with the bottom of the mounted camera. This then counters the tendency of the camera to loosen from the mounting plate. This addresses the torque loading on the rig-camera connection, which can occur when a follow focus is used. It can happen that reaction forces develop at the rig connection point, and these screws help resist those loads by counteracting the torque. From the design, it looks like the new plate will also improve the issue with the VG10 (and the poorly designed Sony tripod mount). The second modification is a nice big aluminum knob. This will make it much easier to tighten the rig to the tripod socket.

Overall I Like It

I’m a mechanical engineer by profession and a scientist by training, so you would expect I’d find and write about any mechanical design issues that I find with the gear I use. However, I can honestly recommend the Jag35 Field Runner, for the price it’s a great rig for new Indyfilm folks and those on a budget. It will be used by weekend warrior film makers and those who don’t mind a few design short-comings. The price difference between the Jag35 offerings and a similar rig from one of the pro-shops like Zacuto or Redrock Micro is nothing short of amazing, and I’m impressed that they have grown so fast and come so far in the short time Jag35 has been selling gear. They’re releasing a motorized follow focus, and they’re even making it wireless. The innovation and price point of their gear is really impressive. At one point I actually was going to start designing my own rig system and get some custom prototypes made, but once I saw what is coming out of Jag35, Habbycam, and IndySystems, I decided the market doesn’t need another rig maker in this category. Of course, the rig system in my head will be designed to be ultra-light using carbon fiber rods with a structural design optimized using Altair Optistruct, so it’s still possible I’ll do something in the future if I’m motivated enough. However, I’m more into spending my time shooting than rig designing.

Sony NEX-VG10 User Review

Editor’s Note: This is a user review of the Sony NEX-VG10 camcorder. It has been written mainly in a window seat on the TGV express train between Basel and Paris L’est. It is a User Review in the sense that I’m just a guy who likes to use camera and writing technologies as storytelling tools. These are my experiences with the VG10 so far. This user report details why I got the camera, what I use it for, and what I think of it.

Background

So, of all the video camera options out there, why did I get a VG10 in the first place? Well, I’m basically a stills photographer with movies in my heads, and the time was right for me to start experimenting with video – and the VG10 fit the bill, offering the critical features I was after. I started shooting stills with a Minolta 7, and then moved on to a 7D, eventually to a Sony A900. Presently, I have a nice collection of Sony Alpha-Minolta mount lenses. I love bokeh, and wanted to start taking moving pictures. Those goals would be easiest to attain if I just could shoot video in a similar manner to the way I do photography. The VG10 allows just such a bridge, while integrating quite well with my current photography tools. Using the LA-EA 1 adapter I can shoot video with all of my Minolta lenses with aperture control (but with manual focus) and as well I can use my Sony F58 flash or Elinchrom Skyports for shooting still images with on-board or external flash. A firmware update is coming to also enable autofocusing with Sony SSM/SAM lenses (with the LA-EA 1 adapter). Plus, via third-party adapters I am also able to shoot with nearly every lens I own. This includes my Hasselblad 80mm f/2.8 medium format beast and Contax G glass. Oh, and I’m an admitted Gear Whore, so why wouldn’t I want to buy this cool new toy?
Why Not Just Buy a HDSLR?

I asked myself this a lot. There are many options for video DSLR (HDSLR) cameras or mirrorless designs like the Sony NEX 5 or a Panasonic GH-1 or GH-2 to shoot video with. However, these are all built around the concept of using a photo tool to shoot video. Since I already have an awesome collection of photo tools (Sony A900, Contax G, Fuji GA645, etc.) I figured it was better to do the opposite, and buy a video tool, which can also be used to shoot still images. No other camera I’m aware of at this time includes autofocusing and audio (with a good microphone) recording in one video package. All the current video DSLR or mirrorless options require an external mic for decent audio, and generally extra rigs are required to make them useful for shooting. I’ve played with many of them in the store, and always came away with one main thought, “these would suck to shoot video with.” Afterall, that’s why a whole industry is exploding along side the SLR video revolution, providing things like focus-follow devices, camera cages, external monitors, microphones, shoulder supports, etc. – because the current devices are inadequate for shooting video and recording audio out of the box.
Design Overview

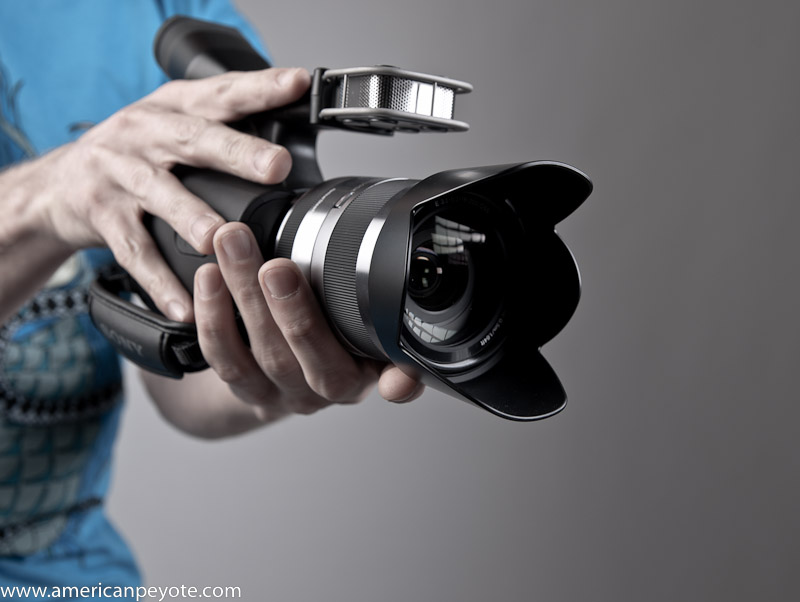
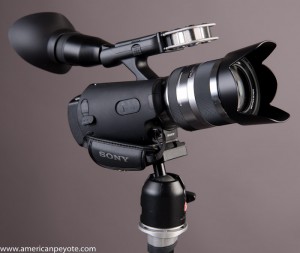
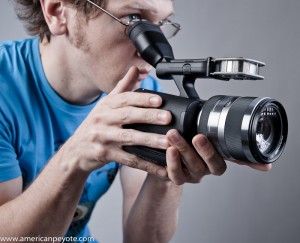
The VG10 is designed as a consumer grade video camera with interchangeable lenses, this makes it totally unique in the world (at the time of publication). It’s designed well, with a nice sort of futuristic body including a handle on top where the microphone is integrated. The handle can be used to hold the camera at waist-level and to pan in different ways. You can do this with a video DSLR as well, you just need to make or buy a cage and handle first. On the left side the viewing screen will flip out and then on the side of body are the various controls. Here you can pick shooting mode, review images, manual exposure settings, etc. You can use the screen or the integrated electronic viewfinder for framing during shooting. This is nice because you can shoot from a number of different positions and comfortably frame the shot. You can buy the camera with the NEX 18-200mm lens, which is optically stabilized. You can also shoot with basically every lens ever made via the appropriate adapter. This makes the camera attractive to owners of any camera system, even Leica users can put their lenses on easily. With its APS sensor, the camera delivers a high quality still or video file. Additionally, due to the sensor size you can have wonderful bokeh (defocused element of the image) in your images or video. The VG10 is often criticized for being rather expensive for what it offers feature wise, but if you price out the body, lens, body design, TTL hotshoe and microphone separately, it offers an acceptable value. What follows are my user views of shooting stills and video with this new funky video-camera.

Shooting Stills

Like I said before, one reason I bought the camera was to be able to shoot with my current lenses. To shoot a still image, you press the still/video toggle button on the back of the camera to access stills mode. Then you press the button on top-rear of the handgrip to shoot an image. All exposure controls are accessed on the control pad behind the video screen. I started by shooting still images to get comfortable with the camera and its user interface and interaction design before getting into video. Since it has a hotshoe, I pulled out my Elinchrom Skyports and started taking images with my external flashes and studio strobes. I had a planned shoot in my studio to produce some send card photos for some models, and I shot with the VG10 along side my A900. The VG10 doesn’t support the RAW file format (but the NEX 3/5 do) but in the studio the exposure is well controlled, and these images would probably not look dramatically different if shot in RAW. Note to Sony: please add RAW file support, it’s easy to do with the firmware update and enough people want it. I like having the RAW option because it allows more freedom in editing. This is one advantage the video DSLR products like the Canon 5D-II have over the VG10, top quality still image quality alongside video capability.

Still Images

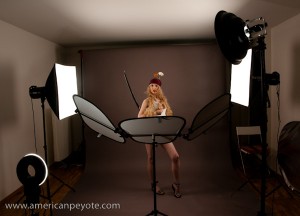
Despite the sort of weird feeling of shooting stills with the VG10 (due to its ergonomics as a video device), the file quality is top notch.  Plus, I’m starting to like shooting from the hip or a little low while using the angled viewfinder. I processed the still images from our model session with Adobe Lightroom 3 and Photoshop CS3. The lighting was provided from two Elinchrom BxRi 250ws strobes in softboxes left and right, with fill reflection coming from LastoLite TriLite reflectors setup in front. My Skyport radio trigger slides into the Sony hotshoe via an adapter and I just fire away as normal. The only problem shooting in the studio is that the brightness of the LCD screen is tied to the exposure of the scene, and as such it goes totally black in the studio because the modeling lights on my strobes aren’t providing enough light when I input the manual settings. You get to see the person for a second when you hit the focus and take a picture, but it’s difficult to frame the person correctly. Maybe there’s a way to turn off the LCD exposure matching feature (another firmware fix?), but I haven’t found it yet. This issue is also a problem when using the new electronic viewfinder on the Sony A33/A55 SLT cameras with studio strobes as well. If it’s like that with the coming A77, I won’t be buying one. It really kills the functionality of the camera for off-camera lighting. One thing I would really love is if you could shoot video and then just press the photo button and shoot an image. Then I could just use the modeling light on my studio strobes to light for video and also take a high quality still image when the strobes fire, but this isn’t possible. All in all, the VG10 takes good quality still images. The main limitations are no RAW, no stills while shooting video, and framing difficulty when using manual exposure and off-camera lighting.
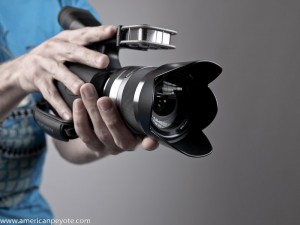
Shooting Video

I’m currently using the VG10 for a couple of different video projects. These include, live band footage, Lego stop-motion animation, and screwing around in my apartment.

The VG10 is a Handycam, and as such it is made to shoot video easily and quickly. There’s a large video button on the back of the camera, you press it, and video recording starts. However, it’s only nice when the camera up at shoulder level when your thumb can easily press it. The camera is also designed to be held at waist level and as well by the top handle. So why is there only one big button in the most inconvenient place at the back of the body? And why can’t we use the still photo button to shoot video with? You can force autofocus using the still image button to focus during video recording, but it should allow video start/stopping as well. Even better, there should be a button at the front of the body to allow more natural use. Even better still, I would like some buttons on the handgrip to allow easy manual control of speed and aperture, but that’s probably not happening in a Handycam.

The Formers

My first video experience with the VG10 was at the Formers gig at Zak in Rapperswil-Jona. Zak is a nice small venue, perfect for live music and a little head banging. I shot stills with my A900 and had the VG10 hanging off my shoulder to shoot with as well. The 18-200 isn’t a very fast lens, the maximum aperture is 3.5 at 18mm and the stage lighting alternated between darkness, green smoke, red, etc. It was a good place to see how the camera does in low, unpredictable light. As it is a Handycam, I just pointed and shot, without paying attention to anything like audio levels, exposure, etc. I missed focus a few times because I was accidentally pressing the photo button, which held the focus in the wrong point. If I had just pointed and let the camera do the thinking it would have worked out better.
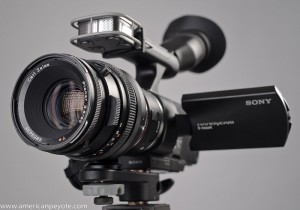
Adapting Lenses

In my apartment I’ve started playing around with different lenses. One of my favorites is the Sigma 20mm f/1.8 from my film days. It needs to be rechipped and currently the autofocus doesn’t work on any of my digital bodies. However, the main reason to use this lens is at maximum aperture, and that’s what I did while filming my small toy collection. A 20mm lens is a very nice focal length on with the APS-sized sensor of the VG10. It’s moderate wide, and high-point of the Sigma lens is that it has macro-level close-focusing capabilities. You can focus down to a few centimeters with this 20mm lens, very unique in the imaging world. However, filming by hand with such a setup is not easy, and it’s wetting my gear acquisition appetite for a dolly to accurately frame, focus, and have smooth camera movement during the shoot.

I bought a Hasselblad 80mm f/2.8 about a year ago, along with a Fotodiox Hassy-Sony adapter to mount it on my A900. Since I wear glasses and the A900 has no live view, the lens doesn’t work so well with that setup. There’s no split-screen to manual focus with the A900 so when I use and focus in through the viewfinder I always focus in front of whatever I’m shooting. However, using the Fotodiox adapter along with the LA-EA 1 I’m able to put the Hassy glass on the VG10. Now I can focus using liveview for stills or video with the Hassy. This creates a sort of badass combination with very nice bokeh and 1080 video, perfect for video documenatry videography and looking cool. I haven’t used it much, but plan to as soon as the proper project gets started.

Audio Quality

My only other experience with gathering audio is with my Zoom H4. I know what good audio sounds like, just like I know what good wine tastes like, but I’m no expert in the area when it comes to highlighting nuances like the difference between MP3 and uncompressed audio. I just know what sounds and tastes good. The microphone has four omnidirectional elements, which allows the system to filter out unwanted background noise and such. As far as I’m concerned the audio quality rocks. I pointed and shot the Formers, didn’t give a thought to the audio levels and the audio came out sounding awesome. No mess, no fuss, no needing to audio sync the sound and video feeds in post-production (like with a HDSLR), I’m very happy with the audio quality on the VG10.

Video Codec and Frame Rates

As a newby with video production, I am totally new to the video formats, codecs, frame rate issues, and other topics concerning indy film making. The VG10 shoots AVCHD in a 1080 50i/60i wrapper, but the actual frame rate is 25 or 30 fps (depends on where you buy it). Unless someone (maybe someone like me) hacks the firmware (like was done with the GH-1 by someone else), it’s super unlikely Sony will release an updated firmware that allows  variable frame rates. This is due to the design philosophy of the Handycam.

A user should be able to pick up and shoot a Handycam without ever thinking about the details. You can’t even pick an ISO setting for shooting video (but you can when shooting stills). That’s the way consumer Sony video products are, and it will probably stay that way. I would like the ability to change frame rate, but at this point it would just be for experimentation, due to the fact that I’ve read on many internet forums that 24p is what people use to shoot movies because aesthetically it looks better. I’ve also read that AVCHD is a horrible format and it isn’t as good as other options like H.264 or something else. However, since I still don’t really know what I’m doing it doesn’t really matter too much, but eventually I will have a clue, and then I’ll think about going to Panasonic with the GH-2 or AF100 if I really get into video production and Sony isn’t offering what I want (I have no brand loyalty).

So dear Sony, give me variable frame rate and different video codecs or I’ll look to another system or try to hack the firmware (but first I would need to learn how to hack).
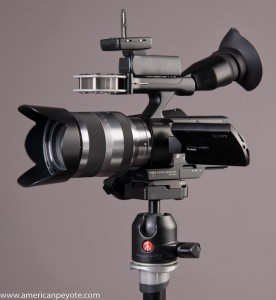
In Summary

All in all, I like the VG10. I’m not a technology apologist or a Sony fanboy. I point out when technology sucks and praise the successes I see. I’ve shot stills in the studio and video in a dark venue and the camera performed well. The VG10 fits the bill for what I want right now in my video life. It’s a camera I don’t have to think much with, uses my current lenses, gives me high quality video and audio, and is portable and adaptable for stills as well – and it fun to use. This “bill of features” will change for sure as I learn more about video production and accordingly demand more from my video camera.

Although I bought the VG10 to be an all-in-one device, I’m looking at designing a cage for the VG10 and also adding a focus follow at some point to improve manual focus capabilities. One glaring design flaw is the tripod mount. The mount on the VG10 is one of worst I’ve ever seen – on any camera – ever. It’s basically a small piece of metal, that doesn’t really connect too well to the inner body of the camera. Some people on the Vimeo VG10 group are already talking about modifying the mount to make it usable (yes, it really is horrible). The tripod mount on the LA-EA 1 adapter is much more robust, and I like to use that with tripods. One other design suck is that the tripod mounts on the LA-EA 1 and the VG10 are not level with one another, making it difficult to adapt heavy lenses to the front and improve the rigidity of the system. But it is a consumer body (now I’m starting to apologize).

The VG10 is basically a “feeler” product from Sony, it’s a test to see what consumers want. It’s made for the consumer market, but it’s prosumers who are really going to be using this camera. The future track of the VG10 can be directed along the right path if Sony gets the proper feedback. It’s in their interest to create products people want to buy. After all, Sony changed the NEX 3/5 firmware when consumers became vocal enough and demanded more, so there is hope.

Future Projects

Thanks in part to my  VG10 acquisition, the video bug is really starting to bite. I have ideas on deck for shooting promo videos of my paintings from 1 Day of Art Copenhagen and as well integrating video shootings into the normal portrait shoots I do. This will be sort of an experiment in using viral web movies to connect the intent of the artist with the viewers, and create dynamic as well as static content during shooting sessions. With the paintings, it’s also a way to explain to myself what my subconsious was doing while I was painting. Elevating the Web Portraits Zurich project is also burning in the back of my mind. I’d like to do some short interviews with the next people I shoot for that project to to present more about the person behind the technology. I like it when technology not only inspires me to buy more shit, but also fills my head with bundles of energy to head out and do new projects (or reimagine old ones), and to engage in ideas and storytelling methods I hadn’t considered before and, as a result – make life jus a little bit more interesting.
Metz 40 MZ Flash Review

Who is Metz?

When I started out with learning about lighting via the Strobist website, I was into the idea of picking up a couple of cheap Nikon SB24, 26, or 28 flashes on eBay. I soon realized however that this was a fool’s game as the Nikon SB line had been strobisized by David Hobby, and the used prices were over $100 for what should have been a cheap strobe to use with my cheap Chinese radio triggers. Then I asked myself a basic question, “Why buy a Nikon SB24/26/28 anyways?” What about a Metz?

The Nikon SB flashes are nice since they’re powerful and certain models can dial down their power to 1/125 or 1/256. This means you have a lot of flexibility with fine-tuning the exposure while shooting. By comparison, the Sunpak 383 and 120J (two of my favorites) only dial down to 1/16 and my Sony FL58 only does 1/32 in manual mode. After some searching I realized that Nikon wasn’t the only option for a quality flashes with a large power range and looked to Metz. Metz is a professional flash producer out of Germany. They’ve been making flashes since before I was born and produce a quality product that rivals the offerings of the camera makers. Metz flashes are generally designed to be workhorses for pro users who need to flash away all day at a wedding or some other event. This means they’re robust and designed to last a long time. Some even have user replaceable flash tubes. I reviewed the Metz offerings on the used market from the viewpoint of price versus performance, and eventually settled on the 40 MZ-3i.

The Metz 40 MZ

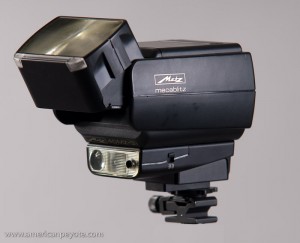
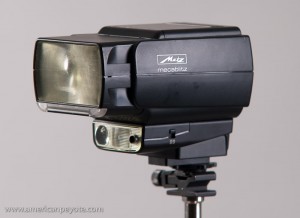
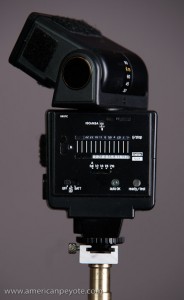
The Metz MECABLITZ 40 MZ-3i is a sweet flash (although now discontinued), and also offers a unique body design for off-camera flash work. Most shoe-mount camera flashes all look the same, the head points straight up in the normal position, and you have to angle it 90 degrees to shoot into an umbrella. The 40 MZ is designed exactly opposite to the norm. In the normal state it’s already pointing along the axis of the camera lens, which makes it perfect for mounting on a light stand and shooting into a softbox or umbrella (it’s more centered along the axis of the umbrella than a traditional flash). Additionally, the head tilts up, slightly down, plus it rotates around. So, basically with the 40 MZ you have a compact flash which is excellently designed for off-camera use with a large power range.

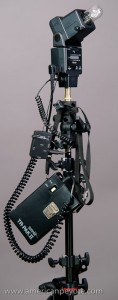
The MZ40 has all the features you want for off-camera (call it Strobist is you like) use. It has decent power, a guide number of 40 (ISO 100, 50mm), the flash power dials down to 1/256, you have a modeling light, stroboscopic function, zoom head (20mm to 105mm), external battery packs, etc. Additionally there’s an integrated wide angle diffuser, the the head pivots vertically between minus 13° to plus 90°, and can rotate 270°. The 40 MZ was produced in three main versions (I, II, III) plus an i designation. The 1 and 3 versions are basically the same except for some minor added functions. For off-camera manual use there’s really no difference.

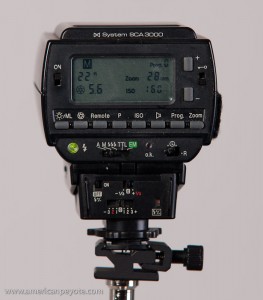
I picked up two 40 MZ-3i’s to shoot with on the used market (one from KEH and one from Adorama). There’s a battery pack you can buy or just shoot with 4 AA batteries. I recommend avoiding the battery packs since they’re old, and if you can get one it probably is run down and will hold fewer flashes than using the standard 4 AA’s. On the back of the flash you can control all the flash functions, which for me means leaving it on manual and adjusting the power level or zoom. If you have a compatible camera and SCA module you can use the TTL functions, but since the 40 MZ is rather old (from the days when film ruled), it’s possible that with your new digital camera the flash won’t work on anything but automatic or manual (no TTL) mode. In automatic mode the flash determines the proper exposure after you set the aperture and shutter speed on the control screen, in csae you want to use it on camera. You can check the function compatibility on the Metz website (a chart shows what functions work with different cameras).

Metz builds two types of flashes, some specifically for certain camera makes like Canon, Nikon, Sony, etc. The other type they produce is adaptable, with separate SCA modules so a flash body can be used with just about any camera body you like (Canon, Nikon, Mamiya, Leica, etc.). The 40 MZ is this type, using SCA modules. This doesn’t really mean anything unless you want to use it on your camera. I have one 40 MZ with a standard shoe (one single pin) and I have one with the module for a Leica camera. Both types are easily triggered using a hotshoe adapter plugged into my Elinchrom Skyports or any other radio trigger.

Using the 40 MZ

There’s little to say about shooting with it, because the 40 MZ is great to shoot with. It’s a workhorse flash with lots of power and a large power range. It’s compact and versatile for off- camera shooting.  The combination of compactness and functionality makes it ideal for location shooting. I also mix the MZ40 with my studio strobes. For example, I might have an Elincrhom BxRi in a CreativeLight softbox paired with a Metz 40 in a Kacey Dish. The MZ40 acts as the control light to fine-tune shadow details while the BxRi lights most of the scene. This is what I did when I shot Oksana, the ability of the Metz to dial-down to a low power made the lighting work, whereas a more powerful flash like a Sunpak 383 would have washed out the fine details of Oksana.

On the other hand, the MZ 40 packs a lot of power, and is ideal when needing to balance the power of the sun on small shoots. This is what I did when shooting flowers on the terrace of my old apartment. The sky was blue, the sun was high, I was bored, and the tulips were in full bloom. So I setup the MZ40 dialed up to maximum power and used it with a weak-powered Contax TLA280 to create some awesome tulip pictures. When I’m traveling I easily drop a few MZ40’s into my Pelican 1510 case like Tetris blocks and pull them out as needed.

Buying a 40 MZ-3i

If you’re looking for a unique flash for off-camera use I recommend checking out the Metz 40 MZ series. On the used market the 40 MZ-3i generally goes for about the same amount (or less) as a Nikon SB, but since nobody except for you, me, and a couple other folks on the internet know about it, you’re not as likely to get into a bidding war on eBay. I bought the 3i version because it’s newer, but they cost more and if you’re looking for a bargain search for the 1i model.

The Gist

The MZ 40 was one of my first flashes, and I liked it so much I bought a second one. Large power range, decent price on the used market, and unique head design, perfect for off-camera use. If you want more functions than a Vivitar 285 or Sunpak 383 and want to avoid the Nikon SB-line, check out the Metz 40 MZ.

Elinchrom BxRi Flash Review

Why the BxRi?

If you’ve been playing around with small flashes and are starting to find them limiting, or just want to blow some more money on photo lighting, then a studio flash might be the answer. I evaluated a lot of different studio flashes in my quest for a pair of larger lights, and eventually settled on the Elinchrom BxRi range when I decided to put together a photo studio in my apartment. The past 5 years have seen an explosion in flash consuming by non-pro hobby and semi-pro photographers. Fueled by the internet and gear lust, many have reasoned and re-reasoned the need for a pair of studio strobes in your heads. But why? Have your small flashes lost their luster? After all, light is light, the photos from small flashes are the same as those from studio strobes.

“Can I do this shoot with small flashes?”

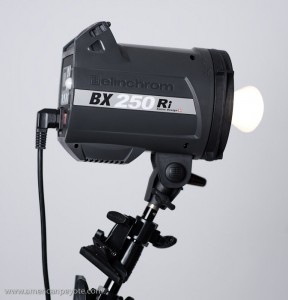
Probably you could, but it would probably be cooler with larger ones. The fact is, when you’re shooting on location or in a studio space the large monolights are nice to have. If you have an AC power outlet you never have to worry about the batteries dying and can enjoy large light output the whole day long. I know what you’re thinking, “more brains, less light” or “enhance the natural ambient” lighting instead of blasting a scene with a lot of light from a studio strobe. This is the philosophy I started with during my Strobist-dominated lighting education. But the truth is, I got into studio strobes simply because I wanted more lighting power and more flexibility and control over the light. The small flashes had become limiting and I found myself lusting for something more. There are many options for proper studio strobes, but I settled on Elinchrom for the nice mix of expandability, dependability, and value. The Elinchrom BxRi series offers an attractive combination of features including, fast flash duration, integrated Skyport with control, mid-price range, good recycle time, and multi-voltage capabilities. More expensive than Alien Bees but cheaper than Profoto the Elinchrom line offers a good price/performance value.

BxRi Features

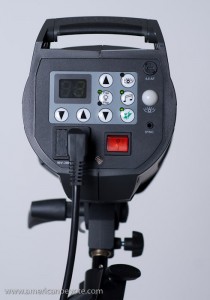
Basically, I bought a pair of BxRi strobes because they offer a nice range of lighting features and remote power control. An Elinchrom Skyport is integrated into the BxRi design, so you can adjust the power level of up to four different light groups from the controller on your camera. Since the devices are integrated into the flashes, you never have to worry about charging their batteries or even turning them on, they’re just there and ready to work when the lights are powered up. Having power control is very nice when you don’t have an assistant to run around and change your lights. Also, if a light is far away or placed high on a boom, it’s a hassle to bring it down just to change the power level on the light.

Since you can buy a universal Skyport to trigger a non-Elinchrom flash (like a Sunpak, Nikon, Canon, Sony, etc.) it’s very easy to create a setup with multiple lights and not be tied to the Elinchrom system. For example, I often use a three-light setup with my BxRi strobes in softboxes and a Sunpak 383 with my Kacey beauty dish. I have the two flashes programed to different channels so I can adjust their power individually, or chose to fire one or the other for different lighting effects. I should note here, if you’re mixing strobes from different companies, there’s the possibility of a color shift between the lights. How much this matters to you is hard to tell, but it’s important to mention. Naturally the BxRi also have modeling lights, which are fantastic for assisting the autofocus on you camera and showing where the light will fall.

BxRi in Studio

I love shooting with the BxRi strobes in the studio instead of or mixed with small flashes like the Sunpak 383 or Metz 40MZ. The BxRi flashes come in either 250ws or 500ws versions. I chose the 250ws lights because for my studio size (the ah, room in my apartment) it just didn’t make sense to get the 500ws version (although I might add a 500ws head in the future). I bought a set with two Portalite softboxes and stands. The Portalites are basic softboxes, very light and without an internal baffel. They setup up quickly and pack down to almost nothing. I often setup the BxRi strobes on the sides of the studio and then add fill in the front with reflectors and a Kacey Dish or an Orbis ringflash. With the built-in Skyports I’m able to setup the  BxRi lights and then fine-tune the lighting from the camera with the model/person in the shot. The stobe in the Kacey dish is then the only strobe I need to configure on its own. All the lights are triggered with Skyports, with one for the small flash. This process goes far faster than when shooting with all small flashes on munual which all need to be adjusted individually on the strobe body.

The BxRi design is multi-voltage , allowing one to shoot on 120V or 220V AC, basically giving a photographer the ability to shoot anywhere. This capability was actually a big reason why I bought into the BxRi lines as opposed to the Elinchrom RX lights. I travel to the United States about once a year, and it’s just sort of strange to buy an electronic device which can’t be used in other countries. I know, you can always buy a voltage converter, but I never know which one to buy, I would forget to pack it, and it just seems safer to go with a light which can run on either 120V or 220V. However, I’ll admit that this is like the Canon tilt-shift lens syndrome. You want to buy a Sony for the camera features but think, “but what if I get into architectural photography, they don’t have a tilt-shift lens like Canon or Nikon.” A lot of people get into the Nikon or Canon systems because of the large range of lenses and accessories, and then end up only using a few not-so-special zoom lenses. You could make the same argument for the multi-voltage or Skyport issue, but it’s nice to have when you need the functionality.

Build Quality

The BxRi series is robust, designed to wow the amateur and be used by the professional user. The body is made of plastic but seems pretty durable. Ah, here I should mention that I sort of broke mine, but it’s because I put a super heavy 150cm Walimex Octabox on my BxRi, and had to tie a piece of rope to the handle to make it support the weight of the octa. I think I sort of bent or damaged the inner support ring, as the locking mechanism doesn’t release correctly anymore, but if you stick with the normal Elinchrom modifiers and don’t overload the design, you shouldn’t have any problems.

The Gist?

If you’re into getting some studio lights for all the right (or wrong) reasons the BxRi line won’t disappoint. The lights are awesome, the integrated Skyports work great and the overall design gives you a lot of lighting funtionality. There are other options than Elinchrom, I had been lusting after a set of Alien Bees Einstein strobes, but even if I still lived in the US I would probably tend towards Elinchrom instead of, Alien Bees (for example). It’s only recently that Alien Bees released the Einstein units, which now allow remote power control and an attractive set of power setting features and short flash durations. Although you can get them in Europe, Alien Bees ship from the UK (an earlier distribution deal with Gotham Audio in Switzerland had fallen through),  at a price significantly highter than the US offering, and after shipping and import duties,  the final price is on the same level as Elinchrom. Then there’s Hensel and Profot lights, but they’re just too expensive for me at this time. If the BxRi are still too much you can also check out the cheaper range, the D-Lite strobes, which has been steadily adding features like a cooling fan and now integrated Skyports as well. The primary difference most users will care about between the BxRi units and the D-Lites is the flash duration, which is faster on the BxRi units (but this might not matter to you).

If you’re looking to buy some Elinchrom lights in Switzerland you have to go through Profot AG. For some reason they’re the one and only distributer in the country, but they offer a range of packages to choose from. To check out more on specs and stuff, go to the main Elinchrom website.

Sunpak 120J Flash Review

People often go through various stages of fascination and impulsive buying when getting into photography equipment (but I also admit I’m a little special in this regard). Once you figure out how to use a normal speedlight like the Nikon SB family of flashes or the Vivitar 285 or Sunpak 383 flash, you start to lust for more. You don’t know what that “more” is, but it’s something like a studio flash but portable like a speedlight. That’s when you decide that it would be cool to buy a bare-bulb flash, and the Sunpak 120J is the obvious choice.

Bare-Bulb Design

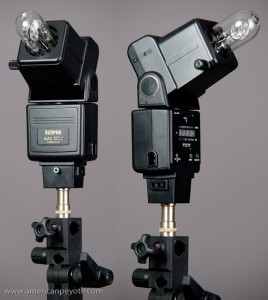
The Sunpak 120J is a bare-bulb design, which means it doesn’t have a fresnel lens to focus the light from the flash tube when it goes pop. Aside from offering cool lighting possibilities, the bare-bulb design is wicked-retro-cool. The flash tube looks like it would fry your brain if it were set off too close and reminds one of a mad-scientist lab. But nothing useless is ever truly beautiful, and the 120J not only looks cool but produces a lot of light. It comes with a standard silver reflector, but you can remove this for use in softboxes and beauty dishes (which is what I do). The 120J was originally a manual flash, but was later produced in a TTL version with a switch-out module. With the TTL version you can buy a TTL module for Canon, Nikon, Minolta, etc. or just use a 1-pin module when triggering with slaves. I love these module designs because it gives more choice to the customer and doesn’t lock you into a flash-camera system. The original 120J is triggered via a HH-plug cord, and includes a screw thread at its base instead of a hotshoe connection. This is awesome since you can directly screw it into a flash bracket or light stand. The 120J runs on four AA batteries, but it was also sold with the TR-II battery pack. This pack is essential with a 120J in my opinion, because the flash can drain the 4 AA’s pretty quickly. Now that you know what it is, why exactly should you want one?

Why the 120J?

The 120J isn’t the only bare-bulb flash around. There’s also the Quantum flash line and the Sunpak 622 can be fitted with a bare-bulb flash tube head. However, the Quantum line is expensive and units require an external battery pack. For the money an Elinchrom Quandra setup makes more sense than a Quantum. The 622 is affordable, but with the bare-bulb head attached the setup is massive. The 120J offers bare-bulb and power in a compact package. As with many classic flashes, once it became popular with people who follow Zach Arias and Strobist, the used price sky-rocketed. I’ve seen the 120J with battery pack listed for 400 USD, that’s just crazy. If you pick up a used 120J (without battery pack) for much more than 200 USD you’re starting to tip over the price-value line for a flash of this caliber. I bought the original version for 180 USD and later the TTL version with battery pack (for like $350 or something) and I don’t regret it, but the second one was a tad overpriced.

Which Version?

I don’t recommend getting the TTL version because it doesn’t offer much more for the money. The chances that your digital camera will actually work with the TTL function is probably pretty low, so you’re left with the same manual power settings as the original version. The original manual version is triggered with a standard HH plug cord, and the TTL version accepts a 1/4 inch plug. However, it should be noted that the mounting system on the original 120J is the most bomber of any flash I own. Instead of a hotshoe connection there’s a standard screw thread, so you can securely place it on a bracket and never worry about stressing the shoe mount. This makes it ideal for off-camera setups. Both versions include 5 manual power steps, from full down to 1/16th power (like the Sunpak 383). The body design is nearly identical to the Sunpak 383, which is why I like using them together.

The 120J in Use

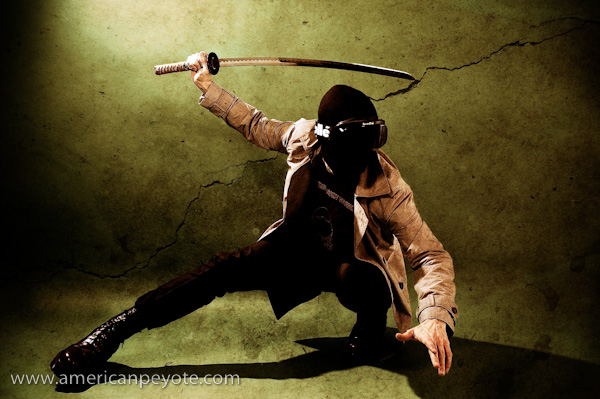
I primarily use my 120J flashes for location shooting, either in a small softbox or with my Kacey Beauty Reflector. For example, when I worked with Margarita, I used a 120J in a Kacey beauty dish placed close, and was able to knock back the ambient light of the area we were shooting in. This combination gives me a lot of beautiful light wherever I am in the world. When coupled with an external battery pack (Sunpak, Quantum, etc) it’ll keep flashing nearly all day and at the highest power will give you sun exposure balancing flexibility. I also use the 120J indoors in my apartment studio when I want a lot of hard light by installing the 120J silver reflector. This sends a lot of unmodified light where I want it. For example, I used a 120J in my Urban Ninja series to place a hard shadow in the image just below the Ninja shown below.

Despite it’s big-bulb design the 120J travels pretty well. When I fly I just take out the bulb and pack the 120J body in my Think Tank Airport Acceleration or Pelican 1510. Two 120J’s pack together symmetrically and it takes just a few seconds to reassemble the flash for action.

Accessories

At some point I want to experiment with the DIY radio camera triggers or the Radio Poppers and see if you can control the TTL flash remotely. If this happened it would almost be worth the crazy prices some people are willing to pay for one. The 120J is also one of the few flashes with a user removable flash tube. Replacements are about 30 USD and are easy to obtain from stores like B&H or Adorama. If you want a 120J check out places like Keh.com and eBay. The eBay prices will probably be more than the 120J is worth, but if you’re rigirous in searching you might snag one for a fair price. I bought both of my 120J’s at Keh, one was “bargin” grade and looked almost like new.

For more info on using the 120J checkout Zach Arias or the 120J Flickr group.

Sunpak 383 Flash Review

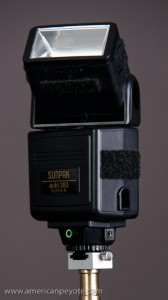
There are many classic things in the camera world. Classic cameras, lenses, shades, etc. But if you’re starting out (or well-established) in the off-camera flash mindset, you should know about the venerable Sunpak 383 Super. Sunpak is an interesting company, they basically make electronics, and have a long history of producing camera flashes at affordable prices. The 383 is a bare-bones device. It has no zoom head, takes 4 AA batteries, has a swivel head (with tilt) and 5 levels of power adjustment (down to 1/16th power). It also sports a nice little plug for a radio trigger and two-prong outlet for a Sunpak battery pack. The 383 is light, compact, and reliable.

The Sunpak 383 is my general go-to flash for travel, mountaineering and location shooting. If it gets dropped in the ocean or falls off the side of a mountain I won’t cry about it. If I lost my Sony F58 it would cost over 500 CHF to replace. For off-camera type use it’s a compact workhorse that you can easily toss in a camera bag or large coat pocket. I’ve taken my 383 hiking up Mt. Santis and on failed ascent attempt up Balmhorn in Switzerland. On the latter adventure there was ahhh, lighting and a quick retreat involved when I had the bright idea to do a night solo ascent in unstable weather. After the weather moved in I took to shooting a snail on the trail with my 383 until lighting started popping in the trees above my head and I decided it was time to stop doing stupid things like night mountaineering.

I also use the 383 in the studio with my Elinchrom BxRi flashes. Generally I have the Elinchroms in softboxes and I use the 383 with my Kacey Beauty Reflector. The 383 also pairs well with the Orbis ringflash, either on or off-camera. When I shoot concrete walls they often benefit from some fill light. For this I pair the 383 with my Orbis ringflash and put the 383 on a Gorilla pod.

Because of the analog power setting on the back, it’s easy to adjust the power level without looking at the back of the flash. This is very nice if you have it up on a boom (as I often do) and can’t see the back of the body. This makes it easier to adjust your light settings and concentrate on shooting instead of fiddling with little black boxes.

The classic 383 Super is generally available on the used market, either on eBay or at places like Keh.com, Adorama, or B&H. The prices are bit crazy since the flash became Strobisized (but still affordable) and if you’re paying over 80 USD, you’re probably paying too much. I found one used in like-new condition at a camera shop in Winterthur, Swizterland for about 10 USD. Since being discontinued sometime ago the 383 has been resurrected as a TTL version with manual settings possible. For the money, I see no reason to get the TTL version unless you want it for TTL usage. You also have the option of getting a Sunpak battery pack and can then power your 383 with a short charging time and shoot all day long. Basically, the 383 is a great flash to start with when learning about off-camera flash and I highly recommend picking one up if you find it at a decent price.

Digital Holga – Yashica EZ F521 Review

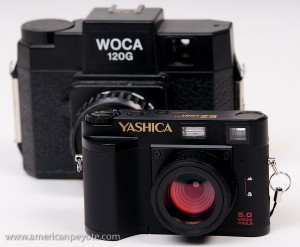
EZF521-03813.jpgYashica released a cool little camera called the EZ F521. It’s been released in Japan and I ordered one from Japan Exposures, this is a review of the camera and additionally of the Digital Holga concept. The Yashica F521 has been labeled the Digital Holga. I think this makes sense on some levels and is preposterous nonsense in other ways. The Holga camera is a simple 120 medium format camera produced in China. You can set the negative size to 6×4.5 or 6×7. The body is plastic as is the lens (the Woca version I use has a glass lens) and comes in variations with or without a flash and now different colors. There’s no way to focus with any precision, the lens has three positions, two apertures, and a fixed shutter speed. Of course you can modify the Holga to do bulb exposure and extra shutter clicks can build up an exposure so you can get cool abstract layers overlaid in one image. Basically the Holga is a cheap and fun way to get into medium format photography. The bodies originally cost about 20 dollars, although since they’ve achieved cult status and been produced in various colors, you might pay between 50-100 USD for a new body (maybe with a flash) which is a lot for some pressed plastic.

The Holga Concept

The Holga concept is to just focus on taking pictures with a cheap camera where you need to focus on the subect, as the performance of the camera sucks. The term Digitla Holga has been thrown around a lot since the rise of digital camera technology, but in my mind the only thing that comes close is sticking a medium format back on a Holga or Woca body. I know you can put a Holga lens on a DSLR, and no, I see no fucking point in putting a 2 cent lens on my Sony A900 body. And no, I don’t want a Lens Baby either. Why? Because the Holga look is a combination of substandard manufacturing and horrible body design coupled with cheap plastic.  It’s insane to put actual time or money into trying to replicate the look in any other way.

EZF521-13170004.jpgThe look of images from the Holga/Woca is characterized as unique, as it comes from light leaks and nearly impossible to determine exposure and focus issues. The image to the left was taken in a coffee shop in Zurich with my Woca. You can see scratch marks from the Woca body and it has a very dark and grungy feel to it. Why try to replicate this look in any other way? Sticking a shitty plastic medium formant lens on your Nikon D3 is not being creative. Additionally, trying to replicate the Holga look in Photoshop using PS actions and filters with programmed algorithms using repeated patterns accomplishes nothing short of making your images look like over processed crap. So in this sense, the Yashica F521 is nothing like a Holga. It doesn’t have light leaks and I think it’s safe to say that pictures from one will look closely like those of another, with little variation from camera to camera. However, the substandard lens and funky exposure properties are retained in the F521 design.

The F521 is too well-built to be a Holga. I’m pretty confident my Holga/Woca would explode if dropped on the ground. Holgas are made from cheap plastic with poor fracture toughness, alowing brittle cracks to propagate easily through the body. The F521 actually has build quality on par with my Ricoh GRD and Canon G10. It’s built like a little tank and sort of resembles a miniature Fuji GA645. The finish on the body looks and feels like anodized aluminum and the faux leather on the grip looks well affixed to the body.

Creative Short-Cut

Anyways, what does it mean to be a Holga? The philosophy behind Holga is that you just shoot, without trying to perfect exposure or focus. Resolution is shit because the lens is crap. The point is just to have fun, and if a cool picture is the results, then sweet. Some will say that these limitations make you more creative, like choosing to use a 50mm instead of a 24-70 zoom. I think this is bullshit, limiting your ability to create an image doesn’t improve creativity, it simply limits your options. Want to be creative? Take up painting and challenge yourself to create something in a completely different way from your normal routine. Photography is the easiest “art form” ever developed, the creative part comes from realizing the non-intuitive attributes of a subject. With a crappy camera like the F521 or Holga you just focus on the subject, not on focus or exposure because you have very little control over either one. So you could say these cameras make you more visually aware, but it’s not a short-cut to overdosing on creative expression.

EZF521-03784-Edit.jpgShooting with the F521

Here are the basic details, the Yashica F521 is light, sized to the palm of your hand, runs on three AAA batteries and takes SD cards. A 1 Gig SD card gives you like 180 images if you use the 12 megapixels interpolated image setting. The normal image size is 5 megapixels. I figure it can’t hurt, so I use the 12 megapixel setting. Look, it’s a toy camera, but the F521 actually has decent control over parameters. You can set the exposure compensation, white balance, image size, there’s macro capability (the lens has two focus positions), on-board flash, and some color modes. The automatic white balance is really horrible, so I set that myself.

My first outing with the F521 was a short trip from Zurich to Basel.  I took the camera along and shot a bunch of abstract motion images in the Zurich and Basel train stations. This is the type of imagery I like producing with this type of camera. I’ve done the same in Tokyo with my Ricoh GRD (GRD Frozen Motion Photography). Basically I walk around shooting while I’m walking and the long shutter speeds due to the low light of the Bahnhof produces the blurred abstract images I see in my head as I’m moving through the night. The F521 scans the sensor from top to bottom (I believe) when taking pictures, so if you’re moving the camera you can get a wavy line patterns due to the sensor scan rate.

Due to it’s small size the F521 is a very non-threatening camera and can be useful for creative street photography. It fits in any bag and the lens has a rubber cap, so it’s very compact to take around and you can throw in a coat pocket without worrying that you might be damaging the front element.

Picture Output

F521_Images-0044.jpgPicture quality is as you would expect from a digital Holga, absolutely horrible, but that’s part of the charm and experience. I mainly use these types of cameras to produce abstract images, more akin to my Artcast paintings than a traditional photo image. You end up with pictures with unpredictable exposure, focus issues, and eventually with non-intuitive results, which is exactly in line with the Holga spirit. Concerning digital workflow, I download the images from the SD card directly into Adobe Lightroom for organizing and processing. The F521 image hold up well to processing, including exposure compensation, shadow adjustments, clarity, etc. Shooting with the F521 is a nice balance to shooting with the A900, and I’m planning to shoot with the 521 and my Elnichrom BxRi lights as soon as I get a photodiode to trigger the Skyports from the on-board flash. Maybe I’ll take off the lens and figure out a way to mount a Mamiya 150 f/3.5 portrait lens to it.

Is It Worth It?

The EZ F521 is cheap and definitely worth a look. It’s available for the international market via Japan Exposures and costs 9,990 Yen (about 100 USD). A few years ago Japan Exposures was selling the Fuji Natura S camera with the fixed 24mm f1.9 lens, I hesitated and then they stopped producing them. It’s my biggest purchasing regret of my camera buying life. So I bought the F521 without really thinking about it and so far I’m loving it. Does it live up to the name Digital Holga? Yes, I’m of the opinion that it totally does.

F521_Images-0032.jpg
F521_Images-0009.jpg
F521_Images-0060.jpg

Sessions with Joey L – DVD Tutorial Review

This is a review of the Sessions with Joey L DVD Tutorial, including a break-down of the DVD content and how I feel it applies to my photographic directions and how it might be useful to other people.

Back in the fall of 2007 I was spending my days in a Tokyo dorm room playing around with Photoshop, and decided it was time to pick up some sort of tutorial DVD.  Yes, you can learn and be inspired without needing to buy these things, but I break my brain trying to figure out stuff like applying Altair Optistruct optimization strategies to fatigued composite structures with barley a manual to work with.  So with Photoshop I was looking for a way to relax and get a grounding in photo processing, so I bought the JoeyL Photoshop Tutorial DVD by photographer Joey Lawrence.  It was well received by some, ridiculed by others, and I found it to be a good buy.  However, I’m able to pull a great deal of knowledge from anything, due to my training in figuring out ball-busting simulation programs like Nastran.  However, for my purposes, what was lacking from the Photoshop Tutorial DVD was the connection between lighting and shot setup and Photoshop processing.  So when Mr. Lawrence released his Sessions with JoeyL DVD, I watched the trailer, and then decided to drop 200 USD on the DVD.

First some background on me

Here’s my situation.  I’ve mainly focused on learning photography and lighting during the last two years.  This was mainly in my spare time while finishing my Doctor of Science degree at ETH Zurich  I read Strobist in between experiments, and sometimes sketched out lighting diagrams at the SPIE Smart Materials conferences.  Since starting a normal job I’ve had time to develop a lighting and processing look that I like, which fits with what I see in my head.  To this end I finished with taking only self-portraits and started organizing model shoots.  The last piece is nearly in place and that is making a strong link between vision and reality.  Taking the image in my head and easily making it a tangible medium people can hold in their hands or see for themselves.  I sketch out shoot ideas, design lighting concepts, network, and do my own Photoshop.  Foe me it’s all part of the process of Arience, the integration of Art and Science in my life.  In my view, everyone is a poet and an engineer.  I attended a Strobist seminar and picked up the Sessions DVD to get a better perspective on how other photographers work, see the process of concept to photo in other people.

The Sessions content is broken down as follows

Lighting Theory

    The Vision
    Lighting Theory – The Basics
    Lighting Theory – Advanced Technique
    The Necessary Tools
    Modifiers

Photoshoots

    Forbes Assignment
    Monty Are I CD Artwork
    Thrillogy Advertisement Shoot
    Model Test Shoot
    Strange Familiar

Business

    Business Lecture
    Trust
    Misc Q&A

Travel

    Travel Lecture
    Ethiopia: Behind the Scenes

Photoshop

    Compositing
    Using Color Curves
    Strange Familiar – Swapping Skies
    Experimenting with Blending Modes
    Black and White Conversion
    Tonal Colorizing
    Fixing Blown Highlights

There’s something that always floats around in my head, namely that photography isn’t difficult, and it gets easier every year.  Images which took a full production studio to create 20 years ago can now be done in a bedroom quicker and with fewer resources.  The thing that interests me is the process and approach a person takes to the whole idea of photography from concept to lighting to final image, and I think this has been well communicated in the Sessions DVD.

Lighting Theory: Joey explains his philosophy and how he sets up lighting.  Then he moves on to modifiers and how the ones he uses to define the character of his images.  If you know nothing of lights and modifiers this is a great video, if you know everything already you probably won’t buy this DVD anyways.  I fall in the middle, and found this to be a very interesting section.  It didn’t totally revolutionize my ideas on lighting, but did make me think a bit more outside of the Strobist softbox.

Photoshoots: Joey presents a walk-through, behind-the-scenes videos of different shoots including bands, a plastic surgeon, and a model test shoot.  Throughout Joey gives explanations of lighting and concept, and you can draw a direct link between how he works and his previously described Lighting Vision.  Also interesting here is seeing the photographer-model interaction.  This is an important, I think the most important part of a shoot.  I try to make an emotional connection with models and explain what I’m trying to create in a shoot, and it’s interesting to see the way Joey works in these different situations, working with a TFP model versus a highly successful surgeon versus a band releasing a new CD.  All in all, very cool to see.

Business: Joey describes how he grew and developed as a photographer, the value of a portfolio, how he gets jobs, basically a discussion on how he works as a businessman.  Again, this is great to see, and would be interesting for anyone contemplating a business (even outside photography), because he focuses on the personal drive and interaction which are needed, as opposed to just having a slick portfolio online somewhere.  He also has a video on Trust and how important it is for business as well as directing shoots, again, very cool stuff to hear about.

Travel: Focus is on Ethiopia, and a lot about how he understands the culture of his subjects before blasting them with a Profoto strobe.  You don’t need to be planning a trip to Africa to get a lot out of these videos, they focus on the human connection between photographer and subject, a topic often missed and usually never even brought up in internet forum discussions (well, the ones I read at least).  The Travel section is great for looking at the human side of photography, and focusing less on the technical side.  It’s also a great motivational video if you’re the type who always thinks of traveling but hasn’t jumped on the plane yet.

Photoshop: Here are presented a few popular techniques, many things people are always asking about on the internet.  Yes, you can also find internet videos on the basic techniques, but it’s the application of those techniques in the larger puzzle which is of value here.  If you want to buy the DVD just for Photoshop, you’re better off looking at something else (I recommend Skin Photoshop the book).  The Photoshop section fits in very well with the rest of the DVD, bringing the vision full circle to the post processing stage.  This was something I found lacking in his Photoshop DVD Tutorial, because there a strong connection wasn’t made between lighting and post-processing.  Here however, you can see how the images from the Strange Familiar shoot are processed, including a new sky, and in this way you get a feeling for the whole process from start to finish.

Why I Liked It

What I like is seeing concept development in other people, and seeing how they think and work.  I like understanding their philosophy of creation and ideas or their approach to concept development and how it’s realized in a final form – be it a picture or an elegant toaster.  In this way, I think the Sessions DVD is fantastic, and I recommend it instead of taking a workshop (if you have to choose).  Sessions gives you a feeling for the whole process from lighting philosophy, through shoot execution, the business approach to final Photoshop editing, and throughout out you get a feeling for the human connection as a main driver of the process.

Is it worth the Money?

Is $200, $250, $300 too much for a photography DVD?  Maybe yes, possibly no.  I paid $200 for my copy, and I’m ok with that. The Zach Arias DVD is $250, the Strobist $135, and new ones come out all the time from places like Lighting-Essentials, Scott Kelby (how many remixed Photoshop books can we release this year?) and David Honl (to name a very few).  But not all are coming from a working commercial photographer who shoots stuff I find interesting. This isn’t the same as a working educator who also takes nice photos.  There is a significant difference here.  It’s easy to say, “you need to do this, this and this” to make cool pictures, it’s another thing to be a working photographer at this level and showing the whole process.
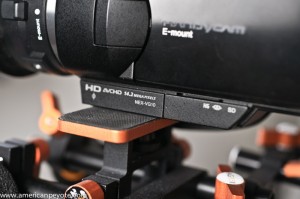
I consider it the difference between learning Physics from a tenured professor who hasn’t written a new publication in 2 years versus a Richard Feynman (even after he was at the top of his field, you can find some of his lectures on the net).  Maybe this sounds harsh, but my main critique of 90% of the photography/Photoshop learning material I see for free from internet sources as well as some professional educators is the lack of vision, and for me that makes all the difference.  The Sessions DVD is a tutorial with Vision and Heart.  But maybe that’s just me?  I got so bored with McNally’s Hot Shoe Diaries I didn’t get half-way through it, but I love re-reading Michael Grecco’s Dramatic Portrait.  It’s just what gets me off.

I’ve also reviewed and still like the JoeyL Behind the Scenes Photoshop DVD, the reason being that the focus isn’t placed on minute details of levels and curve operations, but because it focuses on process and development.  This is the same philosophy I use in engineering research, so maybe that’s why I like it.  The details can always be ironed out, but if you don’t have that overall big picture (that thing you’re reaching for) in your head, then you won’t have a clue about which details need to be fine-tuned.  This is one thing I wasn’t getting from reading Strobist or attending a seminar – but I just learn differently than other people, and so do you.  I don’t need someone to make me creative, I do that on my own, sometimes vie induced boredom.  It’s just cool to see how other people are creative in the scope of their vision.

Brass Tacs

The Sessions DVD isn’t some blue pill to take with a whiskey chaser, promising you everlasting creative abilities as well as the drive to bring your vision into the world.  It’s just another piece in the puzzle. Seek your knowledge in the way you know will be most effective for your own personal learning style.  I get Photoshop technique inspiration by actually painting, I get lighting inspiration when I’m listening to a Web Monday talk or a smart materials presentation.  No two people learn the same way, so find out what works for you and exploit it to make your own visions a reality.